1. Introduction
Thank you for choosing the Conciseer 72 Inch Ceiling Fan with Light and Remote. This manual provides detailed instructions for the safe installation, operation, and maintenance of your new ceiling fan. Please read this manual thoroughly before installation and keep it for future reference.
This modern ceiling fan features 8 blades, a quiet DC motor with 6 speed settings, a reversible function for year-round use, and an integrated 24W 3CCT dimmable LED light. It is designed for indoor use in various spaces such as living rooms, bedrooms, and offices.
2. Safety Information
WARNING: To reduce the risk of fire, electric shock, or personal injury, always follow these basic safety precautions:
- Read all instructions carefully before beginning installation.
- Ensure the power is turned off at the circuit breaker or fuse box before wiring.
- All electrical connections must be in accordance with local codes, ordinances, or national electrical codes. If you are unfamiliar with wiring, consult a qualified electrician.
- The mounting structure must be capable of supporting the weight of the fan (approximately 25.3 lbs or 11.52 kg).
- Do not operate the fan with damaged blades or housing.
- Avoid placing objects in the path of the fan blades.
- This fan is designed for indoor use only.
3. Package Contents
Carefully unpack your ceiling fan and ensure all components are present and undamaged. Refer to the diagram below for identification.

Image Description: A black 72-inch ceiling fan with 8 blades and an integrated light is shown installed in a modern living room. Alongside it are the remote control and three different lengths of black downrods (7.87 inches, 15.75 inches, 23.62 inches), indicating included accessories.
- Fan Motor Housing
- Fan Blades (8x)
- Downrods (7.87", 15.75", 23.62")
- Mounting Bracket
- Canopy
- Remote Control
- Hardware Pack (screws, wire nuts, etc.)
- Instruction Manual
4. Specifications
| Brand | Conciseer |
| Model Name | CS7201-MBK |
| Size | 72 Inch |
| Color | Black |
| Product Dimensions | 8"D x 72"W x 8"H |
| Item Weight | 25.3 pounds (11.52 Kilograms) |
| Number of Blades | 8 |
| Motor Type | Quiet DC Motor |
| Number of Power Levels | 6 Fan Speeds |
| Light Wattage | 24 Watts |
| Color Temperature | 3CCT (3000K, 4500K, 6500K) |
| Dimmable | Yes (Stepless 10%-100%) |
| Control Method | Remote Control |
| Special Features | Quiet Operation, Remote Controlled, Timer, Reversible Airflow |
| Installation Type | Semi Flush Mount |
| Indoor/Outdoor Usage | Indoor |

Image Description: A diagram illustrating the dimensions of the 72-inch ceiling fan, including its 72-inch width, 7.87-inch depth, and various downrod lengths (7.87, 15.75, 23.62 inches). Below this, a detailed remote control instruction panel lists functions such as ON/OFF, fan/light control, speed control, dimmer, fan forward/reverse, timer (2H, 4H, 8H), natural wind, and mute.
5. Installation (Setup)
Before You Begin: Ensure the power supply is disconnected at the main circuit breaker. Gather all necessary tools (screwdriver, wire strippers, ladder, etc.).
- Mounting Bracket Installation: Secure the mounting bracket to the ceiling junction box. Ensure the junction box is securely fastened to the building structure and can support the fan's weight.
- Downrod Assembly: Select the appropriate downrod length for your ceiling height. Feed the motor wires through the downrod. Attach the downrod to the fan motor housing.
- Hanging the Fan: Carefully lift the fan assembly and hang it from the mounting bracket using the hanger ball.
- Wiring Connections: Connect the fan's electrical wires to the household wiring according to the wiring diagram provided in the full manual. Typically, this involves connecting live, neutral, and ground wires. Ensure all connections are secure with wire nuts.
- Canopy Installation: Slide the canopy up to the ceiling and secure it to the mounting bracket, covering the wiring connections.
- Blade Attachment: Attach each of the 8 fan blades to the motor housing using the provided screws. Ensure all screws are tightened securely.
- Light Kit Installation: Connect the light kit wiring and attach the light kit to the fan motor housing.
For detailed diagrams and specific wiring instructions, please refer to the comprehensive manual included in your product packaging.
6. Operation
Your Conciseer ceiling fan is controlled by the included remote. Insert 2 AAA batteries (not included) into the remote control.
Image Description: A detailed view of the remote control for the ceiling fan, showing buttons for power, fan ON/OFF, light ON/OFF, speed control (+/-), dimmer control (+/-), fan forward, fan reverse, timer (2H, 4H, 8H), natural wind mode, and mute function.
- Power ON/OFF: Press the red power button to turn the fan and light on or off.
- Fan ON/OFF: Press the fan ON/OFF button to control the fan motor independently.
- Light ON/OFF: Press the light ON/OFF button to control the light independently.
- Fan Speed Control: Use the + and - buttons to adjust between 6 fan speeds.
- Light Dimmer Control: Use the dimmer + and - buttons to adjust the brightness of the light from 10% to 100%.
- Color Temperature Adjustment (3CCT): The light offers three color temperatures: 3000K (Warm White), 4500K (Natural White), and 6500K (Cool White). Cycle through these by pressing the light ON/OFF button repeatedly or a dedicated CCT button if available on your remote.
- Fan Forward (Summer Mode): Press the Fan Forward button to create a downward airflow, providing a cooling effect.
- Fan Reverse (Winter Mode): Press the Fan Reverse button to create an upward airflow, circulating warm air trapped near the ceiling.
- Timer Function: Press the 2H, 4H, or 8H buttons to set the fan to automatically turn off after 2, 4, or 8 hours, respectively.
- Natural Wind Mode: Press the Natural Wind button to simulate a gentle, varying breeze.
- Mute Function: Press the Mute button to silence remote control beeps or fan operation sounds if applicable.

Image Description: An illustration demonstrating the 6 wind speed settings of the ceiling fan. Speeds 1-2 are described as 'Soft and comfortable wind', speeds 3-4 as 'Medium and natural wind', and speeds 5-6 as 'Strong and cool wind'.

Image Description: A visual representation of the fan's stepless dimmable light feature, showing brightness levels from 10% to 100% in a modern living room setting at night.
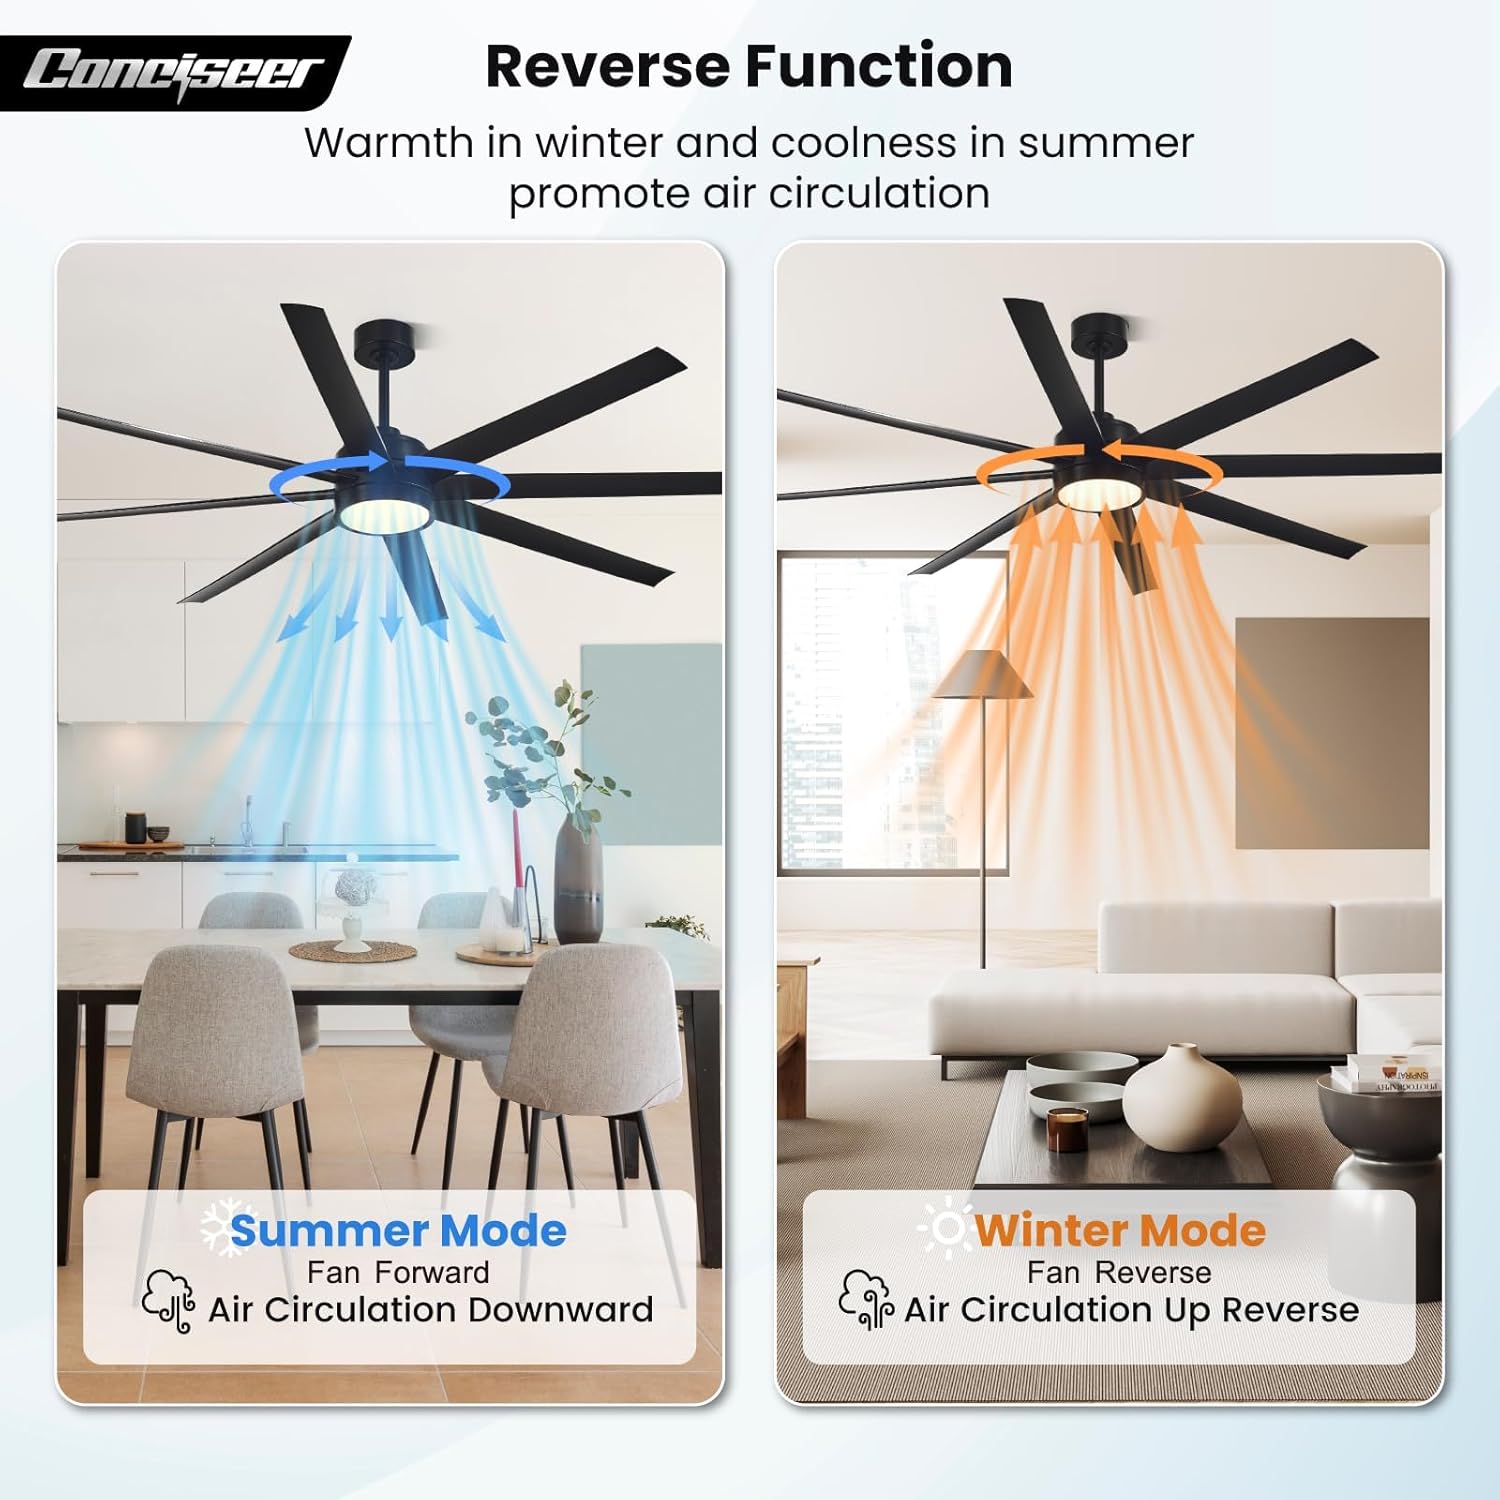
Image Description: Three distinct images showcasing the ceiling fan's light at different color temperatures: 3000K (warm light in a bedroom), 4500K (natural light in a kitchen), and 6500K (cool light in a living room).

Image Description: A diagram illustrating the fan's reversible function. 'Summer Mode' shows the fan rotating forward, pushing air downwards for cooling. 'Winter Mode' shows the fan rotating in reverse, drawing air upwards to circulate warm air.

Image Description: An image showing the ceiling fan installed in a modern living room, with an overlay highlighting the 'Timing function' offering 2H, 4H, and 8H settings for automatic fan shutdown.
7. Maintenance
Regular maintenance ensures optimal performance and extends the lifespan of your ceiling fan.
- Cleaning: Dust the fan blades and motor housing periodically with a soft, damp cloth. Do not use abrasive cleaners or solvents, as these can damage the finish.
- Blade Cleaning: For thorough cleaning, wipe the blades with a mild soap and water solution, then dry immediately.
- Tightness Check: Periodically check all screws and connections on the fan and mounting hardware to ensure they are secure. Loose connections can cause noise or wobble.
- Light Source: The integrated LED light source is designed for long life and is generally not user-replaceable. If the light fails, contact customer support.
8. Troubleshooting
If you experience issues with your ceiling fan, refer to the following common problems and solutions:
| Problem | Possible Cause | Solution |
|---|---|---|
| Fan does not start | No power to the fan; Loose wire connections; Remote control battery low or not inserted correctly. | Check circuit breaker/fuse; Ensure all wiring connections are secure; Replace remote batteries (2 AAA) and ensure correct polarity. |
| Light does not work | No power to the light; Loose wire connections; LED driver issue. | Check power supply; Verify light wiring connections; Contact customer support if LED driver is suspected. |
| Fan wobbles | Loose blades or mounting hardware; Unbalanced blades. | Ensure all blade screws and mounting screws are tight; Use a balancing kit (not included) if necessary. |
| Remote control not responding | Low or dead batteries; Remote not paired (if applicable); Obstruction between remote and receiver. | Replace batteries; Ensure clear line of sight; Refer to the full manual for remote pairing instructions if needed. |
| Fan is noisy | Loose screws; Motor hum; Blades hitting an obstruction. | Tighten all screws; Ensure no obstructions; The DC motor is designed for quiet operation, but some minimal hum is normal. |

Image Description: A graphic illustrating the low noise level of the Conciseer ceiling fan's DC motor, comparing its sound output (around 30 dB, similar to a library) to other common sounds like a shed (10 dB), whisper (35 dB), and normal chat (70 dB).
9. Warranty and Support
Conciseer is committed to providing high-quality products and excellent customer service. While specific warranty details are not provided in this manual, we offer professional after-sales support.
If you encounter any questions during installation or usage, or if you require assistance with troubleshooting, please do not hesitate to contact our support team. Contact information can typically be found on the product packaging or the official Conciseer website.
Please retain your proof of purchase for any warranty claims.