havcybin Imax B6AC
havcybin Imax B6 AC RC Charger User Manual
Model: Imax B6AC
1. Introduction
The havcybin Imax B6 AC RC Charger is a high-performance, microprocessor-controlled charge/discharge station with integrated AC power supply, suitable for various battery types used in RC hobbies. This charger is designed for Li-ion, LiPo, LiFe (1-6 cells), NiCd, NiMH (1-15 cells), and Pb (2V-20V) batteries. It features an 80W output and a 6A charge current, ensuring efficient and balanced charging. The digital LCD screen provides real-time information, making it user-friendly for monitoring and adjusting settings.

Image 1.1: The Imax B6 AC RC Charger, showing its compact design and digital display.
2. Safety Precautions
Please read and understand all safety instructions before using the charger. Failure to do so may result in property damage, injury, or fire.
- Never leave the charger unattended during operation.
- Ensure the charger is placed on a heat-resistant, non-flammable, and non-conductive surface.
- Do not charge batteries near flammable materials or liquids.
- Verify battery type, cell count, and capacity before charging. Incorrect settings can cause severe damage.
- Keep the charger away from moisture, dust, and direct sunlight.
- Do not attempt to charge damaged or swollen batteries.
- Always use the correct connectors and adapters.
- Keep out of reach of children.
3. Package Contents
Carefully unpack all items and check against the list below. If any items are missing or damaged, please contact your retailer.
- 1 x Imax B6AC Charger (80W)
- 1 x Multi-functional Extension Wire
- 1 x Universal Crocodile Clip
- 1 x JST Plug
- 1 x Manual
- 1 x AC Plug
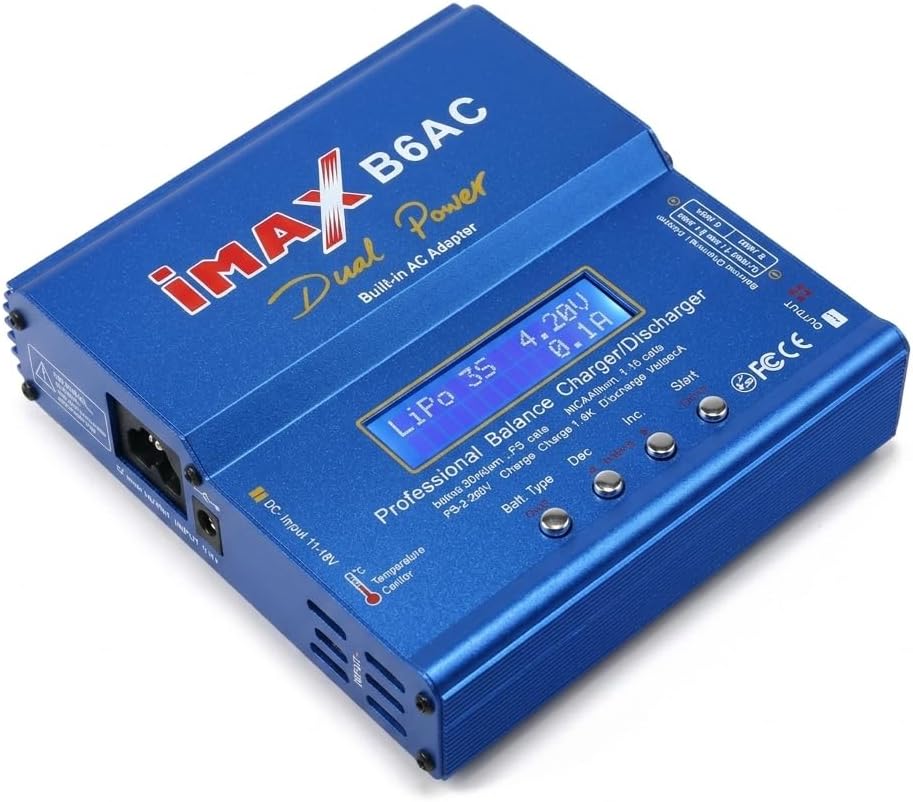
Image 3.1: Contents of the Imax B6 AC RC Charger package, including the charger, various cables, and the user manual.
4. Charger Overview
The Imax B6 AC charger features a digital LCD screen and intuitive buttons for navigation and setting adjustments. Understanding these components is key to proper operation.
4.1 Front Panel
- LCD Screen: Displays charging status, battery information, and menu options.
- Batt. Type Button: Used to select battery type.
- DEC Button: Decreases values or navigates left in menus.
- INC Button: Increases values or navigates right in menus.
- START/ENTER Button: Initiates charging/discharging processes or confirms selections.
- OUTPUT Ports: Main charging output for connecting battery leads.
- Balance Socket: Multi-pin port for connecting LiPo/LiFe/Li-ion balance leads.

Image 4.1: A detailed view of the charger's digital LCD screen and control buttons (Batt. Type, DEC, INC, START).
4.2 Side Panel
- AC Input: For connecting the AC power cord (100V ~ 240V).
- DC Input: For connecting an external DC power source (11.0 ~ 18.0V).
- Temperature Sensor Port: For optional temperature sensor connection.
5. Setup
Follow these steps to set up your Imax B6 AC RC Charger for operation.
- Power Connection:
- For AC power: Connect the provided AC power cord to the charger's AC input port and then to a wall outlet.
- For DC power: Connect an external DC power supply (11.0V-18.0V) to the charger's DC input port. Ensure correct polarity.
- Initial Power On: Once connected to power, the charger will power on and display the initial screen.
- Battery Connection:
- Connect the main charging leads from the charger's OUTPUT ports to your battery. Ensure correct polarity (red to positive, black to negative).
- For LiPo/LiFe/Li-ion batteries, also connect the balance lead from the battery to the corresponding balance socket on the charger.

Image 5.1: The charger set up on a desk, connected to an AC power source and a battery, ready for operation.
6. Operating Modes
The charger offers various programs for different battery types and functions. Use the 'Batt. Type' button to navigate through the main program selections.
- PROGRAM SELECT LIPO BATT: For charging, balance charging, fast charging, storage, and discharging LiPo, Li-ion, and LiFe batteries.
- PROGRAM SELECT NIMH BATT: For charging, discharging, and cycling NiMH and NiCd batteries.
- PROGRAM SELECT PB BATT: For charging and discharging Pb (lead acid) batteries.
- USER SET PROGRAM: To customize and set parameters for charging batteries.
- PROGRAM SELECT SAVE DATA: To save custom setting data (up to 5 packs in memory).
7. Operating Instructions
This section outlines the general steps for charging a battery. Specific parameters will vary based on battery type and desired function.
7.1 General Charging Procedure (Example: LiPo Balance Charge)
- Connect Battery: Ensure the LiPo battery's main leads and balance lead are correctly connected to the charger.
- Select Program: Press the 'Batt. Type' button repeatedly until "PROGRAM SELECT LIPO BATT" appears on the screen. Press 'START/ENTER'.
- Select Function: Use 'INC'/'DEC' to navigate to "LiPo BALANCE" (or other desired function like "LiPo CHARGE", "LiPo FAST CHG", "LiPo STORAGE", "LiPo DISCHARGE"). Press 'START/ENTER'.
- Set Parameters:
- Current Setting: The current value will be blinking. Use 'INC'/'DEC' to adjust the charge current (e.g., 1.0A for a 1000mAh battery). Press 'START/ENTER' to confirm.
- Cell Count Setting: The cell count (e.g., 3S for a 3-cell LiPo) will be blinking. Use 'INC'/'DEC' to set the correct cell count. Press 'START/ENTER' to confirm.
- Start Charging: Press and hold the 'START/ENTER' button for approximately 3 seconds. The charger will perform a battery check.
- Confirm Start: If the battery check is successful, the screen will prompt "CONFIRM (R) S:X P:X". Press 'START/ENTER' to begin charging.
- Monitor Progress: The LCD will display real-time information such as current, voltage, charged capacity, and elapsed time.
- Completion: The charger will beep and display "FULL" or "END" when the process is complete. Disconnect the battery safely.
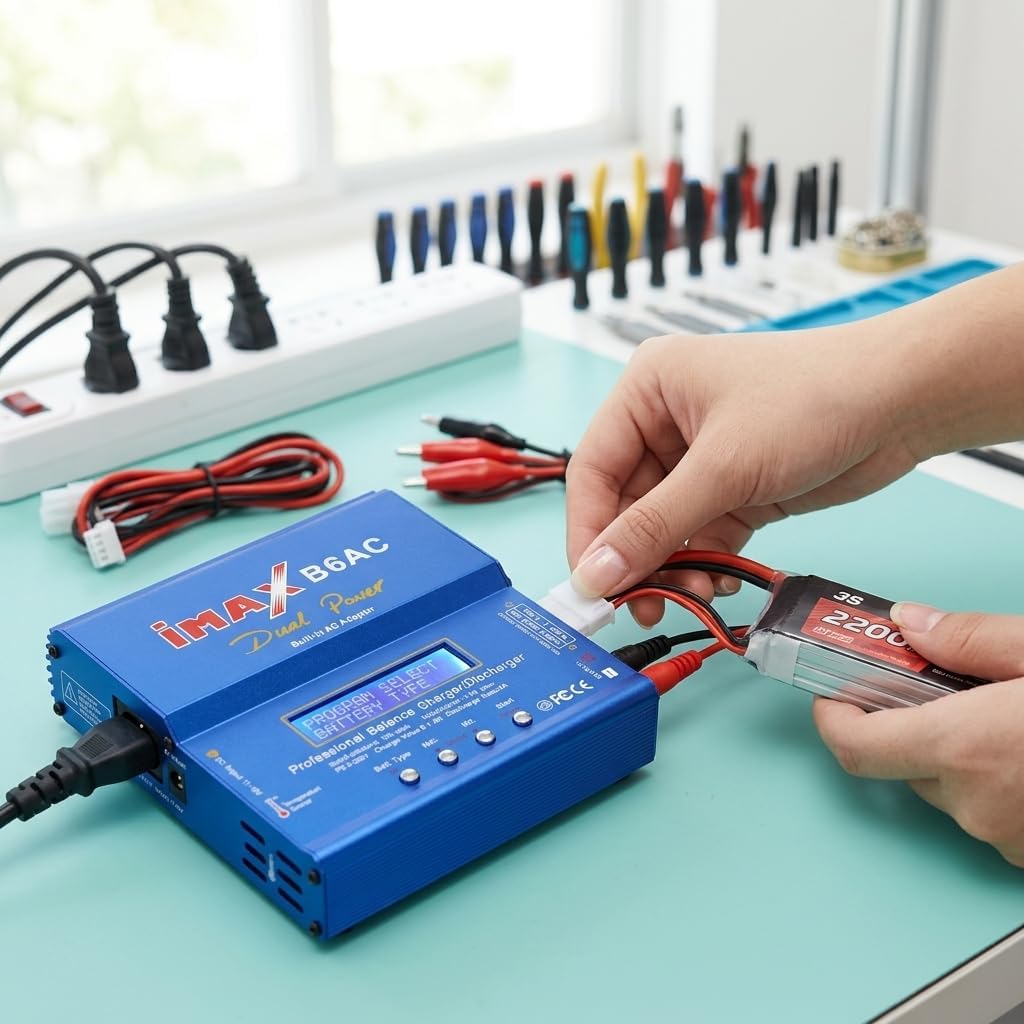
Image 7.1: A LiPo battery connected to the charger's main output and balance port, ready for the charging process.
7.2 Important Notes
- The charger cannot measure the voltage and resistance of 1S batteries.
- Always double-check your settings before starting any process.
- Refer to your battery's specifications for recommended charge rates and cell counts.
8. Maintenance
Proper maintenance ensures the longevity and reliable performance of your charger.
- Cleaning: Use a soft, dry cloth to clean the charger's exterior. Do not use solvents or abrasive cleaners.
- Storage: Store the charger in a cool, dry place away from direct sunlight and extreme temperatures.
- Cable Inspection: Regularly inspect all cables and connectors for signs of wear, damage, or corrosion. Replace damaged cables immediately.
- Ventilation: Ensure the charger's ventilation openings are clear and unobstructed during operation to prevent overheating.
9. Troubleshooting
If you encounter issues with your charger, refer to the following common problems and solutions.
| Problem | Possible Cause | Solution |
|---|---|---|
| Charger does not power on | No power supply; loose connection | Check AC/DC power connection; ensure outlet is functional. |
| Error message: "CONNECTION BREAK" | Battery not connected or poor connection | Ensure main charging leads are securely connected to the battery. |
| Error message: "CELL ERROR" or "VOLTAGE ERROR" | Incorrect cell count setting; damaged battery | Verify the cell count setting matches the battery. Inspect battery for damage. |
| Error message: "BALANCE PORT ERROR" | Balance lead not connected or incorrect connection | Ensure the balance lead is correctly plugged into the balance port. |
| Charger gets hot during operation | Poor ventilation; high ambient temperature | Ensure adequate airflow around the charger. Operate in a cooler environment. |
10. Specifications
| Feature | Specification |
|---|---|
| Operating Voltage Range | DC 11.0 ~ 18.0 Volt or AC 100V ~ 240V 50/60Hz |
| Max. Charge Power | 50W |
| Max. Discharge Power | 5W |
| Charge Current Range | 0.1 ~ 5.0A |
| Discharge Current Range | 0.1 ~ 1.0A |
| Current Drain for Balancing Li-Po | 300mAh/cell |
| NiCd / NiMH Battery Cell Count | 1 ~ 15 cells |
| Li-Ion / Polymer Cell Count | 1 ~ 6 series |
| Pb Battery Voltage | 2V ~ 20V |
| Weight | 546g (Net Weight) / 12.3 ounces |
| Dimensions | 5.3 x 5.5 x 1.3 inches (13.46 x 13.97 x 3.3 cm) |
11. Warranty and Support
For warranty information and technical support, please refer to the documentation provided with your purchase or contact the retailer. Specific warranty terms may vary by region and point of purchase.
Related Documents - Imax B6AC
 |
SKYRC B6AC V2 Bedienungsanleitung: Professionelles Ladegerät/Entladegerät Die SKYRC B6AC V2 Bedienungsanleitung bietet detaillierte Informationen zu diesem professionellen AC/DC Dual Power Balance Ladegerät und Entladegerät, inklusive Funktionen, Sicherheitshinweisen und Betriebsanleitungen. |
 |
SKYRC B6AC V2 Instruction Manual: AC/DC Dual Power Balance Charger/Discharger Comprehensive instruction manual for the SKYRC B6AC V2 AC/DC Dual Power Professional Balance Charger/Discharger, covering features, operation, safety, specifications, and warranty. Learn how to use your charger effectively and safely. |
 |
SKYRC IMAX B6AC V2 AC/DC Dual Power Professional Balance Charger/Discharger Instruction Manual This instruction manual provides comprehensive details on the SKYRC IMAX B6AC V2 AC/DC Dual Power Professional Balance Charger/Discharger, covering its features, operation, safety guidelines, specifications, and troubleshooting. |
 |
SKYRC QUATTRO B6AC Professional Balance Charger/Discharger Instruction Manual Comprehensive instruction manual for the SKYRC QUATTRO B6AC digital intelligent charger, covering features, safety, operation, specifications, and troubleshooting for various battery types. |
 |
iMAX Quattro B6 Digital Intelligent Charger Instruction Manual User manual for the SkyRC iMAX Quattro B6, a 4-port digital intelligent battery charger and discharger. Features include auto-charging, individual cell balancing, PC connectivity, and support for NiCd, NiMH, LiPo, Li-ion, LiFe, and Pb batteries. This guide covers setup, operation, safety, specifications, and troubleshooting. |
 |
SKYRC IMAX B6 V2 Professional Balance Charger/Discharger Instruction Manual Detailed instruction manual for the SKYRC IMAX B6 V2 Professional Balance Charger/Discharger, covering features, safety, operation, and specifications for various battery types including LiPo, LiFe, Lilon, LiHV, NiMH, NiCd, Pb, and DJI batteries. |
Ask a question about this manual
Ask about setup, troubleshooting, compatibility, parts, safety, or missing instructions. Manuals+ will review the question and use this page’s manual context to help answer it.