Introduction
Thank you for choosing the Morpilot Electric Milk Frother. This manual provides essential information for the safe and efficient operation, maintenance, and troubleshooting of your new appliance. Please read it thoroughly before first use and keep it for future reference.
The Morpilot Electric Milk Frother is designed to create perfect hot or cold milk foam for various beverages like cappuccinos, lattes, and hot chocolate. Its intuitive design and multiple functions make it a versatile addition to your kitchen.
Safety Instructions
- Always ensure the appliance is placed on a stable, flat, heat-resistant surface.
- Do not immerse the base unit in water or any other liquid. Only the glass jug is dishwasher safe.
- Keep out of reach of children.
- Do not operate the appliance with a damaged cord or plug.
- Unplug the frother from the power outlet when not in use and before cleaning.
- Allow the frother to cool down for 4-5 minutes after using the heating function before re-use to ensure optimal performance and prevent overheating.
- Use only the provided attachments.
- Do not fill above the MAX fill lines to prevent overflow.
Product Components

Figure 1: Main components of the Morpilot Electric Milk Frother. This includes the main unit with a glass jug, a power base, a frothing whisk, a heating whisk, and a cleaning brush.
- Glass Jug: Detachable, made of high borosilicate glass, heat-resistant and dishwasher safe. Features clear MAX/MIN fill lines.
- Power Base: Contains the heating element and control buttons. Not submersible.
- Frothing Whisk: Used for creating dense or airy milk foam. Located inside the jug.
- Heating Whisk: Used for heating milk without frothing. Stored under the base.
- Cleaning Brush: For easy cleaning of the jug and whisk.
Setup
- Unpack: Carefully remove all components from the packaging.
- Initial Cleaning: Before first use, wash the glass jug and whisks with warm soapy water, then rinse thoroughly. Wipe the power base with a damp cloth. Ensure all parts are completely dry before assembly.
- Place Base: Position the power base on a dry, stable, and level surface near a power outlet.
- Insert Whisk: Choose the appropriate whisk (frothing or heating) and place it securely onto the spindle inside the glass jug.
- Place Jug: Place the glass jug onto the power base, ensuring it is seated correctly.
- Connect Power: Plug the power cord into a suitable electrical outlet.
Operating Instructions
Fill Lines and Capacity

Figure 2: Visual representation of the milk level indicators on the glass jug. The 500ml MAX line is for heating milk, the 250ml MAX line is for frothing hot or cold milk, and the 130ml MIN line is the minimum required for frothing.
- MAX (500ml): For heating milk or cocoa without frothing.
- MAX (250ml): For hot or cold milk frothing. Do not exceed this line when frothing to prevent overflow.
- MIN (130ml): Minimum milk level required for frothing.
4-in-1 Functionality
The Morpilot Electric Milk Frother offers four distinct functions, easily selected with a single button press. The base illuminates with different colors to indicate the selected program.
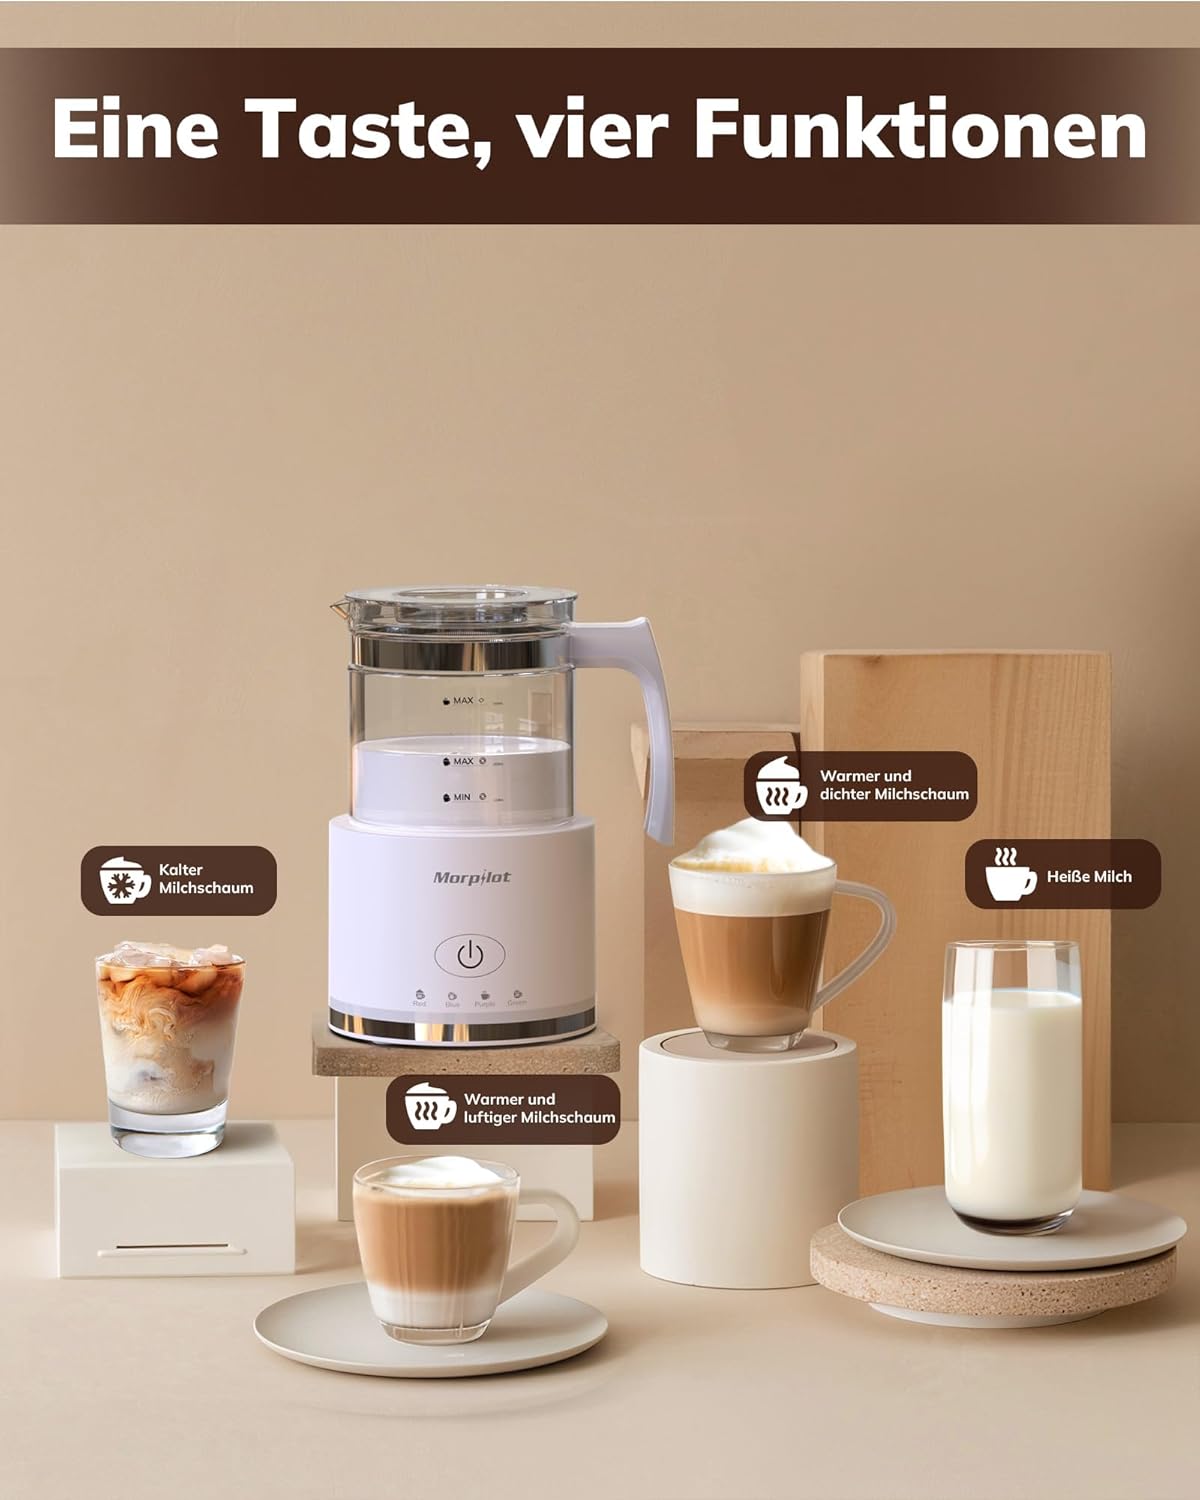
Figure 3: The 4-in-1 functionality of the frother, illustrating the types of beverages it can prepare: cold milk foam, warm and airy milk foam, hot milk, and warm and dense milk foam.

Figure 4: The color-coded light signals on the frother's base, corresponding to the four functions: Red for warm, dense milk foam; Blue for cold milk foam; Purple for hot milk; and Green for warm, airy milk foam.
- Add Milk: Pour the desired amount of milk into the glass jug, ensuring it is between the MIN and appropriate MAX fill lines.
- Select Whisk:
- For frothing (hot or cold foam): Use the frothing whisk (with the spring coil).
- For heating milk only: Use the heating whisk (without the spring coil).
- Choose Function: Press the power button repeatedly to cycle through the four functions. The indicator light on the base will change color to show the selected mode:
- RED: Warm, Dense Milk Foam (for cappuccinos)
- BLUE: Cold Milk Foam (for iced lattes)
- PURPLE: Hot Milk (for hot chocolate or non-frothed milk)
- GREEN: Warm, Airy Milk Foam (for lattes)
- Start Operation: Once the desired function is selected, the frother will automatically start. It will stop automatically when the process is complete.
- Pour and Enjoy: Carefully remove the jug from the base. The latte art drip tip design allows for easy pouring without spills, even for creating latte art.
Latte Art Drip Tip Design

Figure 5: The specially designed drip tip of the jug facilitates precise pouring, making it easier to create intricate latte art designs.
The unique spout design of the glass jug is optimized for pouring frothed milk, allowing for greater control and precision, which is ideal for practicing and creating latte art.
Video Demonstration
Video 1: A demonstration of the Morpilot Electric Milk Frother in use, showcasing its ability to quickly produce warm or cold milk foam and heat milk for various beverages. This video highlights the ease of use and the quality of the resulting milk preparations.
Maintenance and Cleaning
Regular cleaning ensures the longevity and hygienic operation of your milk frother.

Figure 6: The glass jug is easily detachable and can be rinsed under running water or placed in a dishwasher. The base unit should only be wiped clean and never submerged in water.
- Unplug: Always unplug the frother from the power outlet before cleaning.
- Separate Components: Remove the glass jug from the power base. Remove the whisk from the jug.
- Clean Glass Jug and Whisk: The high borosilicate glass jug and the whisks are dishwasher safe. Alternatively, they can be washed by hand with warm soapy water and the provided cleaning brush. Rinse thoroughly and dry completely.
- Clean Power Base: Wipe the exterior of the power base with a clean, damp cloth. Do not immerse the base in water or rinse it under running water. Ensure the bottom of the jug and the top of the base are dry before reassembling.
- Stubborn Residue: For stubborn milk residue on the heating plate inside the jug, fill with a small amount of warm water and a drop of dish soap, then run the cold frothing cycle (BLUE) for a minute to loosen the residue before scrubbing with the brush.
Troubleshooting
| Problem | Possible Cause | Solution |
|---|---|---|
| Frother does not turn on. | Not plugged in; power outlet faulty; base not properly connected to jug. | Ensure the power cord is securely plugged into a working outlet. Check if the jug is correctly seated on the base. |
| Milk not frothing or foam is thin. | Incorrect whisk used; insufficient milk; milk type not suitable for frothing; whisk not properly inserted. | Ensure the frothing whisk (with spring) is used. Check milk level is between MIN and MAX frothing lines. Use cold, fresh milk (whole milk or specific barista plant-based milks work best). Ensure whisk is securely placed on the spindle. |
| Milk not heating. | Heating whisk not used; appliance overheated. | Ensure the heating whisk (without spring) is used for heating only. If recently used, allow the frother to cool down for 4-5 minutes before re-use. |
| Overflow during operation. | Milk filled above MAX frothing line. | Always adhere to the MAX fill lines for frothing (250ml) and heating (500ml). |
| Unpleasant smell or smoke. | Overheating; foreign object in base. | Immediately unplug the appliance. Allow it to cool completely. Inspect for any foreign objects. If the issue persists, contact customer support. |
Specifications
- Model: HS001-G
- Brand: Morpilot
- Color: White
- Capacity: 500ml (heating), 250ml (frothing)
- Power: 600W
- Material: High Borosilicate Glass, Plastic
- Item Weight: 1.05 Kilograms
- Dimensions: 21 x 15 x 14.5 cm (Packaging)
Warranty and Support
Morpilot is dedicated to improving the lives of our customers. For any product-related inquiries, technical support, or warranty claims, please refer to your purchase documentation or visit the official Morpilot store on Amazon.
Official Morpilot Store: Morpilot Store on Amazon.de
Please have your model number (HS001-G) and purchase date ready when contacting support.


