Introduction
The IPUDIS CN101A Digital Programmable Timer Switch is designed for automatic control of electrical appliances based on a preset weekly schedule. It features a digital display, multiple programming options, and a built-in battery for memory retention during power outages. This manual provides detailed instructions for the safe and efficient use of your timer switch.
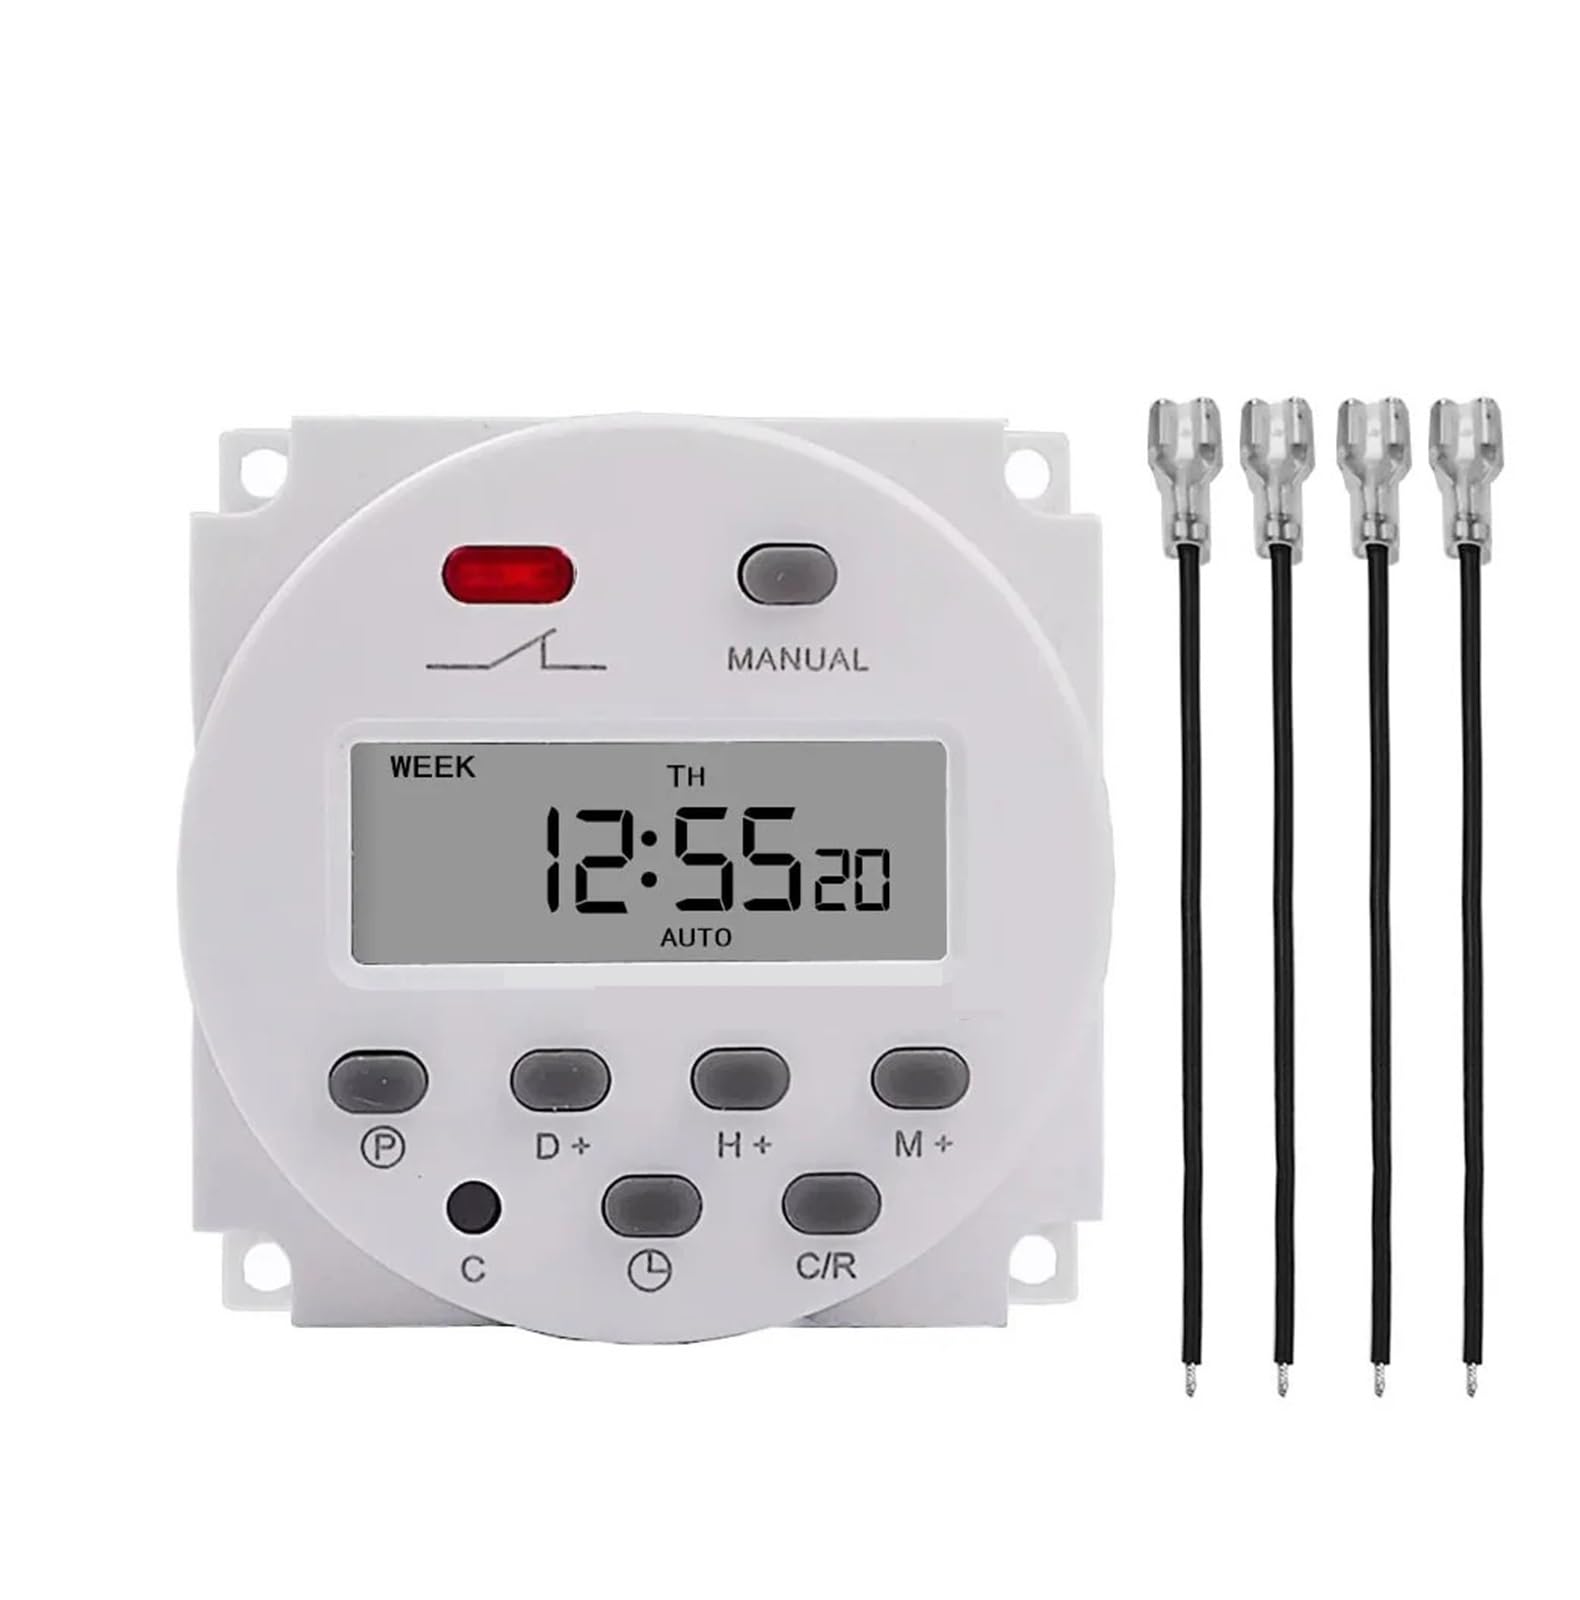
Front view of the IPUDIS CN101A Digital Programmable Timer Switch, showing the display and control buttons, with a protective shield. This image illustrates the general appearance of the device.
Setup and Initial Configuration
1. Unpacking and Inspection
Carefully remove the timer switch from its packaging. Inspect the device for any signs of damage. If any damage is found, do not proceed with installation and contact your supplier.
2. Initial Power-Up and Reset
Before first use, or after a prolonged period of storage, connect the timer to its rated power supply for at least 5-10 minutes to charge the internal battery. This battery maintains the time and program settings during power interruptions.
Locate the RESET button (often a small recessed button). Use a non-metallic pointed object (like a toothpick) to press this button. The display will show "00:00" and all previous settings will be cleared.
3. Setting Current Time and Day
- Press the CLOCK button and hold it.
- While holding CLOCK, press the D+ button repeatedly to set the current day of the week (MO, TU, WE, TH, FR, SA, SU).
- While holding CLOCK, press the H+ button repeatedly to set the current hour (0-23).
- While holding CLOCK, press the M+ button repeatedly to set the current minute (0-59).
- Release the CLOCK button. The time is now set.
4. Wiring Instructions
WARNING: Electrical wiring should only be performed by a qualified electrician. Ensure power is disconnected before attempting any wiring. Incorrect wiring can lead to electric shock, fire, or damage to the device.
The CN101A timer typically has four terminals:
- Terminals 1 & 2: Power input for the timer itself (e.g., 12V, 220V, 230V, 240V AC depending on model). Connect your main power supply here.
- Terminals 3 & 4: Output contacts (normally open or normally closed, depending on the specific model and desired function). These terminals act as a switch for your appliance.
Connect the load (appliance) to terminals 3 and 4. One side of the load connects to the live wire of your power supply, and the other side connects to one of the output terminals (e.g., terminal 3). The other output terminal (e.g., terminal 4) connects back to the neutral or live wire of your power supply, completing the circuit when the timer switches on. Refer to the wiring diagram printed on the device or its packaging for precise connections.
Operating Instructions
1. Programming ON/OFF Schedules
The timer allows for up to 16 ON/OFF programs. Follow these steps to set a program:
- Press the PROG button once. The display will show "1 ON".
- Press D+ to select the day(s) for this program. Options include individual days, weekdays, weekends, or all days.
- Press H+ to set the desired ON hour.
- Press M+ to set the desired ON minute.
- Press PROG again. The display will show "1 OFF".
- Repeat steps 2-4 to set the desired OFF time for the first program.
- Continue pressing PROG to cycle through "2 ON", "2 OFF", up to "16 ON", "16 OFF". Set additional programs as needed.
- After setting all desired programs, press the CLOCK button to exit programming mode and return to the current time display.
2. Manual Override
The MANUAL button allows you to temporarily override the programmed settings:
- Press MANUAL once: Changes output from AUTO OFF to ON.
- Press MANUAL again: Changes output from ON to AUTO ON.
- Press MANUAL again: Changes output from AUTO ON to OFF.
- Press MANUAL again: Changes output from OFF to AUTO OFF.
The "AUTO" setting means the timer will follow its programmed schedule. "ON" means the output is continuously on, and "OFF" means it's continuously off, overriding any programs until the mode is changed back to "AUTO".
3. Random Function (if available)
Some models may include a RANDOM function. If present, pressing this button will activate a random delay (e.g., 10-30 minutes) for programmed ON/OFF times, useful for security purposes.
4. Time Display Mode (12/24 Hour)
Press the CLOCK button and then the TIMER button simultaneously to toggle between 12-hour (AM/PM) and 24-hour time display modes.
Maintenance
1. Cleaning
To clean the timer switch, wipe the exterior with a soft, dry cloth. Do not use abrasive cleaners, solvents, or immerse the device in water. Ensure the device is disconnected from power before cleaning.
2. Internal Battery
The CN101A timer contains a rechargeable internal battery to maintain time and program settings during power outages. This battery is typically designed for a long lifespan and is not user-replaceable. If the display becomes dim or the timer loses settings frequently, the internal battery may be nearing the end of its life. In such cases, consider replacing the entire unit.
Troubleshooting
| Problem | Possible Cause | Solution |
|---|---|---|
| Display is blank or dim. | No power supply; internal battery discharged or faulty. | Check power connection. Connect to power for 5-10 minutes to charge the battery. If problem persists, the unit may need replacement. |
| Timer does not switch ON/OFF at programmed times. | Incorrect program settings; manual override active; current time not set correctly. | Verify program settings (ON/OFF times, days). Check if the timer is in "AUTO" mode. Ensure current time and day are accurately set. |
| Appliance connected to timer does not turn on. | Incorrect wiring; faulty appliance; timer output contacts not closing. | Verify wiring according to the diagram. Test the appliance directly. Check if the timer display shows "ON" when it should be active. |
| Timer loses settings after power outage. | Internal battery not charged or faulty. | Ensure the timer is connected to power for sufficient time to charge the internal battery. If the issue persists, the internal battery may be at the end of its life. |
Technical Specifications
- Model: CN101A Series
- Brand: IPUDIS
- Operating Voltage: 12V, 220V, 230V, 240V AC (model dependent)
- Current Rating: 8A to 16A (model dependent, e.g., 10A)
- Programmable Programs: Up to 16 ON/OFF settings per day/week
- Minimum Interval: 1 minute
- Time Error: Less than 1 second per day
- Power Consumption: Less than 2W
- Internal Battery: Rechargeable, for memory backup
- Operating Temperature: -10°C to +40°C
- Humidity: 35-85% RH
- Dimensions: Approximately 1.18 x 0.79 x 0.39 inches (Package Dimensions, actual device may vary slightly)
- Weight: Approximately 1.76 ounces (50 grams)
Note: Specifications are subject to change without prior notice. Always refer to the product packaging for the most accurate information for your specific model.
Warranty and Support
This IPUDIS product is typically covered by a limited manufacturer's warranty against defects in materials and workmanship. The duration and terms of the warranty may vary by region and retailer. Please retain your proof of purchase for warranty claims.
For technical support, troubleshooting assistance beyond this manual, or warranty inquiries, please contact your original point of purchase or refer to the contact information provided on the product packaging or the manufacturer's official website.
Manufacturer: IPUDIS