Introduction
The BOBOVR D3 Charging Dock is an all-in-one charging solution designed for the Quest 3 headset, its controllers, and the BOBOVR B100 battery. This compact station ensures your VR equipment remains organized and fully charged, ready for your next virtual adventure. It features wireless charging for controllers and dedicated slots for the headset and B100 battery, streamlining your charging process.
What's in the Box
Verify that all the following components are included in your package:
- D3 Charging Dock x1
- Controller Wireless Charging Battery x2
- Controller Battery Cover x2
- Charging Cable x1
- Anti-Slip Pad x2
- Instruction Manual x1
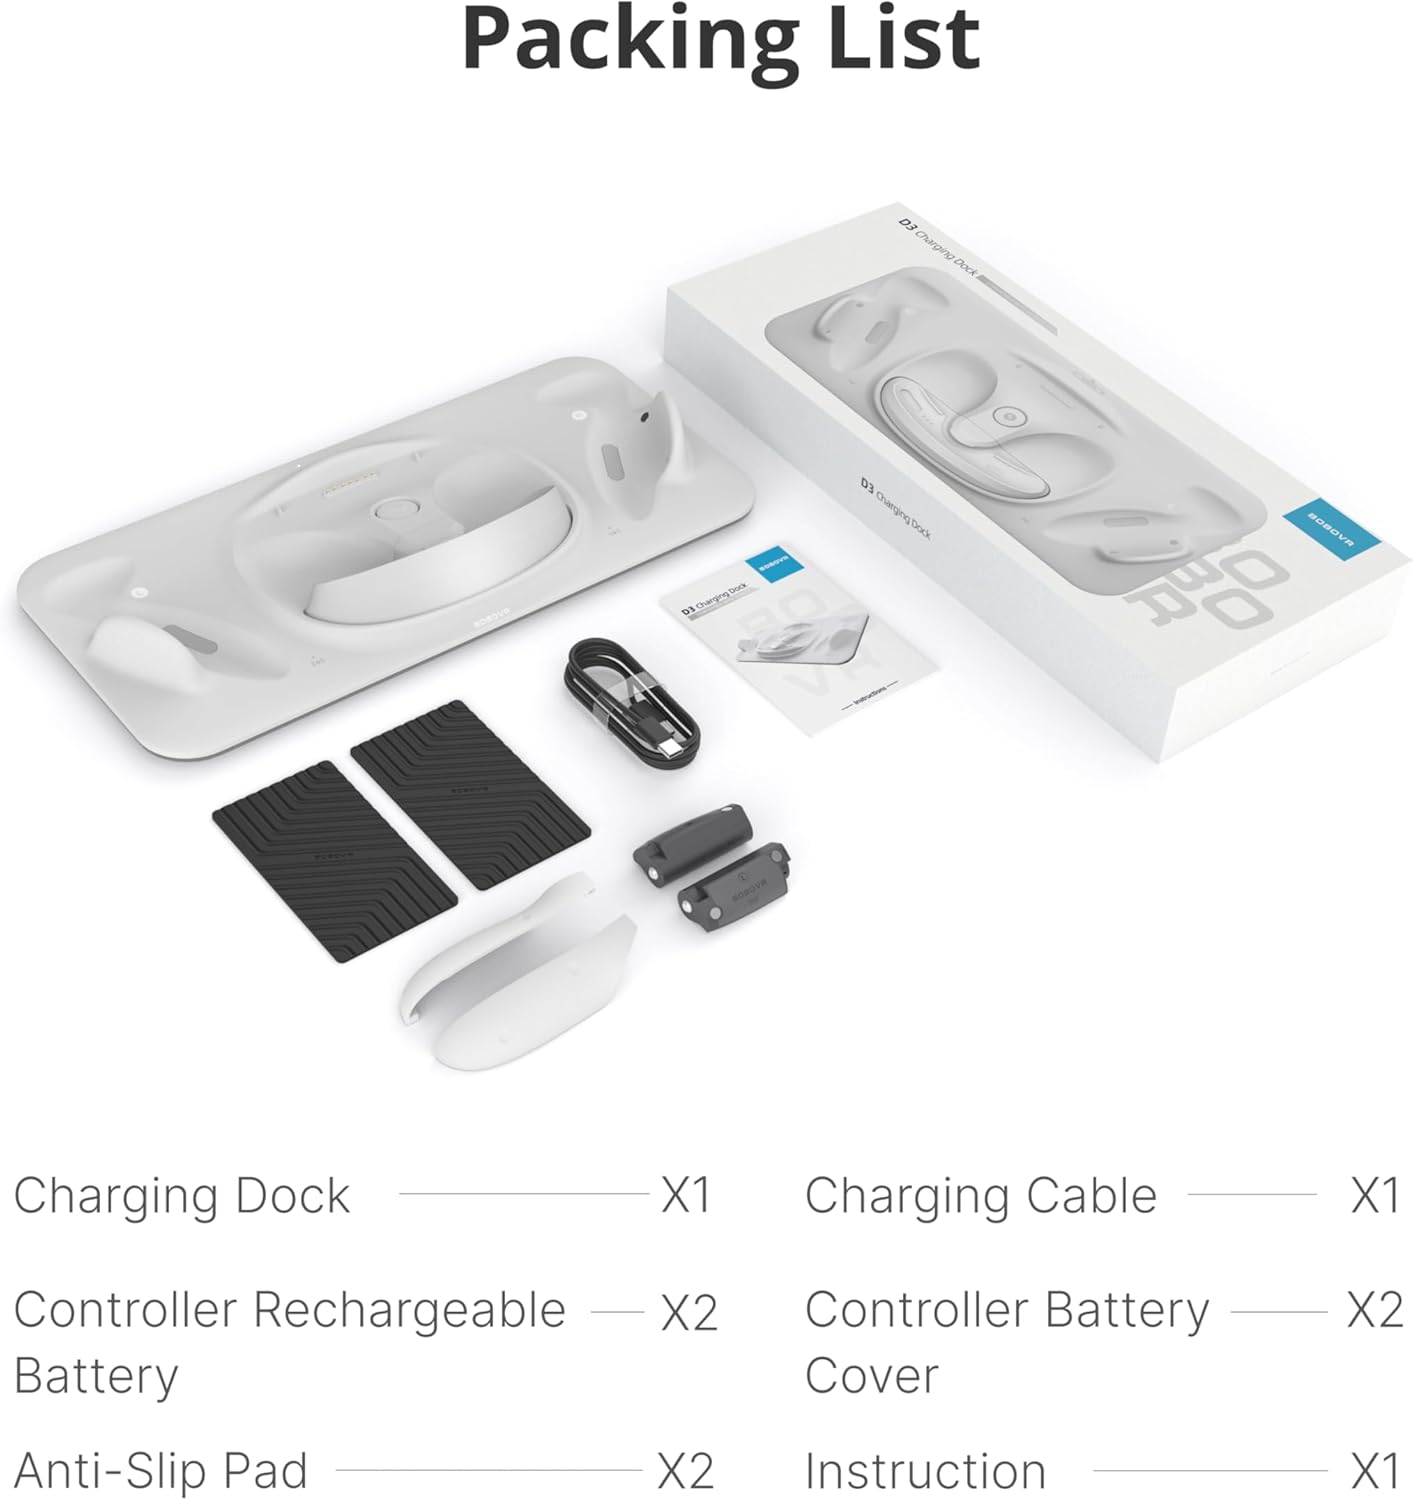
Image: All components included in the BOBOVR D3 Charging Dock package.
Setup Instructions
1. Prepare Controllers for Wireless Charging
- Remove the original battery covers from your Quest 3 controllers.
- Insert the provided BOBOVR wireless charging batteries into each controller, ensuring correct polarity (L for left, R for right).
- Attach the BOBOVR controller battery covers. These covers are designed to allow wireless charging.

Image: Step-by-step guide for installing the custom rechargeable batteries and covers into the controllers.
2. Connect the Charging Dock
- Place the D3 Charging Dock on a stable, flat surface. For added stability, you may attach the included anti-slip pads to the bottom of the dock.
- Connect the provided USB-C charging cable to the 'POWER IN' port on the back of the D3 Charging Dock.
- Connect the other end of the USB-C cable to a power adapter. For optimal and fast charging, a 45W or higher PD (Power Delivery) charger is recommended. An 18W charger can be used but will result in slower charging times. (Note: Power adapter is not included).

Image: The 'POWER IN' port and charging indicator on the D3 dock, illustrating the recommended charger specifications.
3. Place Headset and Accessories
Once the dock is powered, you can place your devices for charging:
- Quest 3 Headset: Carefully place your Quest 3 headset onto the central charging area of the dock. Ensure it is properly seated for the charging connection to engage.
- Controllers: Place your prepared controllers (with BOBOVR batteries and covers) into the designated slots on either side of the dock. They will magnetically align and begin wireless charging.
- B100 Battery: If you have a BOBOVR B100 battery, place it into its dedicated slot on the dock for charging.

Image: Proper placement of the Quest 3 headset and controllers on the D3 Charging Dock for effortless alignment and charging.

Image: The BOBOVR B100 battery being placed into its integrated charging slot on the D3 dock.
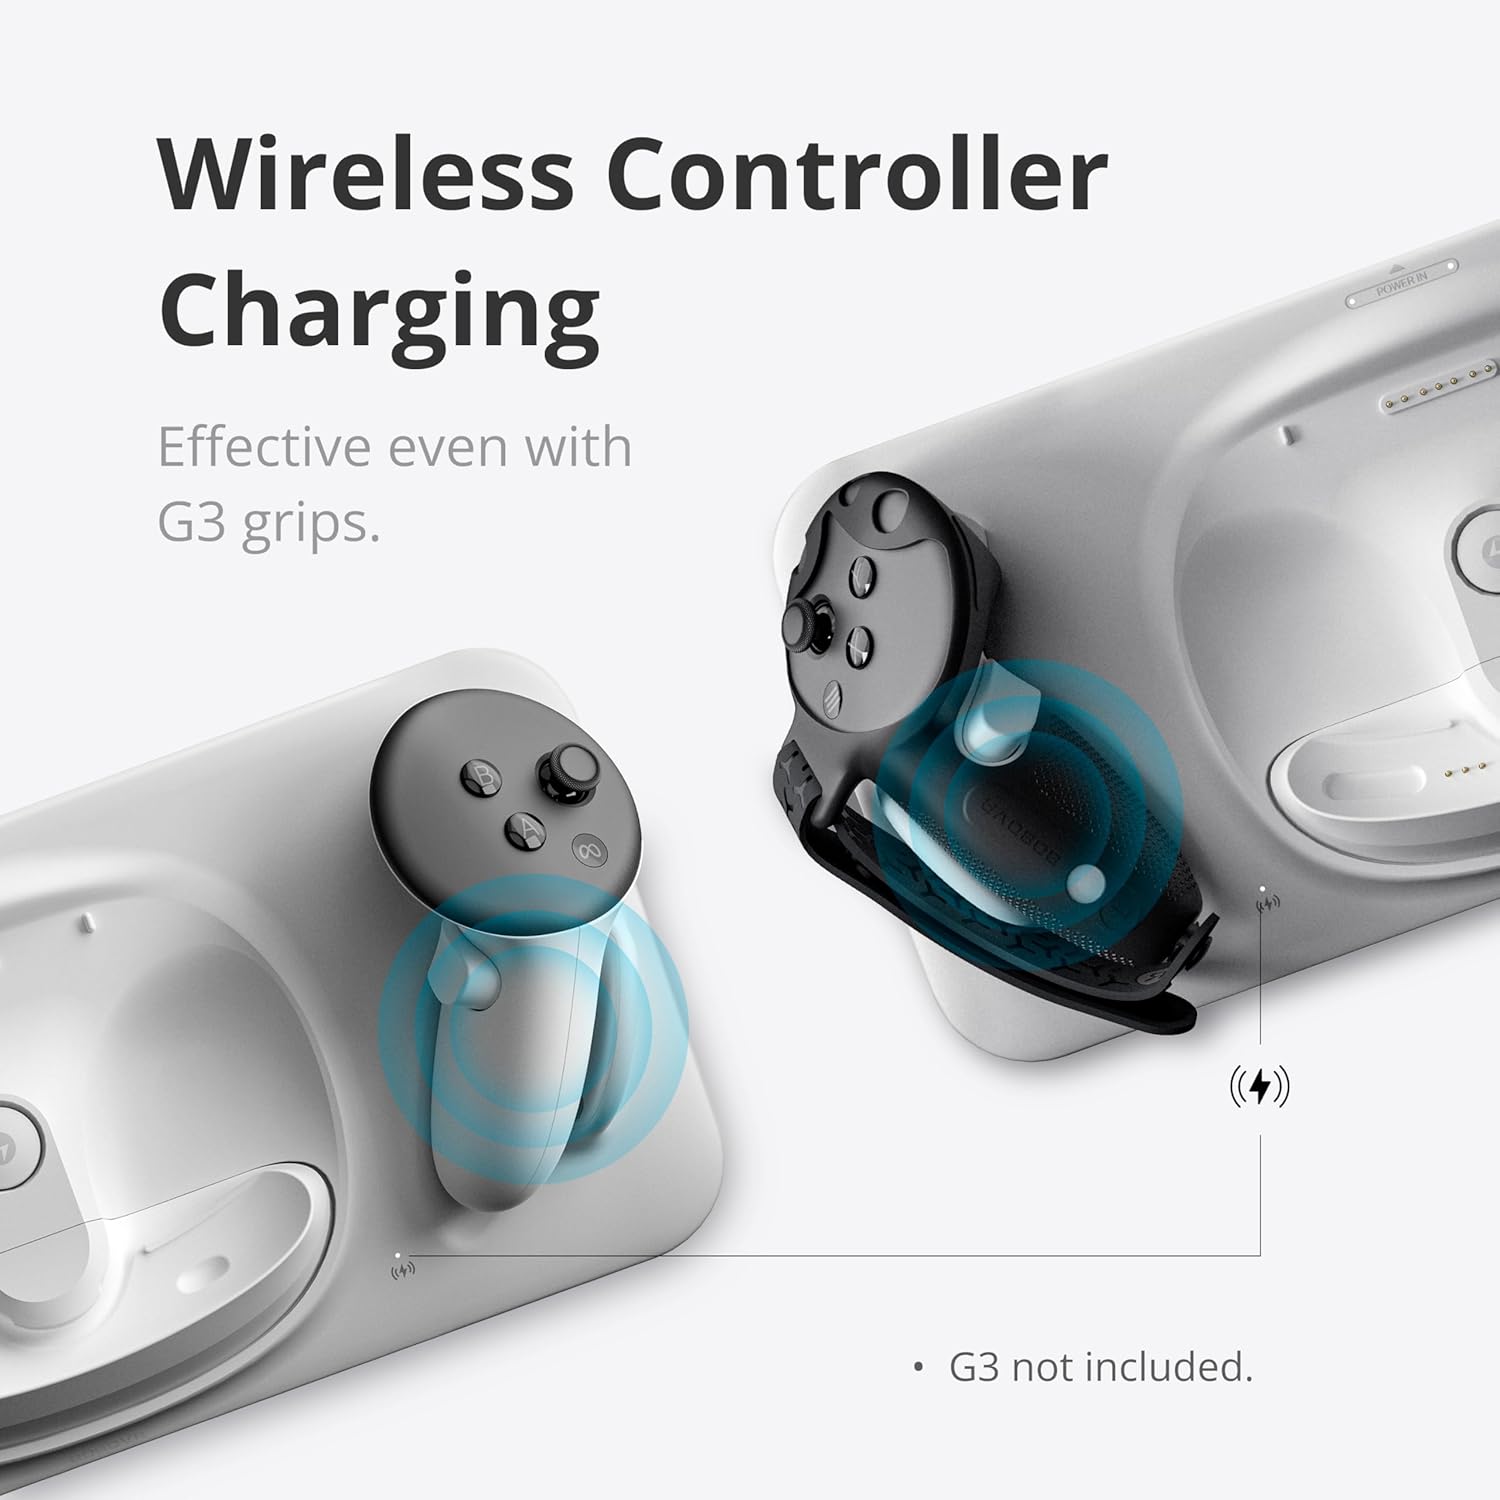
Image: Wireless charging of controllers on the D3 dock, compatible with BOBOVR G3 Plus covers.
Operating Instructions
The BOBOVR D3 Charging Dock is designed for simple, intuitive operation. Once connected to a suitable power source, it automatically detects and charges your devices.
Charging Process
- Automatic Charging: Simply place your Quest 3 headset, controllers, and B100 battery (if applicable) into their respective slots. The dock will automatically initiate charging.
- Fast Charging: With a 45W or higher charger, your entire Quest 3 setup can be fully charged in under 3 hours. The B100 battery can reach 80% charge in about 1.5 hours.
- Wireless Controller Charging: Controllers charge wirelessly via the custom rechargeable lithium batteries. No need to remove BOBOVR G3 Plus covers. Fully charged controllers provide over 24 hours of use.
Charging Indicators
The dock features LED indicators to communicate the charging status and power compatibility:
- Green Light: Indicates normal operation, typically with a 45W or higher charger (PD15V = 3A).
- Yellow Light: Indicates slow charging, typically with a charger less than 45W (9V-15V).
- Red Light: Indicates abnormal operation or an incompatible 5V charger.
Image: Explanation of the charging indicator lights and their meaning based on charger wattage.
Video: Official BOBOVR D3 Charging Dock demonstration, showing how to place and charge the Quest 3 headset, controllers, and B100 battery, and highlighting the magnetic connections and indicator lights.
Maintenance
To ensure the longevity and optimal performance of your BOBOVR D3 Charging Dock, follow these maintenance guidelines:
- Cleaning: Use a soft, dry cloth to wipe down the charging dock. Avoid using abrasive cleaners, solvents, or harsh chemicals, as these can damage the surface.
- Avoid Liquids: Keep the charging dock away from water and other liquids. In case of accidental spills, immediately unplug the device and allow it to dry completely before re-using.
- Storage: When not in use, store the charging dock in a cool, dry place, away from direct sunlight and extreme temperatures.
- Handle with Care: Avoid dropping or subjecting the dock to strong impacts, which could damage internal components.
Troubleshooting
If you encounter issues with your D3 Charging Dock, refer to the following common problems and solutions:
- Headset Not Charging:
- Ensure the Quest 3 headset is properly seated on the central charging area. Sometimes, slight adjustments are needed for the connection to engage.
- Verify that the power adapter connected to the dock is 45W or higher. Lower wattage chargers may not provide sufficient power for the headset.
- Check if any third-party facial interfaces or accessories are obstructing the headset's contact with the charging pins. Removing them temporarily might resolve the issue.
- Slow Charging:
- The charging speed is directly related to the power adapter's wattage. For optimal speed, use a 45W or higher PD charger. An 18W charger will result in significantly slower charging.
- Ensure the charging cable is securely connected to both the dock and the power adapter.
- Controllers Not Charging:
- Confirm that the BOBOVR wireless charging batteries are correctly installed in the controllers and that the BOBOVR battery covers are securely attached.
- Ensure the controllers are placed firmly in their designated magnetic charging slots on the dock. The magnetic connection should be strong.
- Red Indicator Light:
- A red light indicates an incompatible charger, typically a 5V charger. Replace it with a 9V-15V charger (preferably 45W or higher) for proper operation.
Specifications
| Package Dimensions | 15.07 x 6.61 x 1.93 inches |
| Item Weight | 1.17 pounds |
| Item Model Number | D3 |
| Batteries | 2 Lithium Ion batteries required (included for controllers) |
| Manufacturer | BOBOVR |
| Brand | BOBOVR |
| Connector Type | USB Type C |
| Compatible Devices | Quest 3 Headset, BOBOVR B100 Battery, Quest 3 Controllers (with BOBOVR batteries/covers) |
| Included Components | D3 Charging Dock, Controller wireless charging battery*2, Controller battery cover*2 |
| Special Feature | Wireless Charging |
| Input Voltage | 15 Volts (Supports PD chargers of 18W and above, 45W or higher recommended) |
| Total USB Ports | 1 (for power input) |
| Wattage | 18 watts (minimum supported, 45W recommended) |
Warranty & Support
The BOBOVR D3 Charging Dock is manufactured by BOBOVR. For specific warranty information, product support, or to inquire about replacement parts, please refer to the official BOBOVR website or contact their customer service directly. You can often find detailed support resources, FAQs, and contact information by visiting the BOBOVR Store on Amazon or their official brand channels.