1. Introduction
Thank you for choosing the Klutch Dual-Voltage AC/DC TIG/Stick Welder. This manual provides essential information for the safe operation, setup, maintenance, and troubleshooting of your new welding machine. Please read this manual thoroughly before operating the equipment to ensure proper use and to prevent injury or damage.
This welder is designed for both TIG (Tungsten Inert Gas) and Stick (Shielded Metal Arc Welding) processes, offering versatility for various welding applications on different materials, including steel, stainless steel, cast iron, and aluminum.
2. Safety Information
WARNING: Welding can be dangerous. Always follow safety precautions to prevent serious injury or death. Read and understand all safety warnings and instructions before operating this equipment.
- Electric Shock Can Kill: Do not touch live electrical parts. Wear dry welding gloves and protective clothing. Insulate yourself from work and ground.
- Fumes and Gases Can Be Dangerous: Keep your head out of the fumes. Use ventilation or exhaust to remove fumes from the breathing zone.
- Welding Sparks Can Cause Fire or Explosion: Keep flammable materials away. Have a fire extinguisher nearby.
- Arc Rays Can Burn Eyes and Skin: Wear a welding helmet with a proper shade filter. Wear protective clothing to protect skin.
- Hot Parts Can Cause Severe Burns: Allow equipment to cool before touching.
- Magnetic Fields Can Affect Pacemakers: Consult your doctor before operating.
Always ensure your work area is well-ventilated, clean, and free of obstructions. Use appropriate personal protective equipment (PPE) including welding helmet, gloves, protective clothing, and safety shoes.

Image: Rear panel of the welder showing important safety warning labels. Always read and adhere to these warnings.
3. Product Overview
The Klutch Dual-Voltage AC/DC TIG/Stick Welder is a versatile and portable welding solution featuring inverter technology for efficient and consistent power output. Its dual 120V/230V input allows for flexible use in various environments.
Key Features:
- Dual 120V/230V input for wide compatibility.
- Power Factor Correction (PFC) design for enhanced efficiency and welding performance.
- Synergic settings for automatic parameter adjustment, simplifying operation.
- Inverter technology for improved arc starting and lighter unit weight.
- Includes a foot pedal for hands-free current control.
- Integrated overload protection for enhanced safety and durability.
- Adjustable AC frequency and AC balance for optimized TIG welding on aluminum.
- Pulse feature for precise filler metal deposition.
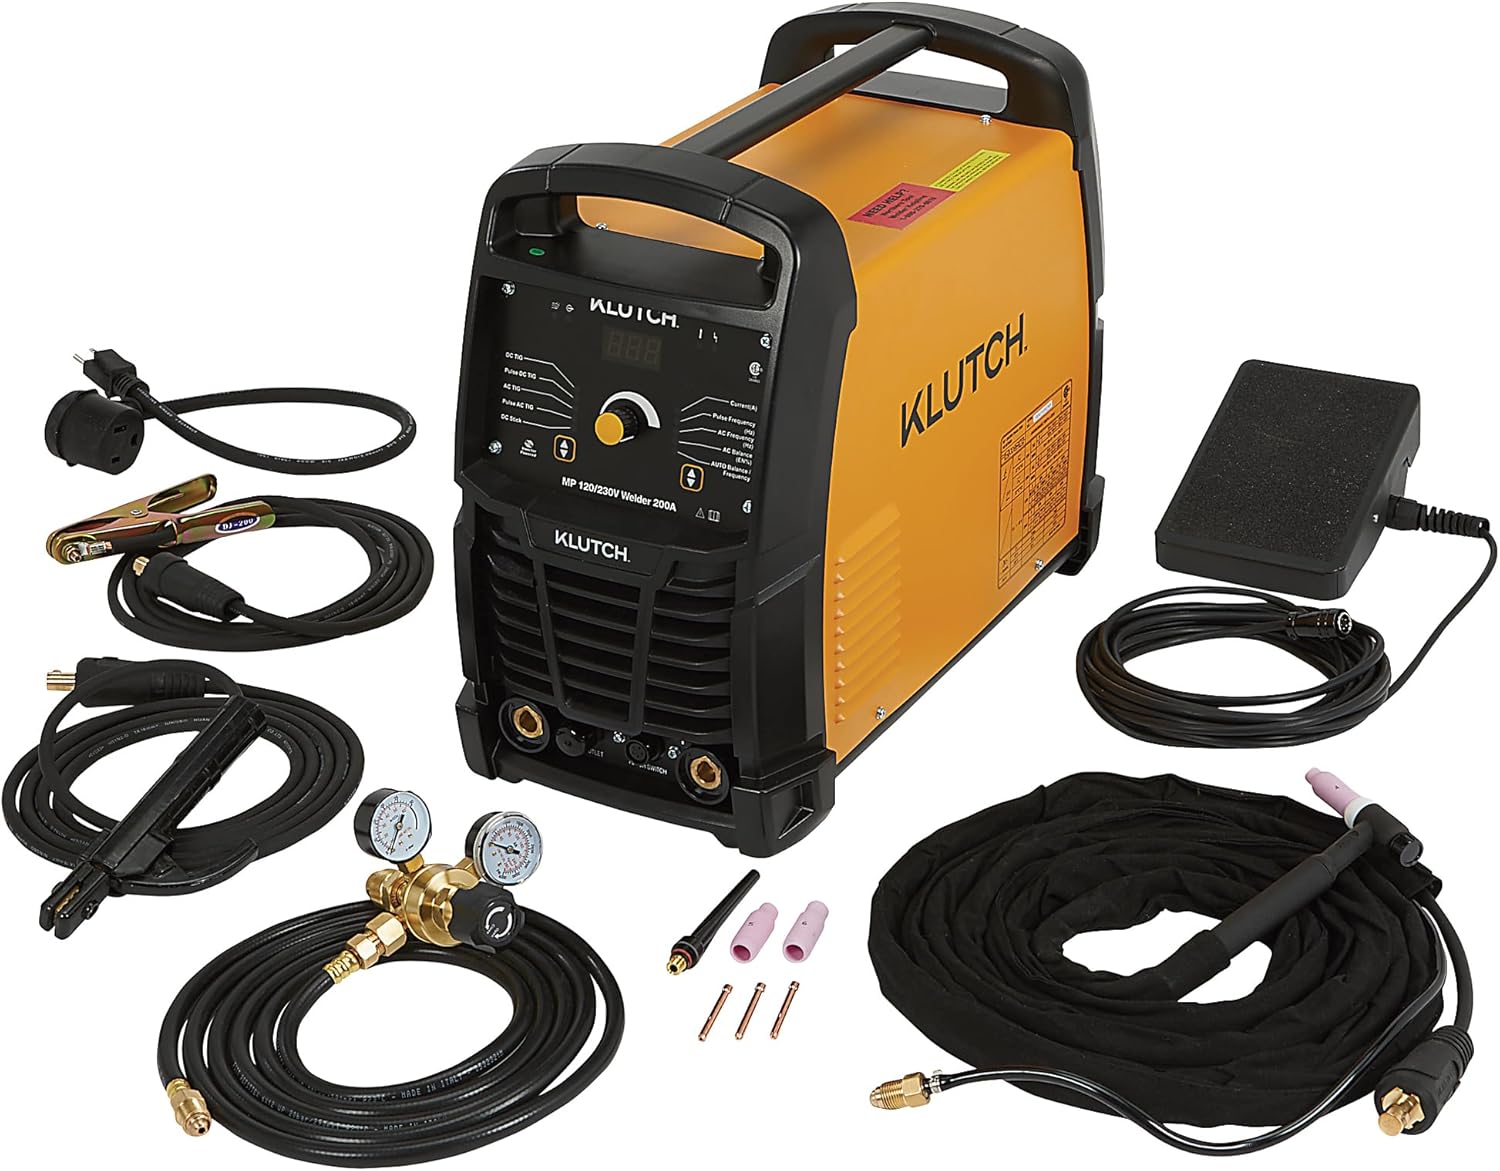
Image: The Klutch Welder unit shown with its complete set of accessories, including the TIG torch, grounding cable, foot pedal, gas regulator, and power adapters.
Front Panel Controls:
The front panel houses the main display, control knob, and connection points for the TIG torch and ground clamp.

Image: Detailed view of the welder's front panel, highlighting the digital display, control knob for current and parameter adjustments, and mode selection indicators.

Image: A closer look at the front panel, showing the specific labels for DC TIG, Pulse DC TIG, AC TIG, Pulse AC TIG, DC Stick modes, and controls for Current, Pulse Frequency, AC Frequency, and AC Balance.
Rear Panel Connections:
The rear panel includes the power input, ON/OFF switch, and gas input connection.

Image: The rear of the welder, illustrating the power cord connection, the ON/OFF switch, and the gas input port.

Image: A closer view of the rear panel, emphasizing the power input socket and the gas input nozzle.
4. Setup
Proper setup is crucial for safe and effective welding. Follow these steps carefully:
4.1 Power Connection:
- Ensure the welder's ON/OFF switch is in the "OFF" position.
- Determine the available power supply (120V or 230V).
- Connect the appropriate power cord adapter (120V adapter included) to the welder's power input.
- Plug the power cord into a properly grounded electrical outlet.
Note: The welder automatically detects the input voltage. Ensure the circuit can handle the required amperage (200A max at 230V, 120A max at 120V).
4.2 Gas Connection (for TIG Welding):
- Connect the gas hose (included) to the gas input port on the rear of the welder.
- Attach the other end of the gas hose to the gas regulator.
- Connect the gas regulator to your shielding gas cylinder (e.g., Argon for TIG).
- Ensure all connections are tight to prevent gas leaks.
- Open the cylinder valve slowly and adjust the regulator to the desired gas flow rate (typically 10-20 CFH for TIG).
4.3 Foot Pedal Connection:
- Locate the foot pedal connection port on the front panel of the welder.
- Connect the foot pedal cable securely to this port.
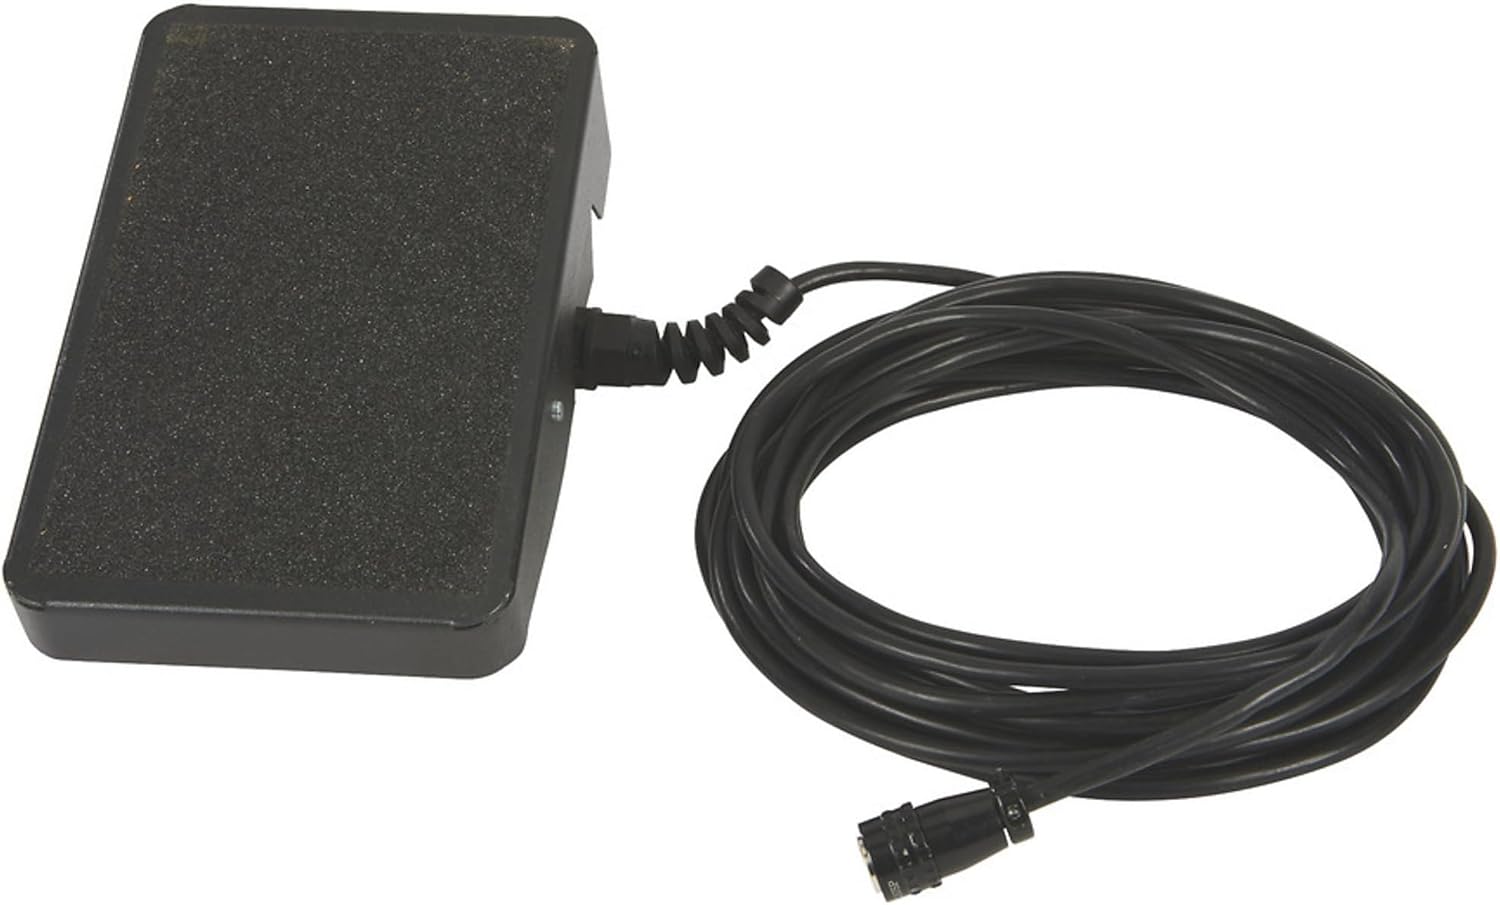
Image: The included foot pedal, used for hands-free current control during TIG welding.
4.4 Grounding Cable Connection:
- Connect the grounding cable's plug to the negative (-) terminal on the front panel.
- Attach the ground clamp securely to the workpiece or a metal workbench that is in direct contact with the workpiece. Ensure a clean, bare metal connection for optimal performance.

Image: The grounding cable with its clamp, essential for completing the welding circuit and ensuring safety.
4.5 TIG Torch / Electrode Holder Connection:
- For TIG welding, connect the TIG torch cable to the positive (+) terminal on the front panel. Ensure the gas line from the torch is also connected to the gas output on the welder (if applicable, or directly to the regulator if using a gas-through-torch setup).
- For Stick welding, connect the electrode holder cable to the appropriate terminal (usually positive for most electrodes, consult electrode manufacturer specifications).
5. Operating Instructions
This section details the operation of your Klutch welder for TIG and Stick welding processes.
5.1 Powering On and Mode Selection:
- After completing all connections, turn the ON/OFF switch on the rear panel to "ON".
- The digital display will illuminate. Use the control knob and selection buttons on the front panel to choose your desired welding mode (DC TIG, Pulse DC TIG, AC TIG, Pulse AC TIG, or DC Stick).
5.2 Parameter Adjustment:
The Klutch welder offers precise control over welding parameters:
- Current (Amperage): Adjust the main control knob to set the welding current. The range is 15-200A (230V input) or 15-120A (120V input).
- Pulse Feature: For TIG welding, activate the pulse feature to control heat input and improve bead appearance. Adjust Pulse Frequency and Pulse Duty Cycle as needed.
- AC Frequency (for AC TIG): Adjust the AC frequency to control the arc cone width and direction. Higher frequency results in a more focused arc.
- AC Balance (for AC TIG): Adjust AC balance to control the cleaning action and penetration when welding aluminum. A higher balance setting increases cleaning action, while a lower setting increases penetration.
- Synergic Setting: The welder features an auto-setting parameter function. When enabled, the machine will automatically adjust certain parameters for easier welding based on your primary current setting.

Image: A welder performing a weld, illustrating the arc and sparks generated during the process. Always wear appropriate eye and skin protection.
5.3 TIG Welding with Foot Pedal:
When using the foot pedal, the pedal controls the welding current. Pressing the pedal increases the current, and releasing it decreases the current. This allows for precise heat control during the weld.
- Select a TIG mode.
- Set the maximum desired current on the welder's front panel. The foot pedal will then modulate the current from a low start to this maximum setting.
- Initiate the arc and control the current with the foot pedal as you weld.
6. Maintenance
Regular maintenance ensures the longevity and optimal performance of your welding machine. Always disconnect power before performing any maintenance.
- Cleaning: Periodically clean the exterior of the welder with a dry, soft cloth. Use compressed air to blow out dust and debris from the cooling vents.
- Cable Inspection: Regularly inspect all cables (power, ground, torch, foot pedal) for cuts, fraying, or damaged insulation. Replace damaged cables immediately.
- Connections: Ensure all electrical and gas connections are tight and free of corrosion.
- TIG Torch Consumables: Inspect and replace TIG torch consumables (tungsten electrode, collet, collet body, gas lens, nozzle) as they wear out.
- Storage: Store the welder in a clean, dry environment when not in use.
7. Troubleshooting
Refer to this section for common issues and their potential solutions.
| Problem | Possible Cause | Solution |
|---|---|---|
| Welder does not power on. | No power from outlet; ON/OFF switch off; internal fuse blown. | Check power outlet; ensure switch is ON; contact service if fuse suspected. |
| No arc or weak arc. | Poor ground connection; incorrect current setting; damaged cables; wrong electrode/tungsten. | Ensure clean, secure ground; adjust current; inspect cables; verify consumables. |
| Overload indicator active. | Exceeded duty cycle; insufficient ventilation; high ambient temperature. | Allow welder to cool; ensure clear airflow around unit; reduce welding time. |
| Poor TIG weld quality (porosity, contamination). | Insufficient gas flow; gas leak; contaminated tungsten; dirty workpiece. | Check gas flow/connections; replace tungsten; clean workpiece thoroughly. |
| Foot pedal not responding. | Foot pedal not connected properly; faulty pedal. | Check foot pedal connection; test pedal if possible. |
If problems persist after attempting these solutions, please contact Klutch customer support.
8. Specifications
Detailed technical specifications for the Klutch Dual-Voltage AC/DC TIG/Stick Welder (Model 90340360103).
| Feature | Detail |
|---|---|
| Model Number | 90340360103 |
| Input Voltage | 120V / 230V (Dual Voltage) |
| Max Amperage (230V) | 200A |
| Max Amperage (120V) | 120A |
| Duty Cycle (230V) | 20% @ 200A |
| Duty Cycle (120V) | 35% @ 120A |
| Welding Amperage Range (230V) | 15 - 200A |
| Welding Amperage Range (120V) | 15 - 120A |
| Welding Processes | AC/DC TIG, Stick |
| Technology | Inverter, Power Factor Correction (PFC) |
| Included Components | 15 ft TIG torch, 10 ft Grounding cable with electrode holder, 10 ft grounding cable with clamp, 25 ft cable with foot pedal, 120 V adaptor, Regulator, 10 ft gas hose. |
| Item Weight | 57 pounds |
| Package Dimensions | 27.8 x 19.5 x 12.6 inches |
| Manufacturer | Klutch |
9. Warranty and Support
For warranty information, please refer to the documentation provided with your purchase or visit the official Klutch website. Keep your proof of purchase for warranty claims.
If you encounter any issues or require technical assistance, please contact Klutch customer support. You can typically find contact information on the manufacturer's website or through your retailer.
This product is returnable until January 31, 2026, as per retailer policy. Please check your purchase details for specific return conditions.