
1. Introduction
This manual provides detailed instructions for the installation, operation, and maintenance of the Caddx Ratel 2 V2 Micro FPV Camera. Designed for FPV racing and drone applications, this camera features advanced sensor technology and a durable build for reliable performance.
2. Product Overview
2.1 Key Features
- Advanced Sensor Technology: Equipped with a 1/1.8" inch starlight sensor for enhanced image clarity.
- Versatile Lens Options: Features a 2.1mm lens with switchable 16:9 and 4:3 aspect ratios, compatible with NTSC/PAL systems.
- Enhanced Durability: Constructed with a metal case and thickened frame for improved crash resistance.
- Wide Field of View: Offers a 165° field of view for comprehensive visual coverage.
- Full-Weather Capability: Designed to operate effectively in various environmental conditions.
2.2 Package Contents
- 1x Caddx Ratel 2 Camera
- 1x Menu Board
- 1x 2Pin Silicon Cable
- 1x 3Pin Silicon Cable
- 1x 1.5mm Allen Wrench
- 1x Warranty Card

Figure 2.2.1: Contents of the Caddx Ratel 2 V2 package. Includes the camera, menu board, cables, Allen wrench, and warranty card.
3. Setup
3.1 Wiring Diagram
The Caddx Ratel 2 V2 camera utilizes a 2-pin and a 3-pin silicon cable for power and video output. Ensure correct polarity when connecting power.
- Power Input: The camera supports a wide power input range of 4.5V to 40V DC.
- Video Output: CVBS (Composite Video Blanking and Sync).
3.2 Mounting
The camera's dimensions are 19x19x20 mm, making it suitable for micro FPV drone frames. Secure the camera firmly using appropriate mounting hardware (not included unless specified in drone kit).

Figure 3.2.1: Front view of the Caddx Ratel 2 V2 Micro FPV Camera, showing its compact design.
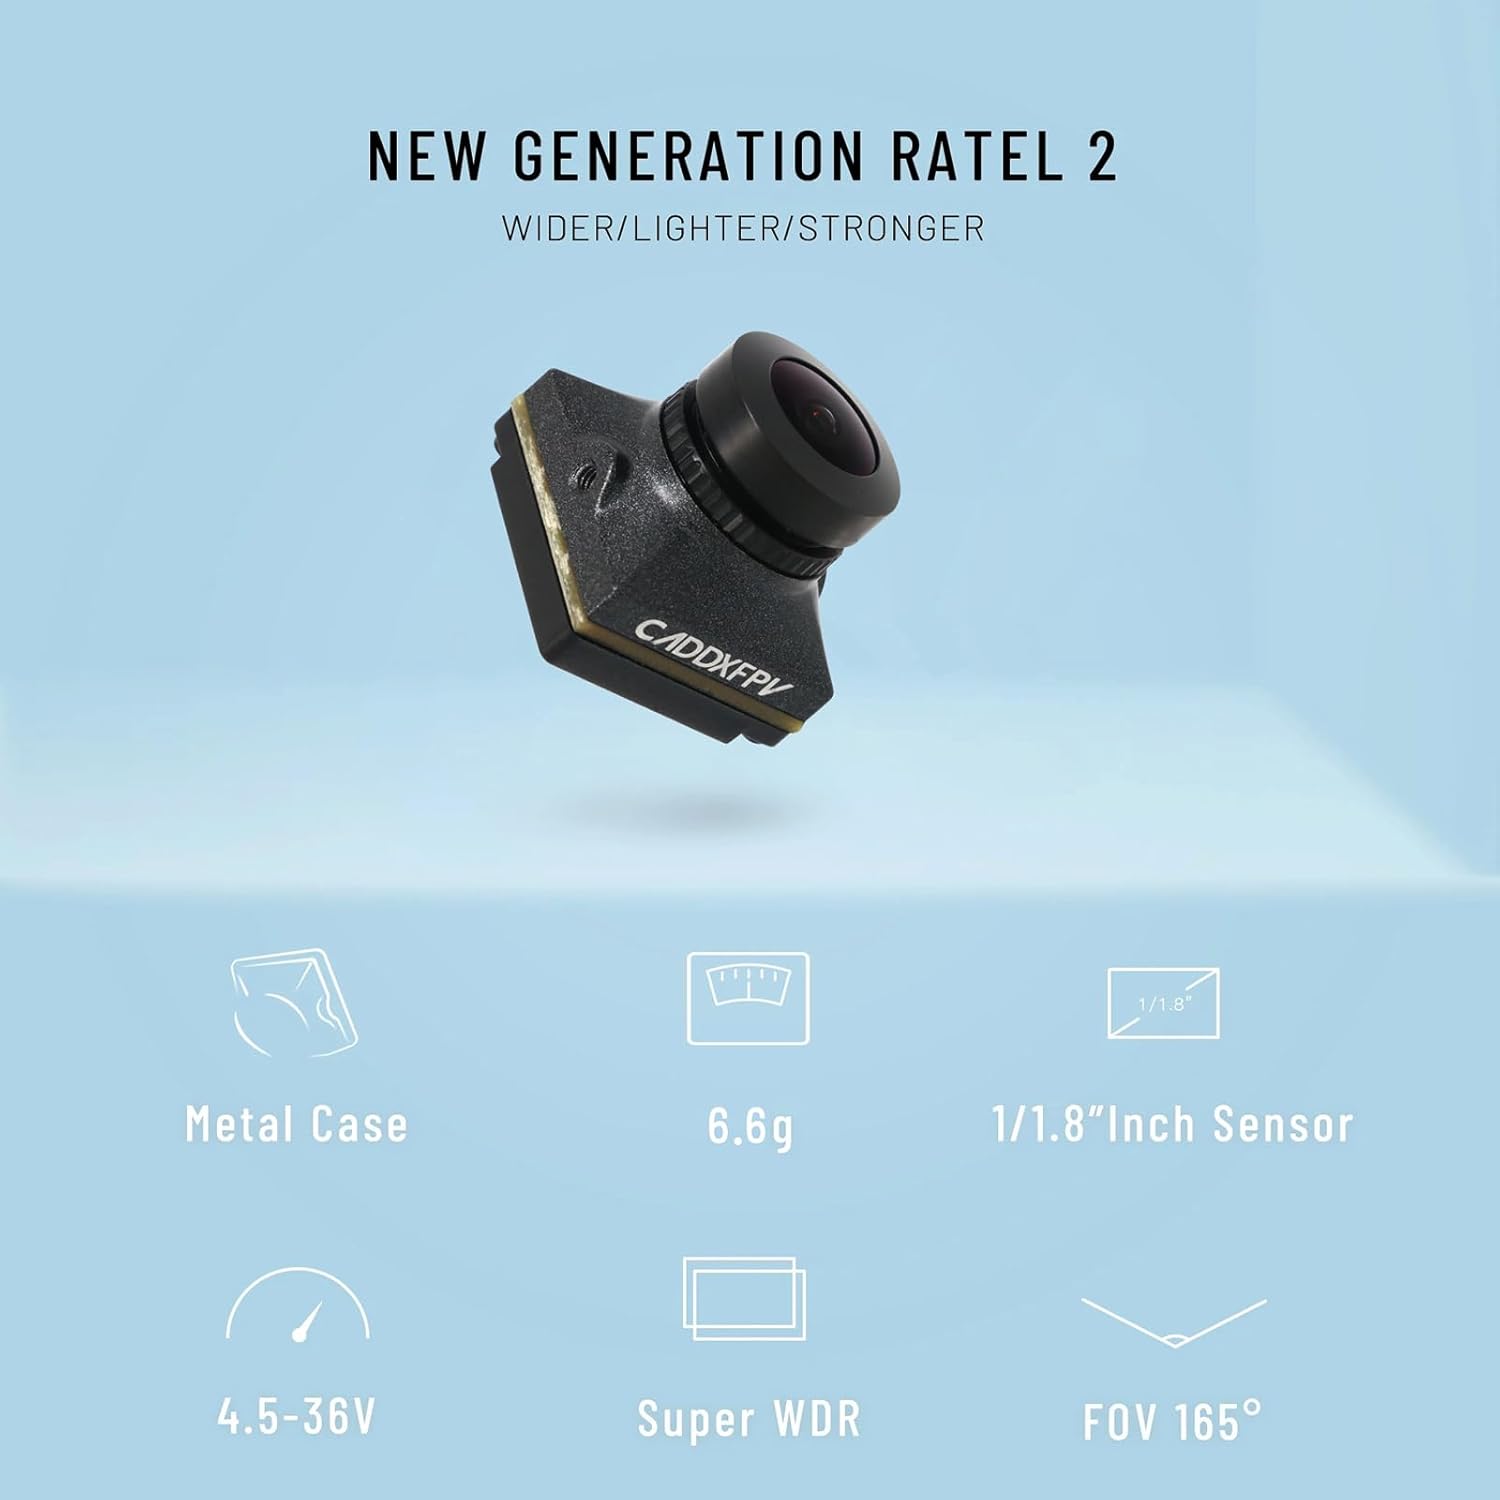
Figure 3.2.2: Infographic detailing the Caddx Ratel 2 V2's features, including its dimensions and power input range.
4. Operating
4.1 On-Screen Display (OSD) Menu
The camera's settings are adjusted via the included menu board. Connect the menu board to the camera's OSD port. Use the buttons on the menu board to navigate and select options within the OSD.
4.2 Adjustable Settings
The OSD menu allows configuration of various camera parameters:
- TV System: Switch between NTSC and PAL formats.
- Image Aspect Ratio: Select either 4:3 or 16:9.
- Day/Night Mode: Options include Auto, Color, Black & White (B&W), and External (EXT).
- WDR (Wide Dynamic Range): Super WDR for improved image quality in high-contrast lighting.
- DNR (Digital Noise Reduction): 3DNR for reducing image noise.
- Shutter Speed: Adjustable for PAL (1/50~100,000) and NTSC (1/60~100,000).
- Language: Multiple language options are available.

Figure 4.2.1: Comparison of the camera's image capture during day and night conditions, demonstrating its full-weather capability.
5. Maintenance
5.1 Cleaning
Gently clean the camera lens with a soft, lint-free cloth. Avoid abrasive materials or harsh chemicals that could damage the lens coating.
5.2 Storage
Store the camera in a dry, dust-free environment when not in use. Protect it from extreme temperatures and direct sunlight.
5.3 Lens Protection
While the camera features a durable metal case, consider using a lens protector during aggressive flying to prevent scratches or impact damage to the lens.

Figure 5.3.1: The Caddx Ratel 2 V2 camera's robust construction is designed for crash protection.

Figure 5.3.2: The camera features a full casing designed to keep out rain and dust, enhancing its durability.
6. Troubleshooting
6.1 No Video Output
- Check Power Supply: Ensure the camera is receiving power within the specified 4.5V-40V DC range. Insufficient voltage can prevent video output.
- Verify Connections: Confirm that all cables are securely connected to the camera, flight controller, and video transmitter.
- Inspect Cables: Check for any damaged or frayed wires.
6.2 Poor Image Quality
- Clean Lens: A dirty or smudged lens can significantly degrade image quality. Clean it carefully as described in Section 5.1.
- Adjust OSD Settings: Experiment with WDR and DNR settings in the OSD menu to optimize image quality for current lighting conditions.
- Check for Interference: Electromagnetic interference from other drone components can affect video signal quality. Ensure proper shielding and cable routing.
6.3 Incorrect Aspect Ratio or TV System
- Access OSD Menu: Use the menu board to enter the OSD.
- Adjust Settings: Navigate to the 'Image' or 'TV System' options and select the desired aspect ratio (4:3 or 16:9) or TV system (NTSC or PAL).
7. Specifications
7.1 Technical Specifications
| Feature | Specification |
|---|---|
| Sensor | 1/1.8'' Inch Starlight |
| Resolution | 1200TVL |
| FOV (Field of View) | 165° |
| Lens | 2.1mm |
| TV System | NTSC & PAL (Switchable) |
| Image Aspect Ratio | 4:3 & 16:9 (Switchable) |
| WDR | Super WDR |
| DNR | 3DNR |
| Min. Illumination | 0.0001LUX (0.001LUX in some descriptions) |
| Video Output | CVBS |
| Day/Night | Auto/Color/B&W/EXT |
| Shutter Speed (PAL) | 1/50~100,000 |
| Shutter Speed (NTSC) | 1/60~100,000 |
| Wide Power Input | 4.5-40V DC |
| Working Temperature | -20℃ ~ +60℃ |
| Weight | 5.9g (6.6g in some descriptions) |
| Dimension | 19x19x20 mm |
| Item Model Number | CAD207 |
8. Warranty and Support
8.1 Warranty Information
A warranty card is included with your Caddx Ratel 2 V2 camera. Please refer to this card for specific warranty terms, conditions, and duration. Retain your proof of purchase for warranty claims.
8.2 Customer Support
For technical assistance or support inquiries not covered in this manual, please contact the retailer or manufacturer directly. Refer to the warranty card or product packaging for contact details.


