1. Introduction
The Y&H 30A PWM Solar Charge Controller is designed to manage power flow from your solar panel to your battery bank and DC loads. It automatically detects 12V or 24V system voltages and is compatible with various battery types, including lead-acid (open, sealed, gel) and lithium batteries. This controller features an LCD display for real-time monitoring and adjustable parameters, along with dual USB outputs for charging small electronic devices.
For 12V battery systems, the solar module's maximum power should be 360W with an open circuit voltage (VOC) between 15V-24V. For 24V battery systems, the solar module's maximum power should be 720W with a VOC between 30V-48V.
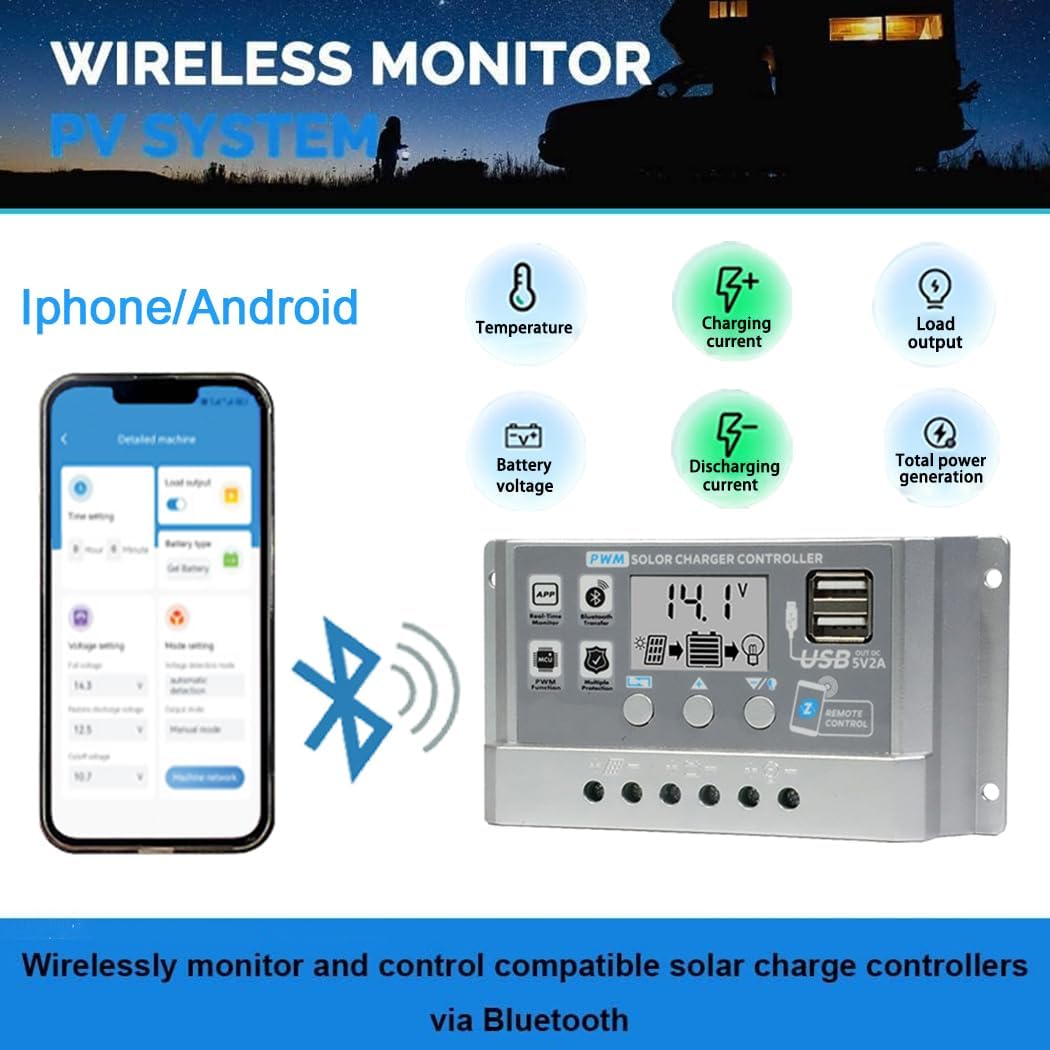
Figure 1: Y&H 30A PWM Solar Charge Controller
2. Setup and System Connection
Follow these steps for proper system connection. Important: Connect components in the specified order to prevent damage to the controller.
- Connect the Battery: Connect the battery to the charge controller's positive and negative terminals. The controller will automatically detect the battery voltage and set appropriate charging parameters.
- Connect the Solar Panel: Connect the photovoltaic module (solar panel) to the charge controller's positive and negative terminals.
- Connect the Load: Connect your DC loads (consumers) to the charge controller's positive and negative load terminals.
Warning: Connecting components in reverse order can damage the controller. Always ensure correct polarity.

Figure 2: System Connection Diagram
Battery Compatibility and Repair Function
The controller supports various battery types including FLD, Gel, LiFePO4, and other lead-acid and lithium-ion batteries. When using the 0V battery repair function, it is crucial to remember and set the correct voltage value for the battery being repaired. For example, if repairing a 12V battery, set the controller to "bt12V" before initiating the repair process.

Figure 3: Battery Type Compatibility
3. Operating Instructions
LCD Display and Interface
The controller features a large LCD screen that displays real-time information such as temperature, charging current, discharge current, cumulative output, and battery voltage. The display is bright and visible, showing multiple parameters simultaneously.

Figure 4: Product Interface Introduction
Parameter Settings
The controller allows adjustment of charging and discharging parameters.
- Short press the Menu key: Cycle through various fields and parameters on the display.
- Short press Up/Down keys: Adjust the required parameters.
- Short press the Menu key again: Save the changes.
- Long press the Up key: Restore factory data settings.
You can adjust parameters like float charge voltage, discharge recovery voltage, battery voltage selection, battery type, load operating mode, and discharge cut-off voltage. Ensure you understand your battery's characteristics before modifying charging parameters. The load output time can also be set when the output is off.

Figure 5: LCD Display and Setting Parameters
Application Communication (Bluetooth)
The controller supports communication with a mobile phone application via Bluetooth. This allows you to monitor cumulative electricity generation, real-time power output, and daily solar usage. You can also modify controller parameters through the application.

Figure 6: Wireless Monitoring via Bluetooth
Load Time Slot Output
In load output mode, you can select a six-day interval output function. Each time interval can be independently enabled or disabled. This feature is typically available with Bluetooth, WiFi, or 4G device settings.
4. Maintenance
To ensure optimal performance and longevity of your solar charge controller, regular maintenance is recommended:
- Inspect Connections: Periodically check all wiring connections for tightness and corrosion. Loose connections can lead to power loss or overheating.
- Clean the Controller: Keep the controller clean and free from dust and debris. Use a dry cloth for cleaning. Ensure ventilation openings are not blocked.
- Monitor Battery Health: Regularly check your battery's condition. The controller's display provides battery voltage information. If using the 0V battery repair function, follow the instructions carefully.
- Environmental Conditions: Ensure the controller is installed in a dry, well-ventilated area, away from direct sunlight and extreme temperatures.
5. Troubleshooting and Protection Features
The Y&H Solar Charge Controller is equipped with multiple built-in protection mechanisms to safeguard the device and your system:
- Overheating Protection: Prevents damage from excessive internal temperatures.
- Overcurrent Protection: Protects against currents exceeding the controller's rated capacity.
- Short Circuit Protection: Automatically disconnects in case of a short circuit in the system.
- Open Circuit Protection: Safeguards the system if a circuit becomes open.
- Reverse Connection Protection: Protects against damage from incorrect polarity connections for both solar panels and batteries.
In most fault conditions, the controller will automatically recover once the issue is resolved, without causing permanent damage to the device.
6. Specifications
| Feature | Specification |
|---|---|
| Brand | Y&H |
| Model Number | BL915-30A-DE |
| Rated Charge Current | 30A |
| System Voltage | 12V / 24V Auto-sensing |
| Max Solar Panel Power (12V System) | 360W |
| Max Solar Panel VOC (12V System) | 15V - 24V |
| Max Solar Panel Power (24V System) | 720W |
| Max Solar Panel VOC (24V System) | 30V - 48V |
| USB Output | Dual USB, 5V/2A (Max) |
| Display Type | LCD |
| Material | Plastic |
| Color | Silver |
| Product Dimensions (L x W x H) | 13.4 cm x 3.3 cm x 7 cm |
| Product Weight | 0.15 kg |
| UPC | 704334409996 |
7. Warranty and Support
For warranty information and technical support, please refer to the documentation provided with your purchase or contact Y&H customer service directly. Keep your proof of purchase for warranty claims.