QHHR GSWBJQ
QHHR Sump Pump High Water Alarm User Manual
Model: GSWBJQ
Brand: QHHR
1. Introduction
The QHHR Sump Pump High Water Alarm is an essential device designed to monitor water levels in various applications such as septic tanks, sump pits, ponds, and water storage tanks. This system provides both audible and visual alerts when water reaches a critical high level, helping to prevent potential flooding and water damage. It can also be integrated with a submersible pump for automated water removal. This manual provides detailed instructions for the installation, operation, and maintenance of your new alarm system.
2. Safety Information
Please read all safety warnings and instructions carefully before installing and operating this device. Failure to do so may result in electric shock, fire, or serious injury.
- Electrical Safety: Ensure power is disconnected before performing any installation, maintenance, or troubleshooting. All electrical connections should be made by a qualified electrician and comply with local electrical codes.
- Water Exposure: While the unit is IP67 rated, ensure all connections are secure and the enclosure is properly sealed to prevent water ingress.
- Alarm Volume: The alarm emits a loud 110 dB sound. Avoid prolonged exposure to prevent hearing damage.
- Mounting: Mount the control panel securely on a stable surface, away from direct water spray or excessive vibration.
- Children and Pets: Keep the device out of reach of children and pets.
3. Package Contents
Verify that all items listed below are included in your package:
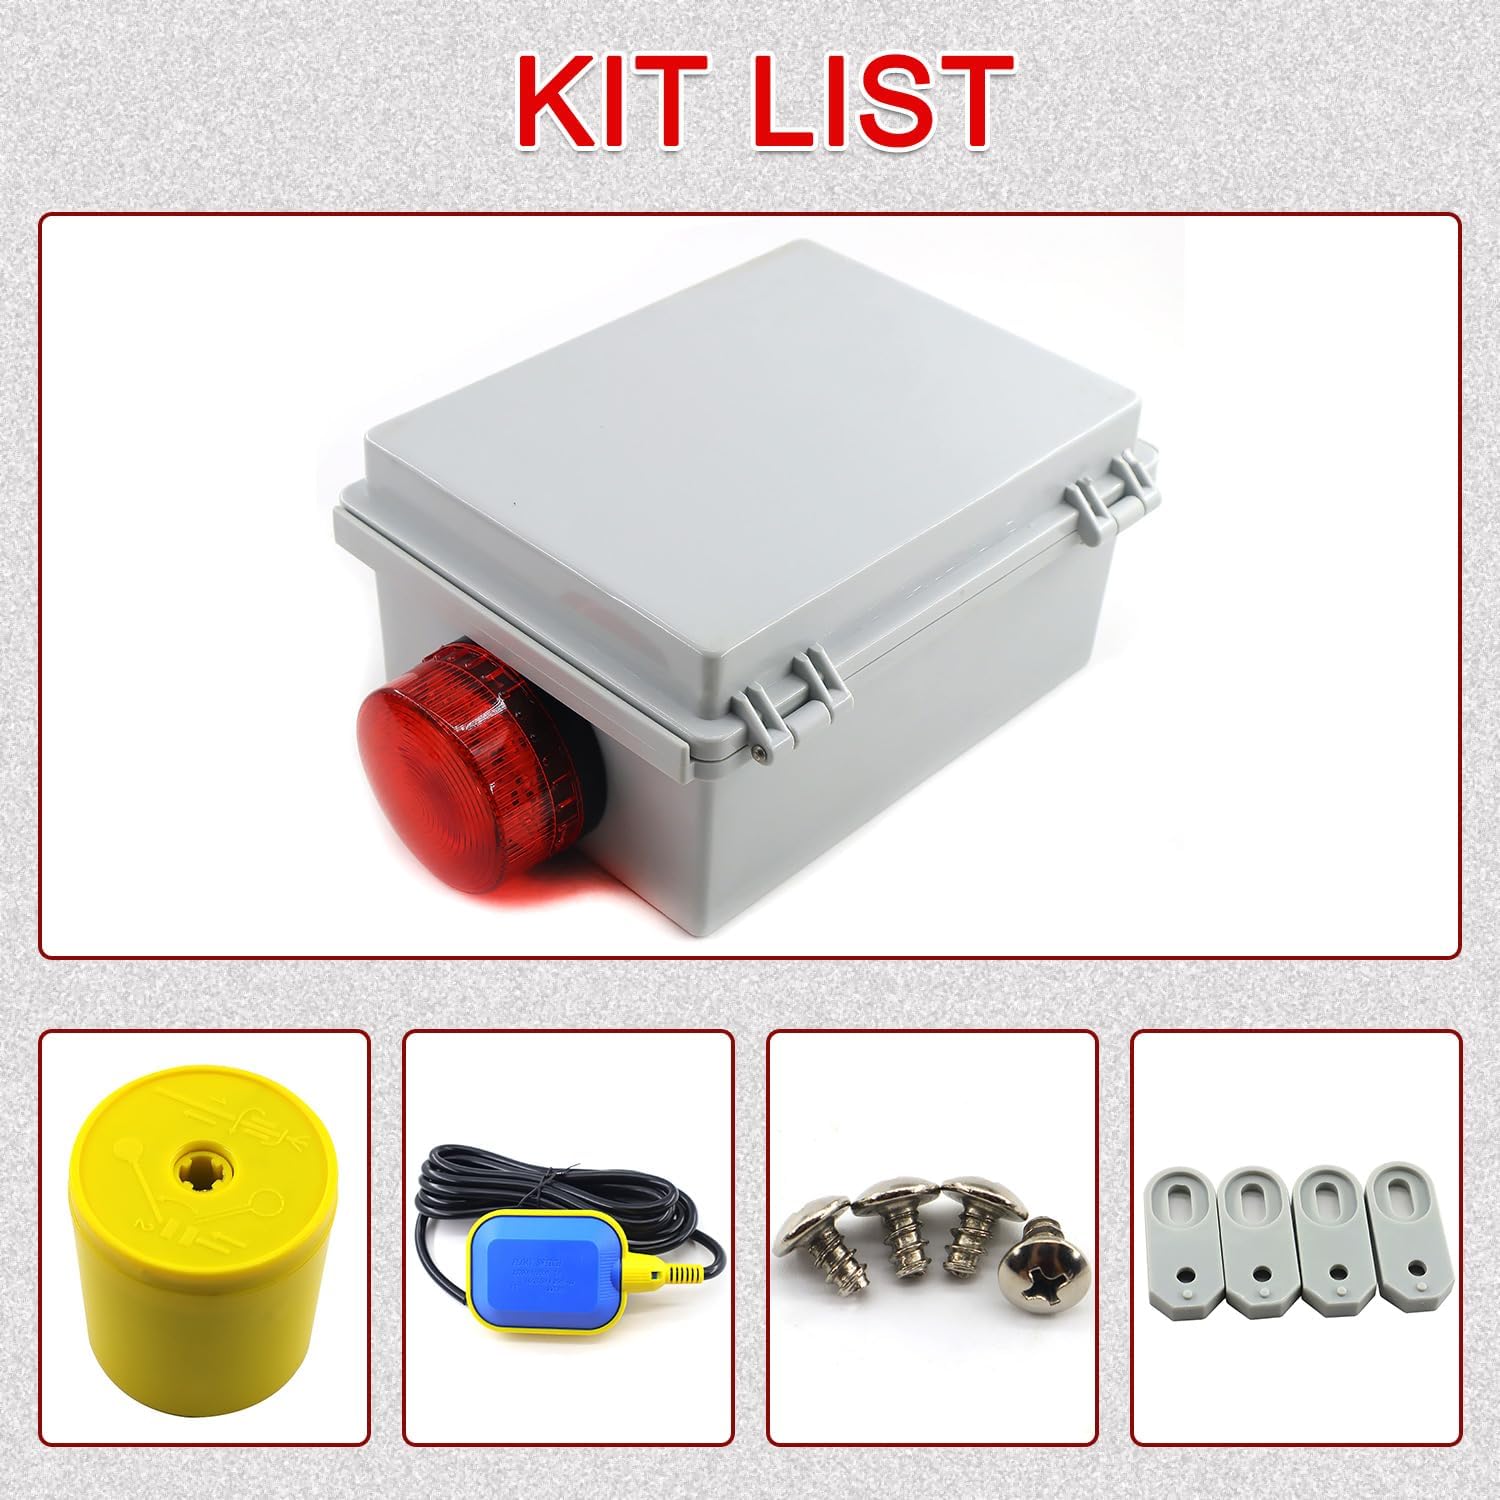
Image: Overview of the components included in the package.
- High Water Alarm Control Panel (with integrated light and siren)
- Float Switch with Cable
- Counterweight for Float Switch
- Mounting Screws and Anchors
4. Product Features
The QHHR Sump Pump High Water Alarm offers robust features for reliable water level monitoring:

Image: Key features of the alarm system, including its loud siren and durability.
- Dual Functionality: Can be used independently as a high water level alarm or connected externally to a submersible pump for automatic drainage.
- Independent Circuits: The pump circuit and alarm circuit are separated, ensuring the alarm functions even if the pump circuit experiences a malfunction.
- Intelligent Water Level Monitoring: Advanced float switch technology accurately senses water level changes.
- High-Visibility & Audible Alarm: Features a bright flashing light and a powerful 110-decibel alarm for clear alerts.
- Durable & Weatherproof: IP67 waterproof rating makes it suitable for both indoor and outdoor environments.
- Corrosion-Resistant: Designed for longevity in various conditions.
- Low Energy Consumption: Efficient operation for continuous monitoring.
5. Setup and Installation
5.1 Components Overview

Image: Internal view of the control panel with wiring diagram and components.
Familiarize yourself with the main components of the control panel:
- Circuit Breakers (CB1, CB2): Provide overcurrent protection for the pump and alarm circuits.
- Terminal Block: For connecting incoming power, pump, and float switch wires.
- Test/Run Switch: Allows for manual testing of the alarm and pump (if connected).
- Audible and Visual Alarm: The siren and flashing light.
5.2 Wiring Instructions (115V - 1PH)
WARNING: Ensure power is OFF before wiring. Consult a qualified electrician if you are unsure.

Image: Detailed wiring diagram for the alarm and pump connections.
- Incoming Power (115V): Connect the incoming L1 (Live) wire to the terminal labeled 'L1' and the N (Neutral) wire to the terminal labeled 'N' on the terminal block.
- Pump Connection (Optional):
- Connect the pump's L1 (Live) wire to the terminal labeled 'P1' (Pump Motor).
- Connect the pump's N (Neutral) wire to the terminal labeled 'N' (shared with incoming neutral).
- Note: The pump motor must have internal overload protection. Pump ratings: 1/2 HP @ 115V, 10.0 F.L.A.
- Float Switch Connection:
- Connect the BLUE wire from the float switch to the terminal labeled 'FLOAT' (or 'BLU').
- Connect the WHITE wire from the float switch to the terminal labeled 'RUN' (or 'WHT').
- Connect the RED wire from the float switch to the terminal labeled 'RED' (for the alarm circuit).
- Connect the BROWN wire from the float switch to the terminal labeled 'BRO' (for the test circuit).
- Alarm Connection: The alarm is pre-wired internally. Ensure the RED wire from the float switch is connected to the alarm circuit as per the diagram.
- Grounding: Ensure the system is properly grounded according to local electrical codes.
5.3 Float Switch Placement

Image: Examples of the alarm system installed in a sump pit and a water tank.
The float switch is crucial for detecting water levels. Its placement determines the activation point of the alarm and/or pump.
- Attach the counterweight to the float switch cable at the desired alarm activation level. The counterweight should be positioned so that the float switch activates when the water reaches the high-level threshold you wish to monitor.
- Secure the float switch cable to a fixed point above the water level, allowing the float to move freely up and down with the water.
- Ensure the float switch has enough clearance to swing freely without obstruction.
6. Operation
6.1 Powering On
Once all wiring is complete and verified, restore power to the circuit. The alarm system is now active and monitoring the water level.
6.2 Testing the Alarm

Image: The test/run switch and internal components of the control panel.
It is recommended to test the alarm periodically to ensure proper functionality:
- Locate the red switch on the side of the control panel.
- Push the switch downwards towards the 'TEST' position.
- The alarm light should flash, and the siren should sound.
- Release the switch to return it to the 'RUN' position. The alarm should cease.
- Alternatively, manually lift the float switch to simulate a high water level. The alarm should activate.
6.3 Alarm Conditions
When the water level rises and lifts the float switch to its activated position, the alarm will trigger, emitting a loud 110 dB siren and a bright flashing light. If connected to a submersible pump, the pump will also activate to begin drainage.
7. Maintenance
Regular maintenance ensures the longevity and reliability of your alarm system:
- Periodic Testing: Test the alarm system monthly using the test switch or by manually lifting the float switch.
- Clean Float Switch: Periodically inspect the float switch for any debris, grime, or obstructions that might hinder its free movement. Clean as necessary.
- Inspect Wiring: Annually inspect all wiring connections for signs of wear, corrosion, or loose terminals. Ensure the enclosure is sealed.
- Keep Clear: Ensure the area around the float switch and the alarm unit is clear of any objects that could interfere with its operation.
8. Troubleshooting
If you encounter issues with your QHHR Sump Pump High Water Alarm, refer to the table below for common problems and solutions:
| Problem | Possible Cause | Solution |
|---|---|---|
| Alarm does not activate when water level rises. |
|
|
| Alarm activates continuously. |
|
|
| Alarm light flashes but no sound. | Siren malfunction. | Contact customer support for assistance. |
| Pump does not activate (if connected). |
|
|
9. Specifications
Technical specifications for the QHHR Sump Pump High Water Alarm:
| Attribute | Detail |
|---|---|
| Manufacturer | QHHR |
| Model Number | GSWBJQ |
| Item Weight | 3.78 pounds |
| Product Dimensions | 6.3 x 4.3 x 8.6 inches |
| Color | Yellow |
| Style | Submersible (Float Switch) |
| Included Components | High Water Alarm Control Panel, Float Switch, Counterweight, Mounting Hardware |
| Batteries Required? | No |
| Alarm Volume | 110 decibels |
| Waterproof Rating | IP67 |
| UPC | 085353699217 |
10. Warranty and Support
One Year Warranty: This product comes with a one-year warranty from the date of purchase, covering defects in materials and workmanship under normal use.
Customer Support: If you have any questions, require technical assistance, or experience any issues with your QHHR Sump Pump High Water Alarm, please do not hesitate to contact our customer support team. We are committed to providing prompt and helpful service.
Please refer to your purchase documentation or the retailer's website for specific contact information.
Ask a question about this manual
Ask about setup, troubleshooting, compatibility, parts, safety, or missing instructions. Manuals+ will review the question and use this page’s manual context to help answer it.