1. Introduction
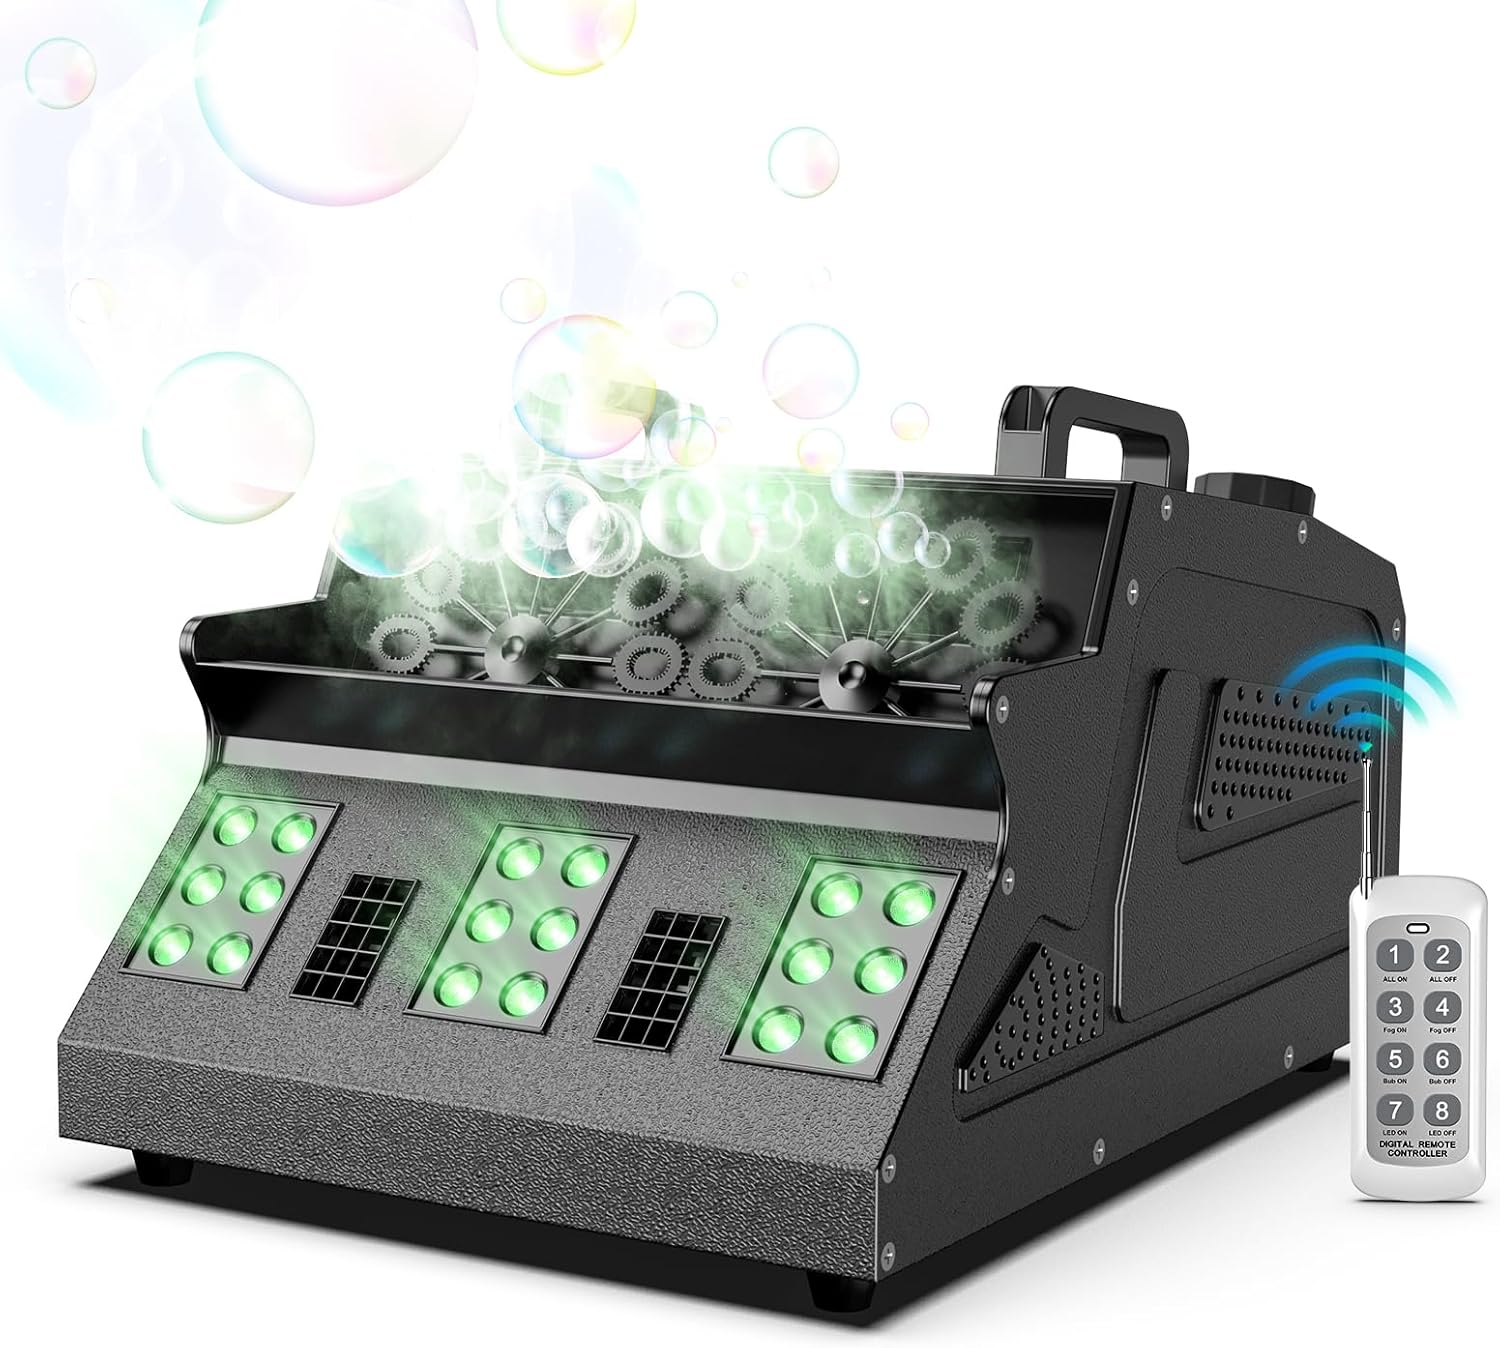
Figure 1.1: Osusuent 1500W Dual Wheel Smoke Bubble Machine.
This image shows the Osusuent 1500W Dual Wheel Smoke Bubble Machine actively producing both fog and bubbles, illuminated by its green RGB LED lights, with a remote control visible nearby.
This manual provides comprehensive instructions for the safe and effective operation, setup, and maintenance of your Osusuent 1500W Dual Wheel Smoke Bubble Machine (Model ZQ10142). This device combines fog and bubble effects with 18 RGB LEDs to create dynamic visual atmospheres for various events.
The machine features independent control for fog and bubble functions, multiple operating modes including remote control, LCD display, and DMX console, and is designed for use in settings such as weddings, parties, stage performances, and celebrations.
2. Safety Information
Please read and understand all safety instructions before operating this device. Failure to do so may result in injury or damage to the machine.
- Power Supply: Ensure the machine is connected to a grounded power outlet with the correct voltage.
- Fluid Usage: Use only high-quality, water-based fog fluid and bubble fluid specifically designed for fog and bubble machines. Do not use flammable liquids.
- Ventilation: Operate the machine in a well-ventilated area. Do not block ventilation openings.
- Placement: Place the machine on a stable, level surface. Keep it away from heat sources, open flames, and water.
- Hot Surfaces: The nozzle and surrounding areas can become very hot during operation. Avoid direct contact.
- Children and Pets: Keep the machine out of reach of children and pets.
- Maintenance: Disconnect from power before cleaning or performing any maintenance.
- Spills: In case of fluid spills, clean immediately to prevent slipping hazards or damage to surfaces.
3. Package Contents
Verify that all items listed below are included in your package:
- 1 x Osusuent 1500W Dual Wheel Smoke Bubble Machine (Model ZQ10142)
- 1 x Power Cable
- 1 x Wireless Remote Control
- 1 x Instruction Manual
4. Product Overview
Familiarize yourself with the components and controls of your smoke bubble machine.

Figure 4.1: Labeled diagram of the Osusuent Smoke Bubble Machine.
This image displays the top and side views of the machine, highlighting key components such as the LCD display, handles, fog fluid tank, bubble fluid collection tray, bubble wheels, RGB LED lights, fan, DMX input/output, power input/output, and power switch.
Key Components:
- LCD Display: Shows operational status and menu options.
- Control Panel: Buttons for menu navigation and function selection (Bubble, Fog, Manual).
- Fog Fluid Tank: Reservoir for fog fluid.
- Bubble Fluid Reservoir: Area for bubble fluid, with bubble wheels.
- RGB LED Lights: 18 LEDs for colorful lighting effects.
- Fan: Disperses fog and bubbles.
- Handles: For easy transport.
- DMX IN/OUT: For DMX 512 console control.
- Power IN/OUT: Power connections.
- Power Switch: To turn the machine on/off.
- Remote Control: Wireless control for various functions.

Figure 4.2: Available control methods for the machine.
The machine supports control via a wireless remote, an integrated LCD display and control panel, and a DMX 512 console for advanced integration.
5. Setup
Follow these steps to set up your Osusuent Smoke Bubble Machine for first use.
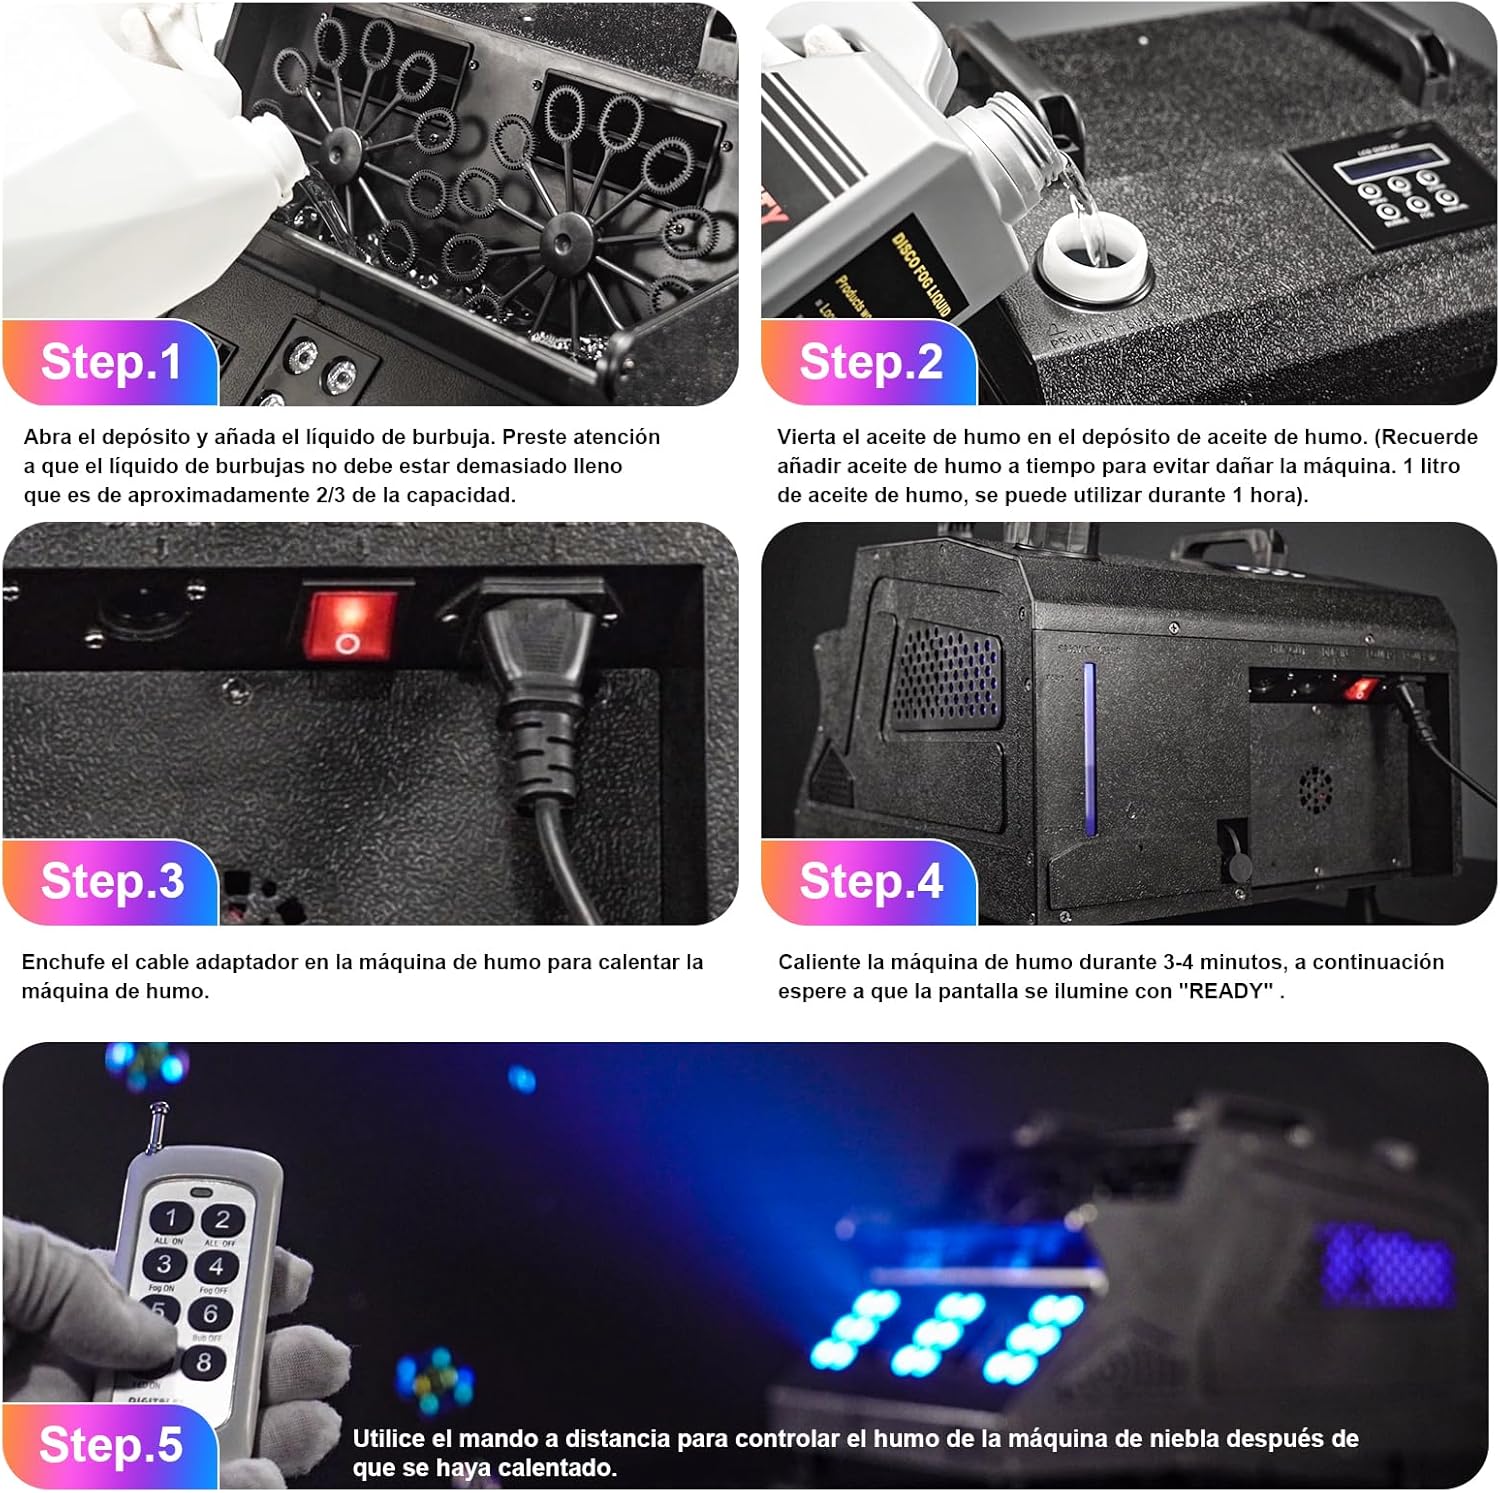
Figure 5.1: Visual guide for machine setup.
This image illustrates the five key steps for setting up the machine: adding bubble fluid, adding fog fluid, connecting power, waiting for warm-up, and using the remote control.
- Step 1: Add Bubble Fluid. Open the bubble fluid reservoir and carefully pour in bubble fluid. Do not fill beyond approximately 2/3 of its capacity to prevent overflow.
- Step 2: Add Fog Fluid. Pour fog fluid into the designated fog fluid reservoir. Ensure you use appropriate fog fluid to prevent damage to the machine. A 1-liter capacity of fog fluid can provide approximately 1 hour of operation.
- Step 3: Connect Power. Plug the power cable into the machine's power input and then into a suitable grounded electrical outlet.
- Step 4: Warm-up. Turn on the machine using the power switch. The machine will begin to warm up. The initial warm-up time is approximately 3 to 5 minutes. Wait until the LCD display shows "READY" before proceeding. Subsequent heating cycles typically take 45 to 60 seconds.
- Step 5: Prepare for Operation. Once "READY" is displayed, the machine is ready for operation.
6. Operating Instructions
The Osusuent Smoke Bubble Machine offers flexible control options for various effects.
6.1. Independent Function Control
The machine allows for independent control of fog and bubble generation. You can activate either function separately or combine them.

Figure 6.1: Demonstrating fog-only and bubble-only modes.
This image illustrates the machine's capability to produce either bubbles exclusively or fog exclusively, highlighting the independent control feature.
6.2. Control Methods
- Wireless Remote Control: Use the provided remote control to activate fog, bubbles, and LED effects. The effective control distance is 10-30 meters.
- LCD Display and Control Panel: Navigate the menu on the LCD display using the "MENU", "UP", "DOWN", "BUBBLE", "FOG", and "MANUAL" buttons to select desired functions and settings.
- DMX 512 Console: For professional setups, connect a DMX 512 console via the XLR input/output ports. The machine supports 7 DMX control channels, allowing for precise control over fog output, bubble generation, and RGB LED lighting effects.
6.3. Operation Details
- Fog Output: Once warmed up, the machine can spray fog for 2-3 minutes continuously.
- Bubble Output: Bubble generation does not require preheating and starts immediately upon activation. The two bubble wheels operate at 30 rotations per minute for abundant bubble production.
- RGB LED Effects: The 18 RGB LEDs can produce various color effects and can be controlled independently or in conjunction with fog/bubbles. Strobe effects are available from 1-13Hz.
7. Maintenance
Regular maintenance ensures the longevity and optimal performance of your machine.
- Fluid Management: Always ensure sufficient fog and bubble fluid levels. Running the fog machine without fluid can cause damage. The bubble fluid collection tray allows for recycling of unused bubble fluid.
- Cleaning: Periodically clean the exterior of the machine with a soft, dry cloth. Do not use abrasive cleaners or solvents.
- Nozzle Cleaning (Fog): To prevent clogging, run a specialized fog machine cleaning solution through the machine every few months, or after heavy use.
- Bubble Wheel Cleaning: Clean the bubble wheels and reservoir regularly to prevent residue buildup.
- Storage: When not in use for extended periods, drain all fluids and store the machine in a cool, dry place.
8. Troubleshooting
If you encounter issues with your machine, refer to the following common problems and solutions:
| Problem | Possible Cause | Solution |
|---|---|---|
| No fog output |
|
|
| No bubble output |
|
|
| Remote control not working |
|
|
| LEDs not lighting up |
|
|
If the problem persists after attempting these solutions, please contact customer support.
9. Specifications
| Feature | Detail |
|---|---|
| Model Number | ZQ10142 |
| Brand | Osusuent |
| Power | 1500W |
| Dimensions (L x W x H) | 50 x 37.5 x 32 cm |
| Weight | 7.65 Kilograms |
| Material | Acrylonitrile Butadiene Styrene (Plastic) |
| LEDs | 18 RGB LEDs |
| Control Protocol | DMX 512 (7 Channels), Wireless Remote (315 MHz), Onboard LCD Panel |
| Remote Control Distance | 10 - 30 meters |
| Warm-up Time (Initial) | 3 - 5 minutes |
| Warm-up Time (Subsequent) | 45 - 60 seconds |
| Fog Spray Duration | 2 - 3 minutes (continuous) |
| Bubble Output | 2 bubble wheels, 30 rotations/minute each |
| Fog Fluid Capacity | 1 Liter (approx. 1 hour usage) |
| Bubble Fluid Capacity | 2 Liters (approx. 30 minutes usage) |
| Strobe Frequency | 1 - 13 Hz |
| Manufacturer | Shenzhen Zhuoqiong Technology Co., Ltd. |
10. Warranty and Support
Information regarding warranty coverage and customer support was not provided in the product details. Please refer to the seller or manufacturer's website for specific warranty terms and contact information for technical support.
For any issues not covered in the troubleshooting section, or for parts and service, please contact the retailer or manufacturer directly.