Tecno Camon 30 Pro CL8
Instruction Manual for LCD Screen Assembly
Model: Tecno Camon 30 Pro CL8
Product Overview
This product is an LCD Screen Assembly designed for the Tecno Camon 30 Pro CL8. It includes the LCD, digitizer touch screen, and front glass, all pre-assembled for easier installation. This assembly is intended for repairing or replacing faulty screens, addressing display problems, dead pixels, cracked LCD screens, and issues with touch functionality or response.
The screen assembly comes with a black frame, which can simplify the replacement process.
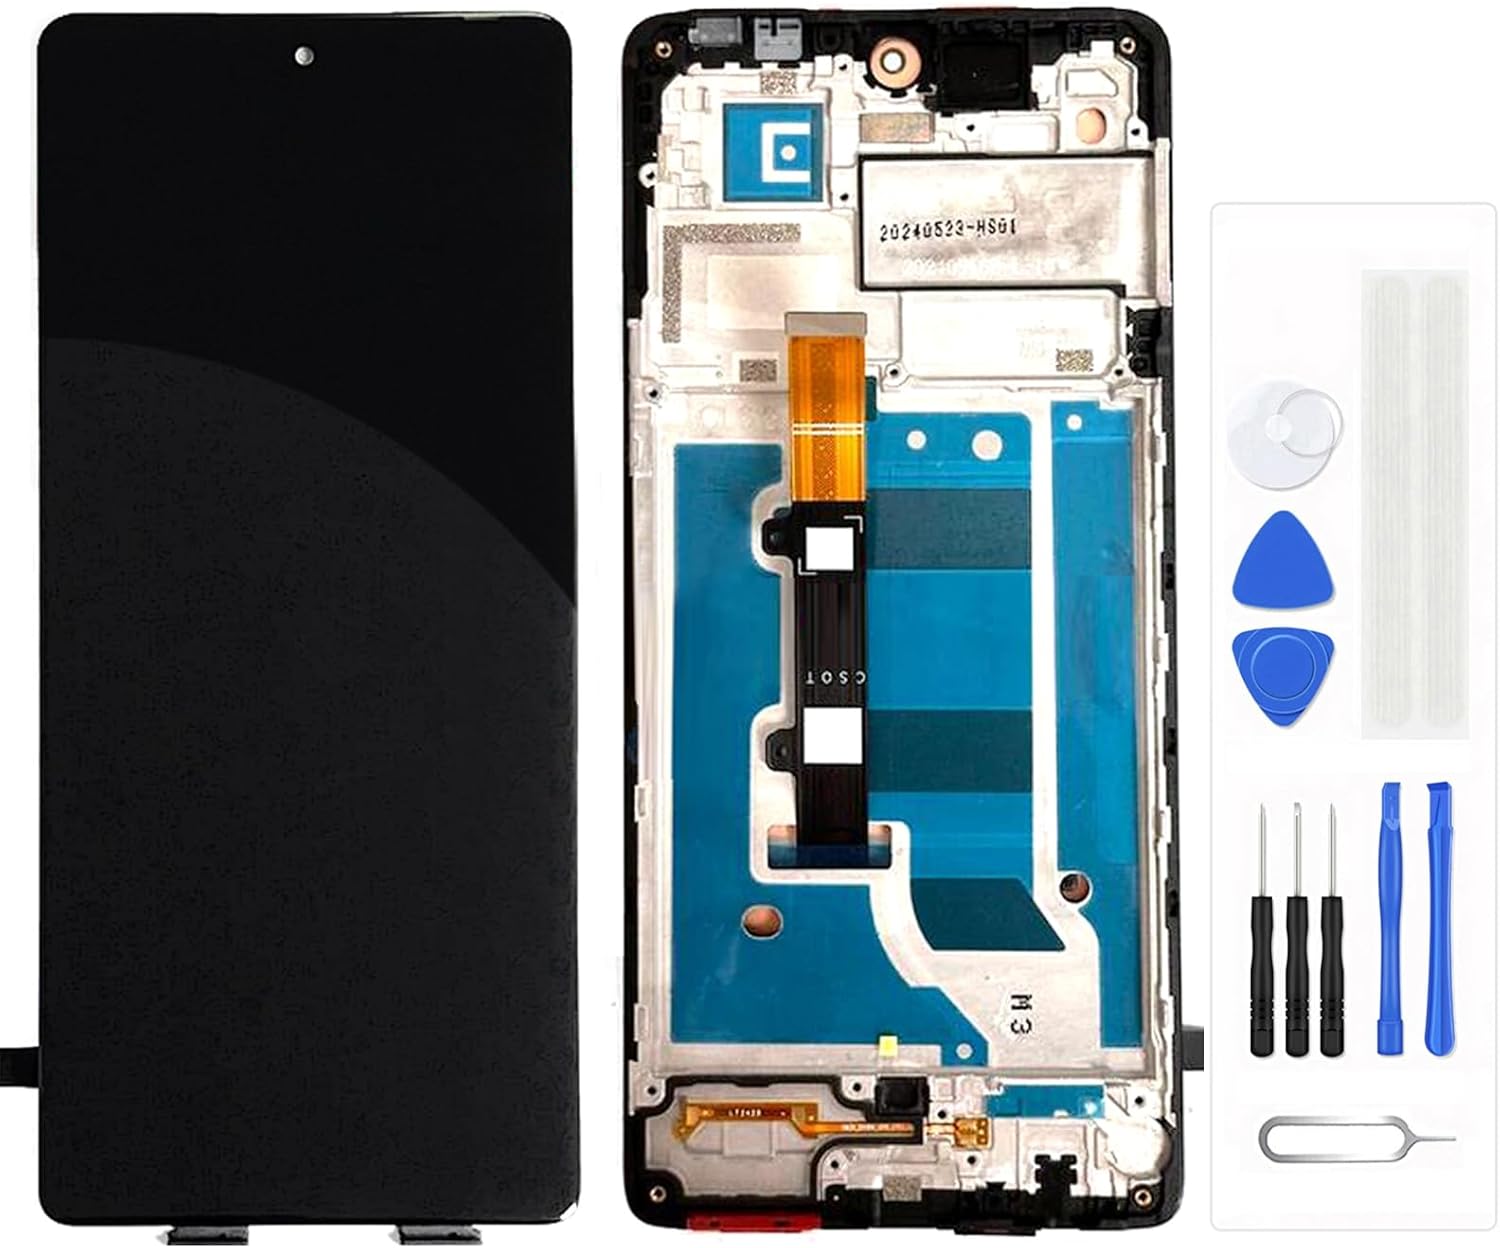
Image: The complete LCD screen assembly with black frame, alongside a set of basic repair tools.
Package Contents
Upon opening the package, please verify that all components are present and undamaged:
- 1 x LCD Screen for Tecno Camon 30 Pro CL8 (with Black Frame)
- 1 x Set of Quality Repair Tools (may include screwdrivers, pry tools, suction cup, SIM ejector pin, adhesive strips)

Image: A detailed view of the various repair tools provided with the screen assembly.
Setup and Pre-Installation Testing
Before proceeding with the full installation, it is crucial to perform a test of the new screen assembly. This ensures the screen is fully functional before permanent installation and removal of protective films.
Important Notes Before Testing/Installation:
- Professional Installation Recommended: Repairing mobile phone screens requires technical skill. It is highly recommended to seek professional installation or ensure you have sufficient knowledge and experience.
- Research Repair Videos: Before starting, search for suitable repair videos on platforms like YouTube specific to the "Tecno Camon 30 Pro CL8 screen replacement" to familiarize yourself with the process.
- Do Not Remove Protective Films/Tags: During testing, do not remove any protective films or tags from the screen. Removing them may void the warranty.
- Handle with Care: The screen assembly is fragile. Avoid pulling the flex cables too hard or pressing the LCD panel forcefully, as this can cause damage.
- Power Off and Disconnect Battery: Always ensure your phone is completely powered off and the battery cable is disconnected before attempting any repairs or connections.
Pre-Installation Test Steps:
- Clean Connections: Carefully clean the flex cable of the new screen and the corresponding slot on your phone's motherboard. Ensure there is no debris or visible dust on the connector.
- Connect Screen: Tightly connect the new screen's flex cable to the motherboard. Do not apply excessive force.
- Check Battery: Make sure your phone's battery is fully charged and that your motherboard is not damaged.
- Power On and Test: Power on the phone. Test the display for clarity, color accuracy, and dead pixels. Test the touch functionality thoroughly across the entire screen, including multi-touch gestures.
- Power Off: Once testing is complete and satisfactory, power off the phone and disconnect the battery before proceeding with full installation.

Image: Visual representation of the testing process for screen color, display quality, and touch response.
Installation Guidance
This section provides general guidance for the installation process. Remember to consult specific repair videos for your phone model.
Understanding Screen Components:

Image: An exploded diagram illustrating the different layers of a phone screen assembly, including the back cover, frame, LCD display, and outer glass.
The product you received is an "LCD Screen with Frame," which means the LCD display and outer glass are already integrated into a new frame. This significantly simplifies the installation process compared to replacing only the LCD or glass.
General Installation Steps (Consult Video Guides):
- Disassemble Phone: Carefully open your phone, typically by removing the back cover and screws. Disconnect the battery.
- Remove Old Screen: Disconnect the flex cables of the old screen from the motherboard. Carefully remove the old screen assembly from the phone's chassis.
- Transfer Components: Transfer any necessary components from your old screen assembly (e.g., earpiece speaker, front camera, sensors) to the new screen assembly. Ensure they are correctly seated.
- Install New Screen: Connect the flex cables of the new screen assembly to the motherboard. Carefully align and seat the new screen assembly into the phone's chassis.
- Reconnect Battery: Reconnect the battery cable.
- Initial Test: Before fully reassembling, power on the phone and perform a quick test of the screen and touch functionality.
- Reassemble Phone: If the test is successful, power off the phone, disconnect the battery, and proceed to reassemble the phone, securing all screws and replacing the back cover.
Troubleshooting Common Issues
This screen assembly is designed to resolve various display and touch-related problems. If you encounter issues after installation, consider the following:

Image: Visual examples of common screen malfunctions that this replacement part aims to fix, such as unresponsiveness, dust under the screen, display artifacts, and physical cracks.
- No Display/Black Screen:
- Ensure the screen's flex cable is securely and correctly connected to the motherboard.
- Check if the battery is charged and connected properly.
- Verify that the motherboard itself is not damaged.
- Touch Not Working/Unresponsive:
- Re-seat the touch digitizer flex cable.
- Ensure there's no debris or dust on the connector.
- Perform a hard reset of the phone (refer to your phone's manual for instructions).
- Display Issues (Lines, Discoloration, Dead Pixels):
- Check the display flex cable for any kinks or damage.
- Ensure the cable is fully seated.
- If issues persist after re-seating, the screen itself might be faulty (contact support).
- Screen Flickering:
- Often related to loose connections. Re-seat all flex cables.
- Ensure no pressure is being applied to the screen from inside the phone.
If you have followed all troubleshooting steps and the issue persists, please contact customer support for further assistance.
Product Specifications
| Compatible Model | Tecno Camon 30 Pro CL8 |
| Type | LCD Display Touch Screen Assembly (with Black Frame) |
| Package Dimensions | 7.87 x 5.51 x 3.15 inches |
| Item Weight | 3.52 ounces |
| Manufacturer | Generic |
| Color | With Black Frame |
Warranty and Support
This product comes with a 3-month warranty from the date of purchase. This warranty covers manufacturing defects and issues arising from normal use.
The warranty may be voided if:
- Protective films or tags are removed before testing or if the product is damaged during installation.
- The product shows signs of physical damage, misuse, or improper installation.
For any problems, questions, or warranty claims, please contact the seller or manufacturer directly. Do not force the installation if you encounter difficulties; instead, seek assistance.