
1. Introduction
This manual provides essential information for the installation, operation, and maintenance of your ATRACYPART Carburetor, Model A2516. Please read these instructions carefully before proceeding with installation or use to ensure proper function and longevity of the product.
1.1 Compatibility
This carburetor is designed for specific Yamaha Road Star models. Verify your motorcycle's make, model, and year against the list below:
- Yamaha Road Star XV1600: 1999, 2000, 2001, 2002, 2003
- Yamaha Road Star XV1700: 2002, 2003, 2004, 2005, 2006, 2007, 2008, 2009, 2010, 2011, 2012, 2013, 2014

Figure 1: Carburetor compatibility overview for Yamaha Road Star models.
1.2 Replaces OEM Part Numbers
This product is a direct replacement for the following Original Equipment Manufacturer (OEM) part numbers:
- 4WM-14101-03-00
- 4WM-14101-13-00

Figure 2: Visual representation of the carburetor and its OEM part number replacement information.
1.3 Key Features
- Durable Construction: Manufactured from high-quality, corrosion-resistant materials for long-term reliability.
- Efficient Fuel Mixing: Incorporates advanced fuel mixing technology for improved combustion efficiency.
- Enhanced Performance: Designed to contribute to improved horsepower, torque, and stable idle speed control.
- OEM Standards: Built to meet or exceed OEM specifications for fit and performance.

Figure 3: Overview of the carburetor's key features and benefits.
2. Package Contents
Upon opening the package, verify that all components are present and undamaged. The package should contain:
- 1 x ATRACYPART Carburetor Assembly (Model A2516)
- Additional Jets
- Intake Manifold
- Spark Plug
- Carburetor Tune-Up Kit (may include cleaning brushes, fuel filters, etc.)
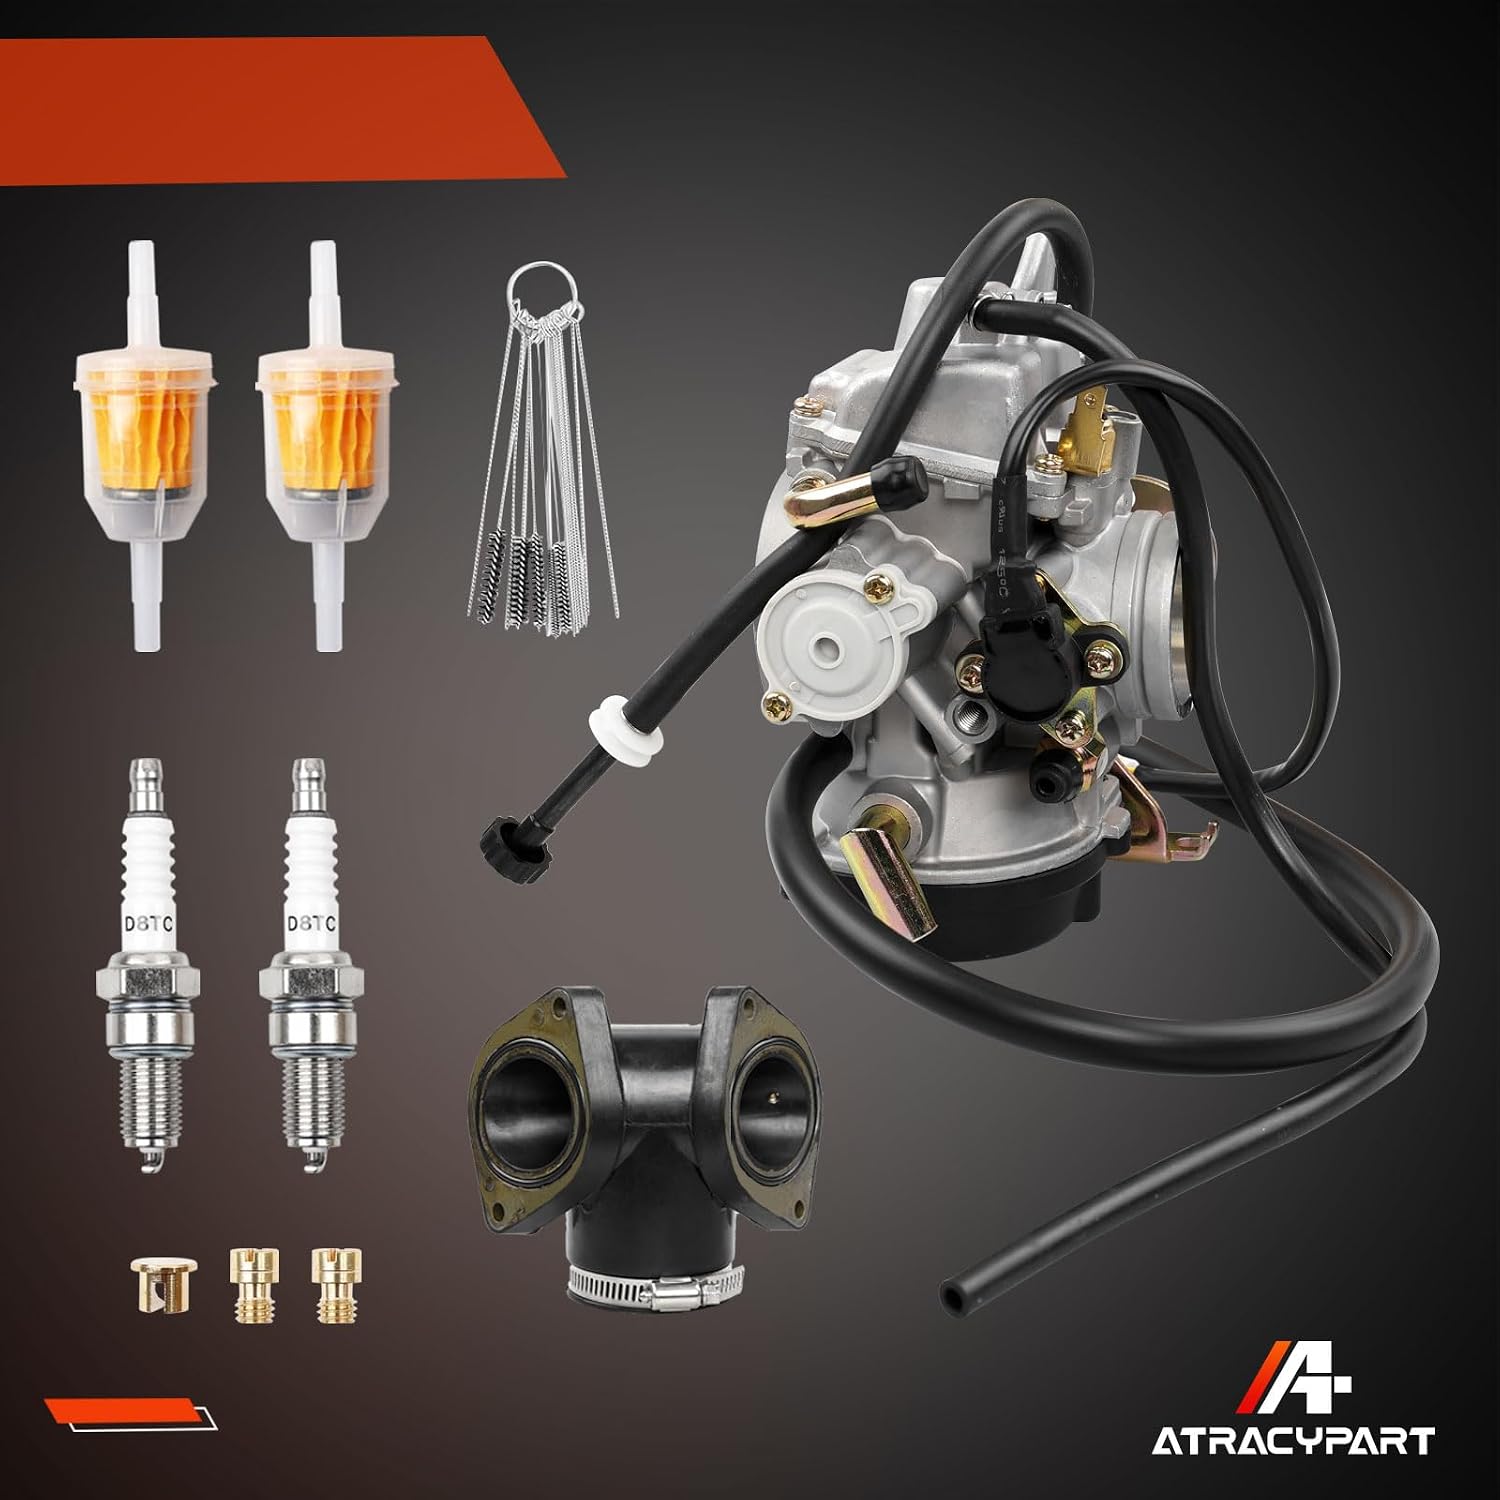
Figure 4: All components included in the carburetor tune-up kit.
3. Specifications
| Attribute | Detail |
|---|---|
| Brand | ATRACYPART |
| Model Number | A2516 |
| Manufacturer Part Number | A2516 |
| Exterior Finish | Aluminum |
| Included Components | Carburetor, Extra Jets, Intake Manifold, Spark Plug, Tune-up Kit |

Figure 5: Carburetor size details, showing key dimensions for reference.

Figure 6: Multiple detailed views of the carburetor assembly.
4. Installation
Disclaimer: Carburetor installation requires mechanical knowledge and specific tools. Incorrect installation can lead to engine damage or unsafe operating conditions. For best results and safety, professional installation is highly recommended. This manual does not provide detailed step-by-step installation instructions.
4.1 General Installation Guidelines
- Safety First: Ensure the motorcycle is turned off, cooled down, and secured on a stable stand. Disconnect the battery before starting work.
- Fuel System Preparation: Drain the fuel tank and lines to prevent spills and fire hazards.
- Removal of Old Carburetor: Carefully disconnect all fuel lines, vacuum lines, throttle cables, and electrical connections from the existing carburetor. Remove mounting bolts and detach the old carburetor.
- Inspection: Inspect the intake manifold, gaskets, and surrounding components for wear or damage. Replace any worn parts.
- Installation of New Carburetor: Install the new ATRACYPART Carburetor using new gaskets (if applicable). Reconnect all lines, cables, and electrical connections securely. Ensure throttle cables operate smoothly without binding.
- Initial Setup: After installation, refill the fuel tank. Check for any fuel leaks.
- Idle and Mixture Adjustment: The carburetor may require fine-tuning of the idle speed and air-fuel mixture for optimal performance. Refer to your motorcycle's service manual for specific adjustment procedures.
5. Operation
The carburetor's primary function is to mix air and fuel in the correct ratio for combustion in the engine. Once properly installed and adjusted, the carburetor should provide consistent fuel delivery and engine performance.
- Engine Start-up: Follow your motorcycle's standard starting procedure. The choke (if applicable) may be needed for cold starts.
- Throttle Response: The engine should respond smoothly to throttle input without hesitation or bogging.
- Idle Stability: The engine should maintain a steady idle speed once warmed up.
If you experience issues such as rough idle, poor acceleration, or excessive fuel consumption, refer to the Troubleshooting section or consult a qualified mechanic.
6. Maintenance
Regular maintenance is crucial for the longevity and optimal performance of your carburetor. The frequency of maintenance depends on usage and environmental conditions.
6.1 Recommended Maintenance Practices
- Fuel Filter Replacement: Regularly inspect and replace the fuel filter to prevent contaminants from reaching the carburetor.
- Air Filter Cleaning/Replacement: A clean air filter is essential for proper air-fuel mixture. Follow your motorcycle's service schedule for air filter maintenance.
- Fuel System Cleaner: Periodically use a high-quality fuel system cleaner to prevent varnish and carbon buildup within the carburetor.
- Carburetor Cleaning: If performance issues arise, a thorough cleaning of the carburetor jets and passages may be necessary. This often involves disassembling the carburetor.
- Gasket Inspection: Check for any signs of fuel leaks around the carburetor and replace gaskets as needed.
7. Troubleshooting
This section outlines common issues and potential solutions. If problems persist, consult a qualified motorcycle mechanic.
| Problem | Possible Cause | Solution |
|---|---|---|
| Engine cranks but won't start | No fuel, clogged fuel filter, fouled spark plug, incorrect choke setting | Check fuel level, replace fuel filter, inspect/replace spark plug, adjust choke |
| Rough idle or stalling | Incorrect idle mixture/speed, vacuum leak, dirty jets | Adjust idle screw, check for vacuum leaks, clean carburetor jets |
| Poor acceleration or hesitation | Clogged main jet, improper float level, restricted air filter | Clean main jet, adjust float level, clean/replace air filter |
| Excessive fuel consumption | Improper float level, worn needle valve, rich mixture setting | Adjust float level, replace needle valve, adjust mixture screw |
8. Warranty and Customer Support
This ATRACYPART Carburetor comes with a 2-Year Warranty from the date of purchase. This warranty covers defects in materials and workmanship under normal use.
The warranty does not cover damage resulting from improper installation, misuse, neglect, accidents, or unauthorized modifications.
For warranty claims, technical assistance, or any questions regarding your product, please contact ATRACYPART customer support. Our dedicated team is available to assist you with inquiries within 24 hours.
Please retain your proof of purchase for warranty validation.