BILT HARD WLD-1606
BILT HARD 135A 3-in-1 IGBT Inverter Welder User Manual
Model: WLD-1606 | Brand: BILT HARD
1. Introduction
This manual provides essential information for the safe and efficient operation of your BILT HARD 135A 3-in-1 IGBT Inverter Welder. Please read all instructions carefully before use to ensure proper setup, operation, and maintenance. This welder supports Flux Core MIG, Lift TIG, and Stick (MMA) welding processes, offering versatility for various welding tasks.
2. Safety Information
WARNING: Welding can be dangerous. Always follow safety precautions to prevent injury or death.
- Always wear appropriate personal protective equipment (PPE), including a welding helmet, gloves, and protective clothing.
- Ensure proper ventilation to avoid inhaling welding fumes.
- Protect eyes and skin from arc rays.
- Prevent electric shock by ensuring proper grounding and inspecting cables for damage.
- Keep flammable materials away from the welding area.
- Disconnect power before performing any maintenance or adjustments.
- The machine features auto shutdown with error codes (E1=Overcurrent / E2=Overheat) for safety.
3. Product Overview
The BILT HARD 135A Welder is a versatile 3-in-1 machine designed for various welding applications. It features an IGBT inverter design for improved efficiency and a synergic control system for ease of use.
3.1 Included Components
- BILT HARD 135A 3-in-1 Welder
- Solar Powered Auto Darkening Welding Helmet
- Welding Gloves
- 6.6ft MIG Gun (pre-installed 0.030" tip)
- 10ft Ground Clamp
- 10ft Electrode Holder
- 2lb Flux Core Wire (0.030")
- Spare 0.035" Conduct Tip
- Brush & Hammer
- User Manual
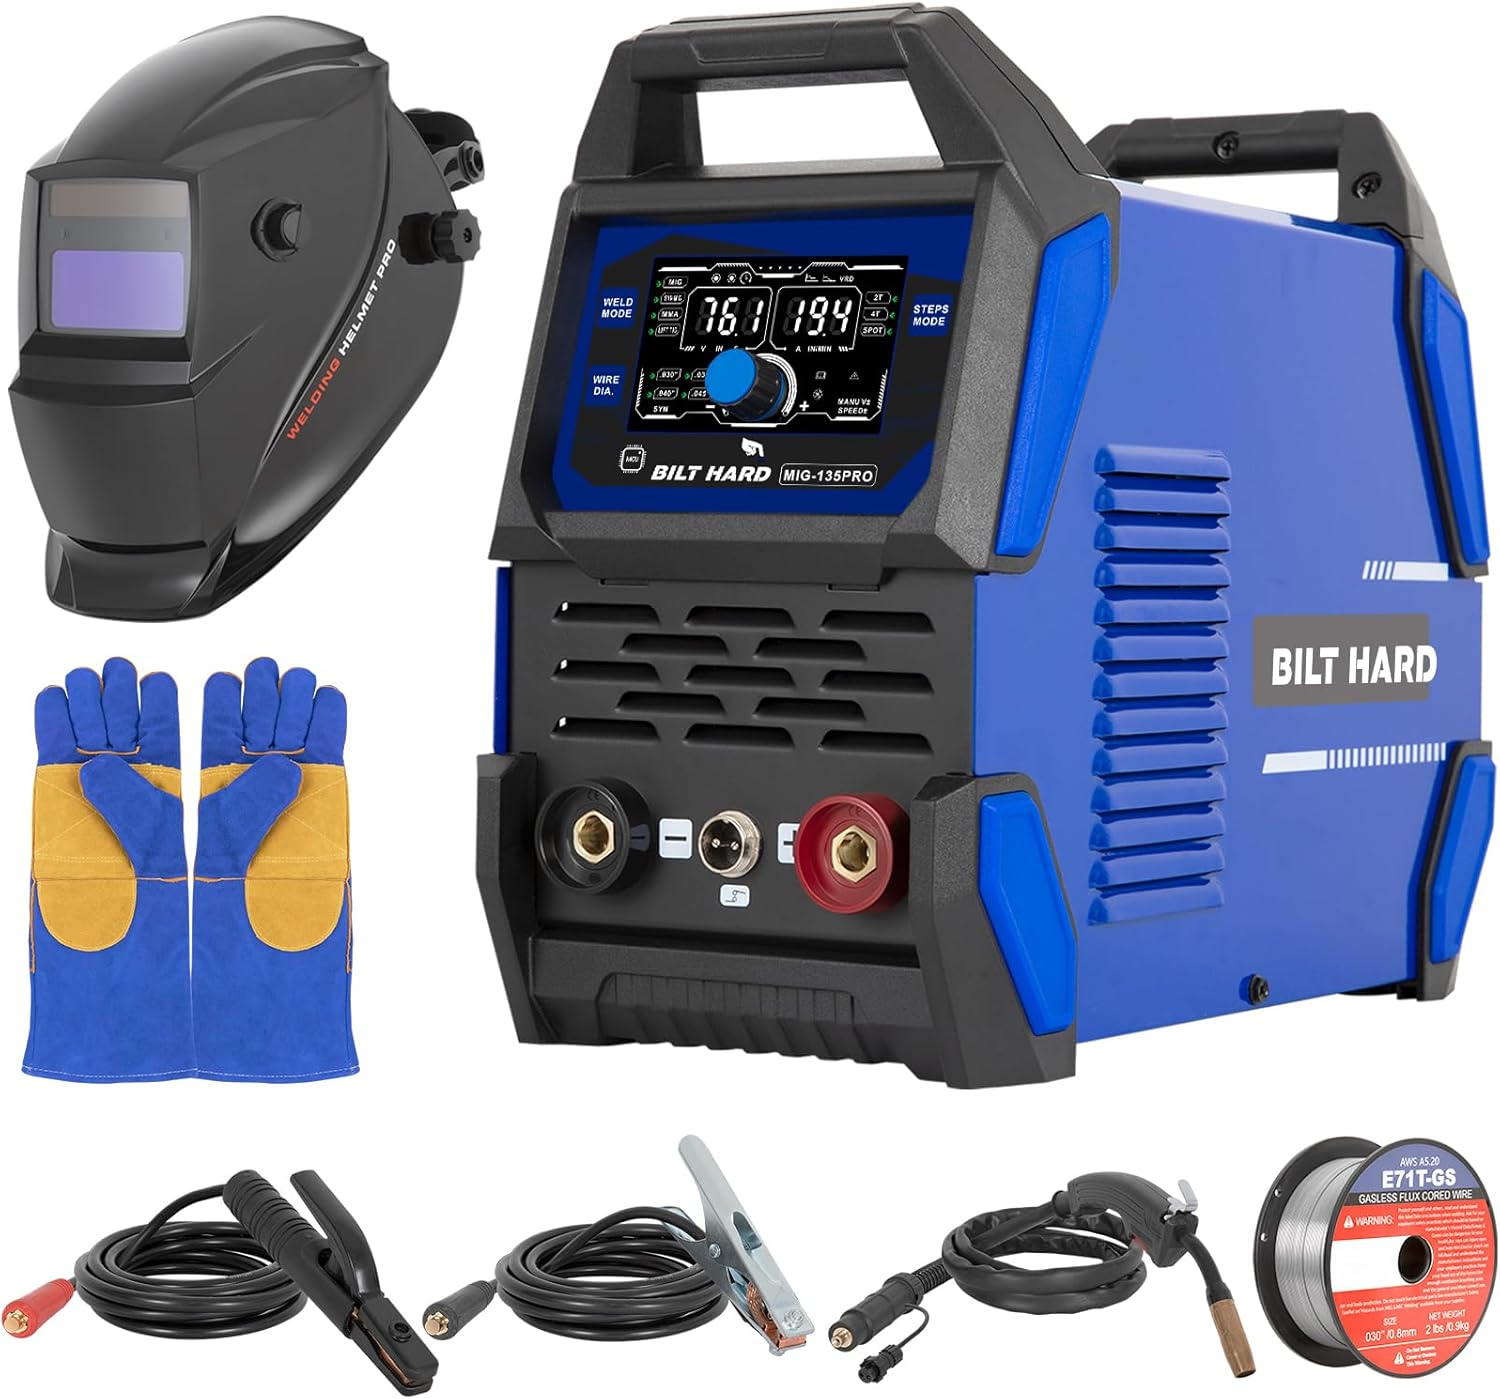
Figure 3.1: BILT HARD 135A Welder with all included accessories, including the welding helmet, gloves, MIG gun, ground clamp, electrode holder, flux core wire, and brush/hammer.

Figure 3.2: Illustration of the three welding modes supported by the BILT HARD 135A Welder: Stick (MMA), Flux Cored MIG, and Lift TIG.

Figure 3.3: Key safety and intelligent features of the welder, including overload protection (E1/E2 error codes), built-in fan for cooling, IP21 water rating, and electrostatic coating.

Figure 3.4: Detailed view of the welder's front and back panels, indicating the LED display, control knobs, output terminals, power switch, and fan.
3.2 Control Panel and Connections
The welder features an LED digital display for real-time voltage/current/wire speed tracking. Intuitive knobs and buttons allow for easy adjustment and mode selection.
- Voltage/Plate Thickness/Spot Time Display: Shows current welding parameters.
- Amperage/Wire Feeding Speed Display: Displays output current and wire feed rate.
- Weld Mode Options: Select between Flux Core MIG, Lift TIG, and Stick (MMA).
- Wire Diameter Options: Choose between 0.030" or 0.035" flux core wire.
- Steps Mode Options: Choose 2T, 4T, or Spot trigger modes.
- Adjust Knob: Fine-tune welding parameters.
- MIG Gun Socket/Negative Output Terminal: Connection point for MIG gun or negative lead.
- Control Switch Socket: For specific accessory connections.
- Positive Output Terminal: Connection point for positive lead.
- Power Switch: Turns the unit on/off.
- Input Power Cable: Connects to 110V AC power source.
- Earth Pin: Grounding connection.
- Nameplate: Contains product identification information.
- Fan: Provides cooling for the machine.
4. Setup
4.1 Initial Inspection
Upon unpacking, inspect the welder and all accessories for any signs of damage. Report any damage to your supplier immediately.
4.2 Power Connection
Connect the input power cable to a standard 110V AC outlet. Ensure the power source meets the welder's requirements.
4.3 Connecting Welding Cables
Connect the MIG gun, ground clamp, or electrode holder to the appropriate terminals on the front panel. Ensure connections are secure.
Video 4.1: This video demonstrates the basic setup and connection of the BILT HARD 3-in-1 Welder, showing how to connect the welding leads and prepare for operation.
4.4 Loading Flux Core Wire (for MIG Welding)
- Open the side panel of the welder.
- Place the 2lb flux core wire spool onto the spindle.
- Feed the wire through the wire feed mechanism and into the MIG gun liner.
- Close the side panel securely.

Figure 4.1: Illustration of the easy side-loading mechanism for welding wire on the BILT HARD 135A Welder.
5. Operating Instructions
5.1 Selecting Welding Mode
Use the "Weld Mode Options" button on the control panel to cycle through Flux Core MIG, Lift TIG, and Stick (MMA) modes. The selected mode will be indicated on the LED display.
Video 5.1: This video provides an overview of the BILT HARD 135A 3-in-1 MIG Welder, demonstrating its multi-process capabilities and ease of use.
5.2 Adjusting Parameters (Synergic Control)
The synergic control system automatically adjusts voltage and feed speed based on the amperage you set. Use the "Adjust Knob" to fine-tune the current for your specific welding task. For advanced users, specialized MIG (burn-back/inductance) and MMA (hot start/arc force/VRD) modes are available for customized welding.
5.3 Welding Helmet and Gloves
Always wear the provided solar-powered auto-darkening welding helmet and heat-resistant gloves before starting any welding operation. The helmet offers a viewing size of 3.66"x1.69" and the gloves are rated for 932°F/500°C.

Figure 5.1: Features of the auto-darkening welding helmet, including true color view, fast darkening, and adjustable headband.

Figure 5.2: Details on the heat-resistant welding gloves and the included 0.030" flux cored wire.

Figure 5.3: Step-by-step guide for assembling the welding helmet's headband and components.
6. Maintenance
6.1 Cleaning
Regularly clean the exterior of the welder with a dry cloth. Ensure the cooling fan and vents are free from dust and debris to maintain optimal airflow.

Figure 6.1: The built-in fan promotes heat dissipation, and the included wire brush helps remove debris after welding.
6.2 Storage
Store the welder in a dry, clean environment away from direct sunlight and extreme temperatures. Disconnect all cables and store them neatly.
6.3 Wire Feed Mechanism
Periodically check the wire feed mechanism for any obstructions or wear. Ensure the wire guide and contact tip are clean and in good condition.
7. Troubleshooting
| Problem | Possible Cause | Solution |
|---|---|---|
| Welder does not power on. | No power supply; faulty power cable. | Check power outlet and cable connections. |
| Error Code E1 (Overcurrent). | Excessive current draw. | Reduce welding current; allow machine to cool. |
| Error Code E2 (Overheat). | Machine overheated. | Allow machine to cool down (fan will continue for 1-2 mins); ensure proper ventilation. |
| Poor weld quality. | Incorrect settings; improper technique; dirty workpiece. | Adjust voltage/wire speed; review welding technique; clean workpiece thoroughly. |
| Wire feeding issues (MIG). | Tangled wire; clogged liner; worn contact tip. | Untangle wire; clean/replace liner; replace contact tip. |
8. Specifications
| Feature | Detail |
|---|---|
| Model Number | WLD-1606 |
| Input Voltage | 110 Volts AC |
| Welding Processes | Flux Core MIG, Lift TIG, Stick (MMA) |
| MIG Current Range | 30A - 135A |
| MMA Current Range | 20A - 135A |
| TIG Current Range | 15A - 135A |
| Wire Diameter Support | 0.030" (0.8mm), 0.035" (0.9mm) |
| Trigger Modes | 2T, 4T, Spot |
| Dimensions (L x W x H) | 13.6 x 6.6 x 11.15 inches |
| Item Weight | 76 pounds |
| Protection Standard | IP21 |
9. Warranty and Support
For warranty information and technical support, please refer to the documentation included with your purchase or visit the official BILT HARD website. The product is sold by Weize, and customer support is available.
Additional protection plans may be available for purchase, offering extended coverage for 3 or 4 years.
Ask a question about this manual
Ask about setup, troubleshooting, compatibility, parts, safety, or missing instructions. Manuals+ will review the question and use this page’s manual context to help answer it.