
Creality CR-Scan-Raptor
Creality CR-Scan Raptor 3D Scanner
Instruction Manual
1. Introduction
This manual provides comprehensive instructions for the safe and effective use of your Creality CR-Scan Raptor 3D Scanner. The CR-Scan Raptor is designed for high-precision 3D scanning, featuring hybrid blue light and Near-Infrared (NIR) technology to achieve 0.02mm accuracy. It supports scanning objects ranging from 5mm to 2000mm, making it suitable for various applications from small components to larger parts. Please read this manual thoroughly before operating the device.

Image 1.1: The Creality CR-Scan Raptor 3D Scanner capturing a detailed object.
2. Product Overview and Components
Familiarize yourself with the various parts of your CR-Scan Raptor 3D Scanner to ensure proper handling and operation.

Image 2.1: Detailed view of the CR-Scan Raptor components.
- USB-C 3.0 Port: For connecting the scanner to your computer.
- Two-color Supplemental Light: Provides additional illumination for enhanced texture capture.
- 3D Scanning Camera: Captures the geometric data of the object.
- DOE Projector: Projects structured light patterns for accurate depth perception.
- Color Camera: Captures color information for full-color 3D models.
- Multi-line Laser Projector: Emits blue laser lines for high-precision scanning.
- Start/Pause Button: Initiates or pauses the scanning process.
- Zoom In/Out Buttons: Adjusts the scanning field of view.
- Brightness/Exposure Buttons: Controls the brightness and exposure settings for optimal scanning.
3. Setup
Follow these steps to set up your Creality CR-Scan Raptor 3D Scanner.
3.1 System Requirements
Ensure your computer meets the following specifications for optimal performance:

Image 3.1: Cross-platform compatibility and system requirements.
- Windows: Windows 10/11 (64-bit), Intel i7-7th generation or higher, Nvidia graphics card (6GB video memory), 16GB RAM or higher.
- macOS: macOS 11.7.7 and above, Apple M-series processors (M1/M2/M3), 16GB RAM or higher.
3.2 Hardware Connection
- Connect the CR-Scan Raptor to your computer using the provided USB-C 3.0 cable.
- Ensure the connection is secure. The scanner will typically be recognized automatically by your operating system.
3.3 Software Installation
- Download the latest CrealityScan software from the official Creality website.
- Follow the on-screen instructions to install the software on your computer.
- Launch CrealityScan and ensure the scanner is detected.
4. Operating Instructions
This section details the process of using your CR-Scan Raptor for 3D scanning.
4.1 Scanning Modes and Technology
The CR-Scan Raptor utilizes a dual blue light and NIR technology for versatile scanning.

Image 4.1: Dual scanning modes: Blue Laser for precision, NIR for versatility.
- Blue Laser Mode: Employs 7 parallel blue laser lines (0.1mm thin) for ultra-high precision scanning of small objects (5mm and above) with an accuracy of up to 0.02mm. This mode is ideal for capturing intricate details.
- NIR (Near-Infrared) Mode: Offers easier and wider compatibility for scanning larger objects and provides robust performance, especially for objects that might be challenging for blue laser alone.
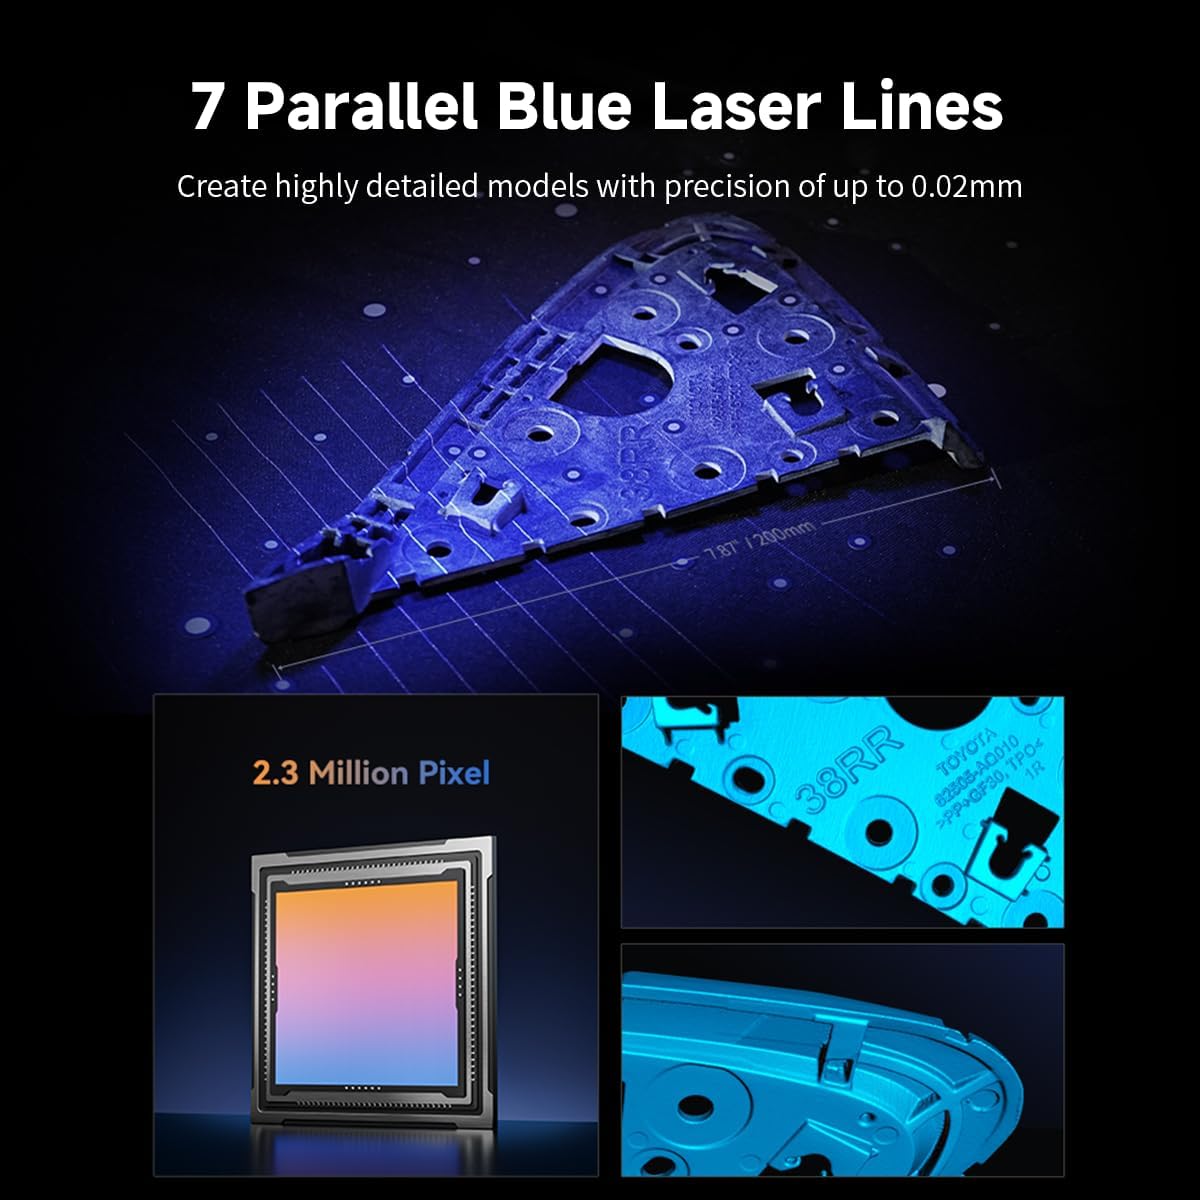
Image 4.2: The precision of 7 parallel blue laser lines and the 2.3 million pixel sensor.
4.2 Scanning Process
- Prepare the Object: Ensure the object is clean and stable. For highly reflective or transparent objects, a matte scanning spray may be beneficial, though the CR-Scan Raptor is designed to minimize this need for black/metal objects.
- Launch CrealityScan Software: Open the software and select your desired scanning mode (Blue Laser or NIR) based on the object's size and required detail.
- Position the Scanner: Hold the scanner steadily, maintaining an appropriate distance from the object. The software will provide visual feedback on optimal distance.
- Start Scanning: Press the 'Start' button on the scanner or in the software. Move the scanner smoothly around the object to capture all surfaces. The 60FPS high-speed scanning and One-Shot 3D imaging technology help reduce tracking loss and ensure smooth handheld operation.
- Monitor Progress: Observe the real-time scan data on your computer screen. Adjust brightness/exposure as needed using the scanner's buttons.
- Capture Color: The 24-bit true color capture, supported by 12 LED texture lights and dual-color LEDs, ensures photorealistic color data, even in low light conditions.
- Complete Scan: Once all necessary data is captured, press the 'Pause' or 'Stop' button.

Image 4.3: Handheld scanning with anti-shake technology for smooth data acquisition.
4.3 Post-Processing
The CrealityScan software includes features for processing your scan data:
- 1-Click Processing: Simplifies the steps for merging, aligning, and meshing scan data.
- Point Cloud Editing: Tools for cleaning, optimizing, and refining the captured point cloud data.
- Export: Export your final 3D model in various formats for use in other CAD or 3D modeling software.
5. Maintenance
Proper maintenance ensures the longevity and accuracy of your CR-Scan Raptor.
5.1 Cleaning
- Gently wipe the scanner's exterior with a soft, dry, lint-free cloth.
- For lenses and projectors, use a specialized lens cleaning cloth and solution to avoid scratches.
- Do not use abrasive cleaners or solvents.
5.2 Calibration
The CR-Scan Raptor includes a glass calibration board for maintaining long-term accuracy. Refer to the CrealityScan software's calibration guide for detailed instructions on how and when to perform calibration.
6. Troubleshooting
This section addresses common issues you might encounter.
- Scanner Not Detected:
- Ensure the USB-C 3.0 cable is securely connected to both the scanner and your computer.
- Verify that your computer meets the minimum system requirements.
- Try connecting to a different USB 3.0 port.
- Restart the CrealityScan software and your computer.
- Poor Scan Quality/Tracking Loss:
- Ensure adequate lighting conditions.
- Maintain a steady hand and smooth scanning motion.
- Check if the object has sufficient geometric features for tracking. Add markers if necessary for featureless objects.
- Calibrate the scanner using the provided calibration board.
- Adjust brightness and exposure settings in the software or using the scanner buttons.
- Software Crashes/Freezes:
- Ensure your graphics drivers are up to date.
- Close other demanding applications running in the background.
- Reinstall the CrealityScan software.
If you encounter issues not covered here, please refer to the official Creality support resources or contact customer service.
7. Specifications
Key technical specifications for the Creality CR-Scan Raptor 3D Scanner:

Image 7.1: Internal structure and performance features of the CR-Scan Raptor.
| Feature | Specification |
|---|---|
| Model Number | CR-Scan-Raptor |
| Accuracy | Up to 0.02mm |
| Scanning Speed | 60 FPS |
| Scanning Range | 5mm – 2000mm |
| Light Source | Dual Blue Light & Infrared (NIR) |
| Color Capture | 24-Bit True Color (with 12 LED texture lights) |
| Connectivity | USB-C 3.0 |
| Operating System | Windows 10/11 (64-bit), macOS 11.7.7 and above |
| Weight | Approximately 372g (12.8 ounces) |
| Dimensions (Package) | 13.74 x 12.48 x 6.46 inches |
| Included Accessories | Scan Body, Glass Calibration Board |
8. Warranty and Support
For warranty information, technical support, or service inquiries, please visit the official Creality website or contact their customer support team. Keep your purchase receipt as proof of purchase for warranty claims.
Manufacturer: Creality
Date First Available: August 12, 2024
Ask a question about this manual
Ask about setup, troubleshooting, compatibility, parts, safety, or missing instructions. Manuals+ will review the question and use this page’s manual context to help answer it.