1. Introduction
This manual provides essential information for the safe and efficient operation, assembly, and maintenance of your Speedrid 27.5" Electric Mountain Bike. Please read this manual thoroughly before your first ride and retain it for future reference. Proper assembly and regular maintenance are crucial for your safety and the longevity of your e-bike.

Figure 1.1: Speedrid 27.5" Electric Mountain Bike
2. Safety Information
Your safety is paramount. Always wear a helmet and appropriate safety gear when riding. Adhere to all local traffic laws and regulations. Perform pre-ride checks as outlined in the maintenance section.
- Always wear a certified helmet.
- Ensure brakes are functioning correctly before each ride.
- Check tire pressure and condition.
- Be aware of your surroundings and ride defensively.
- Do not ride under the influence of alcohol or drugs.
- Familiarize yourself with the e-bike's controls before riding in traffic.
3. Package Contents
Upon unpacking, verify that all components are present and undamaged. If any items are missing or damaged, contact customer support immediately.
- Electric Bike Frame (partially assembled)
- Front Wheel
- Removable Battery (48V/499Wh)
- Battery Charger
- Seat Post with Saddle
- Pedals
- Handlebar
- Front Fender
- Headlight
- Tool Kit
- User Manual
4. Assembly Instructions
Your Speedrid electric bike arrives approximately 85% assembled. The following steps detail the final assembly process. For visual guidance, please refer to the assembly video provided below. While the video may feature a slightly different model (G26), the general assembly steps are applicable.
Video 4.1: General E-bike Assembly Guide (Note: Model shown may vary slightly)
4.1 Unpacking and Initial Setup
- Carefully open the box and remove the bike. Remove all protective packaging materials and zip ties.
- Identify all components listed in Section 3.
4.2 Installing the Kickstand
- Locate the kickstand mounting plate near the rear wheel.
- Attach the kickstand using the provided screws and tighten them securely with the multi-tool.
4.3 Handlebar Installation
- Remove the preservative screen and loosen the screws on the stem.
- Position the handlebar into the stem, ensuring it is centered and aligned.
- Tighten the stem screws evenly. Ensure the handlebar is firmly secured and does not rotate.
4.4 LCD Display and Control Panel Installation
- Mount the LCD display and control panel onto the handlebar in a comfortable and visible position.
- Secure the display and control panel by tightening their respective screws.
4.5 Front Wheel Installation
- Remove the protective cover from the front wheel axle.
- Carefully lift the front of the bike and align the front wheel with the fork dropouts. Ensure the brake rotor slides correctly into the brake caliper.
- Insert the quick-release skewer or axle bolts and tighten them securely.
4.6 Headlight Installation
- Attach the headlight to the designated mounting point on the front fork.
- Secure the headlight with the provided screws and tighten them.
4.7 Seat Post and Saddle Installation
- Insert the seat post with the saddle into the seat tube of the frame.
- Adjust the seat height to a comfortable riding position.
- Secure the seat post using the quick-release lever or bolt. Ensure it is tight enough to prevent movement during riding.
- Optionally, install the provided seat cover for added comfort.
4.8 Pedal Installation
- Identify the left (L) and right (R) pedals. The left pedal has a reverse thread.
- Thread the 'L' pedal counter-clockwise into the left crank arm.
- Thread the 'R' pedal clockwise into the right crank arm.
- Tighten both pedals securely with a wrench.
5. Components Overview
5.1 Motor
The Speedrid e-bike is equipped with a 48V 500W high-speed brushless motor, capable of reaching a peak power of 750W. This motor provides robust assistance for daily commuting and off-road adventures, offering up to 73Nm of torque and supporting climbing slopes up to 25 degrees with low noise operation.

Figure 5.1: Motor Specifications
5.2 Battery
The bike features a removable 48V 10.4Ah (499Wh) lithium-ion battery. It offers a riding range of 26 miles (pure power mode) to 45 miles (pedal-assist mode) and supports fast charging in 3-4 hours. The battery includes multiple protection features: overcharge, over-discharge, short circuit, overcurrent, and BMS power saving, with an IP54 waterproof rating.
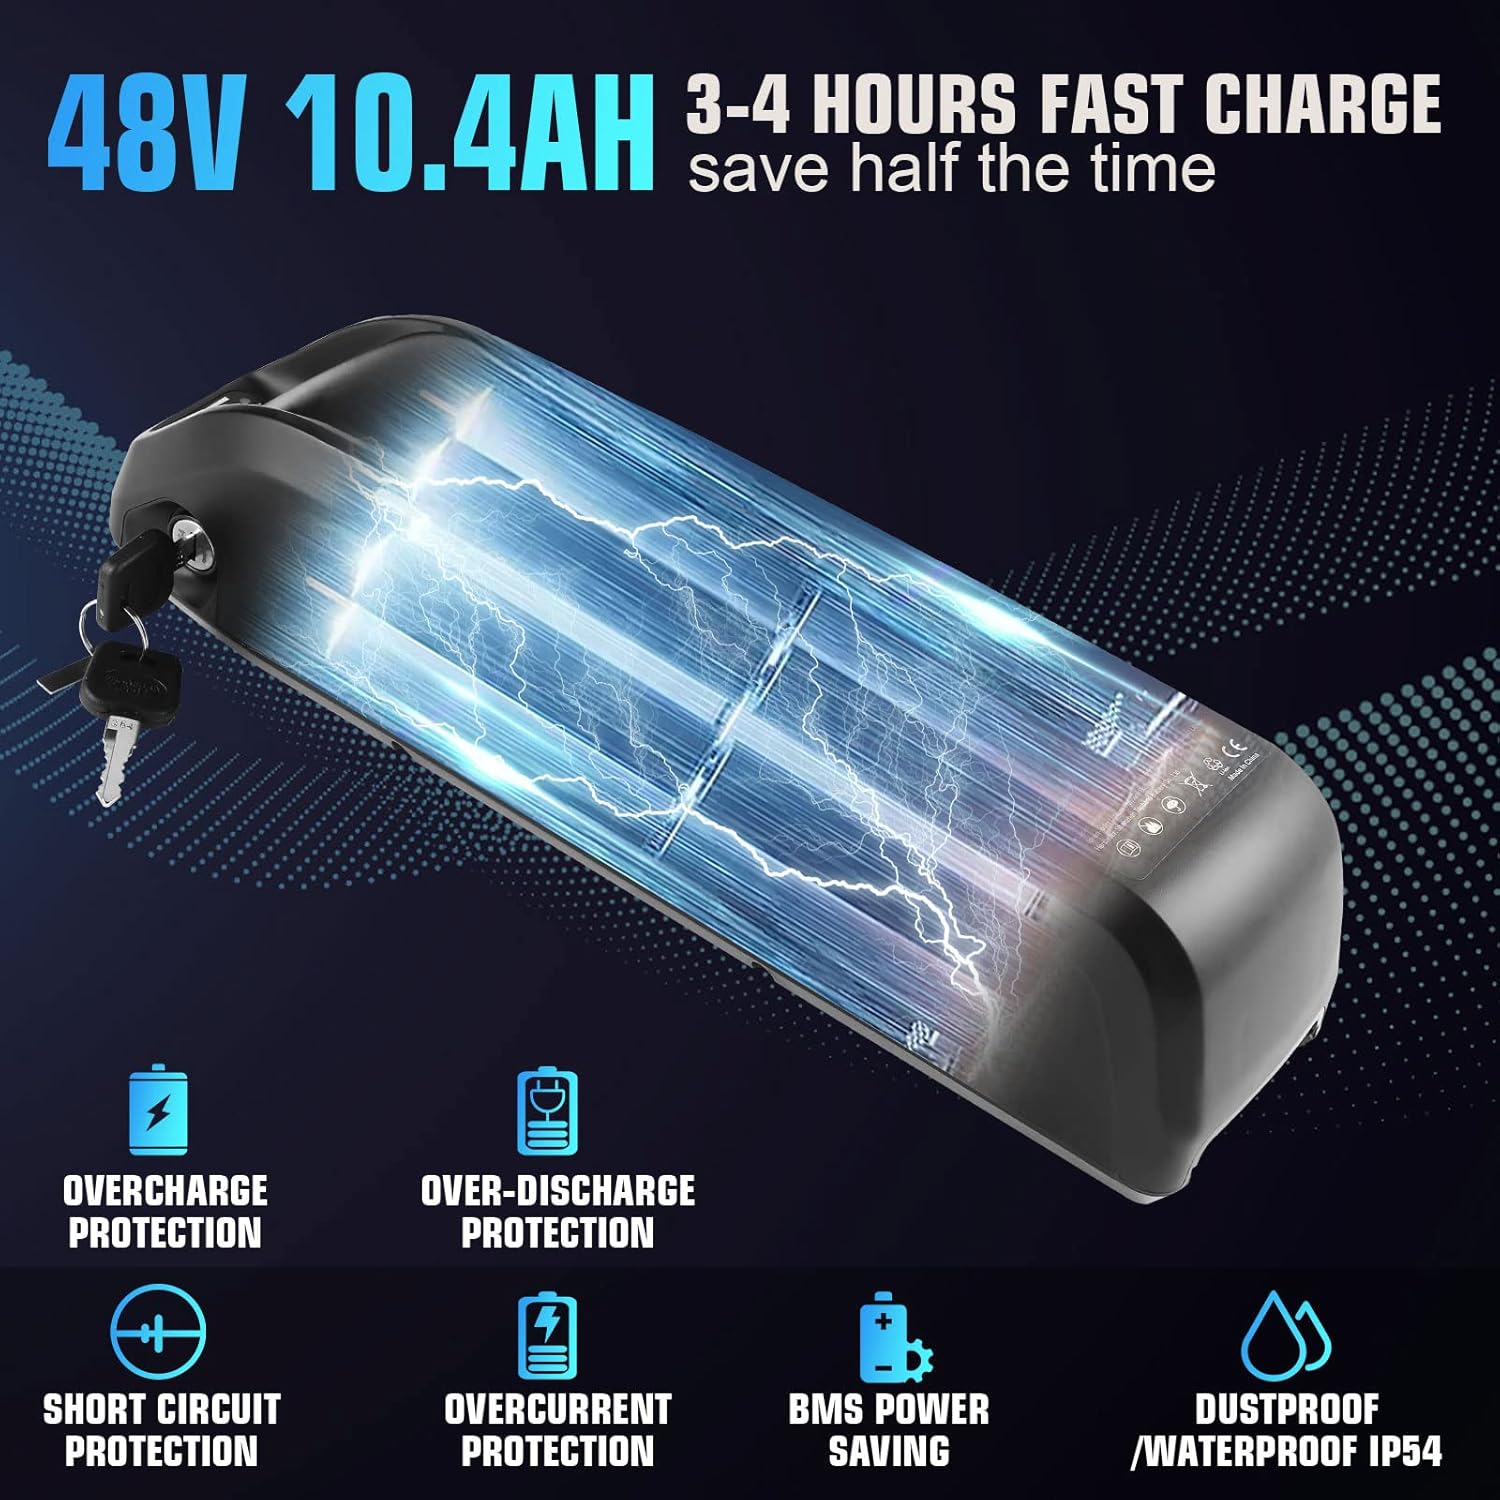
Figure 5.2: Removable Battery
5.3 LCD Display
An intelligent colorful LCD display provides real-time information including speed, mileage, PAS level, battery indicator, and features a backlit screen for visibility in various lighting conditions.

Figure 5.3: LCD Display Interface
5.4 Wheels and Tires
The e-bike is equipped with 27.5-inch wheels, offering improved speed retention and stability compared to smaller wheels. The tires are designed for various terrains, including highway, forest trails, and mountain terrain, providing good shock absorption and durability.
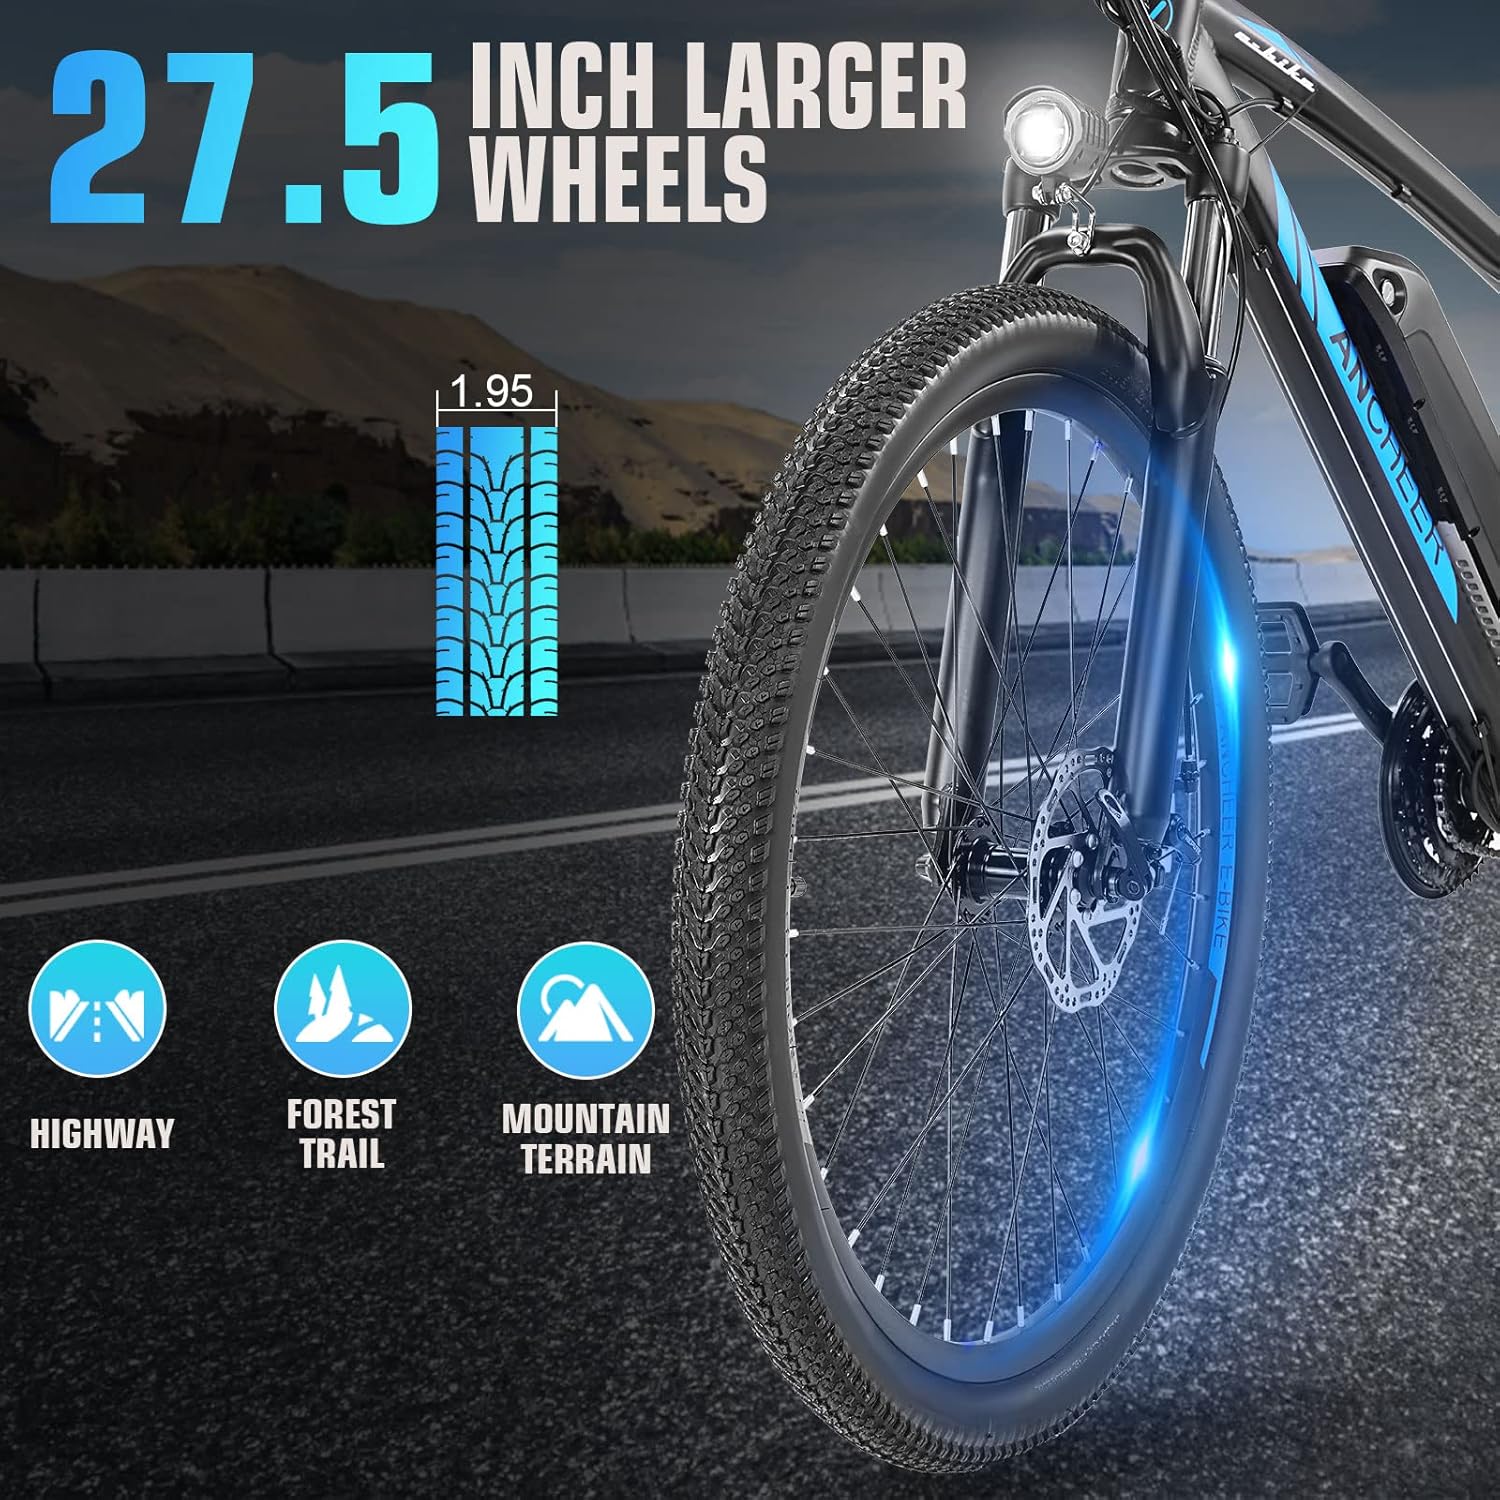
Figure 5.4: 27.5-inch Wheels
5.5 Suspension Fork
The bike features a high-strength carbon steel shock-absorbing front fork, which is lockable. This allows riders to adjust the suspension performance based on the terrain, providing comfort on rough paths and efficiency on smooth surfaces.

Figure 5.5: Lockable Front Suspension Fork
5.6 Braking System
The Speedrid e-bike utilizes mechanical front and rear disc brakes, offering precise braking and reliable stopping power. The power-off brake levers ensure that motor assistance is cut off when braking, enhancing safety.

Figure 5.6: Mechanical Disc Brakes
5.7 Drivetrain
The bike is equipped with a 21-speed Shimano gear system, allowing for versatile riding across different terrains and gradients. This provides efficient power transfer and smooth shifting.

Figure 5.7: 21-Speed Drivetrain
6. Operating Instructions
6.1 Powering On/Off
To power on the e-bike, press and hold the power button on the LCD display. To power off, press and hold the same button until the display turns off.
6.2 Pedal Assist System (PAS)
The e-bike offers 5 levels of pedal assistance. Use the '+' and '-' buttons on the control panel to adjust the assistance level. Higher levels provide more motor assistance, reducing the effort required for pedaling.
6.3 Throttle Operation
The e-bike can be operated using the thumb throttle for pure electric power without pedaling. Gently twist the throttle to engage the motor. The maximum speed in pure electric mode is approximately 20 mph.
6.4 Gear Shifting
Use the Shimano 21-speed shifters on the handlebar to change gears. The left shifter controls the front derailleur (larger gear changes), and the right shifter controls the rear derailleur (smaller gear changes). Shift gears smoothly to match terrain and speed.
6.5 LCD Display Functions
The LCD display shows various riding data:
- Speed: Current riding speed.
- Mileage: Trip distance and total odometer.
- PAS Level: Current pedal assist level (0-5).
- Battery Indicator: Displays remaining battery charge.
- Backlight: The screen is backlit for clear visibility.
7. Battery Care and Charging
7.1 Charging Procedure
- Ensure the e-bike is turned off before charging.
- Connect the charger to the charging port on the battery.
- Plug the charger into a standard electrical outlet. The charger indicator light will typically turn red during charging and green when fully charged.
- Charging time is approximately 3-4 hours for a full charge.
- Disconnect the charger once charging is complete.
7.2 Battery Removal and Installation
The battery is removable for convenient charging or storage. Use the provided key to unlock the battery from the frame. To reinstall, align the battery with the mounting rails and slide it into place until it clicks securely. Lock the battery with the key.

Figure 7.1: Battery Charging and Removal
7.3 Battery Safety Precautions
- Do not expose the battery to extreme temperatures or direct sunlight.
- Use only the charger provided by Speedrid.
- Do not puncture, drop, or disassemble the battery.
- Store the battery in a cool, dry place when not in use.
8. Maintenance
Regular maintenance ensures optimal performance and safety of your e-bike.
8.1 Pre-Ride Checks
- Tires: Check tire pressure and inspect for wear or damage.
- Brakes: Test front and rear brakes for proper function and responsiveness.
- Chain: Ensure the chain is clean, lubricated, and free from rust.
- Bolts & Fasteners: Verify all bolts and quick-release levers are securely tightened.
- Battery: Check battery charge level.
8.2 Regular Maintenance
- Cleaning: Clean the bike regularly with a damp cloth. Avoid high-pressure washing directly on electrical components.
- Lubrication: Lubricate the chain and other moving parts as needed.
- Brake Pads: Inspect brake pads for wear and replace if necessary.
- Gear Adjustment: Periodically check and adjust gear shifting for smooth operation.
8.3 Storage
- Store the e-bike in a dry, sheltered area.
- If storing for an extended period, charge the battery to 50-70% and recharge every 2-3 months.
9. Troubleshooting
| Problem | Possible Cause | Solution |
|---|---|---|
| Bike does not power on | Battery low or not installed correctly; loose connections. | Charge battery; ensure battery is securely locked; check all cable connections. |
| Motor not assisting | PAS level is 0; loose motor cable; brake lever engaged. | Increase PAS level; check motor cable connection; ensure brake levers are fully released. |
| Brakes feel weak | Worn brake pads; loose brake cable; air in hydraulic system (if applicable). | Inspect and replace brake pads; adjust brake cable tension; consult a bike mechanic for hydraulic issues. |
| Gears not shifting smoothly | Derailleur out of adjustment; bent hanger; dirty/dry chain. | Adjust derailleur; clean and lubricate chain; consult a bike mechanic for bent components. |
10. Specifications
| Feature | Specification |
|---|---|
| Model Name | AMA005638 |
| Bike Type | Mountain and Commuting Bike |
| Age Range | Adult |
| Motor | 48V 500W (Peak 750W) Brushless |
| Battery | 48V 10.4Ah (499.2 Wh) Lithium-ion, Removable |
| Charging Time | 3-4 Hours (Fast Charge) |
| Max Range | Up to 60 Miles (Pedal Assist Mode) |
| Top Speed | 20 mph (Throttle) |
| Number of Speeds | 21 (Shimano) |
| Wheel Size | 27.5 Inches |
| Frame Material | Aluminum Alloy |
| Suspension Type | Front (Lockable) |
| Brake Style | Mechanical Disc |
| Electric Assist Type | Pedal Assist, Throttle Assist |
| Included Components | Bell, Headlight, Tool Kit |
11. Warranty and Support
The Speedrid 27.5" Electric Mountain Bike comes with a 1-year warranty. For warranty claims, technical support, or any inquiries, please contact Speedrid customer service through your purchase platform or the official Speedrid website. Please have your model number (AMA005638) and proof of purchase ready when contacting support.