Introduction
This manual provides essential information for the safe assembly, operation, and maintenance of your PUCKIPUPPY Bulldog Pro 1350W Electric Bike. Please read this manual thoroughly before your first ride to ensure proper usage and to maximize the lifespan of your e-bike. Retain this manual for future reference.

The PUCKIPUPPY Bulldog Pro Electric Bike, featuring a robust frame and fat tires.
Setup and Assembly
Your PUCKIPUPPY Bulldog Pro Electric Bike is 85% pre-assembled. The following steps detail the final assembly process. Refer to the assembly video for visual guidance.
Official PUCKIPUPPY Assembly Video for the Bulldog Pro model. This video provides a step-by-step guide for completing the bike's assembly.
- Handlebar Installation:
Attach the handlebar to the stem using the provided hex keys. Ensure all bolts are securely tightened to prevent movement during operation. Connect all necessary cables from the handlebar controls to the main bike frame.
- Front Wheel Attachment:
Carefully align the front wheel with the fork. Insert the axle through the fork dropouts and the wheel hub. Secure the wheel using the provided nuts and a No. 15 wrench. Ensure the brake rotor is correctly positioned within the brake caliper.
Detail of the front wheel with its hydraulic disc brake system.
- Front Mudguard Installation:
Mount the front mudguard to the fork using the designated bolts and a No. 5 hex key. Ensure it is centered over the wheel and provides adequate clearance for tire rotation.
- Headlight Attachment:
Secure the headlight to the front of the bike, typically on the fork crown or handlebar stem, using the appropriate hex key. Connect the headlight cable to the corresponding port on the bike's wiring harness.
- Kickstand Installation:
Attach the kickstand to the designated mounting points near the rear wheel using a No. 5 hex key. Ensure it is stable and allows the bike to stand upright securely.
- Pedal Installation:
Identify the left (L) and right (R) pedals. Thread the pedals into their respective crank arms. The right pedal threads clockwise, and the left pedal threads counter-clockwise. Tighten them firmly with a No. 15 wrench.
- Rear Fender Installation:
Mount the rear fender over the rear wheel using the provided bolts and a No. 4 hex key. Ensure it is securely fastened and provides sufficient coverage.
- Rear Rack Installation:
Attach the rear rack to the frame's mounting points using a No. 4 hex key. Connect any integrated tail light wiring if applicable. Ensure the rack is stable and capable of supporting loads.
The rear rack and full suspension system of the PUCKIPUPPY Bulldog Pro.
- Saddle Adjustment:
Insert the saddle post into the seat tube. Adjust the saddle height to a comfortable riding position where your feet can touch the ground while seated. Secure the quick-release lever or bolt firmly.
Operating Your E-Bike
Display and Controls
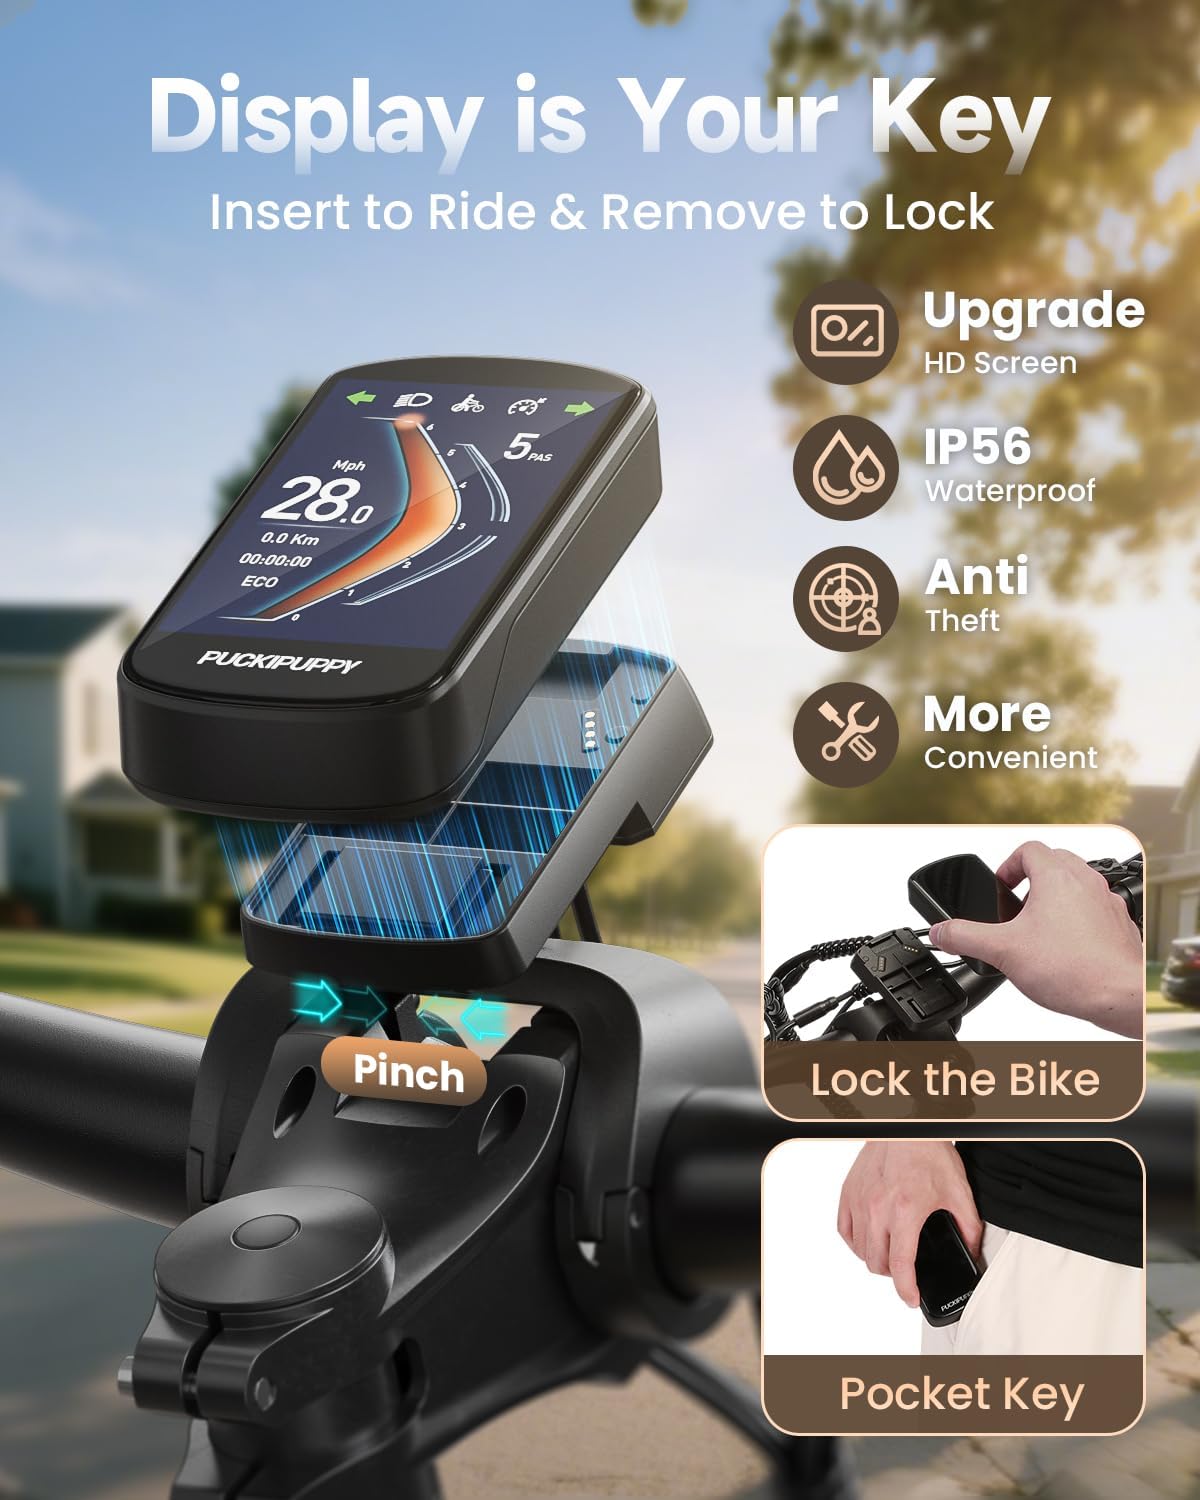
The PUCKIPUPPY Bulldog Pro features a detachable display that serves as your key. Insert the display to activate the bike and remove it to lock the system, enhancing security.
A quick look at the detachable display, demonstrating its functionality as a key for the e-bike.

The display functions as a key: insert to ride, remove to lock.
Ride Modes and Gearing
The e-bike offers 5 ride modes and an 8-speed gear shift system. Utilize these to adapt to various terrains and riding preferences. The torque sensor measures your pedal force, providing power assistance precisely when needed, reducing knee strain and improving climbing efficiency.

Explanation of the torque sensor's function in providing responsive power assistance.
Battery and Charging
The Bulldog Pro is equipped with a 48V 30Ah removable battery, offering a range of up to 130 miles. Charging can be done in two ways:
- Charging the battery while it is installed on the e-bike.
- Removing the battery from the e-bike and charging it separately.
A full charge typically takes 6-8 hours with the 48V 2A fast charger.

Two convenient methods for charging your e-bike battery.

Information on the e-bike's long-range capability and battery protection features.
Maintenance
Regular maintenance is crucial for the longevity and safe operation of your PUCKIPUPPY Bulldog Pro e-bike.
General Care
- Keep your e-bike clean. Wipe down the frame and components regularly with a damp cloth. Avoid high-pressure washing directly on electrical components.
- Store the e-bike in a dry place, away from direct sunlight and extreme temperatures.
- Check all bolts and fasteners periodically to ensure they are tight.
Tires
The 26"x4" fat tires are designed for all-terrain use. Regularly check tire pressure and inflate to the recommended PSI (usually indicated on the tire sidewall) for optimal performance and safety.

The 26x4 inch fat tires provide excellent grip for various terrains.
Brakes
The e-bike features dual hydraulic disc brakes. Inspect brake pads for wear and brake levers for proper function before each ride. Ensure the brake fluid levels are adequate and the system is free of air bubbles for consistent braking performance.

The 180mm dual hydraulic disc brakes ensure strong and reliable stopping power.
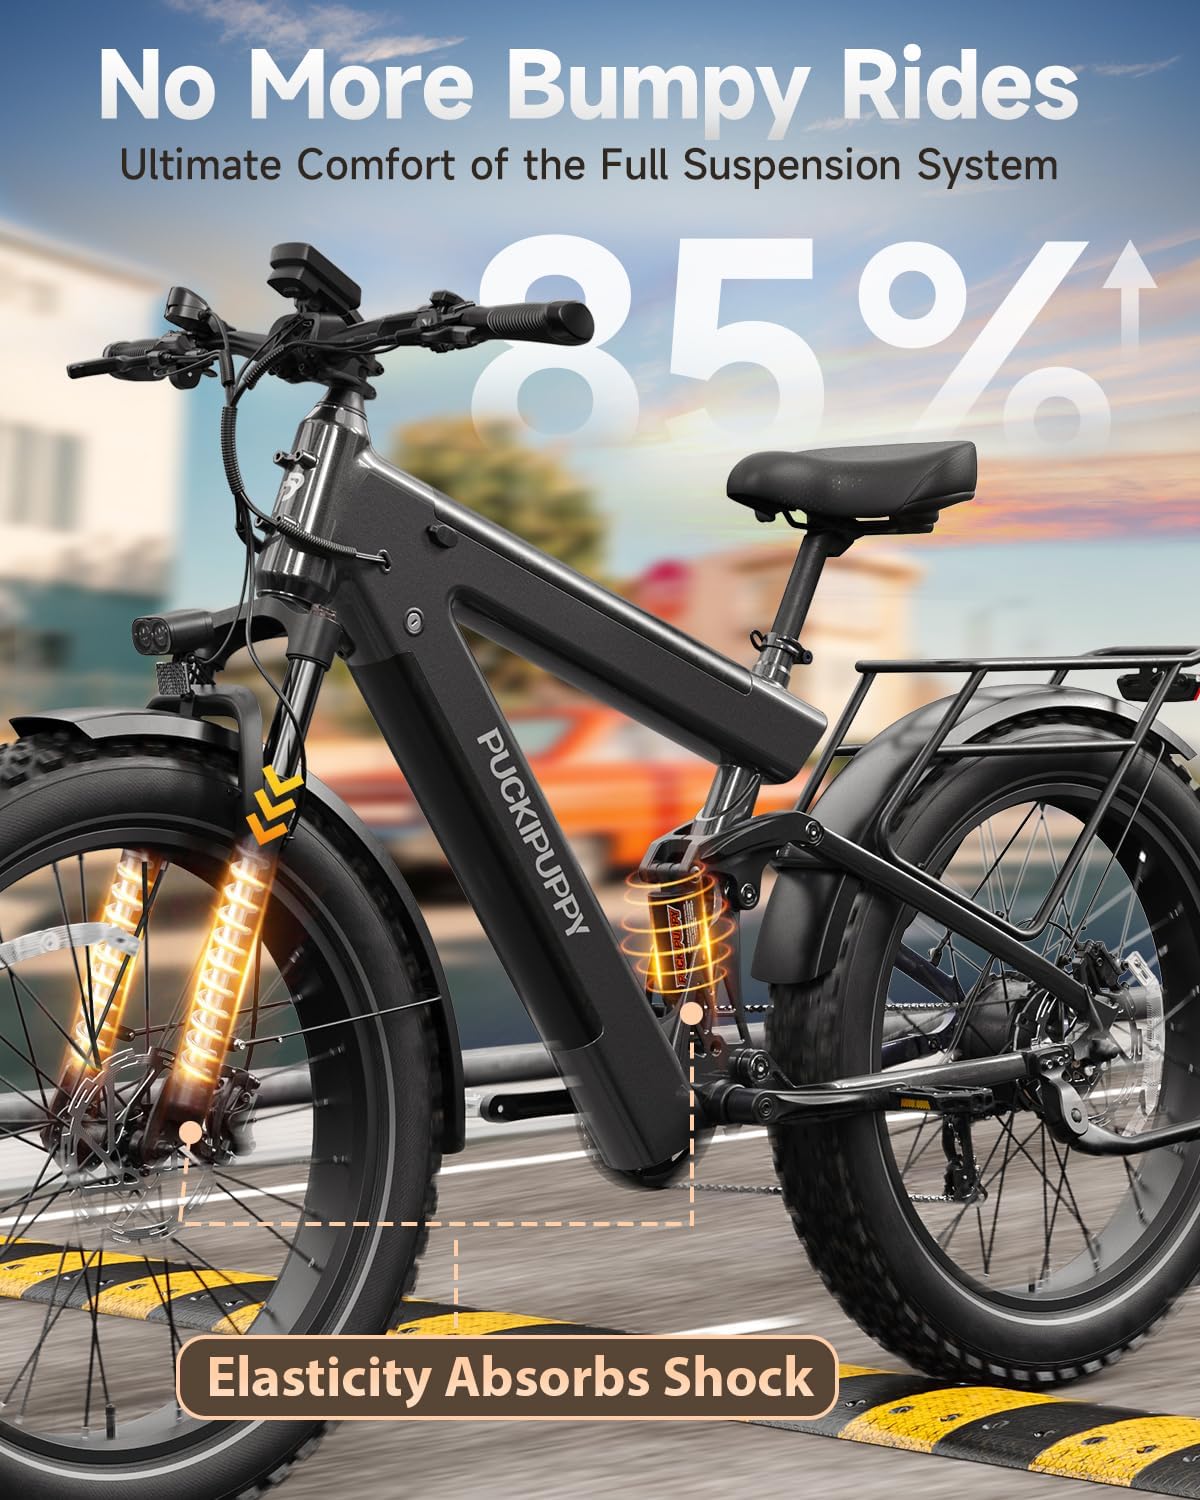
Suspension
The full suspension system, including a hydraulic suspension fork and concealed vertical suspension, reduces impact by 85%. Regularly check the suspension components for any signs of damage or leaks. Keep the suspension clean and lubricated as per manufacturer recommendations.

The full suspension system provides a comfortable ride.
Troubleshooting
This section addresses common issues you might encounter with your PUCKIPUPPY Bulldog Pro e-bike.
No Power to Display/Motor
- Ensure the battery is fully charged and properly seated in its compartment.
- Check all electrical connections, especially those to the display, motor, and battery, for looseness or damage.
- Verify the display is correctly inserted and activated.
Brakes Not Responding Effectively
- Inspect brake pads for wear; replace if necessary.
- Check brake cables or hydraulic lines for damage or leaks.
- Ensure brake calipers are properly aligned with the rotors.
Unusual Noises During Operation
- Check for loose components, such as fenders, racks, or chain.
- Inspect the chain and gears for proper lubrication and alignment.
- If the noise originates from the motor or internal components, contact customer support.
Specifications
Detailed technical specifications for the PUCKIPUPPY Bulldog Pro Electric Bike.
| Feature | Specification |
|---|---|
| Bike Type | Electric Bike |
| Age Range | Adult |
| Brand | PUCKIPUPPY |
| Number of Speeds | 8 |
| Color | Iron Gray (Bulldog Pro) |
| Wheel Size | 26 Inches |
| Frame Material | Aluminum |
| Suspension Type | Dual (Longitudinal Full Suspension) |
| Special Features | 130 miles range, 26x4-inch Fat tires, 48V 30Ah Rechargeable battery, 8-Speed, Dual Hydraulic Disc Brakes |
| Included Components | Ebike, 85% pre-assembled, Basic Ride Pack, User's Manual, Warranty Card |
| Brake Style | Disc |
| Wheel Width | 4 Inches |
| Model Name | BulldogPRO |
| Power Source | Electric |
| Assembly Required | Yes |
| Recommended Height | 5.4 - 6.6 FT |
| Max Load Capacity | 400 lbs |
| Bicycle Weight | 92.5 lbs |
Key dimensions and weight specifications for the PUCKIPUPPY Bulldog Pro.
Warranty and Support
Warranty Information
For detailed warranty information, please contact the seller directly. A warranty card is included with your purchase.
Customer Support
PUCKIPUPPY provides professional pre- and after-sales support. If you have any questions, require assistance with assembly, operation, or troubleshooting, please contact our support team.
Phone Support: 877-755-9956
Operating Hours: Monday to Friday, 9:00 AM - 6:00 PM PST