Brataste B0DCVBJGCV
Brataste Wireless Weather Station User Manual
Model: B0DCVBJGCV
1. Product Overview
The Brataste Wireless Weather Station provides comprehensive indoor and outdoor environmental data, including temperature, humidity, weather forecasts, and time-related information. Its large color display ensures easy readability and access to vital weather insights for your home or office.

Image: The main display unit of the Brataste Wireless Weather Station alongside its remote outdoor sensor.
Key Features:
- 7.5" LCD HD Color Screen for clear, multi-angle viewing.
- Measures indoor and outdoor temperature and humidity.
- Provides weather forecasts for the next 12-24 hours based on barometric pressure changes.
- Atomic clock with dual alarms and snooze function.
- Displays sunrise and sunset times, moon phases, and tide indicators.
- Includes mold risk and comfort indicators for indoor environment.
- Supports up to 3 wireless remote sensors (one included).
- Multiple power modes: DC adapter for continuous display or 2*AAA batteries for portability.
- Adjustable backlight with 5 brightness levels and night mode.
2. Setup Guide
2.1 Unboxing and Components
Carefully remove all components from the packaging. Ensure you have the main weather station unit, one wireless remote sensor, a DC power adapter, and the user manual.
2.2 Powering the Main Unit
The main unit can be powered by either the included DC adapter for a permanent, always-on display, or by 2*AAA batteries (not included) for portable use. When using batteries, the screen will only light up for 15 seconds when the top button is pressed to conserve power.
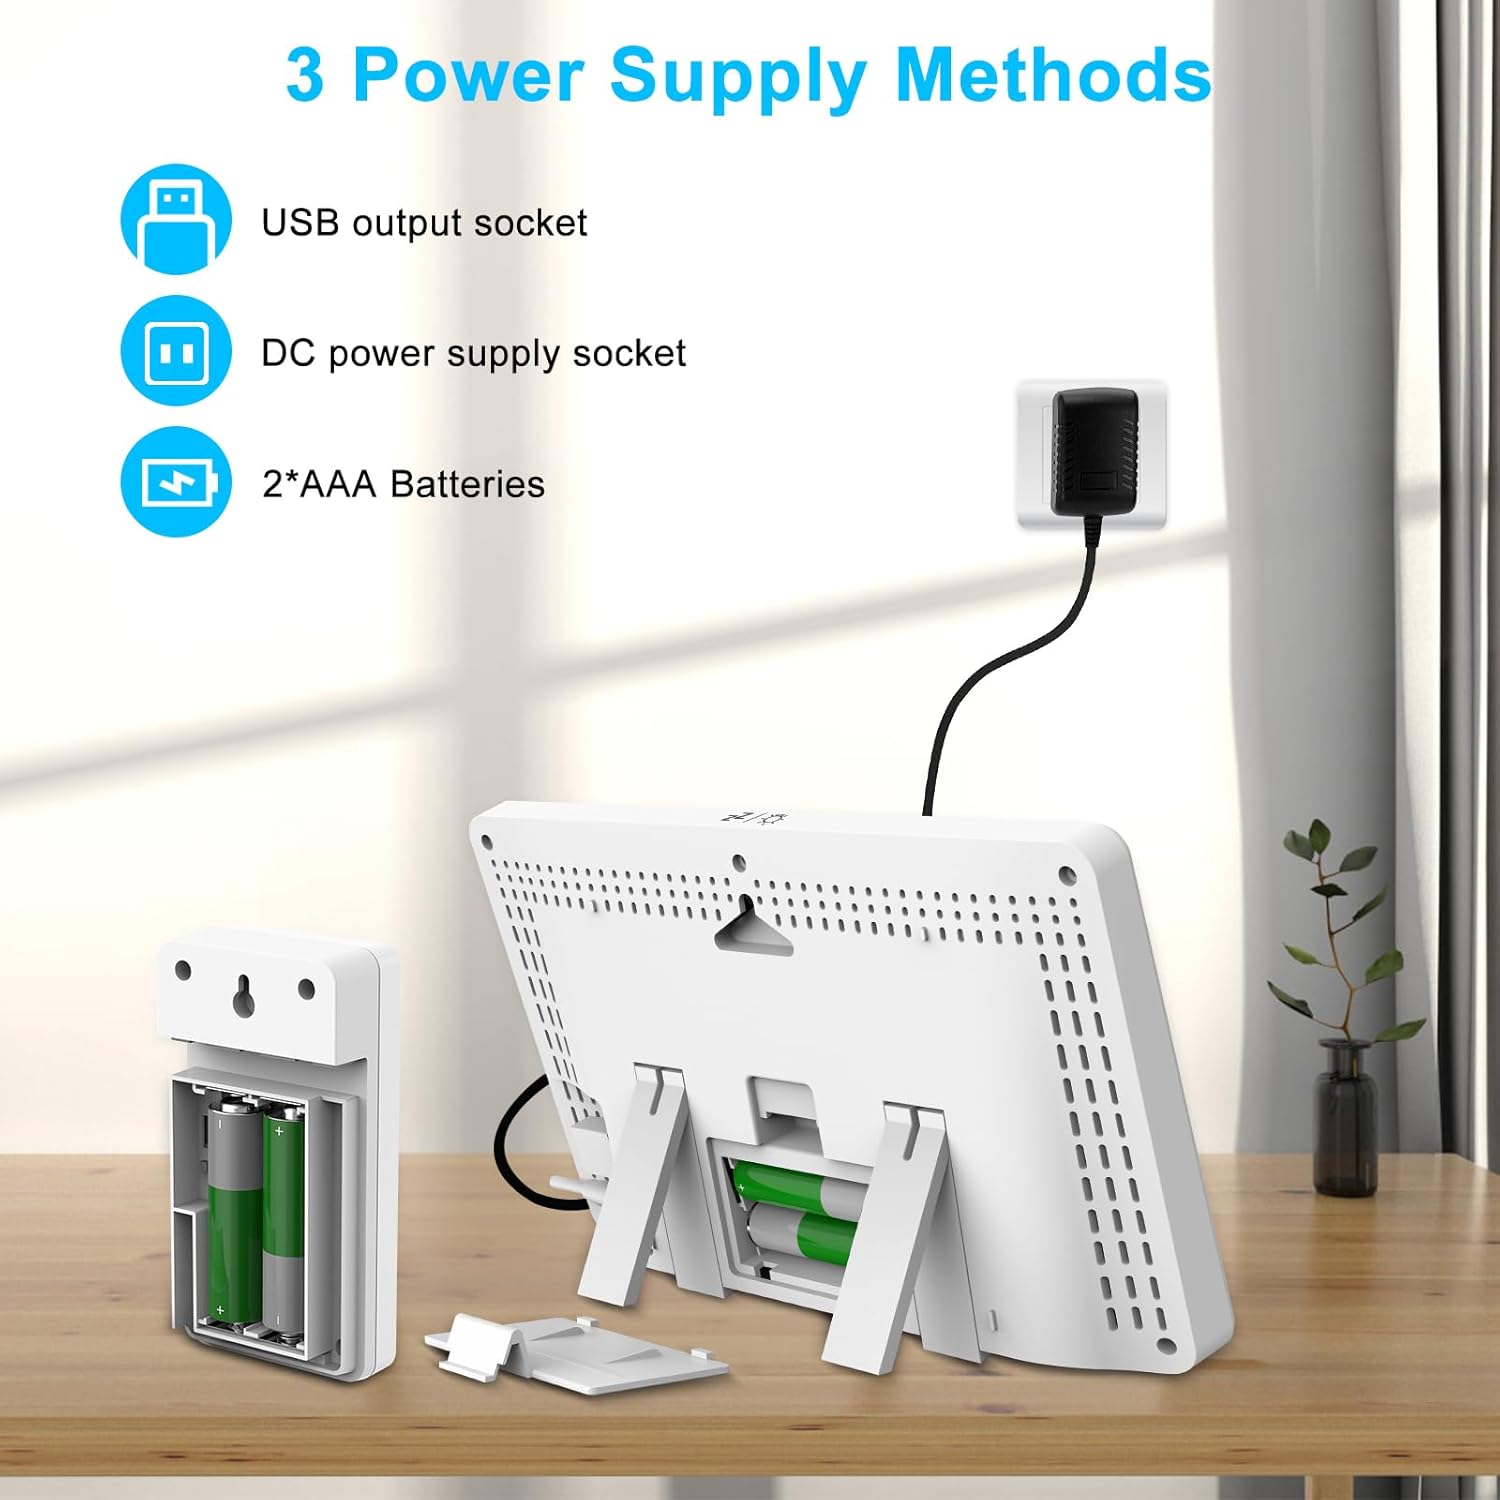
Image: Illustration of the three power supply methods for the main weather station unit.
2.3 Installing Batteries in the Remote Sensor
Open the battery compartment on the back of the wireless remote sensor and insert 2*AAA batteries (not included), ensuring correct polarity. The sensor will automatically begin transmitting data.
2.4 Pairing the Sensor and Main Unit
Once both units are powered, they should automatically pair within 60 seconds. Ensure they are within range (up to 200ft/60m in an open area). If pairing does not occur, refer to the troubleshooting section.
2.5 Placement Recommendations
The main unit can be placed on a table using its integrated stand or wall-mounted. The remote sensor should be placed outdoors in a shaded, dry location, away from direct sunlight and precipitation, for accurate readings. It is splash-resistant but not waterproof.
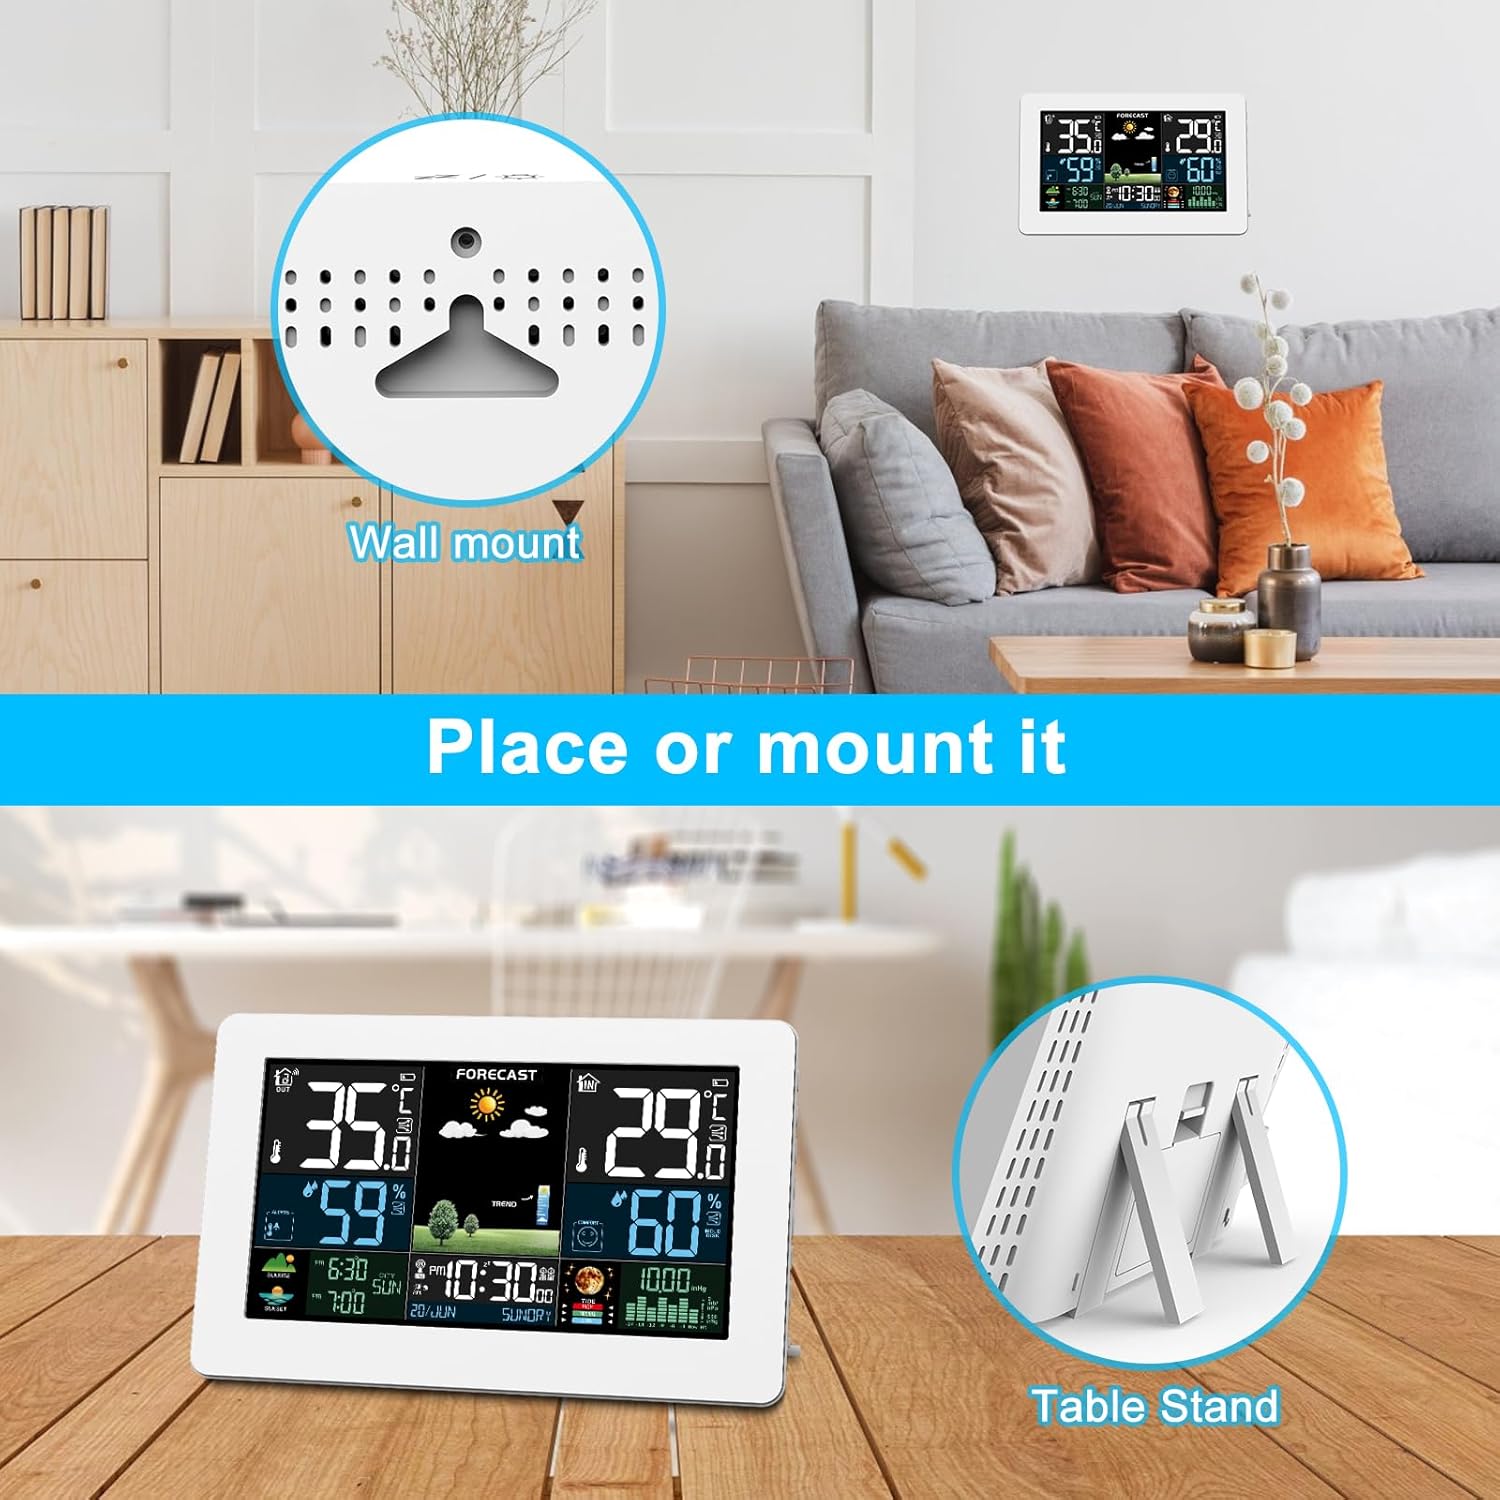
Image: Versatile placement options for the weather station, including wall-mount and table stand.
3. Operating Instructions
3.1 Display Overview
The 7.5-inch LCD HD color screen displays a wealth of information at a glance. Key areas include:
- Outdoor Temperature & Humidity: Located on the left side.
- Indoor Temperature & Humidity: Located on the right side.
- Weather Forecast: Central display showing icons for sunny, cloudy, rainy, etc.
- Time & Date: Central bottom section, automatically synchronized via atomic clock.
- Sunrise & Sunset Times: Bottom left.
- Moon Phases & Tides Indicator: Bottom right.
- Barometric Pressure Trend: Bottom right, indicating pressure changes.
- Comfort Index & Mold Risk: Indoor section, providing environmental comfort levels.
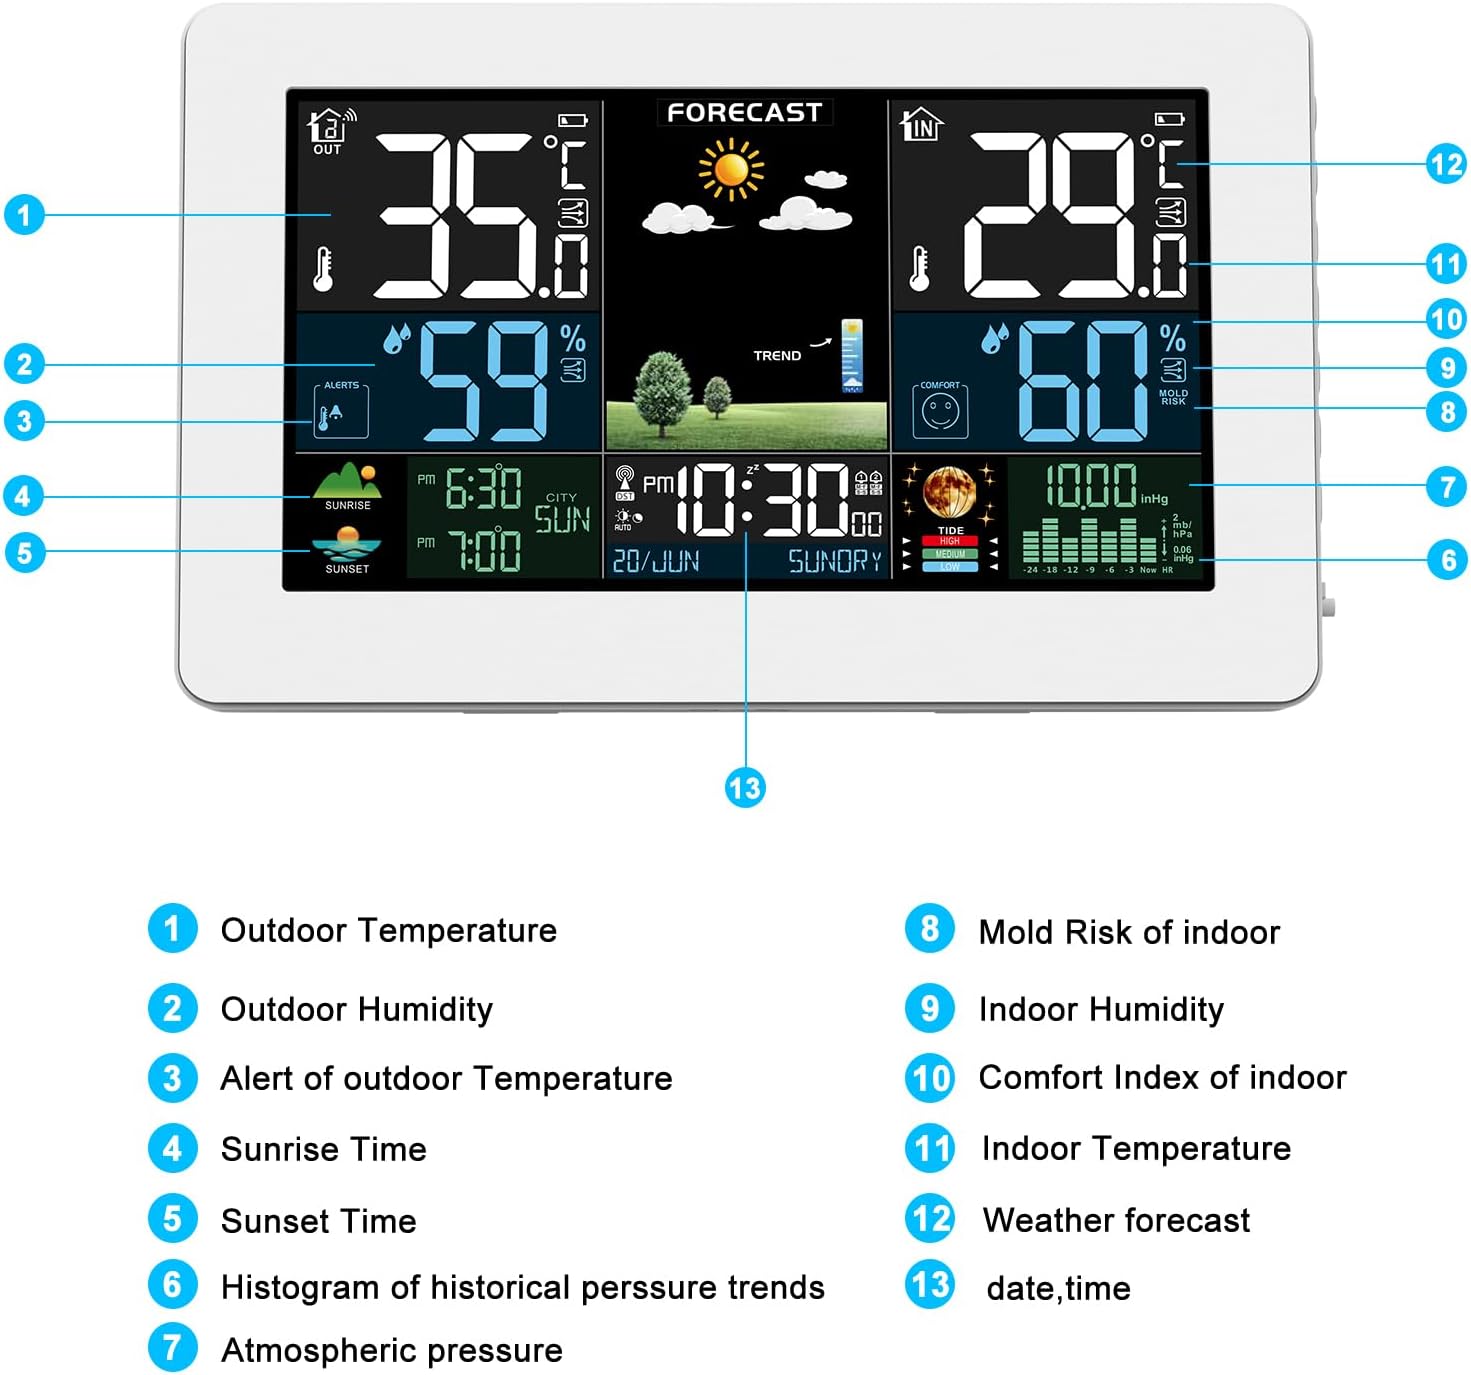
Image: Labeled diagram explaining each section of the weather station's display.
3.2 Setting Time and Alarms
The weather station features an atomic clock for automatic time synchronization. You can set dual daily alarms with flexible repeat intervals (M-F, M-S, S-S) and a snooze function. Refer to the manual's specific section for detailed alarm setting instructions.
3.3 Adjusting Backlight
The display offers 5 backlight brightness levels. When powered by the DC adapter, the screen can be set to always-on. In battery mode, the backlight activates for 15 seconds with a button press to conserve energy.
3.4 Weather Forecast Interpretation
The station forecasts weather for the next 12-24 hours based on barometric pressure trends. Icons represent conditions such as sunny, slightly cloudy, cloudy, rainy, heavy rainy, and snowy.
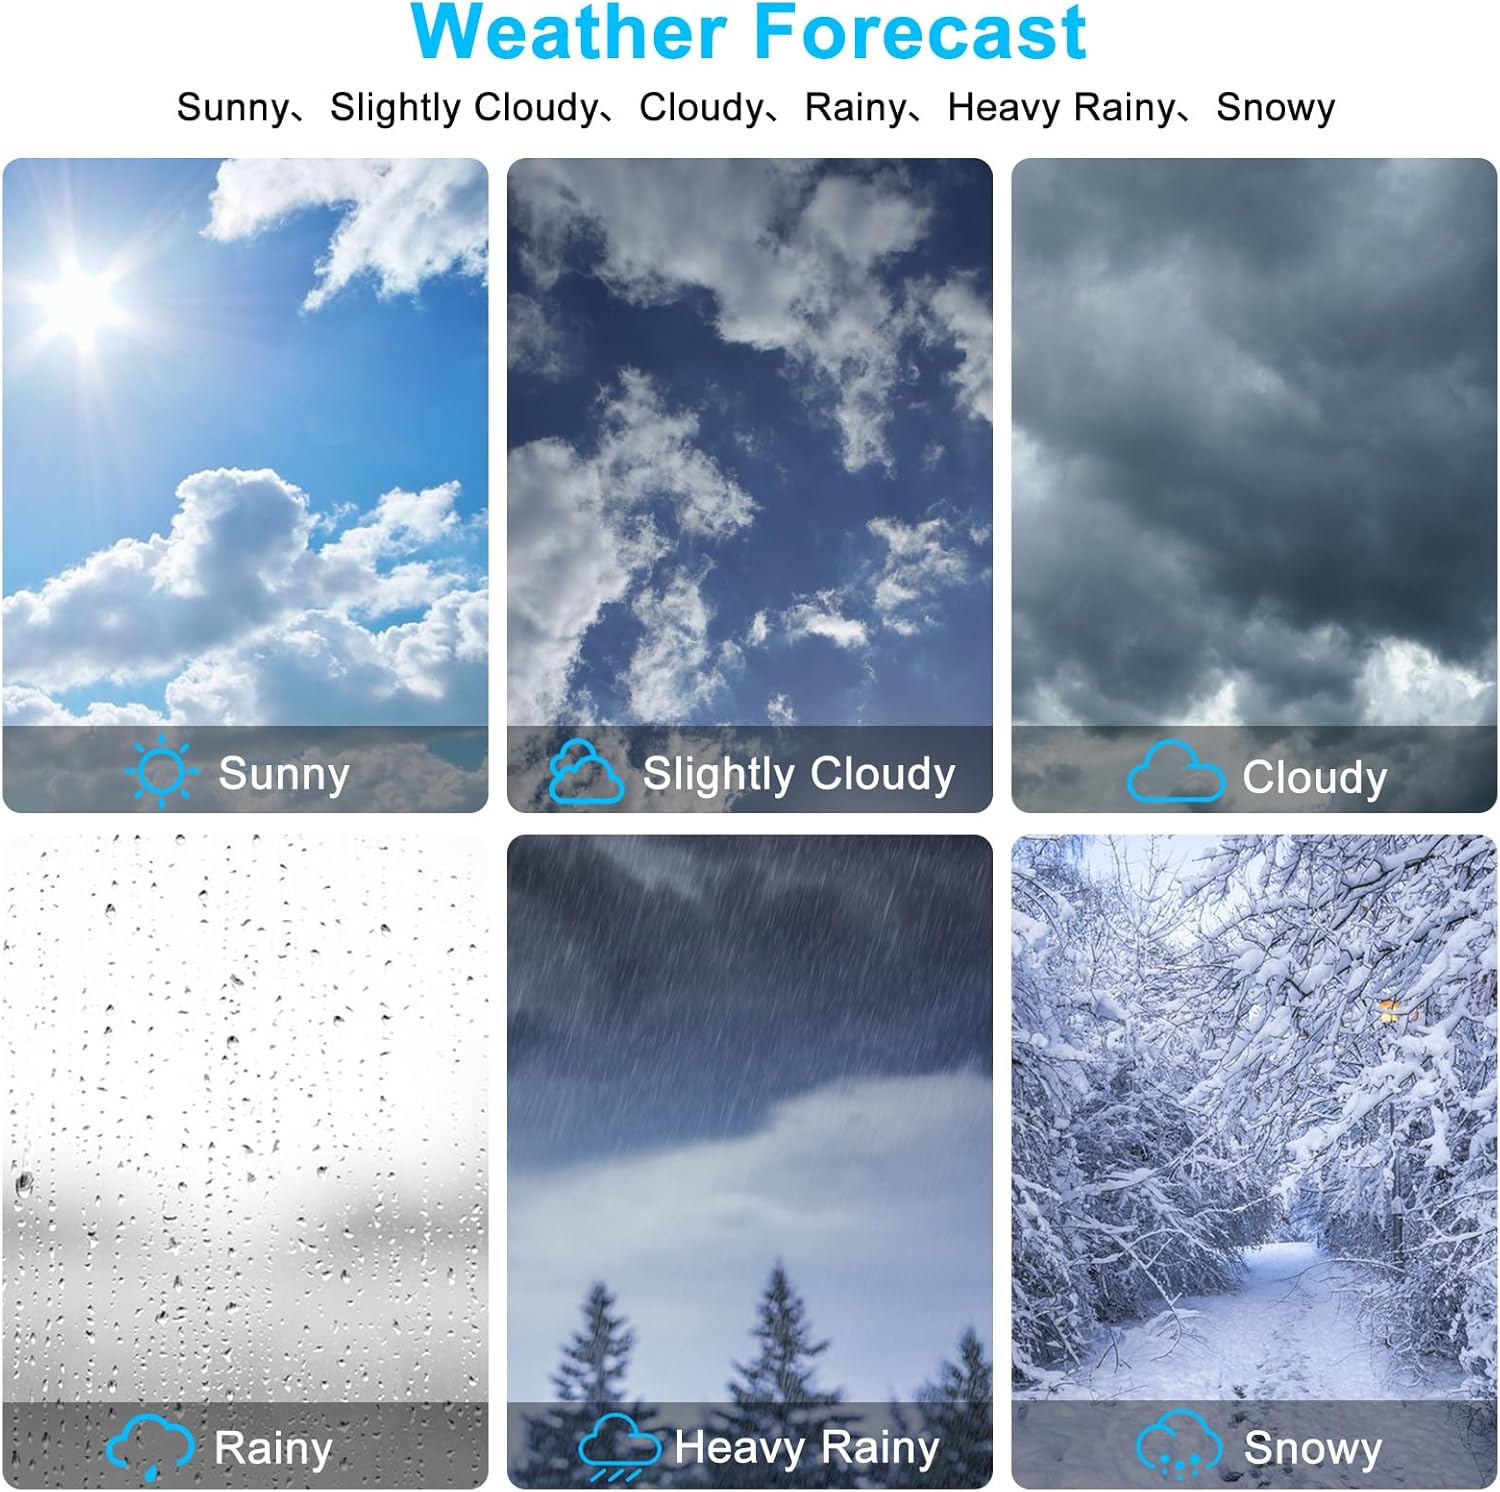
Image: Visual representations of various weather forecast conditions.
3.5 Connecting Additional Sensors
The weather station supports up to three wireless remote sensors, allowing you to monitor temperature and humidity in different locations like a backyard, greenhouse, or cellar. Additional sensors are sold separately.

Image: Examples of placing multiple remote sensors in various locations.
3.6 Official Product Video
Video: An official product video from Brataste-US demonstrating the features and color display of the Weather Station Wireless Indoor Outdoor unit.
4. Maintenance
- Cleaning: Wipe the display and sensor with a soft, dry cloth. Avoid abrasive cleaners or solvents.
- Battery Replacement: Replace batteries in both the main unit (if used) and the remote sensor when the low battery indicator appears on the display.
- Sensor Protection: While the remote sensor is splash-resistant, avoid prolonged exposure to heavy rain or direct water immersion to ensure longevity.
5. Troubleshooting
| Problem | Possible Cause | Solution |
|---|---|---|
| No display on main unit | No power or low batteries. | Ensure DC adapter is properly connected or replace batteries. |
| Outdoor sensor not connecting/displaying | Sensor out of range, low sensor batteries, or interference. | Move sensor closer to main unit, replace sensor batteries, or try a different channel if available. Allow up to 3 hours for accurate temperature display after initial setup. |
| Inaccurate temperature/humidity readings | Sensor exposed to direct sunlight/heat source, or poor ventilation. | Relocate the remote sensor to a shaded, well-ventilated area. Ensure main unit is not near heat/cold sources. |
| Atomic clock not setting automatically | Weak signal or interference. | Place the main unit near a window or in an open area away from electronic devices. Allow time for signal acquisition. |
6. Specifications
- Model: B0DCVBJGCV
- Display Type: 7.5" LCD HD Color Screen
- Power Source: DC Adapter (included), 2*AAA Batteries (not included)
- Remote Sensor Power: 2*AAA Batteries (not included)
- Wireless Transmission Range: Up to 200ft (60m) in open area
- Temperature Accuracy: ±2 °C
- Connectivity Technology: RF (433.92 MHz)
- Product Dimensions: 8.07 x 5.12 x 1.18 inches
- Item Weight: 1.19 pounds
- Included Components: Weather Station, External Sensor, Adapter, Manual
7. Warranty and Support
Brataste is committed to providing high-quality products and excellent customer service. We strive to ensure our products are the best companions in your daily life.
- Customer Service: 7*24-HOURS Lifetime Support.
- Money Back Guarantee: 30-DAYS Money Back.
- Replacement/Repair Service: 24-MONTHS Free Replacement/Repair Service.
- Manufacturing Experience: Backed by 10-YEARS Mature Manufacturing Experience.
For any inquiries or support, please refer to the contact information provided in your product packaging or visit the official Brataste store on Amazon.
Ask a question about this manual
Ask about setup, troubleshooting, compatibility, parts, safety, or missing instructions. Manuals+ will review the question and use this page’s manual context to help answer it.