1. Introduction
Thank you for purchasing the Commercial Electric 14-Watt 1100 Lumens Bronze Hardwired LED Metal Spot Landscape Flood Light. This durable and efficient outdoor lighting fixture is designed to provide bright, warm white illumination for your landscape. This manual contains important information regarding the safe installation, operation, and maintenance of your new flood light. Please read it thoroughly before installation and retain it for future reference.
This hardwired LED flood light is suitable for outdoor use, offering a robust metal construction and water-resistant design to withstand various weather conditions.
2. Safety Information
WARNING: Risk of electric shock. Disconnect power at the fuse or circuit breaker before installing or servicing. All electrical connections must be in accordance with local codes, ordinances, or the National Electric Code (NEC).
- Always turn off the power supply at the main circuit breaker before beginning any electrical work.
- Consult a qualified electrician if you are unsure about the installation process.
- Do not install this fixture in areas where it may be submerged in water.
- Ensure all wiring connections are secure and properly insulated.
- Do not attempt to modify the fixture. Any modifications will void the warranty and may pose a safety risk.
- This fixture is designed for 120V DC input. Ensure your power source matches this requirement.
3. Package Contents
Carefully unpack your flood light and ensure all items are present and undamaged. If any parts are missing or damaged, do not attempt to assemble or install the product. Contact customer service for assistance.
- 1 x Commercial Electric 14-Watt LED Metal Spot Landscape Flood Light
- Wiring (pre-attached)
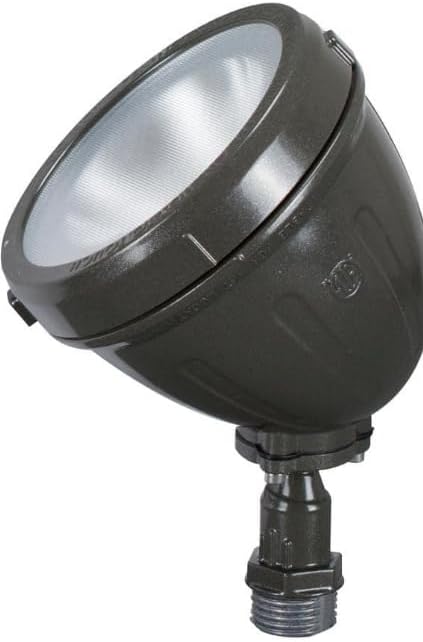
Figure 3.1: Front angled view of the Commercial Electric 14-Watt LED Metal Spot Landscape Flood Light.
4. Specifications
| Feature | Specification |
|---|---|
| Brand | Generic |
| Model Number | 456 |
| Color | Bronze and Black |
| Specific Uses | Outdoor Landscape Lighting |
| Power Source | Hardwired |
| Installation Type | Surface Mount |
| Light Source Type | Integrated LED |
| Finish Type | Bronze |
| Shade Material | Metal |
| Voltage | 120 Volts (DC) |
| Light Color | Warm White |
| Wattage | 14 Watts |
| Brightness | 1100 Lumens |
| Water Resistance Level | Water Resistant |
| Product Dimensions (L x W x H) | 3.66 x 0.4 x 5.36 inches |
| Assembly Required | No |
5. Setup and Installation
This flood light is designed for hardwired installation. Professional installation is recommended. Ensure you have all necessary tools (e.g., wire strippers, screwdriver, electrical tape, wire nuts) before starting.
5.1. Pre-Installation Checklist
- Verify that the power supply is turned OFF at the circuit breaker.
- Ensure the mounting surface is stable and can support the fixture.
- Confirm the wiring from your power source is compatible with the fixture's requirements (120V DC).
5.2. Mounting the Fixture
- Position the fixture at the desired location on the wall or surface.
- Mark the drilling points for the mounting screws.
- Drill pilot holes if necessary.
- Secure the fixture to the mounting surface using appropriate screws (not included).
5.3. Wiring Connections

Figure 5.1: Rear view of the flood light with wiring connections.

Figure 5.2: Side view illustrating the wiring harness and adjustable head.
- Carefully pull the fixture's wiring through the mounting surface opening to access the junction box.
- Connect the fixture's wires to your household wiring using appropriate wire nuts (not included):
- Connect the black wire from the fixture to the live/hot wire from the power supply.
- Connect the white wire from the fixture to the neutral wire from the power supply.
- Connect the green or bare copper wire from the fixture to the ground wire from the power supply.
- Ensure all connections are secure and insulated with electrical tape if necessary.
- Carefully tuck all wires into the junction box.
5.4. Final Steps
- Once wiring is complete, restore power at the circuit breaker.
- Test the light by activating the associated switch.
- Adjust the angle of the flood light to direct illumination as desired. The fixture head can be rotated within limits as indicated on the unit.
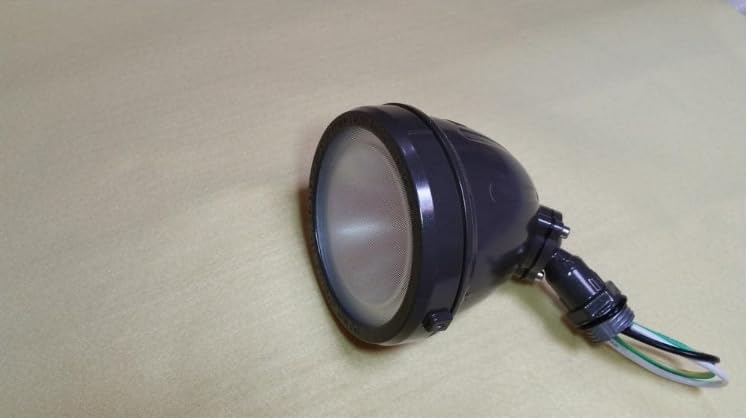
Figure 5.3: The flood light in a resting position, highlighting its robust construction.
6. Operating Instructions
This hardwired LED flood light operates by connecting to your existing electrical system. Once properly installed and wired, the light can be controlled via a standard wall switch (toggle switch) or any compatible external control method (e.g., timer, photocell) connected to the circuit.
- To Turn ON: Flip the connected wall switch to the 'ON' position.
- To Turn OFF: Flip the connected wall switch to the 'OFF' position.
The fixture's head can be manually adjusted to direct the light beam to your desired area. Ensure the adjustment is made while the power is off to prevent accidental contact with hot surfaces.

Figure 6.1: Example of the flood light installed in a landscape setting, providing illumination.
7. Maintenance
The Commercial Electric LED flood light requires minimal maintenance. Regular cleaning will help maintain its appearance and performance.
- Cleaning: Disconnect power before cleaning. Use a soft, damp cloth to wipe the exterior of the fixture. Do not use abrasive cleaners or solvents, as they may damage the finish or electrical components.
- LED Longevity: The integrated LED is designed for long-term use and does not require bulb replacement.
- Inspection: Periodically inspect the fixture and wiring for any signs of damage, wear, or loose connections. Address any issues promptly.
8. Troubleshooting
If you experience issues with your flood light, refer to the following troubleshooting guide:
| Problem | Possible Cause | Solution |
|---|---|---|
| Light does not turn ON | No power to the fixture | Check circuit breaker and wall switch. Ensure power is restored. |
| Loose wiring connection | Turn off power. Check and secure all wiring connections. | |
| Faulty fixture | If all connections are secure and power is present, the fixture may be faulty. Contact customer support. | |
| Light flickers or dims | Unstable power supply | Consult an electrician to check your electrical system. |
| Loose wiring connection | Turn off power. Check and secure all wiring connections. | |
| Water inside fixture | Improper sealing or damage | Turn off power immediately. Inspect for cracks or damage. If damaged, replace the fixture. Ensure proper installation to prevent water ingress. |
If the problem persists after attempting these solutions, please contact customer support.
9. Warranty and Support
This Commercial Electric product is backed by a standard manufacturer's warranty, covering defects in materials and workmanship under normal use. The warranty period typically begins from the date of purchase. Please retain your proof of purchase for warranty claims.
For technical support, warranty inquiries, or replacement parts, please contact the manufacturer's customer service. Refer to the product packaging or the retailer's website for specific contact information.
Customer Service: Please refer to your purchase documentation or the retailer's website for contact details.
Online Resources: For additional information, FAQs, or product registration, visit the official Generic brand website or the retailer's product page.