1. Introduction
This manual provides comprehensive instructions for the installation, operation, and maintenance of your Masoll RV/Trailer Tire Pressure Monitoring System (TPMS) with 8 sensors. This system is designed to monitor tire pressure and temperature in real-time for RVs, travel trailers, 5th wheels, and other compatible vehicles, enhancing driving safety by providing timely alerts for tire abnormalities.
The Masoll TPMS is suitable for vehicles with tire pressures ranging from 0-87 PSI and a transmission distance of up to 120 feet. It includes a color LCD display, 8 external sensors, and a signal booster.

Figure 1.1: Compatible Vehicle Types for Masoll TPMS
2. Product Overview
2.1 Components
- Color LCD Display Monitor: Provides real-time tire pressure and temperature readings.
- External Sensors (8x): Screw onto tire valve stems to measure pressure and temperature.
- Signal Booster: Enhances sensor signal transmission to the display, extending range up to 120ft.
- USB Power Cable: For connecting the display monitor.
- Security Nuts and Wrench: To secure sensors and prevent theft.
2.2 Key Features
- RV-Specific Design: Flexible sensor options (2/4/6/8) for various RV configurations.
- Color LCD Display: Bright and clear readings with 4-level brightness adjustment.
- Auto Calibration: Sensors are factory-paired; current tire pressure is set as reference upon installation.
- High-Powered Signal Booster: Ensures stable signal transmission up to 120ft, IP69 waterproof.
- Multiple Alarms: High/low tire pressure, high temperature, fast leakage, sensor lost, and sensor low voltage alerts.
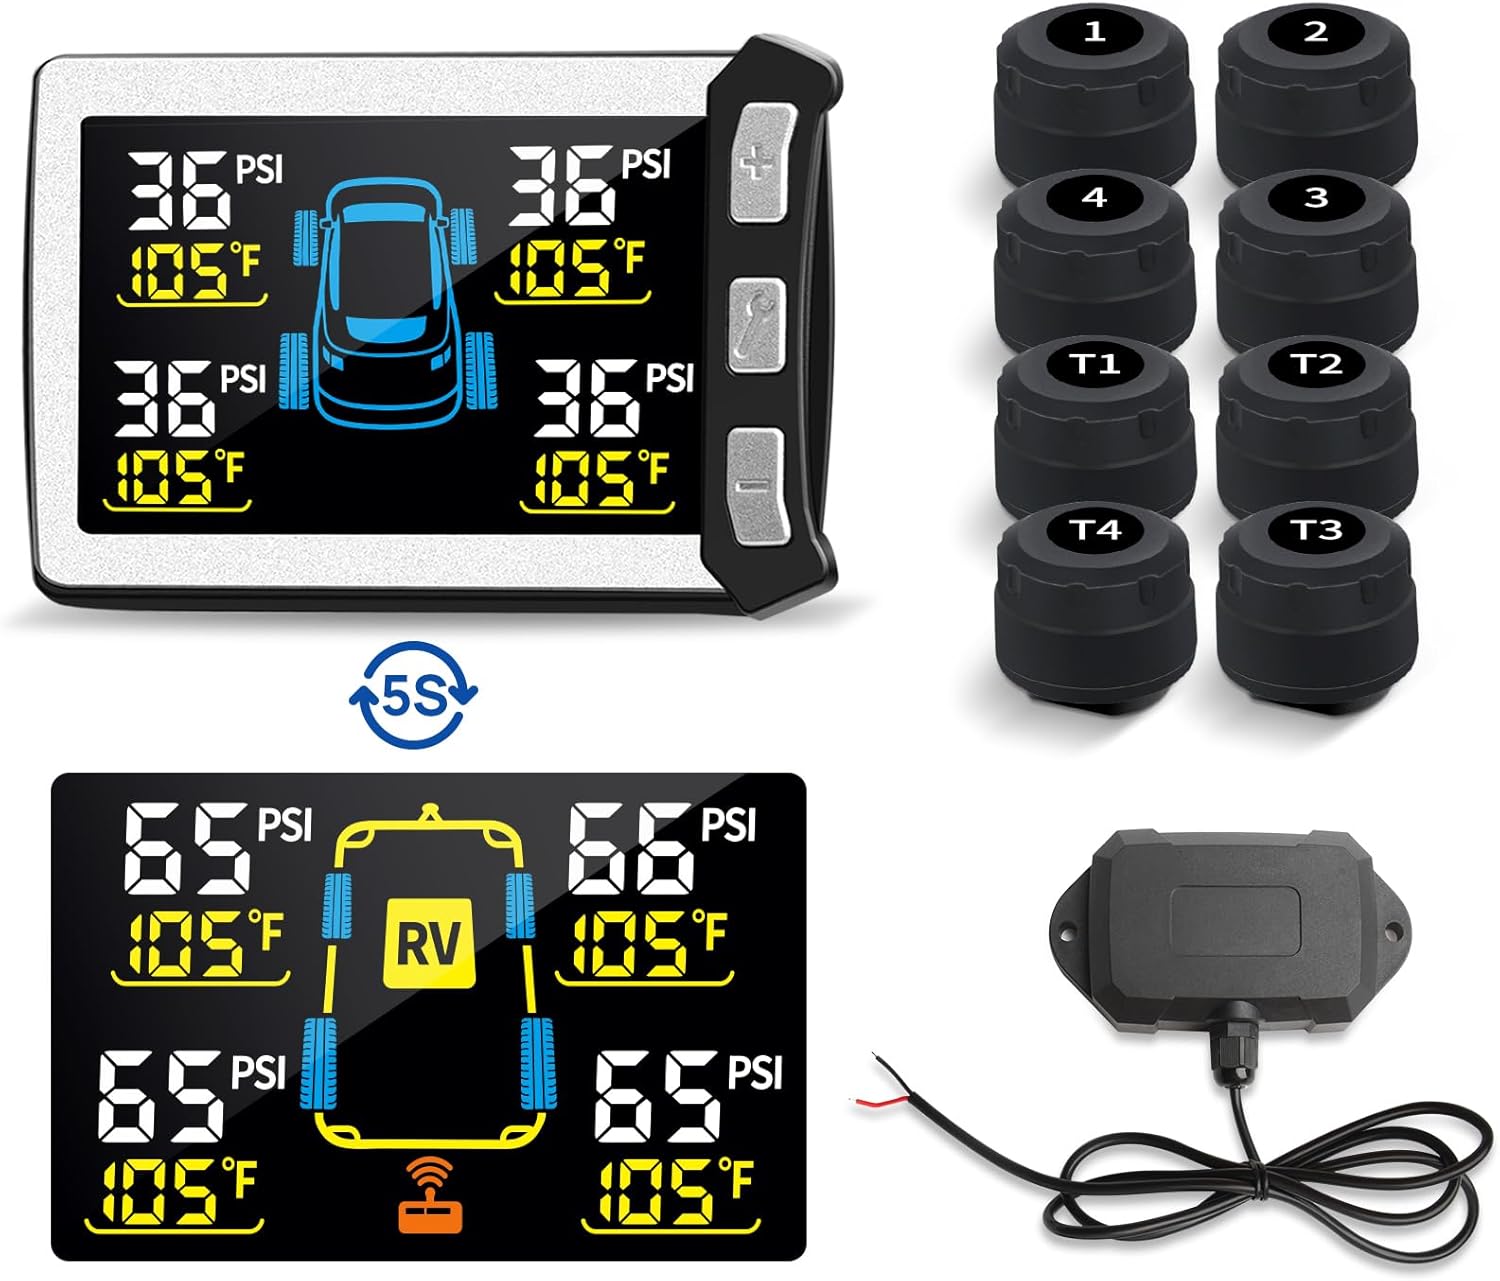
Figure 2.1: Masoll TPMS Components (Monitor, Sensors, Booster)

Figure 2.2: Masoll TPMS Display and Key Features
3. Setup and Installation
The Masoll TPMS is designed for straightforward installation. Sensors are factory-paired to the monitor, eliminating the need for manual pairing.
3.1 Monitor Installation
- Choose a suitable location on your vehicle's dashboard that does not obstruct your view and is easily accessible.
- Secure the monitor using the provided mounting accessories (e.g., adhesive pad, suction cup mount).
- Connect the monitor to a 12-24V power source using the supplied USB power cable. The monitor will power on automatically.
3.2 Sensor Installation
Before installing sensors, ensure your tires are inflated to their correct pressure. The system will use this as the reference pressure.
- Identify the correct sensor for each tire position (e.g., 1, 2, 3, 4 for the towing vehicle; T1, T2, T3, T4 for the trailer). Labels are typically on the sensors.
- Remove the original valve cap from the tire valve stem.
- Screw on the security nut (if using) onto the valve stem, then screw the sensor onto the valve stem until it is hand-tight.
- Tighten the security nut against the sensor using the provided wrench to deter theft and ensure a secure fit.
- Repeat for all 8 tires. The monitor should begin displaying readings shortly after installation.
3.3 Signal Booster Installation
The signal booster is crucial for maintaining a stable connection, especially for longer RVs or trailers (up to 120ft transmission distance).
- Mount the booster in a central location on your trailer or RV, ideally where it has a clear line of sight to both the sensors and the monitor.
- Connect the booster to a 12-24V power source. It is recommended to wire it to a circuit that receives power when the vehicle is running or towing, such as the running light circuit on a trailer.
- Ensure the booster is securely mounted and its connections are protected from weather. The booster is IP69 waterproof.
- A booster symbol will appear on the monitor display when the booster is actively working.
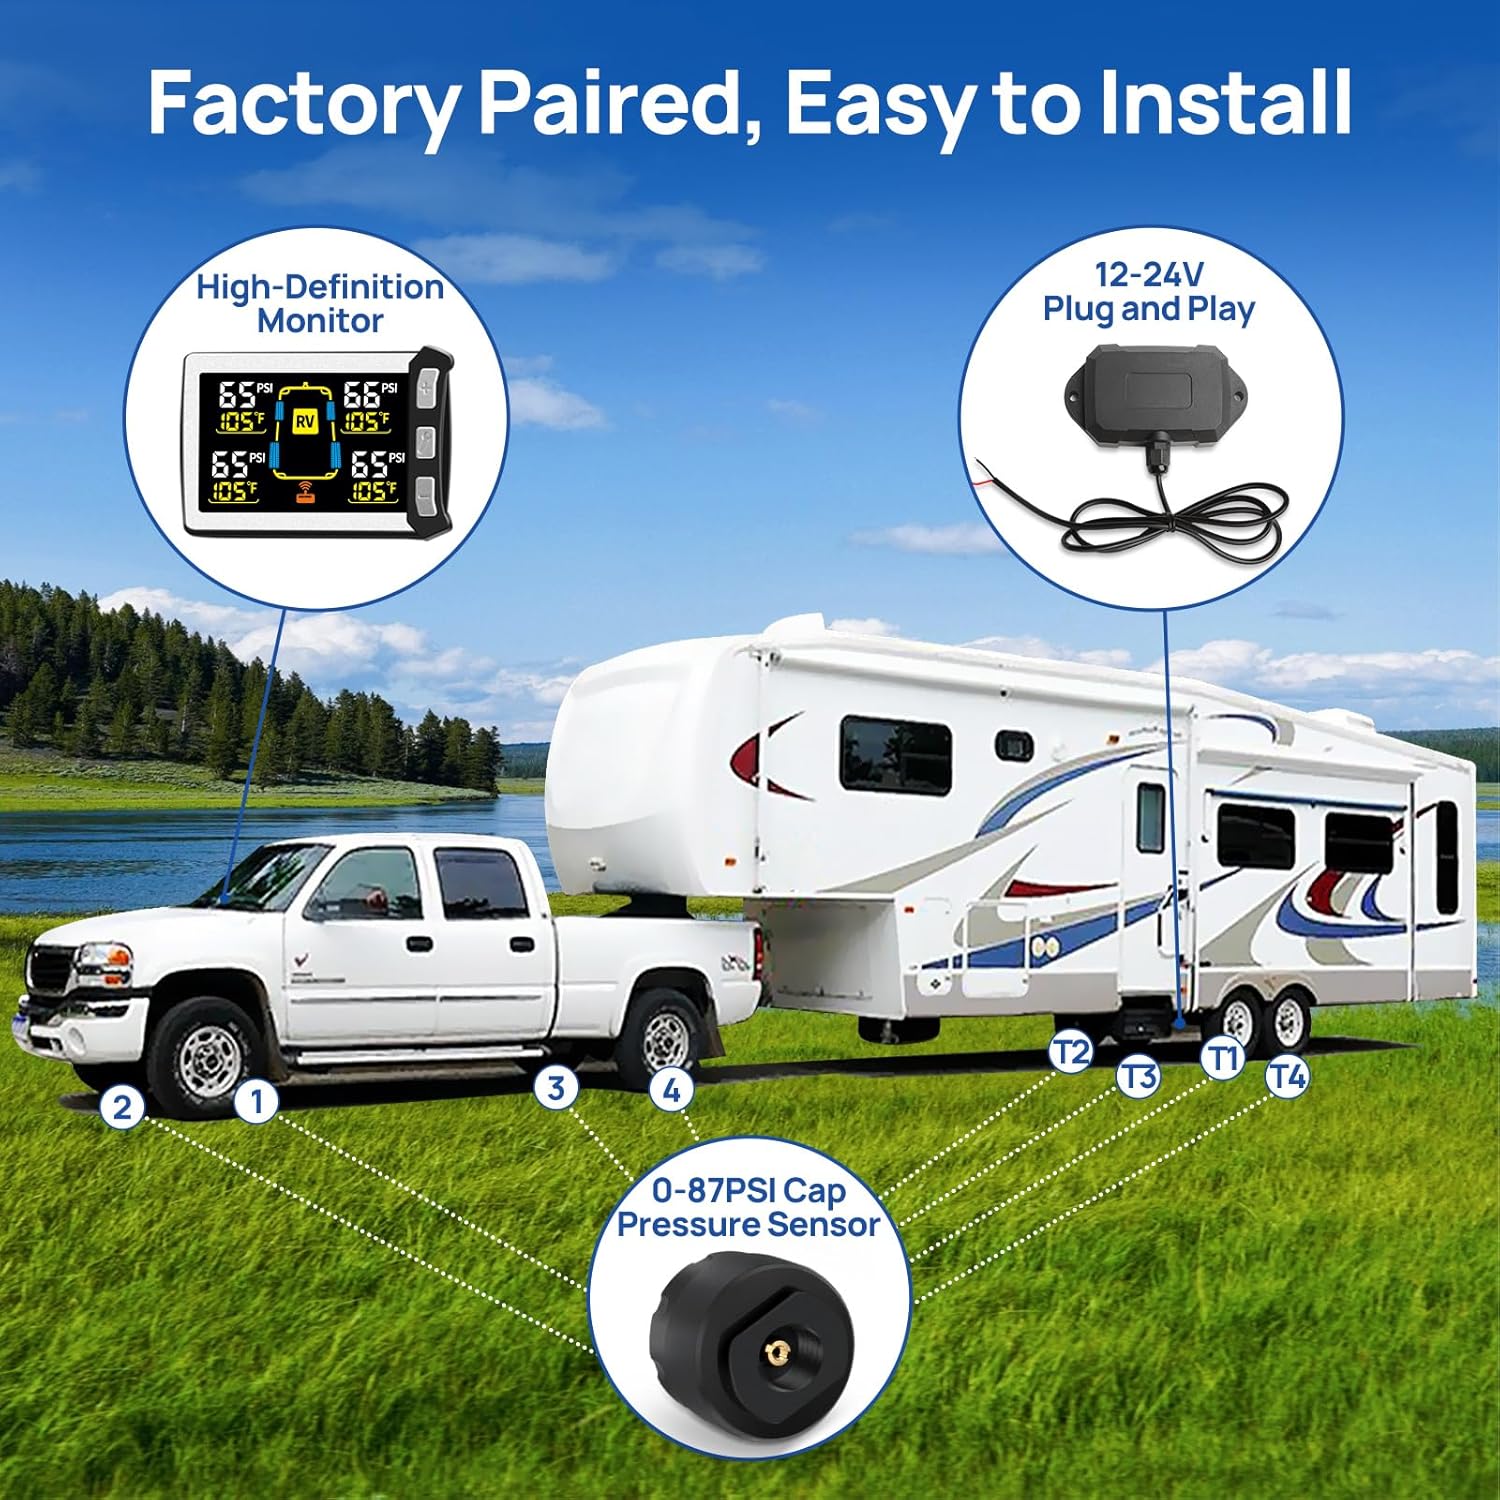
Figure 3.1: Masoll TPMS Installation Diagram

Figure 3.2: Signal Booster for Extended Transmission Distance
4. Operating Instructions
4.1 Display Functions
The color LCD display provides clear, real-time data for all monitored tires. When the truck and trailer are connected, the display automatically rotates between truck and trailer tire data every 5 seconds. If only the truck is being monitored, the display will show only truck tire data.

Figure 4.1: Real-Time Pressure Monitoring Display
4.2 Button Operations
- "+" Button: Press to manually switch between truck and trailer tire displays when both are connected.
- "-" Button: (Specific function not detailed in product info, typically for menu navigation or decreasing values if adjustable settings were present).
- "Wrench" Button:
- Short press: Adjusts display brightness (4 levels available).
- Long press (~3 seconds): Toggles the signal booster ON/OFF.
4.3 Alarm System
The system provides visual and audio alarms for various tire conditions:
- High/Low Tire Pressure Alert: Triggers when actual pressure is 25% higher or 15% lower than the initial reference pressure.
- High Temperature Alert: Warns if a tire's internal temperature exceeds a safe threshold (e.g., 158°F).
- Fast Leakage Alert: Detects rapid pressure loss.
- Sensor Lost Alert: Indicates a sensor is no longer transmitting data.
- Sensor Low Voltage Alert: Notifies when a sensor's battery is low.
When an alarm is triggered, the display will highlight the affected tire(s) and an audible alert will sound.
5. Maintenance
5.1 Sensor Care
- Regularly check sensors for physical damage or loose connections.
- If a sensor low voltage alert occurs, the sensor battery may need replacement. Consult the manufacturer for specific battery types and replacement procedures.
- Ensure the security nuts are tightened to prevent sensors from loosening during travel.
5.2 Cleaning
- Clean the display monitor with a soft, dry cloth. Avoid abrasive cleaners or solvents.
- Sensors and the booster can be wiped clean with a damp cloth. Ensure no moisture enters the booster's electrical connections.
6. Troubleshooting
| Problem | Possible Cause | Solution |
|---|---|---|
| No tire data displayed / Signal loss |
|
|
| Display is dim or hard to read |
|
|
| Inaccurate pressure readings |
|
|
| Alarm sounds frequently without apparent issue |
|
|
7. Specifications
- Brand: Masoll
- Model: XM+RP12+8MZS3
- Tire Pressure Range: 0-87 PSI
- Transmission Distance: Up to 120 ft (with booster)
- Display Type: Color LCD with 4-level brightness adjustment
- Booster Waterproof Rating: IP69
- Power Input: 12-24V
- Item Weight: 458 g
- Parcel Dimensions: 16.79 x 12.6 x 6.4 cm
8. Warranty and Support
Masoll products typically come with a manufacturer's warranty. For specific warranty details, duration, and terms, please refer to the documentation included with your purchase or contact the seller directly. If you encounter any issues or require technical assistance, please reach out to the Masoll customer support team or your point of purchase for prompt service.