1. Introduction
This user manual provides detailed instructions for the installation, operation, and maintenance of your XIBANY Electric Scooter Dual Drive Brushless Controller Kit. Please read this manual thoroughly before attempting any installation or operation to ensure proper function and safety. This kit is designed for electric scooters requiring 48V, 52V, or 60V power with 25A or 50A dual drive brushless controllers.
1.1 Safety Information
- Always disconnect power before installing or servicing the controller kit.
- Ensure all connections are secure and correctly matched to prevent damage to components or the scooter.
- Avoid exposing the controllers to water or extreme temperatures.
- If you are unsure about any installation step, consult a qualified technician.
- Verify the voltage compatibility of your scooter with the controller kit (48V, 52V, or 60V).
2. Package Contents
Upon opening your package, please verify that all the following components are included:
- 2 x Brushless Motor Controllers (A and B units)
- 1 x Instrumentation Display Unit
- 1 x Main Wiring Harness (No Hall wire included, if applicable to your setup)
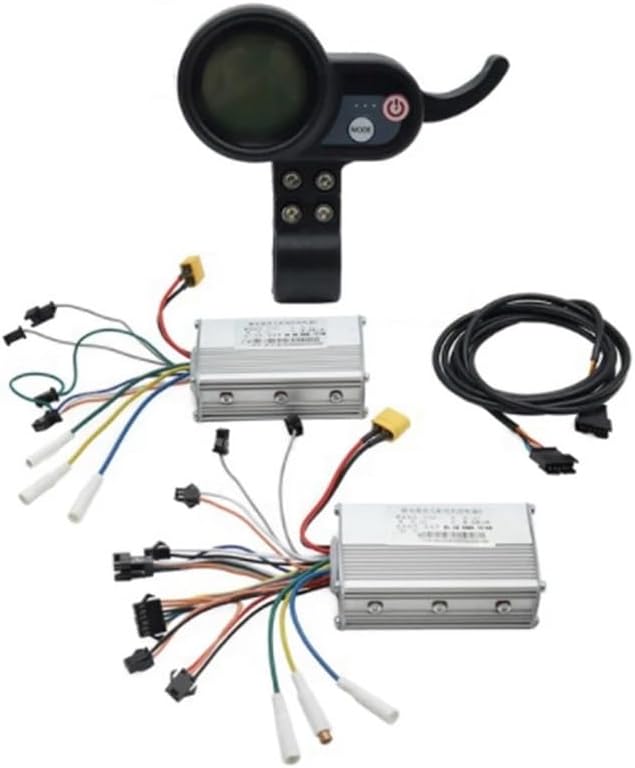
Figure 2.1: Overview of the XIBANY Dual Drive Brushless Controller Kit, including two controllers, an instrumentation display, and a wiring harness.
3. Product Overview
The XIBANY controller kit is designed to provide efficient and reliable control for dual-motor electric scooters. It features two independent brushless motor controllers and a central instrumentation display for monitoring and control.
3.1 Controller Units
The kit includes two identical brushless motor controllers, typically labeled 'A' and 'B' for front and rear drive distinction. These units manage power delivery to the scooter's motors.
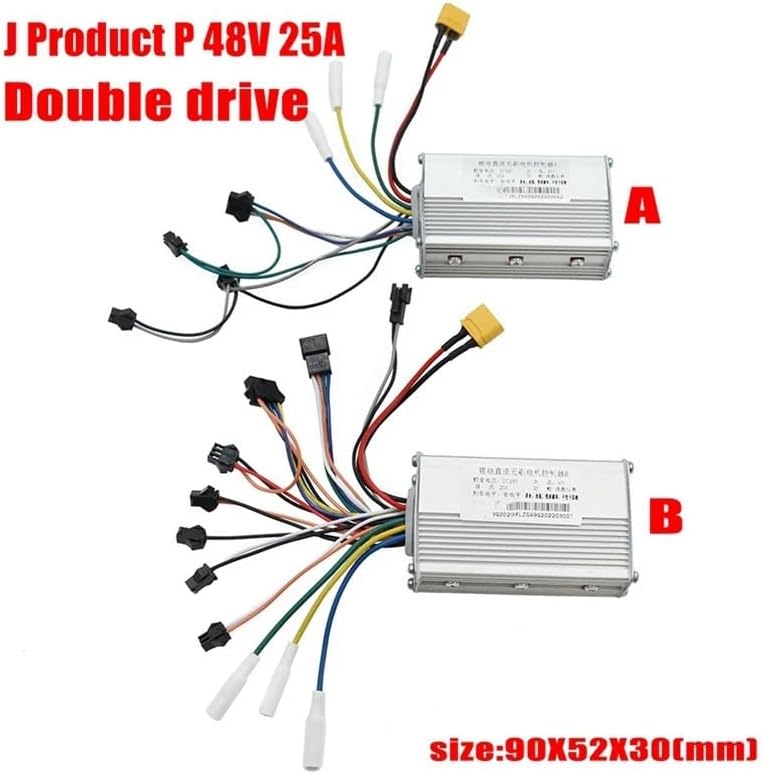
Figure 3.1: Two brushless motor controllers (A and B) with their respective wiring harnesses. Dimensions are approximately 90x52x30mm.
3.2 Instrumentation Display Unit
The display unit provides real-time information and control over the scooter's functions. It typically shows speed, battery level, and mode settings.

Figure 3.2: Front view of the instrumentation display, featuring a circular screen and control buttons.

Figure 3.3: The display unit indicating its adjustable voltage range, compatible with 36V to 60V systems.

Figure 3.4: Rear view of the instrumentation display, revealing the internal circuit board and connector for the main wiring harness.
3.3 Main Wiring Harness
The main wiring harness connects the display unit to the controllers and other scooter components. It is crucial to ensure correct connections for proper functionality.
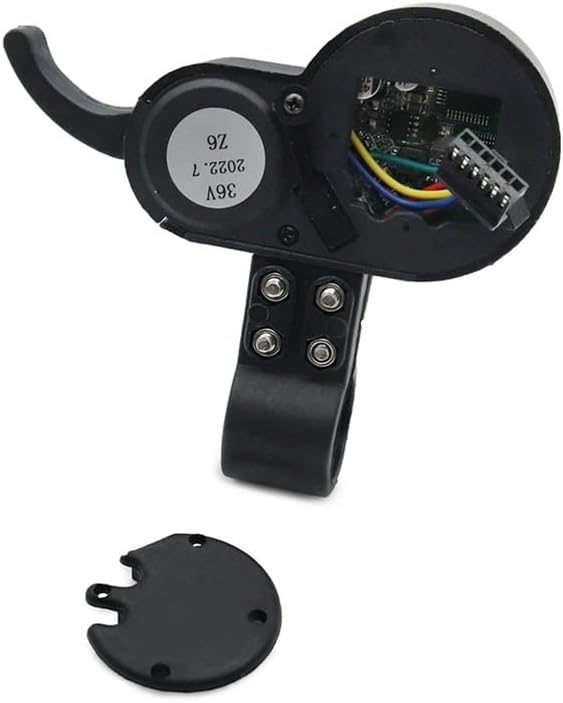
Figure 3.5: The main wiring harness, featuring various connectors for integration with the controllers and scooter's electrical system.
4. Setup and Installation
Careful installation is essential for the optimal performance and safety of your electric scooter. Follow these steps for proper setup.
- Preparation: Ensure the scooter's power is completely off and the battery is disconnected. Gather necessary tools (e.g., screwdrivers, wire cutters/strippers, electrical tape).
- Mounting Controllers: Securely mount the two brushless controllers (A and B) in a protected area on your scooter, ensuring good ventilation. Refer to Figure 3.1 for controller appearance.
- Connecting Motors: Connect the motor phase wires (usually three thicker wires) from each motor to the corresponding connectors on controllers A and B. Ensure correct phase matching.
- Connecting Battery: Connect the main power wires from the scooter's battery to the power input terminals on both controllers. Pay close attention to polarity (positive to positive, negative to negative).
- Installing Display Unit: Mount the instrumentation display unit on the handlebar in a position that is easily visible and accessible. Refer to Figure 3.2 for display unit appearance.
- Connecting Display to Controllers: Use the main wiring harness (Figure 3.5) to connect the display unit to the controllers. Ensure all multi-pin connectors are firmly seated.
- Connecting Other Components: Connect any other necessary components such as throttle, brake levers, lights, etc., to the appropriate connectors on the controllers or wiring harness.
- Final Check: Double-check all connections for security and correctness. Ensure no bare wires are exposed.
- Initial Power-Up: Reconnect the battery and power on the scooter. Observe the display for proper function and check for any error codes.
Note: Specific wiring configurations may vary depending on your scooter model. Always refer to your scooter's wiring diagram if available.
5. Operating Instructions
Once installed, operating the XIBANY controller kit is straightforward via the instrumentation display.
- Power On/Off: Press and hold the power button (usually marked with a power symbol) on the display unit to turn the scooter's electrical system on or off.
- Mode Selection: Press the 'MODE' button to cycle through different riding modes or display information (e.g., speed, odometer, trip distance).
- Throttle Control: Use the scooter's throttle to control acceleration. The controllers will regulate motor speed based on throttle input.
- Braking: Engage the scooter's brake levers. The controllers are designed to cut power to the motors when brakes are applied.
Refer to your scooter's specific operating manual for detailed riding instructions.
6. Maintenance
Regular maintenance helps ensure the longevity and reliable performance of your controller kit.
- Keep Clean: Periodically clean the controllers and display unit with a dry, soft cloth. Avoid using harsh chemicals or excessive moisture.
- Check Connections: Regularly inspect all wiring connections for tightness and signs of wear or corrosion. Re-secure any loose connections.
- Inspect for Damage: Check the controller casings and wiring for any physical damage, cracks, or frayed insulation. Replace damaged components immediately.
- Avoid Overheating: Ensure controllers are not covered or obstructed, allowing for proper heat dissipation.
7. Troubleshooting
If you encounter issues with your XIBANY controller kit, refer to the following table for common problems and solutions.
| Issue | Possible Cause | Solution |
|---|---|---|
| Scooter does not power on. | Loose battery connection, discharged battery, faulty power button. | Check battery connections, charge battery, inspect display unit wiring. |
| Motors not responding to throttle. | Loose throttle connection, motor phase wire issue, controller fault. | Verify throttle and motor phase wire connections. Check for error codes on display. |
| Inconsistent power or jerky operation. | Loose wiring, poor motor phase connection, sensor issue (if applicable). | Inspect all wiring, especially motor phase connections. Ensure secure fit. |
| Display unit not showing information. | Loose display connection, power issue to display. | Check the main wiring harness connection to the display unit. |
If the problem persists after attempting these solutions, please contact customer support.
8. Specifications
Key technical specifications for the XIBANY XIBANY001 Dual Drive Brushless Controller Kit:
| Feature | Detail |
|---|---|
| Brand | XIBANY |
| Model Name | XIBANY001 |
| Controller Type | Dual Drive Brushless |
| Voltage Compatibility | 48V, 52V, 60V (Adjustable via display) |
| Current Rating | 25A / 50A (per controller, depending on variant) |
| Material | ABS + Metal |
| Controller Dimensions (approx.) | 90 x 52 x 30 mm |
| Item Weight | Approx. 50 Grams (per controller) / 1.76 ounces (total package) |
| Package Contents | 2 Controllers, 1 Instrumentation, 1 Main Wiring Harness |
9. Warranty and Support
XIBANY products are manufactured to high-quality standards. For warranty information or technical support, please refer to the retailer where you purchased this product or visit the official XIBANY website. Please have your product model number (XIBANY001) and purchase details ready when contacting support.
For further assistance, please contact:
- Customer Service: [Insert Customer Service Contact Information Here, e.g., email, phone number, website]