
1. Product Overview
The Maupvit Vanity Desk with Mirror and Lights is designed to provide a functional and stylish space for makeup application and grooming. It features integrated lighting, a power outlet for electronic devices, and ample storage solutions.

Image 1.1: Fully assembled Maupvit Vanity Desk with Mirror and Lights in Light Oak Grey, showing the overall design and included stool.
- Integrated Lighting: Mirror surrounded by 10 Hollywood-style light bulbs with 3 color modes (warm, natural, cool) and adjustable brightness.
- Built-in Power Outlet: Includes 2 standard AC plug sockets and 2 USB ports for convenient charging and powering beauty tools.
- Ample Storage: Features a wide desktop, multiple open storage shelves, and two spacious drawers to organize cosmetics, jewelry, and other personal items.
- Durable Construction: Crafted from engineered wood for a stable and aesthetically pleasing structure.
- Compact Design: Suitable for various bedroom and dressing room sizes.

Image 1.2: Overview of the vanity's storage capabilities, highlighting open shelves, desktop space, and drawers.
2. Safety Information
Please read and understand all safety instructions before assembly and use. Failure to follow these instructions may result in injury or damage to the product.
- Keep all small parts and packaging materials away from children and pets to prevent choking hazards.
- Ensure all screws and fasteners are securely tightened during assembly. Periodically check and re-tighten as needed.
- Do not overload drawers or shelves to prevent tipping or structural damage.
- Place the vanity on a flat, stable surface.
- Avoid exposing the product to excessive moisture or direct sunlight.
- When using the power outlet, ensure devices are compatible with the specified voltage and current (125V/12A for AC, 5V/2A for USB).
- Unplug the vanity from the power source before cleaning or performing any maintenance.
3. Package Contents
Verify that all components are present before beginning assembly. If any parts are missing or damaged, please contact customer support.
- Vanity Desk Components (various panels, drawers, hardware)
- Mirror with Integrated Lights
- Power Outlet Strip
- Stool Components
- Assembly Hardware (screws, dowels, cam locks, etc.)
- Assembly Instructions Manual
- Light Bulbs (10 pieces)

Image 3.1: Dimensional diagram of the vanity desk and stool, indicating various measurements.
4. Setup and Assembly
Assembly is required for this product. Follow the detailed step-by-step instructions provided in the accompanying manual. It is recommended to have two people for assembly to ensure stability and ease of handling larger components.
- Unpack Components: Carefully remove all parts from the packaging and lay them out on a clean, soft surface to prevent scratches.
- Identify Parts: Refer to the parts list in your separate assembly manual to identify each component and hardware piece.
- Assemble Base Structure: Begin by assembling the main frame of the vanity desk according to the diagrams.
- Install Drawers: Assemble the two drawers and install them into the desk frame using the built-in slide rails.
- Attach Mirror Unit: Secure the mirror unit to the top of the desk. Ensure it is firmly attached.
- Install Lights: Screw the 10 light bulbs into the sockets around the mirror.
- Integrate Power Strip: Install the power outlet strip into its designated slot on the side of the desk.
- Assemble Stool: Put together the stool following its specific assembly steps.
- Final Check: Once assembled, ensure all connections are tight and the vanity is stable.
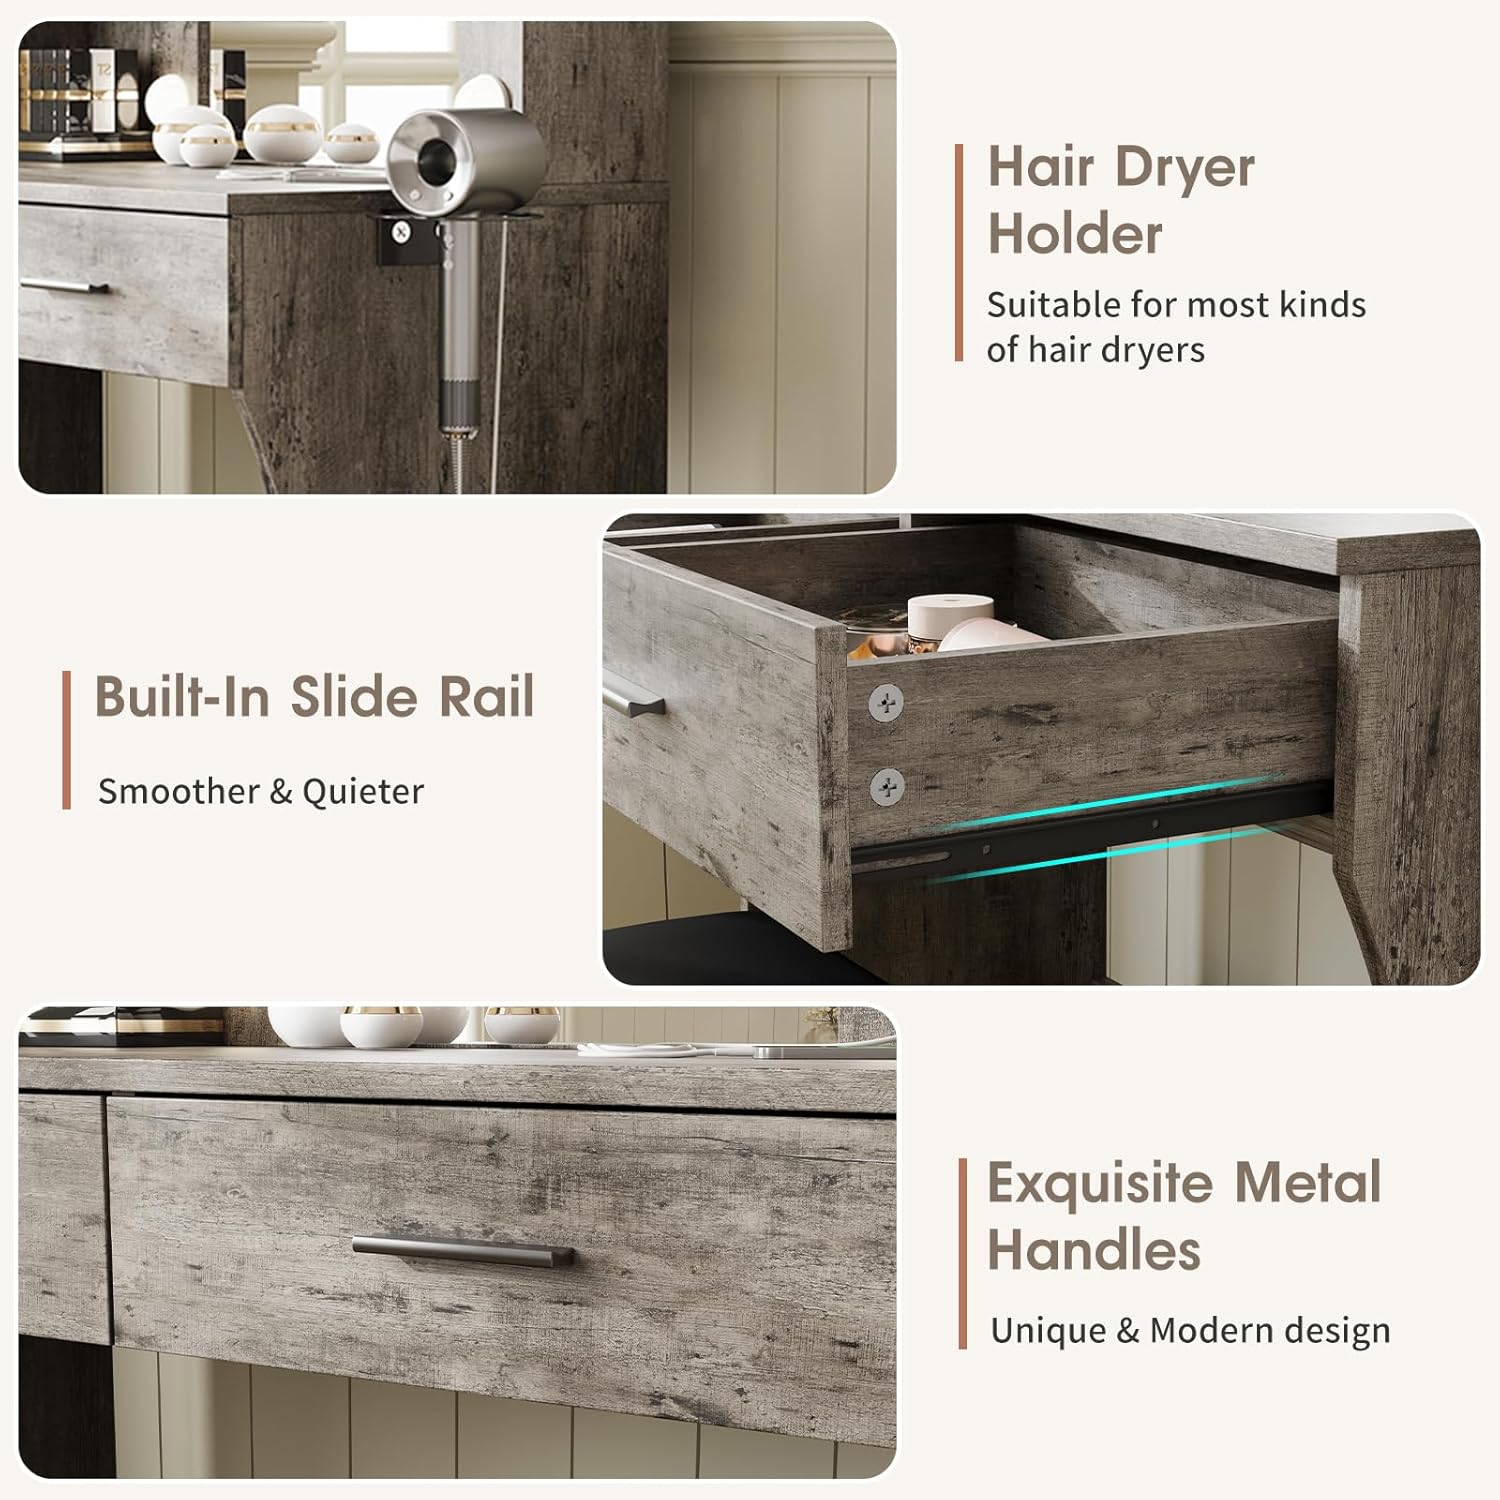
Image 4.1: Detailed view of the hair dryer holder, smooth drawer slide mechanism, and exquisite metal handles.
5. Operating Instructions
5.1. Mirror Lights Operation

Image 5.1: Visual representation of the three available lighting modes and brightness adjustment.
The vanity mirror features integrated LED lights with adjustable settings:
- Power On/Off: Press the power button on the light control switch to turn the lights on or off.
- Change Lighting Mode: Short press the power button to cycle through the 3 color modes: Warm Light (3000K), Natural Light (4000K), and Cold Light (6000K).
- Adjust Brightness: Long press the power button to continuously adjust the brightness level from 0% to 100%. Release the button when the desired brightness is reached.
5.2. Power Outlet Usage

Image 5.2: The integrated power strip, providing convenient access to AC outlets and USB charging ports.
The built-in power strip provides convenient access to power for your electronic devices:
- AC Outlets: Two standard 125V/12A AC outlets are available for plugging in hair dryers, curling irons, or other small appliances.
- USB Ports: Two 5V/2A USB ports are available for charging smartphones, tablets, and other USB-powered devices.
- Power Cord: The power strip is connected via a 4.9-foot power cord. Ensure it is plugged into a suitable wall outlet.
6. Maintenance
Regular maintenance will help preserve the appearance and functionality of your vanity desk.
- Cleaning Surfaces: Wipe all surfaces with a soft, damp cloth. Avoid abrasive cleaners or harsh chemicals that may damage the finish.
- Mirror Care: Clean the mirror with a glass cleaner and a lint-free cloth. Do not spray cleaner directly onto the mirror; apply it to the cloth first.
- Light Bulbs: If a light bulb needs replacement, ensure the vanity is unplugged. Replace with compatible LED bulbs.
- Hardware Check: Periodically check all screws and fasteners to ensure they remain tight. Re-tighten if necessary.
- Spills: Immediately wipe up any spills to prevent moisture damage to the engineered wood.
7. Troubleshooting
| Problem | Possible Cause | Solution |
|---|---|---|
| Lights do not turn on. |
|
|
| Lights are dim or flickering. |
|
|
| Power outlets not working. |
|
|
| Drawers are stiff or difficult to open. |
|
|
8. Specifications
| Feature | Detail |
|---|---|
| Model Number | D3M545GR05E |
| Color | Light Oak Grey |
| Material | Engineered Wood (Particleboard) |
| Product Dimensions (D x W x H) | 33.5" x 15.7" x 53.5" |
| Item Weight | 61.6 Pounds |
| Number of Drawers | 2 |
| Lighting Modes | 3 (Warm, Natural, Cold) |
| Brightness Adjustment | Stepless (0-100%) |
| AC Outlet Output | 125V / 12A (2 outlets) |
| USB Port Output | 5V / 2A (2 ports) |
| Power Cord Length | 4.9 feet |
9. Warranty and Support
This product comes with a commitment to quality. For any issues, missing parts, or defective products, please contact the seller directly for assistance.
While specific warranty details are not provided in this manual, the manufacturer is dedicated to customer satisfaction. For support, please refer to your purchase platform or contact the seller through the "contact seller" option for prompt solutions.
Please retain your proof of purchase for any warranty claims or support requests.