Introduction
This manual provides detailed instructions for the installation, operation, and maintenance of the Tolxh #2607202520 Drill Switch Assembly. This component is a compatible replacement part designed for specific Bosch drill models. It is crucial to read and understand these instructions before attempting any installation or use.
Safety Information
Always prioritize safety when working with power tools and electrical components. Failure to follow these safety guidelines may result in injury or damage to the tool.
- Disconnect Power: Always ensure the power tool is disconnected from its power source (battery removed or unplugged from mains) before performing any maintenance, installation, or repair.
- Professional Installation: If you are not confident in your ability to safely install this part, seek assistance from a qualified technician.
- Inspect Components: Before installation, inspect the new switch assembly for any visible damage. Do not install damaged parts.
- Proper Tools: Use appropriate tools for disassembly and reassembly to prevent damage to the drill or the new switch.
- Wiring: Ensure all wire connections are secure and correctly matched to prevent electrical shorts or malfunction.
Compatibility
This replacement switch assembly is specifically designed for the following Bosch Drill models:
- Bosch GSR120
- Bosch GSB120-LI
Please verify your drill model number and the original part number (2607202520) before proceeding with installation to ensure proper fit and function.
Installation Instructions
Follow these steps carefully to replace the drill switch assembly. It is highly recommended to consult a professional if you are unsure about any step.
- Prepare the Drill: Ensure the drill's battery is removed or the power cord is unplugged. Place the drill on a clean, stable surface.
- Open the Casing: Carefully unscrew and open the drill casing. Pay attention to the location and type of screws. Keep them organized.
- Document Wiring: Before disconnecting anything, take clear photographs or draw a detailed diagram of the existing switch's wiring connections. Note which wire connects to which terminal.
- Remove Old Switch: Disconnect all wires from the old switch assembly. Carefully remove the old switch from its housing within the drill casing.
- Install New Switch: Position the new Tolxh #2607202520 switch assembly into the designated slot in the drill casing.
- Connect Wiring: Using your documented wiring diagram or photos, connect the wires to the corresponding terminals on the new switch. Ensure each connection is firm and secure.
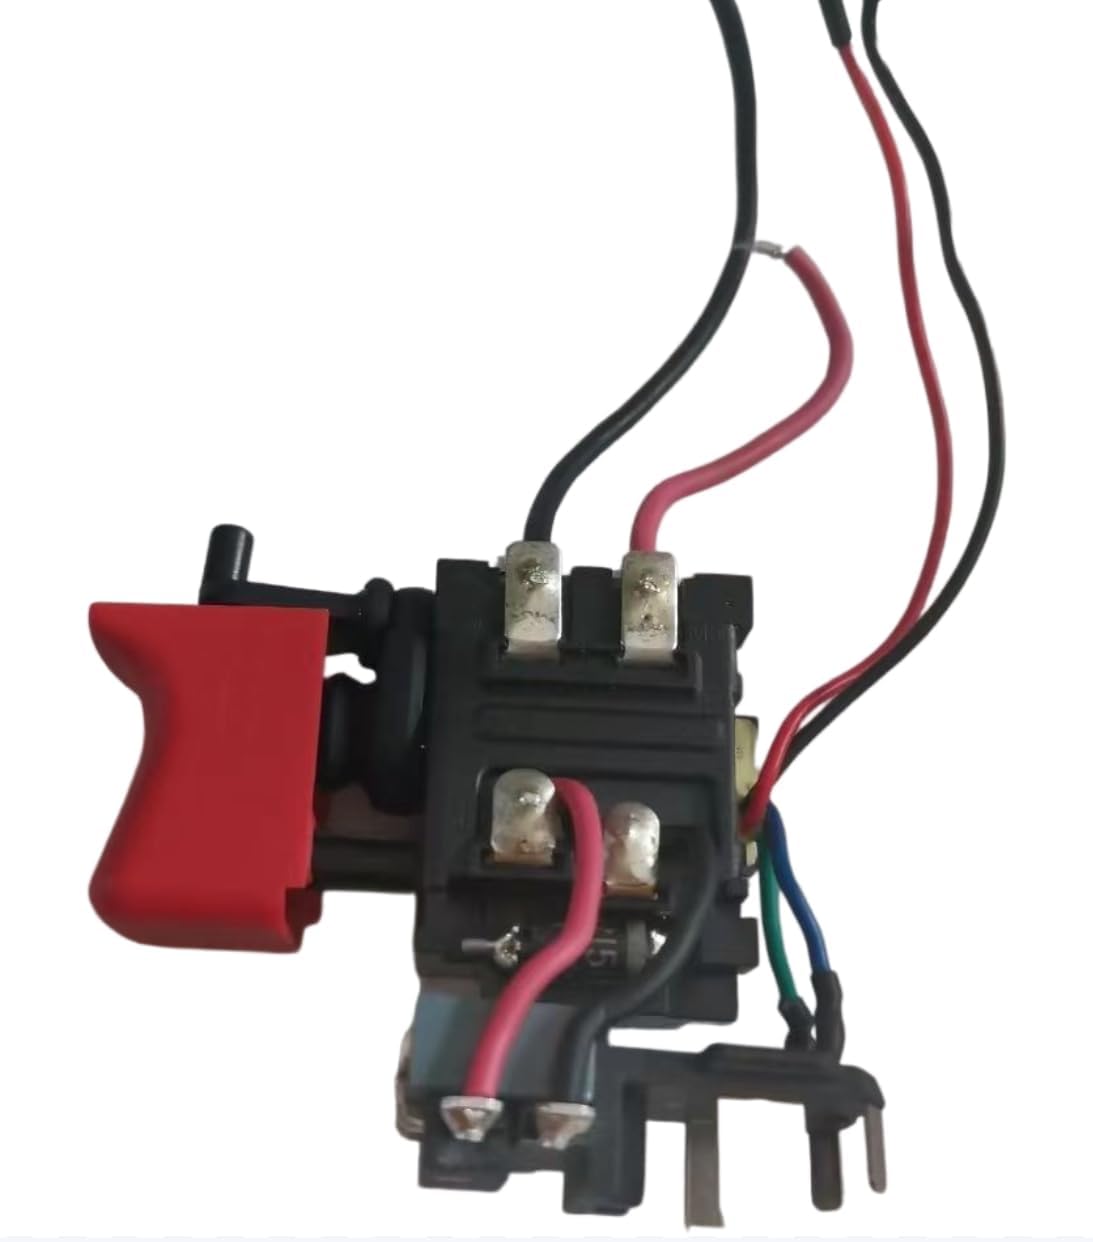
Figure 1: Overview of the Tolxh #2607202520 Drill Switch Assembly, showing the main body, trigger, and connected wires. This image illustrates the general appearance of the replacement part.
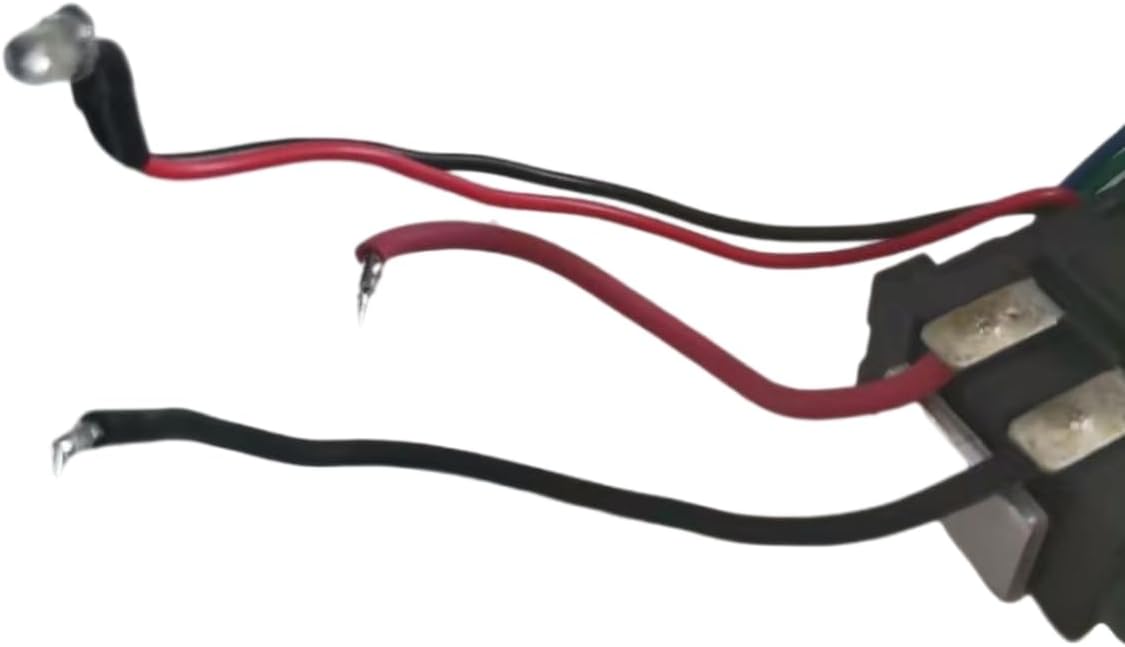
Figure 2: A detailed view of the wiring terminals on the Tolxh Drill Switch Assembly. This image highlights the connection points for the various wires, which is crucial for correct installation.
- Close Casing: Carefully reassemble the drill casing, ensuring no wires are pinched and all components are properly seated. Tighten all screws securely.
- Test Functionality: Reconnect the battery or plug in the power cord. Perform a brief functional test to ensure the switch operates correctly (e.g., trigger response, forward/reverse function if applicable).
Operation
The drill switch assembly controls the power supply to the drill motor, initiating and stopping the drill's operation. It typically includes a variable speed trigger, allowing for precise control over drilling speed based on pressure applied. Depending on the drill model, it may also incorporate a direction selector (forward/reverse) for driving and removing screws.
Maintenance
The switch assembly itself requires minimal maintenance. To ensure its longevity and proper function:
- Keep Clean: Regularly clean the exterior of the drill, especially around the trigger mechanism, to prevent dust and debris from entering the switch.
- Avoid Moisture: Do not expose the drill or switch to excessive moisture, which can cause electrical damage or corrosion.
- Storage: Store the drill in a dry, clean environment away from extreme temperatures.
Troubleshooting
If you encounter issues after installing the new switch, consider the following:
- Drill Does Not Start:
- Ensure the battery is fully charged and properly inserted, or the power cord is securely plugged in.
- Recheck all wire connections to the switch for looseness or incorrect placement.
- If other power components are functional, the switch itself might be faulty or incorrectly installed.
- Intermittent Operation:
- Loose wire connections are a common cause of intermittent power. Re-secure all connections.
- A partially damaged switch or internal wiring issue could also be a factor.
- Switch Feels Stiff or Unresponsive:
- Dust or debris inside the trigger mechanism can impede its function. A gentle cleaning around the trigger area might help.
- If the issue persists, the internal mechanism of the switch may be damaged, requiring replacement.
Specifications
| Brand | Tolxh |
| Part Number | #2607202520 |
| Compatible Models | Bosch GSR120, GSB120-LI |
| Operation Mode | Manual |
| Contact Type | Normally Open |
| Connector Type | Micro USB (referring to internal connection style, not external port) |
| Switch Type | Push Button |
| Terminal | Screw |
| Circuit Type | 1-way |
| Actuator Type | Push Button |
| Contact Material | Copper |
| Number of Positions | 1 |
Warranty and Support
This product is a non-original compatible spare part. In the event of errors during installation or replacement that result in damage or inability to use the product, a one-month refund is offered from the date of purchase. Your satisfaction is important to us. For any questions or support needs, please contact the seller directly through your purchase platform.