Introduction
This manual provides detailed instructions for the setup, operation, and maintenance of your CYMHCHL 080BT 17.2" Large Digital Wall Clock. Please read this manual thoroughly before using the product to ensure proper function and longevity.
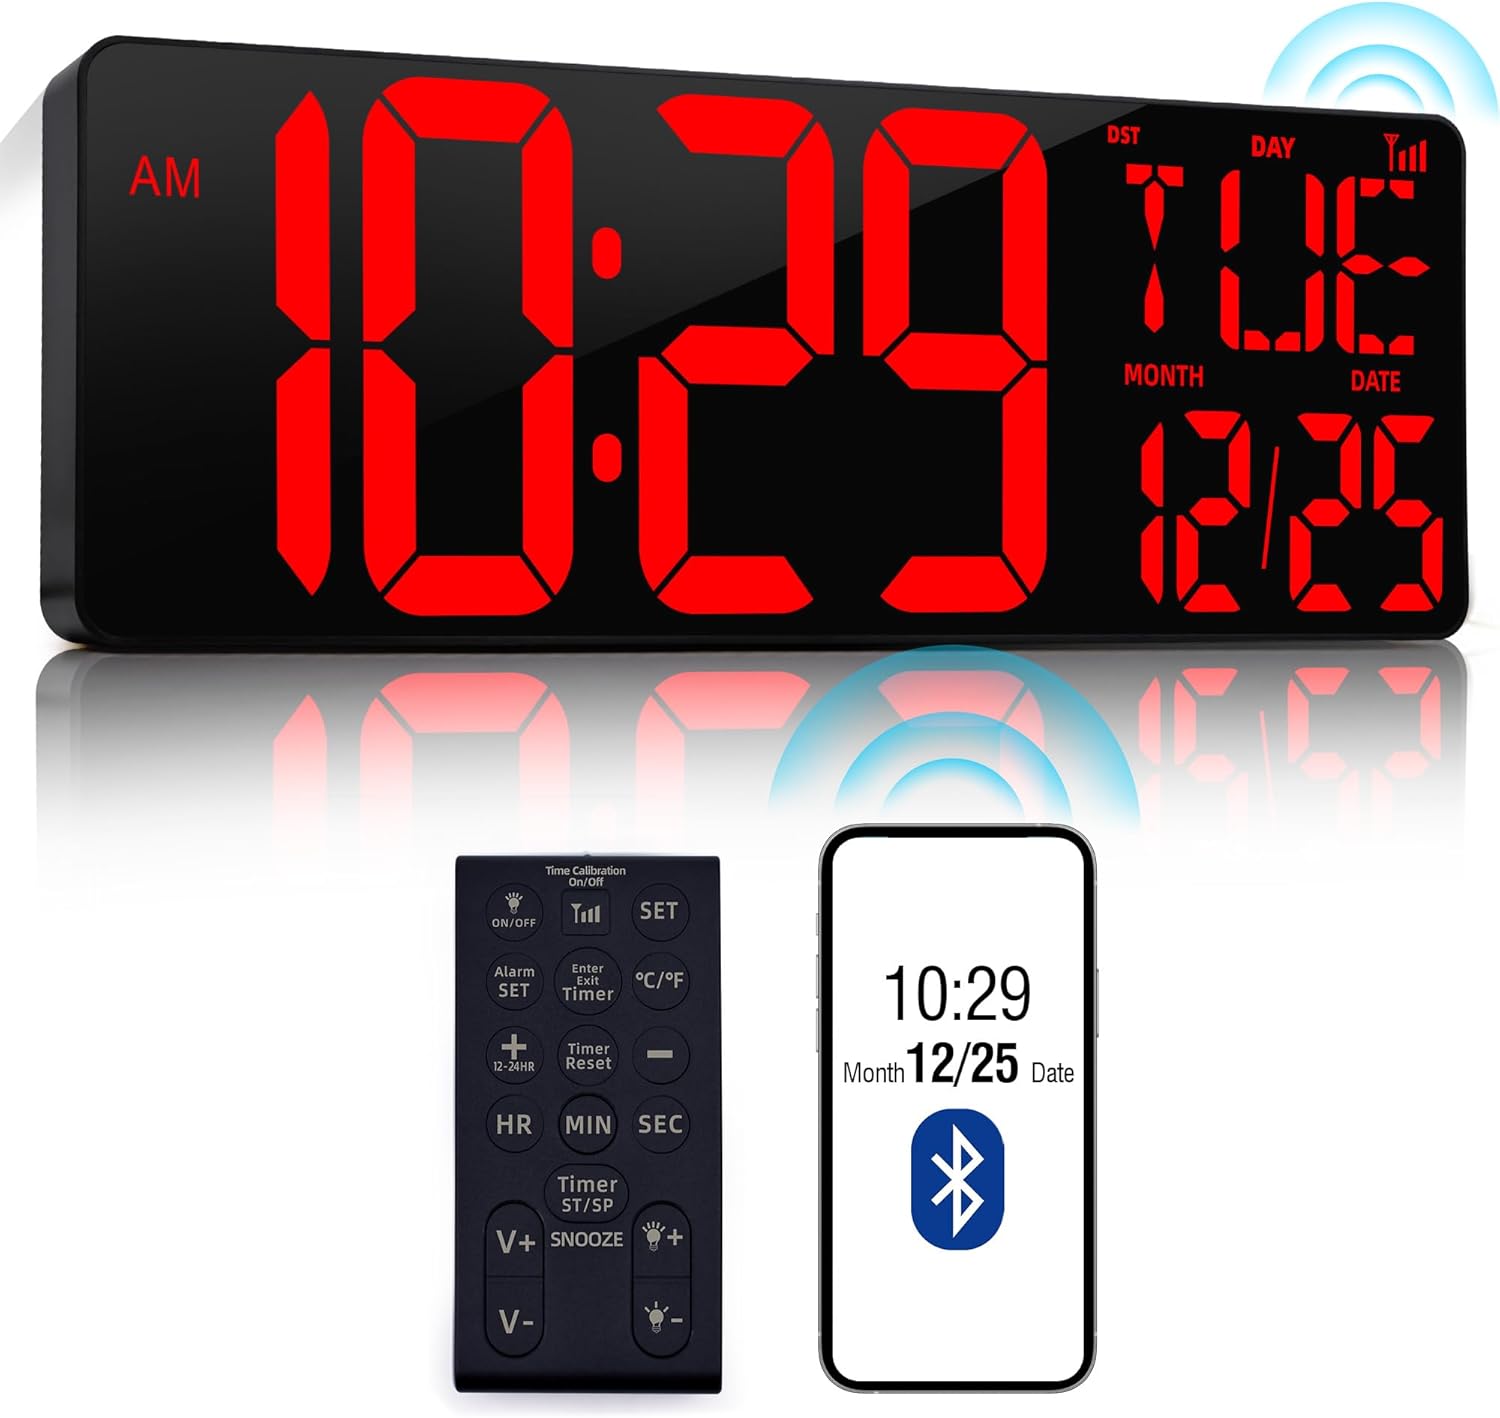
Image: The CYMHCHL 080BT digital wall clock displaying time, date, and day, accompanied by its remote control and a smartphone illustrating Bluetooth time synchronization.
Safety Information
- Ensure the power adapter is connected to a suitable power outlet.
- Do not expose the clock to extreme temperatures, direct sunlight, or high humidity.
- Keep the device away from water or other liquids.
- Do not attempt to disassemble or repair the clock yourself. Contact customer support for assistance.
- Use only the provided power adapter.
Package Contents
Please check the package for the following items:
- CYMHCHL 080BT Digital Wall Clock
- Remote Control
- Power Adapter (with 9.5ft power cord)
- Wall Mounting Kit (includes hang board, double-sided tape, bubble spirit level)
- Desktop Stand
- 4 x AAA Batteries (for memory backup)
- User Manual (this document)
Product Overview
Familiarize yourself with the clock's components and display features.

Image: An illustration highlighting the clock's features including Bluetooth connection, memory time, auto-dimming, remote control, DST, alarm, 12/24hr display, date/temperature cycle, brightness levels, count up/down timer, and temperature mode.

Image: A detailed diagram of the remote control, labeling each button and its corresponding function, such as ON/OFF, SET, Alarm SET, Timer, HR, MIN, SEC, V+, V-, ST/SP, and SNOOZE.
Setup
1. Power Connection
Connect the provided power adapter to the DC input port on the back of the clock, then plug the adapter into a standard wall outlet. The clock will power on automatically.
2. Memory Battery Installation
The clock includes 4 AAA batteries for memory backup. These batteries ensure that system settings and time continue to run during a power outage, eliminating the need for recalibration when power is restored.
- Locate the battery compartment on the back of the clock.
- Insert the 4 AAA batteries, observing the correct polarity (+/-).
- Close the battery compartment cover securely.

Image: The rear view of the digital clock, highlighting the memory battery compartment, brightness/light sensor, and room temperature detection sensor.
3. Mounting Options
The clock can be wall-mounted or placed on a desktop using the included stand.
Wall Mounting:
The wall mounting kit includes a hang board, double-sided tape, and a bubble spirit level for easy installation without drilling.
- Choose a wall location near an electrical outlet.
- Apply the double-sided tape to the back of the hang board.
- Use the bubble spirit level to ensure the hang board is level, then firmly attach it to the wall.
- Carefully hang the clock onto the installed hang board.

Image: A visual guide demonstrating the process of wall-mounting the clock using the provided hang board, double-sided tape, and bubble spirit level.
Desktop Placement:
Attach the included desktop stand to the back of the clock for stable placement on any flat surface.

Image: The digital clock displayed in two configurations: wall-mounted with its power cord, and standing on a desk using its integrated stand.
4. Bluetooth Automatic Time Synchronization
The clock features Bluetooth 5.3 technology for automatic time synchronization with your smartphone. This process takes approximately 1.5 seconds and calibrates the time up to 4 times per day.
- Ensure your phone's Bluetooth function is turned on.
- Plug in the clock's power supply. The Bluetooth activation signal will begin flashing.
- On your phone, go to Bluetooth settings and find "LED CLOCK" in the device list.
- Tap "LED CLOCK" and confirm pairing to synchronize the phone's time with the clock.
- To manually activate or deactivate Bluetooth, long-press the Bluetooth button on the remote control for 3 seconds.

Image: A four-step visual guide demonstrating how to synchronize the digital clock's time with a smartphone using Bluetooth, from enabling Bluetooth to pairing the device.
Operating Instructions
The clock can be operated using the buttons on the unit or the included remote control.
1. Basic Time Display
- The clock displays time (AM/PM indicator), day of the week, month, and date.
- 12/24 Hour Format: Press the "12/24H" button on the remote to toggle between 12-hour and 24-hour time formats.

Image: The digital clock showing examples of 12-hour format, 24-hour format, and how Daylight Saving Time (DST) is indicated.
2. Date and Temperature Display
- The clock cycles between displaying the date and temperature every 5 seconds.
- Temperature Unit: Press the "℃/℉" button on the remote to switch between Celsius and Fahrenheit.
3. Auto-Dimming and Brightness Adjustment
- The clock features an auto-dimming function that adjusts display brightness based on ambient light conditions.
- Manual Brightness: Use the "V+" and "V-" buttons on the remote control to manually adjust the brightness level (4 levels available, plus off).

Image: The digital clock demonstrating its adjustable brightness feature, showing five distinct levels from Level 4 (brightest) to Off.
4. Daylight Saving Time (DST)
The clock supports automatic Daylight Saving Time adjustments. Refer to the remote control diagram for the specific DST button.
5. Alarm Function
The clock includes an alarm function with three working day modes.
- Press the "ALARM SET" button on the remote control.
- Use the "HR" and "MIN" buttons to set the desired alarm time.
- Press "ALARM SET" again to confirm.
- Select one of the three working day modes:
- 1E: Everyday
- 2E: Monday-Friday
- 3E: Saturday-Sunday
- To turn off the alarm, press the "ALARM SET" button until the alarm indicator disappears.
- To snooze, press the "SNOOZE" button when the alarm sounds.

Image: The digital clock displaying its various modes: a countdown timer, an alarm set for 6:00 AM, and the standard time display.
6. Timer Function (Count Up/Down)
The clock features a count up/down timer with a maximum period of 29 hours, 59 minutes, and 59 seconds.
- Press the "TIMER" button on the remote control to enter timer mode.
- Use the "HR", "MIN", and "SEC" buttons to set the desired countdown time.
- Press "ST/SP" (Start/Stop) to begin the countdown.
- To pause/resume, press "ST/SP" again.
- To reset the timer, press the "Timer Reset" button.
- To exit timer mode, press the "TIMER" button again.
Maintenance
- Clean the clock display and casing with a soft, dry cloth.
- Do not use abrasive cleaners or solvents, as these may damage the surface.
- Ensure the clock is unplugged before cleaning.
Troubleshooting
| Problem | Possible Cause | Solution |
|---|---|---|
| Clock display is blank. | No power. | Check if the power adapter is securely plugged into the clock and the wall outlet. Ensure the outlet is functional. |
| Time is incorrect. | Bluetooth sync failed or not activated. | Ensure Bluetooth is enabled on your phone and the clock. Re-attempt Bluetooth pairing as described in the Setup section. |
| Remote control not working. | Remote batteries are low or depleted; Obstruction between remote and clock. | Replace the remote control batteries. Ensure there is a clear line of sight between the remote and the clock. |
| Display is too dim or too bright. | Auto-dimming sensor blocked; Manual brightness setting. | Ensure the light sensor on the clock is not obstructed. Adjust brightness manually using the "V+" and "V-" buttons on the remote. |
Specifications
| Feature | Detail |
|---|---|
| Model Number | 080BT |
| Display Type | Digital LED |
| Product Dimensions | 16.5"W x 5.7"H |
| Power Source | Corded Electric |
| Memory Battery | 4 x AAA batteries (included) |
| Bluetooth Version | 5.3 |
| Remote Control Range | Up to 32 ft |
| Special Features | Bluetooth Auto Time Sync, Ultra High Definition LED Display, 12/24H, ℃/℉, Auto-DST, Auto-Dimming, 3 Alarm Modes, Count Up/Down Timer |
| Material | Acrylic, Plastic |
| Item Weight | 2.38 pounds |
Warranty Information
This CYMHCHL product comes with a limited warranty. For specific details regarding warranty coverage and duration, please refer to the warranty card included in your product packaging or contact CYMHCHL customer support.
Customer Support
If you encounter any issues or have questions regarding your CYMHCHL 080BT Digital Wall Clock, please contact our customer support team for assistance.
- Online Support: Visit the official CYMHCHL website for FAQs and support resources.
- Email Support: Refer to your product packaging or the official website for contact email.
- Amazon Support: For purchases made on Amazon, you can contact the seller directly through your order history.