NEXPOW X7
NEXPOW X7 Car Jump Starter + 18W USB-C Power Adapter Charger User Manual
Model: X7
1. Product Overview and Components
The NEXPOW X7 Car Jump Starter is a powerful and versatile device designed to start depleted vehicle batteries and serve as a portable power bank. It comes with an 18W USB-C Power Adapter Charger for convenient recharging.

Figure 1.1: What's in the Box
This image displays the NEXPOW X7 Jump Starter unit, USB-C to USB-C cable, battery clamps with starter cable, cigarette lighter converter, user manual, and a zipper carry case. These are the standard components included with your purchase.
Key Components:
- X7 Jump Starter Unit: The main device with a 3.2-inch LED display, power button, flashlight, and various output ports.
- Battery Clamps with Starter Cable: Red (positive) and Black (negative) clamps for connecting to a vehicle battery.
- USB-C to USB-C Cable: For charging the jump starter and for power delivery to compatible devices.
- 18W USB-C Power Adapter Charger: Wall adapter for fast charging the jump starter and other USB-C devices.
- Cigarette Lighter Converter: For powering 12V devices.
- Zipper Carry Case: For convenient storage and transport of all components.

Figure 1.2: X7 Jump Starter Features
This image highlights the 3.2-inch LED display, power button, flashlight button, EC-5 output port for jump starting, USB-A output port (5V/3A, 9V/2A, 12V/1.5A), Type-C input/output port (PD60W), and DC output port (12-16.8V/10A).
2. Safety Information
Please read and understand all safety instructions before using the NEXPOW X7 Jump Starter. Failure to follow these instructions may result in electric shock, fire, or serious injury.
- Always wear eye protection and gloves when working with batteries.
- Do not submerge the unit in water. The unit has an IP63 waterproof rating, meaning it is resistant to rain and splashes, but not full submersion.
- Do not operate the unit if it is damaged.
- Keep out of reach of children.
- Do not short-circuit the battery clamps.
- The unit features multiple protection systems including spark-proof, reverse polarity protection, low-temperature protection, high-temperature protection, and over-load protection.
- Operate within the specified temperature range: -4°F to 104°F (-20°C to 40°C).

Figure 2.1: IP63 Waterproof Design
This image demonstrates the unit's resistance to water splashes, making it suitable for outdoor use and increasing its durability.
3. Setup and Charging
Before first use, fully charge the NEXPOW X7 Jump Starter.
3.1 Charging the Jump Starter
- Connect the USB-C cable to the Type-C input port on the X7 Jump Starter.
- Connect the other end of the USB-C cable to the provided 18W USB-C Power Adapter Charger.
- Plug the 18W USB-C Power Adapter Charger into a wall outlet.
- The LED display on the jump starter will show the charging progress. Charge until the display indicates 100%.
The 18W USB-C Power Adapter Charger is designed for fast and safe charging, featuring protection against overcharging, over-currents, and overheating.
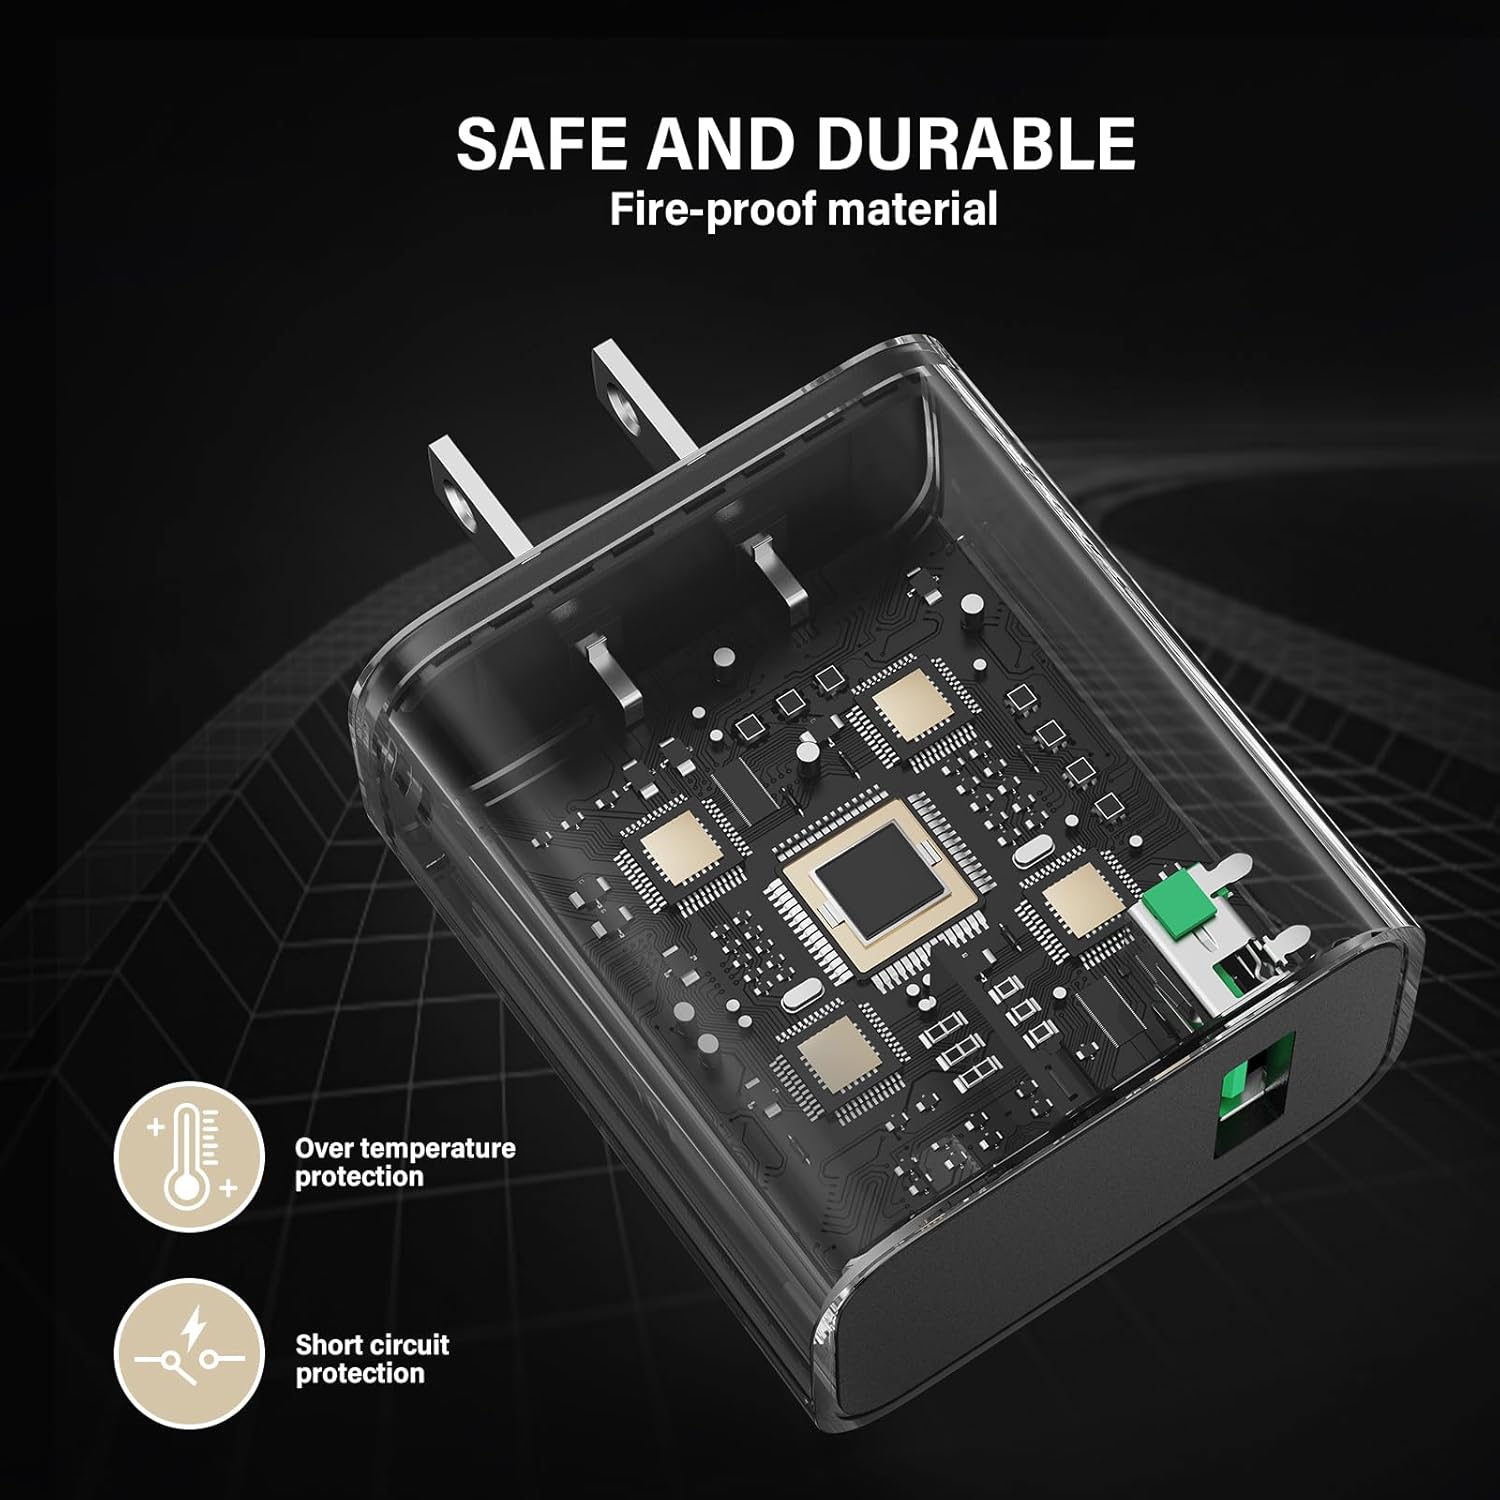
Figure 3.1: 18W USB-C Power Adapter Charger Safety Features
This image illustrates the internal design of the charger, highlighting its built-in intelligent chip for over-temperature and short-circuit protection.
4. Operating Instructions
4.1 Jump Starting a Vehicle
Ensure the jump starter is at least 50% charged before attempting to jump start a vehicle.
- Connect Clamps: Connect the red (positive, +) clamp to the positive terminal of the vehicle's battery. Connect the black (negative, -) clamp to the negative terminal of the vehicle's battery.
- Connect to Jump Starter: Insert the blue plug of the battery clamps cable into the EC-5 output port on the NEXPOW X7 Jump Starter. Ensure a secure connection.
- Start Vehicle: Once connected, the jump starter will automatically detect the battery. Start your vehicle's engine. If the vehicle does not start immediately, wait 30 seconds before trying again. Do not crank for more than 3 seconds per attempt.
- Disconnect: Once the vehicle starts, immediately disconnect the battery clamps from the jump starter, then disconnect the clamps from the vehicle battery (black first, then red).

Figure 4.1: Jump Starting Process
This image shows the NEXPOW X7 Jump Starter connected to a car battery, illustrating the setup for jump starting a vehicle.
4.2 Using as a Portable Power Bank
The X7 Jump Starter can charge various electronic devices.
- USB-A Output: Connect your device's USB charging cable to the USB-A output port (5V/3A, 9V/2A, 12V/1.5A).
- Type-C Output: Connect your device's USB-C charging cable to the Type-C output port (PD60W) for fast charging compatible devices like laptops, tablets, and smartphones.
- DC Output: Use the DC output port (12-16.8V/10A) with the cigarette lighter converter to power 12V accessories.

Figure 4.2: Portable Charging Capabilities
This image demonstrates the X7 Jump Starter's ability to charge multiple electronic devices simultaneously, showcasing its versatility as a portable power bank.
4.3 Using the LED Flashlight
The X7 Jump Starter includes an integrated LED flashlight for emergency situations or low-light conditions.
- Press and hold the flashlight button (usually integrated with the power button) to turn on the flashlight.
- Press again to cycle through different modes (e.g., solid light, strobe, SOS).
- Press and hold again to turn off the flashlight.
5. Maintenance
Proper maintenance ensures the longevity and optimal performance of your NEXPOW X7 Jump Starter.
- Recharging: Recharge the unit every 3-6 months, even if not in use, to maintain battery health.
- Storage: Store the jump starter in a cool, dry place, away from direct sunlight and extreme temperatures. Use the provided zipper carry case for protection.
- Cleaning: Wipe the unit with a soft, damp cloth. Do not use harsh chemicals or abrasive cleaners.
- Battery Clamps: Keep the battery clamps clean and free of corrosion.
6. Troubleshooting
If you encounter issues with your NEXPOW X7 Jump Starter, refer to the following common problems and solutions:
| Problem | Possible Cause | Solution |
|---|---|---|
| Unit does not turn on. | Battery is depleted. | Recharge the jump starter fully. |
| Vehicle does not start. | Incorrect clamp connection; vehicle battery completely dead; engine too large for unit. | Ensure clamps are connected correctly (red to positive, black to negative). Use the force start function if the battery is completely dead (refer to specific instructions in the full manual if available). Verify engine displacement is within specifications (up to 12L Gas, 10L Diesel). |
| Error message on display. | Protection system activated (e.g., reverse polarity, over-temperature). | Disconnect clamps, check connections, allow unit to cool down if hot, then retry. Consult the full manual for specific error codes. |
| Unit not charging devices. | Unit battery low; incorrect cable/port. | Ensure jump starter is sufficiently charged. Verify correct cable is used for the device and connected to the appropriate output port (USB-A, Type-C, or DC). |
If problems persist, please contact NEXPOW customer support.
7. Specifications
Detailed technical specifications for the NEXPOW X7 Car Jump Starter and 18W USB-C Power Adapter Charger:
| Feature | Specification |
|---|---|
| Brand | NEXPOW |
| Model | X7 |
| Peak Output Current | 3000 Amps |
| Battery Capacity | 20000mAh |
| Engine Compatibility (Gas) | Up to 12 Liters |
| Engine Compatibility (Diesel) | Up to 10 Liters |
| Jump Starts per Charge | Up to 60 |
| Operating Temperature | -4°F to 104°F (-20°C to 40°C) |
| Waterproof Rating | IP63 |
| USB-A Output | 5V/3A, 9V/2A, 12V/1.5A |
| Type-C Input/Output | PD60W |
| DC Output | 12-16.8V/10A |
| Charger Output (USB-C) | 18W |
8. Warranty and Support
For warranty information, please refer to the documentation included with your product or visit the official NEXPOW website. Warranty terms typically cover manufacturing defects for a specified period from the date of purchase.
For technical support, troubleshooting assistance, or inquiries regarding your NEXPOW X7 Jump Starter, please contact NEXPOW customer service through their official website or the contact information provided in your product packaging.
Ask a question about this manual
Ask about setup, troubleshooting, compatibility, parts, safety, or missing instructions. Manuals+ will review the question and use this page’s manual context to help answer it.