1. Introduction
This manual provides comprehensive instructions for setting up, operating, maintaining, and troubleshooting your Dell P2425H 24-inch Full HD (1920x1080) 100Hz IPS Monitor. Please read this manual thoroughly before using the monitor to ensure proper operation and to prevent damage.
The Dell P2425H monitor is designed to enhance your workspace with its 24-inch IPS panel, delivering crisp 1920x1080 resolution at a 100 Hz refresh rate. It features ComfortView Plus technology for reduced blue light emissions, promoting eye comfort during extended use. The monitor offers versatile connectivity options including HDMI, DisplayPort, and a built-in USB hub, along with an ergonomic stand for optimal viewing comfort.

Image 1.1: Dell P2425H 24-inch monitor with included accessories.
2. Safety Information
Observe the following safety precautions to ensure safe and optimal performance of your monitor:
- Do not place the monitor near heat sources or in direct sunlight.
- Ensure proper ventilation around the monitor.
- Use only the power cord and cables provided or recommended by Dell.
- Do not attempt to service the monitor yourself. Refer all servicing to qualified service personnel.
- Keep the monitor away from water or excessive moisture.
- Position the monitor on a stable, flat surface to prevent it from falling.
3. Package Contents
Verify that all items are present in the package:
- Dell P2425H 24-inch Monitor
- Monitor Stand (Base and Riser)
- Power Cord
- DisplayPort Cable (6 feet)
- HDMI Cable (6 feet)
- USB-A 3.2 Gen 1 to USB-B Upstream Cable (6 feet)
- USB-C Cable
- LCD Cleaning Kit
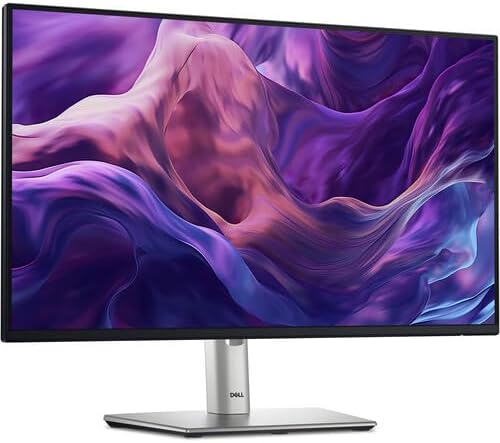
Image 3.1: Contents of the Dell P2425H monitor package, including cables and cleaning kit.
4. Setup
4.1. Assembling the Monitor Stand
- Place the monitor base on a flat, stable surface.
- Align the stand riser with the slot on the base and press down until it clicks into place.
- Attach the assembled stand to the back of the monitor panel. Align the tabs on the stand with the grooves on the monitor and push until it locks securely.
- Ensure the monitor is securely attached to the stand before placing it upright.

Image 4.1: Detail of the monitor stand base for assembly reference.
4.2. Connecting the Monitor
Before connecting, ensure your computer and monitor are powered off.
- Power Connection: Connect the power cord to the monitor's power port and then to a grounded electrical outlet.
- Video Connection: Choose one of the following video cables to connect your computer to the monitor:
- HDMI: Connect one end of the HDMI cable to the HDMI port on your computer and the other end to the HDMI port on the monitor.
- DisplayPort: Connect one end of the DisplayPort cable to the DisplayPort on your computer and the other end to the DisplayPort on the monitor.
- USB-C: If your computer supports video output over USB-C, connect the USB-C cable to the USB-C port on your computer and the USB-C port on the monitor.
- USB Upstream Connection (for USB Hub functionality): To enable the monitor's USB ports, connect the USB-A to USB-B upstream cable from your computer's USB port to the upstream USB-B port on the monitor.
- USB Downstream Connections: Connect your USB devices (e.g., keyboard, mouse, USB drive) to the USB-A downstream ports on the monitor.

Image 4.2: Rear panel of the Dell P2425H monitor, highlighting connectivity ports.
5. Operating the Monitor
5.1. Power On/Off
Press the power button located on the monitor to turn it on or off. The power LED will indicate the monitor's status.
5.2. On-Screen Display (OSD) Menu
The OSD menu allows you to adjust various monitor settings. Use the control buttons, typically located on the bottom or back of the monitor, to navigate the menu.
- Brightness/Contrast: Adjust the display's luminance and contrast levels.
- Input Source: Manually select the video input (HDMI, DisplayPort, USB-C).
- Color Settings: Modify color temperature, gamma, and preset modes.
- Display Settings: Adjust aspect ratio, sharpness, and response time.
- Menu Settings: Configure OSD language, transparency, and timeout.
- Others: Access factory reset, DDC/CI, and other advanced options.
5.3. Adjusting Monitor Settings
For optimal viewing, adjust the monitor's physical position:
- Height Adjustment: Gently push or pull the monitor panel up or down along the stand riser. The monitor can be adjusted up to 150mm.
- Tilt: Hold both sides of the monitor panel and gently tilt it forwards or backwards to achieve your desired viewing angle.
- Swivel: Rotate the monitor panel left or right on its base.
- Pivot: Rotate the monitor panel 90 degrees clockwise or counter-clockwise for portrait or landscape orientation. Ensure the monitor is at its maximum height and tilted back before pivoting to avoid hitting the desk.

Image 5.1: Side profile of the Dell P2425H monitor demonstrating height and tilt adjustments.
6. Maintenance
6.1. Cleaning the Monitor
To clean your monitor, follow these steps:
- Turn off the monitor and unplug the power cord.
- Use a soft, lint-free cloth lightly dampened with water or a non-abrasive screen cleaner (like the included LCD Cleaning Kit).
- Gently wipe the screen and exterior surfaces. Avoid spraying liquid directly onto the screen or into any openings.
- Do not use benzene, thinner, ammonia-based cleaners, or abrasive cleaning agents.
6.2. General Care
- Avoid placing heavy objects on the monitor or its cables.
- Protect the monitor from extreme temperatures and humidity.
- When moving the monitor, hold it by the stand or base, not by the screen.
7. Troubleshooting
If you encounter issues with your monitor, refer to the following common problems and solutions:
| Problem | Possible Solution |
|---|---|
| No image on screen |
|
| Image is blurry or distorted |
|
| USB ports not working |
|
| No sound (if applicable) |
|
8. Specifications
| Feature | Detail |
|---|---|
| Model Number | P2425H |
| Screen Size | 24 Inches |
| Panel Type | IPS (In-Plane Switching) |
| Native Resolution | 1920 x 1080 (Full HD) |
| Refresh Rate | 100 Hz |
| Aspect Ratio | 16:9 |
| Response Time | 5 ms (GtG - Gray-to-Gray) |
| Contrast Ratio | 1500:1 (Static) |
| Brightness | 250 nits |
| Color Support | 16.7 Million Colors, 99% sRGB |
| Connectivity | 1x HDMI, 1x DisplayPort, 1x USB-C, 1x USB-B Upstream, 2x USB-A 3.2 Downstream |
| Ergonomics | Height Adjustable (up to 150mm), Tilt, Swivel, Pivot |
| Dimensions (with stand) | 21 x 16 x 7.1 inches (approximate) |
| Weight (with stand) | 14.78 pounds (approximate) |
| Certifications | ENERGY STAR 8.0, EPEAT Gold, ComfortView Plus |
9. Warranty and Support
For warranty information and technical support, please refer to the documentation included with your monitor or visit the official Dell support website. You can typically find detailed warranty terms, driver downloads, and contact information for customer service there.
Dell Support Website: www.dell.com/support
10. Recycling Information
Please dispose of your monitor and its components responsibly. Electronic waste should not be disposed of with general household waste. Consult your local authorities or recycling centers for information on proper disposal methods for electronic products.