Product Overview
The Odokee Wireless Charging Alarm Clock Radio is a versatile bedside companion designed to simplify your daily routine. It integrates multiple functionalities into a sleek, modern design, providing convenience and enhancing your living space.
- All-in-One Modern Nightstand Companion: Features wireless charging, Bluetooth speaker, FM radio, and nightlight.
- Bluetooth Connectivity for Seamless Streaming: Experience exceptional audio with a 10W stereo Bluetooth speaker.
- Convenient for Powering Devices: 10W Qi certified fast wireless charging and a USB charging port keep your nightstand organized.
- FM Radio for Diverse Entertainment: Stay connected to your favorite local stations with the built-in FM radio and set a sleep timer.
- Dimmable Display for Comfortable Viewing: Customize your sleep environment with a digital display that adjusts from 0-100% brightness.
- 8-Color Nightlight for a Peaceful Ambiance: Set the mood with a nightlight that offers adjustable brightness and multiple color options.
Product Features

Figure 1: All-in-One Bedside Speaker - Combining essential functions for your convenience.
Wireless & USB Charging
The Odokee alarm clock features a 10W Qi-certified wireless charging pad on top, allowing you to simply place your compatible smartphone for fast charging. Additionally, a USB charging port is located on the back for charging other devices like smartwatches or earbuds.

Figure 2: Qi-Certified Wireless and USB Charging capabilities.
10W Stereo Bluetooth Speaker
Connect your smartphone or other Bluetooth-enabled devices to the alarm clock's 10W stereo speaker for clear, powerful audio playback. Enjoy your favorite music, podcasts, or audiobooks with enhanced sound quality.

Figure 3: Internal components highlighting the 10W stereo sound system.
FM Radio Functionality
Tune into your preferred FM radio stations directly from the device. The built-in FM radio ensures you can stay updated with local news, music, or talk shows. A sleep timer function allows the radio to play for a set duration before automatically turning off.

Figure 4: Enjoying FM radio with the alarm clock.
Dimmable Digital Display & Nightlight
The large digital display offers adjustable brightness from 0% to 100%, ensuring comfortable viewing in any lighting condition, day or night. The integrated nightlight provides 8 different color options to create a soothing ambiance in your bedroom.

Figure 5: Adjustable display brightness for personalized comfort.
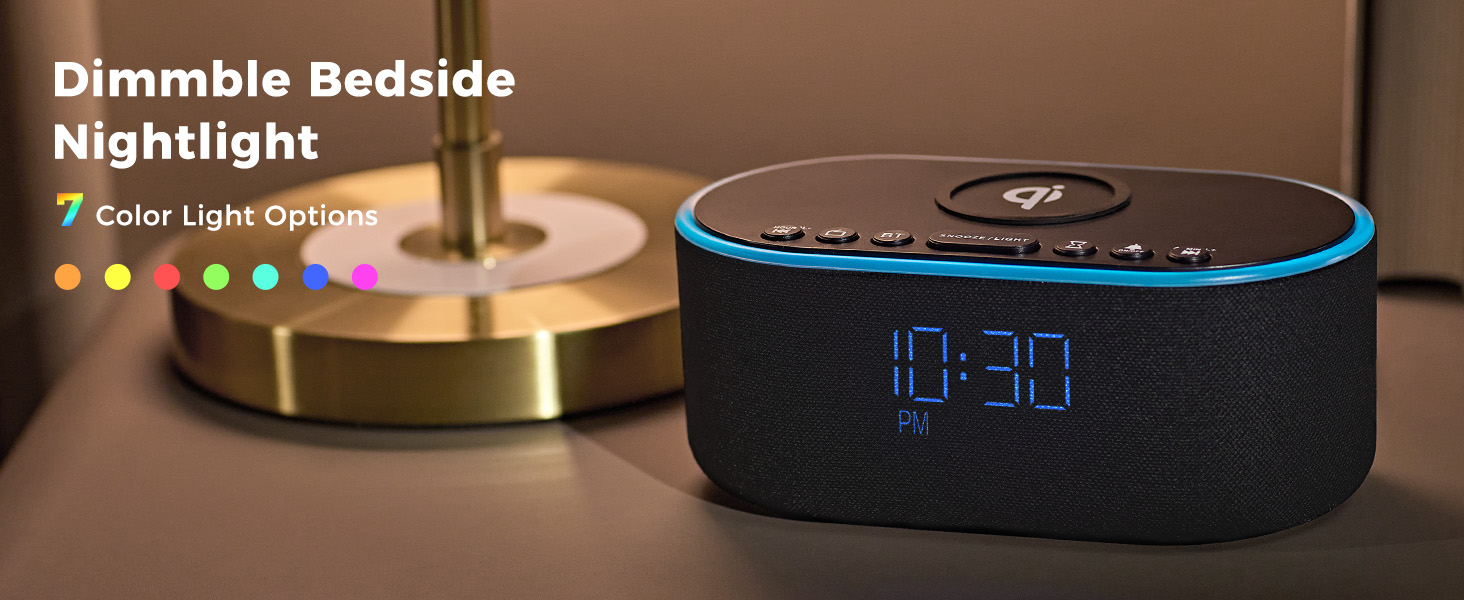
Figure 6: Explore 8 vibrant nightlight colors.
Official Product Video
Video 1: Official product overview of the Odokee Wireless Charging Alarm Clock Radio, demonstrating its key features and design.
Controls and Display
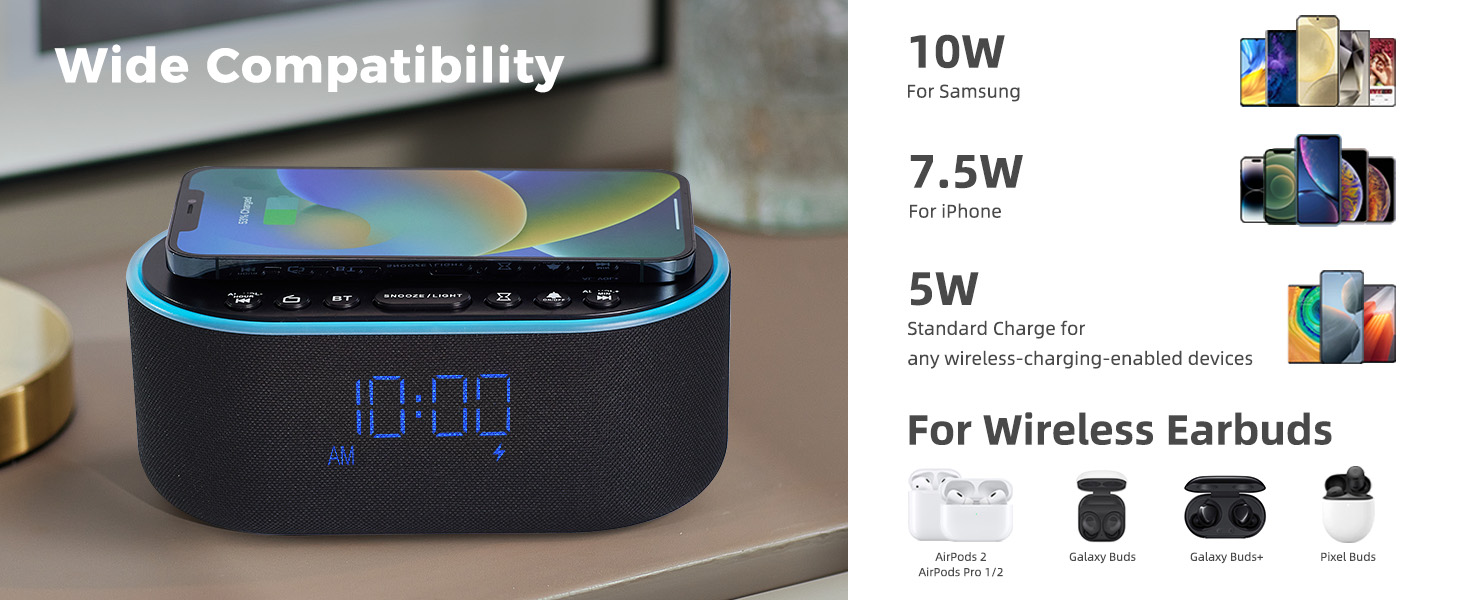
Figure 7: Top and Back Panel Controls Diagram.
Top Panel Controls
- Wireless Charging Pad: Place Qi-compatible devices here for wireless charging.
- AL VOL- / Hour: Adjust alarm volume down, or set alarm hour.
- Radio On/Off: Toggle FM radio on/off.
- BT (Bluetooth) On/Off: Activate/deactivate Bluetooth pairing mode.
- SNOOZE / LIGHT: Snooze active alarm; short press to cycle nightlight colors; long press to turn nightlight off.
- Sleep Timer: Set sleep timer duration.
- Alarm On/Off: Toggle alarm on/off.
- AL VOL+ / Min: Adjust alarm volume up, or set alarm minute.
Back Panel Controls
- FM/BT Volume (High/Low): Adjust overall volume for FM radio and Bluetooth audio.
- DC 9V: Power input port.
- USB: USB charging port for external devices.
- Night Light Dimmer: Adjust brightness of the nightlight.
- 12H/24H: Switch between 12-hour and 24-hour time format.
- Alarm Set: Enter alarm setting mode.
- Time Set: Enter time setting mode.
- Display Dimmer (Low/High): Adjust the brightness of the digital time display.
- Radio Antenna: Extend fully for optimal FM radio reception.
Setup
Power Connection
- Connect the provided power adapter to the DC 9V input port on the back of the alarm clock.
- Plug the power adapter into a standard wall outlet. The display will light up.
Radio Antenna
- For optimal FM radio reception, fully extend the radio antenna located on the back panel.
Operating Instructions
Setting the Time
- Press and hold the Time Set button on the back panel until the hour digits begin to flash.
- Use the AL VOL- / Hour and AL VOL+ / Min buttons on the top panel to adjust the hour.
- Press the Time Set button again to switch to minute adjustment. The minute digits will flash.
- Use the AL VOL- / Hour and AL VOL+ / Min buttons to adjust the minutes.
- Press the Time Set button one more time to confirm and exit time setting mode.
- To switch between 12-hour and 24-hour format, press the 12H/24H button on the back panel.
Setting the Alarm
- Press and hold the Alarm Set button on the back panel until the alarm hour digits begin to flash.
- Use the AL VOL- / Hour and AL VOL+ / Min buttons on the top panel to adjust the alarm hour.
- Press the Alarm Set button again to switch to alarm minute adjustment. The minute digits will flash.
- Use the AL VOL- / Hour and AL VOL+ / Min buttons to adjust the alarm minutes.
- Press the Alarm Set button one more time to confirm and exit alarm setting mode.
- To activate or deactivate the alarm, short press the Alarm On/Off button on the top panel. An alarm icon will appear/disappear on the display.
Snooze Function
- When the alarm sounds, press the SNOOZE / LIGHT button on the top panel to activate the snooze function. The alarm will temporarily stop and sound again after 9 minutes.
Wireless Charging
- Place your Qi-compatible smartphone directly onto the wireless charging pad located on the top of the alarm clock.
- Ensure the phone is centered on the charging pad for optimal connection. A charging indicator will appear on the clock display.
- Note: Do not place metal phone cases or metal objects in the wireless charging area to prevent interference.
USB Charging
- Connect your device's USB charging cable to the USB port on the back panel of the alarm clock.
- The alarm clock will provide power to charge your device.
Bluetooth Pairing
- Press the BT button on the top panel to enter Bluetooth pairing mode. The display will show "BT" and flash.
- On your smartphone or Bluetooth device, search for "UE268" in the Bluetooth settings.
- Select "UE268" to pair. Once successfully paired, the "BT" indicator on the clock display will stop flashing.
- You can now play audio through the alarm clock's speaker. Adjust volume using the FM/BT Volume scroll on the back panel or your connected device.
FM Radio Operation
- Press the Radio On/Off button on the top panel to turn on the FM radio.
- Use the AL VOL- / Hour and AL VOL+ / Min buttons to tune to your desired frequency. Long press these buttons for automatic station scanning.
- Adjust the radio volume using the FM/BT Volume scroll on the back panel.
- To set a sleep timer for the radio, press the Sleep Timer button on the top panel repeatedly to cycle through preset durations (e.g., 15, 30, 60, 90 minutes). The radio will automatically turn off after the selected time.
Nightlight Control
- Short press the SNOOZE / LIGHT button on the top panel to cycle through the 8 available nightlight colors.
- Long press the SNOOZE / LIGHT button to turn the nightlight off.
- Adjust the brightness of the nightlight using the Night Light Dimmer button on the back panel.
Display Brightness
- Adjust the brightness of the digital time display using the Display Dimmer scroll on the back panel. You can set it from 0% to 100% brightness.
Maintenance
- Cleaning: Use a soft, dry cloth to clean the surface of the alarm clock. Do not use liquid cleaners or abrasive materials.
- Storage: If not in use for an extended period, unplug the device and store it in a cool, dry place.
Troubleshooting
| Problem | Possible Cause | Solution |
|---|---|---|
| Clock display is off/blank. | No power connection or display dimmer set to 0%. | Ensure power adapter is securely plugged in. Adjust Display Dimmer on the back panel. |
| Wireless charging not working. | Phone not Qi-compatible, not centered, or metal objects on pad. | Verify phone compatibility. Reposition phone. Remove metal objects/cases. |
| Bluetooth not pairing. | Device not in pairing mode or too far. | Ensure alarm clock is in BT pairing mode (flashing "BT"). Move devices closer. Restart both devices. |
| Poor FM radio reception. | Antenna not extended or weak signal. | Fully extend the radio antenna. Try repositioning the alarm clock. |
| Alarm not sounding. | Alarm not activated or volume too low. | Press Alarm On/Off button to activate (icon visible). Increase alarm volume using AL VOL+ button. |
Specifications
- Brand: Odokee
- Model: UE268
- Color: Black - Blue Digits
- Display Type: Digital LED
- Power Source: Corded Electric (DC 9V)
- Wireless Charging Output: 10W (Qi Certified)
- USB Charging Output: Standard USB
- Speaker Output: 10W Stereo
- Radio: FM
- Nightlight: 8-Color RGB with adjustable brightness
- Product Dimensions: 2.96"W x 7.28"H
- Item Weight: 1.16 pounds (525 Grams)
Warranty and Support
This Odokee product comes with an 18-month Warranty from the date of purchase.
For technical support, troubleshooting, or warranty claims, please contact Odokee customer service through the retailer's platform or visit the official Odokee store online.