1. Introduction
Thank you for choosing the Generic New T7 Full HD 4K Mirroring Projector. This projector is designed to provide a high-quality viewing experience with its Full HD 1920x1080 native resolution, 4000 lumens brightness, and versatile connectivity options. It supports wireless screen mirroring via Wi-Fi, allowing seamless integration with your mobile devices. With a flexible projection size from 40 to 200 inches, the T7 is ideal for home cinema, presentations, and educational settings.
Please read this manual carefully before operating the projector to ensure proper use and to maximize its performance and lifespan. Keep this manual for future reference.
2. Package Contents
Verify that all items listed below are included in your package:
- 1x Generic New T7 Projector
- 1x Power Cable
- 1x AV Cable
- 1x Remote Control
- 1x User Manual (English)
3. Product Overview
Familiarize yourself with the projector's components and interfaces.
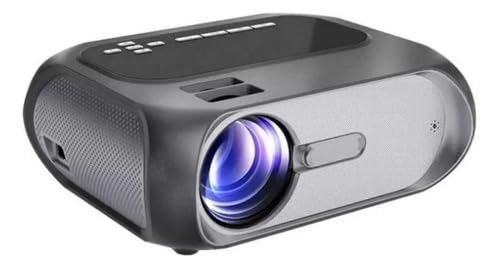
Image 3.1: Generic New T7 Projector. This image shows the projector from an angled view, highlighting its compact design and key features such as Miracast, Airplay, Wi-Fi, 4000 lumens, and 1080p resolution. Dimensions are also indicated: 25.5cm length, 20.5cm width, and 9cm height.

Image 3.2: Front view of the T7 Projector. This image provides a clear view of the projector's lens and front panel, showcasing its sleek design.
3.1 Interfaces
- 1 x AV Port: For connecting older devices with AV output.
- 1 x HDMI Port: For high-definition audio and video input from modern devices.
- 2 x USB 2.0 Ports: For connecting USB flash drives to play media files.
- 1 x Headphone Port: For connecting external audio devices or headphones.
- 2 x IR Receivers: For remote control signal reception.
- 1 x Power Port: For connecting the power cable.
4. Setup
4.1 Placement
Place the projector on a stable, flat surface. Ensure there is adequate ventilation around the projector. The optimal projection distance is between 1 to 4 meters, allowing for a screen size of 40 to 200 inches.

Image 4.1: Projection Size Guide. This image illustrates various projection sizes (40, 60, 80, 100, 140 inches) and their corresponding distances from the projector to the screen, ranging from 118cm to 390cm.
4.2 Power Connection
- Connect the power cable to the projector's power port.
- Plug the other end of the power cable into a suitable electrical outlet (Bivolt compatible).
4.3 Initial Power On
- Press the power button on the projector or the remote control to turn on the device.
- Adjust the focus ring on the projector lens until the image appears clear and sharp on the screen.
5. Operating Instructions
5.1 Basic Operation
- Use the remote control to navigate the projector's menu and select input sources.
- The projector features powerful built-in speakers, eliminating the need for external audio in many cases.
- For enhanced audio, connect external speakers, home theater systems, or headphones to the headphone port.
5.2 Connectivity Options
The T7 projector supports a wide range of devices:

Image 5.1: Device Compatibility. This chart illustrates the wide range of devices compatible with the T7 projector, including smartphones, iPads, Smart TVs, laptops, PCs, gaming consoles, DVD players, and USB flash drives.
5.2.1 HDMI Connection
Connect your laptop, gaming console, or other HDMI-enabled devices to the projector using an HDMI cable for high-quality video and audio transmission.
5.2.2 USB Playback
Insert a USB flash drive into one of the USB 2.0 ports. Use the projector's menu to browse and play movies, series, or other media files directly from the drive.
5.2.3 AV Connection
For older devices, connect them to the AV port using the provided AV cable.
5.3 Wi-Fi Screen Mirroring (Miracast & Airplay)
The T7 projector supports wireless screen mirroring from compatible smartphones and tablets via Wi-Fi.

Image 5.2: Projector User Interface. This image displays the projector's main menu, including options for network settings, which are crucial for Wi-Fi connectivity and screen mirroring.

Image 5.3: Wi-Fi Screen Mirroring in Action. This image demonstrates a smartphone wirelessly mirroring its screen content, in this case, a football match, onto a large projected display via the T7 projector.
- Ensure your projector is connected to a Wi-Fi network. Navigate to the 'Network Settings' in the projector's menu to connect.
- Connect your mobile device (smartphone or tablet) to the same Wi-Fi network as the projector.
- On your mobile device, activate the screen mirroring function (e.g., Miracast for Android, Airplay for iOS).
- Select the projector from the list of available devices on your mobile device.
- The mobile device's screen content will now be displayed on the projector.
6. Specifications
| Feature | Specification |
|---|---|
| Brand | Generic |
| Model Name | T7 |
| Display Technology | LED |
| Brightness | 4000 Lumens (180 ANSI Lumens) |
| Native Resolution | 1920 x 1080 Full HD |
| Maximum Display Resolution | 1920 x 1080 |
| Contrast Ratio | 3000:1 |
| LED Lamp Power | 51W |
| Projection Distance | 1 - 4 meters |
| Projection Size | 40 - 200 inches |
| Connectivity Technology | Wi-Fi (Miracast, Airplay) |
| Power Input | Bivolt (110-240V compatible) |
| Interfaces | 1x AV, 1x HDMI, 2x USB 2.0, 1x Headphone, 2x IR, 1x Power |
| Dimensions (H x L x W) | 9 cm x 20 cm x 24 cm |
| Weight | 1.62 kg |
| Special Features | Portable, Built-in Speakers, Multi-language support |
| Compatible Devices | Laptop, Smartphone, Gaming Console, PC, Smart TV, iPad, Flash Drive, DVD |
7. Maintenance
7.1 Cleaning the Lens
Use a soft, lint-free cloth specifically designed for optical lenses. Gently wipe the lens in a circular motion. Avoid using abrasive cleaners or excessive force, as this can scratch the lens.
7.2 Cleaning the Exterior
Wipe the projector's exterior with a soft, dry cloth. For stubborn dirt, slightly dampen the cloth with water. Do not use chemical cleaners, as they may damage the finish.
7.3 Ventilation
Ensure that the projector's ventilation openings are not blocked. Proper airflow is essential to prevent overheating and maintain optimal performance.
7.4 Storage
When not in use for extended periods, store the projector in a cool, dry place, away from direct sunlight and excessive dust. Use the original packaging or a protective case if available.
8. Troubleshooting
If you encounter issues with your projector, refer to the following common problems and solutions:
8.1 No Power
- Check if the power cable is securely connected to both the projector and the electrical outlet.
- Ensure the power outlet is functional by testing it with another device.
- Press the power button on the projector or remote control.
8.2 No Image or "No Signal" Message
- Verify that the correct input source (HDMI, AV, USB) is selected in the projector's menu.
- Ensure all cables (HDMI, AV) are securely connected to both the projector and the source device.
- If using Wi-Fi mirroring, confirm both devices are on the same network and mirroring is activated.
- Try restarting both the projector and the source device.
8.3 Poor Image Quality
- Adjust the focus ring on the projector lens to sharpen the image.
- Ensure the projection surface is flat and smooth.
- Check the resolution settings on your source device to match the projector's native resolution (1920x1080).
- Reduce ambient light in the room for better contrast and brightness.
8.4 No Sound
- Increase the volume on both the projector and the source device.
- Check if the projector is muted.
- If using external speakers, ensure they are properly connected and powered on.
- If using HDMI, ensure the source device is sending audio through HDMI.
8.5 Wi-Fi Mirroring Issues
- Confirm both the projector and your mobile device are connected to the same Wi-Fi network.
- Ensure your mobile device supports Miracast (Android) or Airplay (iOS).
- Restart your Wi-Fi router, projector, and mobile device.
- Check for any software updates for your mobile device or projector.
9. Warranty and Support
9.1 Warranty Information
This product comes with a 30-day seller warranty from the date of purchase. Please retain your proof of purchase for any warranty claims.
9.2 Customer Support
For further assistance, technical support, or warranty inquiries, please contact your seller or refer to the contact information provided at the point of purchase.