Introduction
Thank you for choosing the ChooChoo Large Record Player Stand. This manual provides essential information for the safe assembly, operation, and maintenance of your new furniture. Please read these instructions carefully before beginning assembly and retain them for future reference.

Image: The ChooChoo Large Record Player Stand in Soft White, showcasing its design and functionality in a living room setting.
Safety Information
- Always follow assembly instructions precisely. Incorrect assembly can lead to instability and potential injury.
- Do not exceed the recommended weight capacity for the top surface or shelves.
- Ensure all connections for the charging station are secure and properly plugged into a grounded outlet.
- Keep small parts and packaging materials away from children during assembly.
- Place the stand on a level surface to prevent tipping.
Package Contents
Please verify that all components are present before beginning assembly. A detailed list of parts and hardware is typically included in the physical instruction manual provided with your product. Common components include:
- Top Panel
- Side Panels (with X-frames)
- Bottom Panel
- Shelf Panels
- Dividers for record storage
- Hardware (screws, dowels, cam locks, etc.)
- Charging Station unit (with power cord)
- LED Light Strip (with remote control)
Assembly Instructions
Assembly of this record player stand is designed to be straightforward. It is recommended to have a Phillips head screwdriver available. Power tools are generally not recommended as they may overtighten screws and damage the engineered wood components.
- Unpack and Identify Parts: Carefully unbox all components and lay them out on a clean, soft surface to prevent scratches. Refer to the parts list in your physical manual to identify each piece.
- Assemble Side Frames: Attach the X-frame side panels to the main frame components using the provided hardware. Ensure all connections are snug for stability.
- Install Shelves and Dividers: Secure the internal shelves and record dividers into their designated slots. The dividers create individual compartments for organized record storage.
- Attach Top Panel: Carefully align and attach the top panel to the assembled frame.
- Install Charging Station: Integrate the charging station unit into its designated cutout on the top panel. Ensure the power cord is routed safely.
- Apply LED Light Strip: Adhere the LED light strip to the underside of the top shelf or within the open compartment as per the specific instructions provided with the LED kit.
- Final Tightening: Once fully assembled, gently tighten all screws to ensure maximum stability. Do not overtighten.
- Attach Floor Protectors: Apply the included fuzzy feet protectors to the bottom of the stand's legs to prevent scratching your floors.

Image: Dimensional diagram of the record player stand, indicating its width, depth, and height for planning placement.
Operating Instructions
Charging Station
The integrated charging station provides convenient power access for your devices.
- Power Connection: Plug the stand's main power cord into a standard 120V AC wall outlet.
- AC Outlets: Use the two 120V AC outlets to power your record player or other electronic devices.
- USB Ports: Use the two 5V/2A USB ports to charge smartphones, tablets, or other USB-powered devices.

Image: Detail of the charging station, highlighting the AC outlets and USB ports for device connectivity.
LED Light Strip
The LED light strip offers customizable ambiance for your listening space.
- Powering On/Off: Use the remote control or the switch on the battery pack (if applicable) to turn the LED light on or off.
- Color Selection: The remote control allows you to select from 16 different colors to match your mood or decor.
- Flashing Modes: The remote also provides options for 4 different flashing modes, offering dynamic lighting effects.
- Battery Replacement: If the LED light is battery-operated, ensure to replace batteries as needed following the instructions provided with the LED kit.
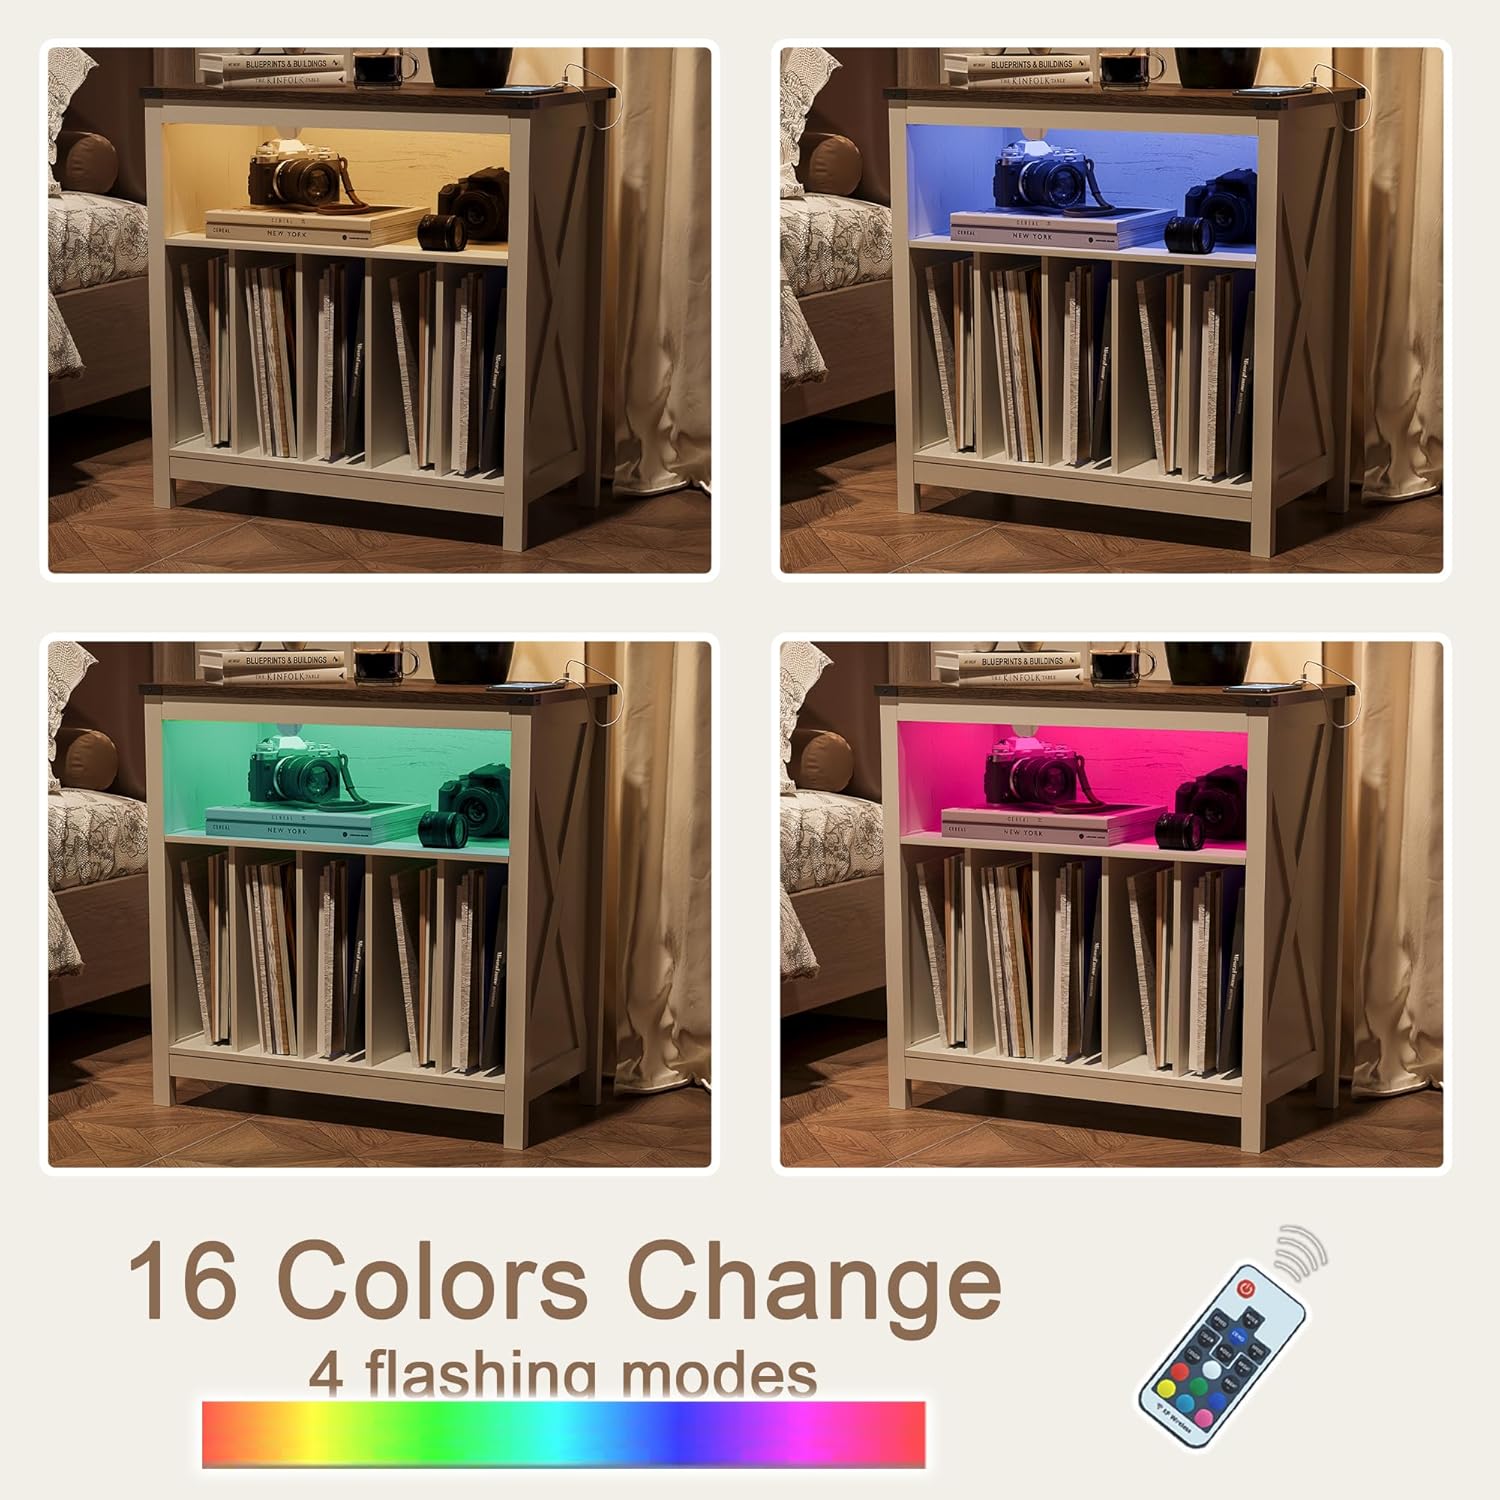
Image: Examples of the LED light strip displaying various colors, demonstrating the customizable lighting options.
Maintenance
To ensure the longevity and appearance of your ChooChoo Record Player Stand, follow these simple maintenance guidelines:
- Cleaning: Wipe surfaces with a soft, damp cloth. Avoid harsh chemicals or abrasive cleaners, which can damage the finish.
- Spills: Immediately wipe up any spills to prevent staining or damage to the engineered wood.
- Dusting: Regularly dust with a dry, soft cloth to prevent buildup.
- Hardware: Periodically check and retighten any loose hardware to maintain structural integrity.
Troubleshooting
| Problem | Possible Cause | Solution |
|---|---|---|
| LED light does not turn on. | Batteries are dead or incorrectly inserted; loose connection; faulty LED strip. | Check and replace batteries if applicable. Ensure all connections are secure. If issues persist, contact customer support. |
| Charging station not providing power. | Stand's power cord is unplugged; wall outlet is not working; faulty charging unit. | Ensure the stand's power cord is securely plugged into a working wall outlet. Test the outlet with another device. If issues persist, contact customer support. |
| Stand feels wobbly or unstable. | Loose hardware; uneven floor surface. | Check and tighten all assembly screws. Ensure the stand is placed on a flat, level surface. |
Specifications
- Model Number: ET2403-1TWL
- Dimensions (L x W x H): 29.9 x 15.7 x 30.7 inches
- Item Weight: 43.4 pounds
- Material: Engineered Wood
- Finish Type: Matte
- Color: Soft White
- Charging Station: 2 AC Outlets (120V/12A), 2 USB Ports (5V/2A)
- Power Cord Length: 6.5 feet
- Assembly Required: Yes
Warranty and Support
For any questions, concerns, or to report missing or damaged parts, please contact ChooChoo customer support. Refer to the contact information provided in your purchase documentation or on the official ChooChoo website. Please have your model number (ET2403-1TWL) and purchase date ready when contacting support.