CUNPU S027/32/34ES
CUNPU 32 Inch 4K 144Hz Gaming Monitor User Manual
Model: S027/32/34ES
1. Introduction
This manual provides detailed instructions for the setup, operation, maintenance, and troubleshooting of your CUNPU 32 Inch 4K 144Hz Gaming Monitor. Please read this manual thoroughly before using the product to ensure proper functionality and to prevent damage.

Figure 1.1: Front view of the CUNPU 32 Inch 4K 144Hz Gaming Monitor.
The CUNPU 32 Inch 4K 144Hz Gaming Monitor features a UHD Fast IPS panel, 1ms GTG response time, and 120% sRGB color coverage, designed for an immersive visual experience in gaming, photo editing, and video production. It supports FreeSync and G-Sync technologies for smooth, tear-free visuals.
2. Setup
2.1 What's in the Box
- 1 x 32 inch 4K Monitor
- 1 x 1.5M DP 1.4 Cable
- 1 x HDMI 2.1 Cable
- 1 x Power Adaptor
- 1 x Manual (this document)
2.2 Monitor Assembly
Follow these steps to assemble your monitor stand and attach it to the display panel. Ensure the monitor is placed on a soft, flat surface during assembly to prevent scratches.
Video 2.1: This video demonstrates the assembly process for a similar 32-inch 4K gaming monitor, including attaching the stand and connecting cables. While the monitor model in the video may vary slightly, the assembly steps are generally applicable.
- Carefully remove the monitor and stand components from the packaging.
- Attach the stand base to the stand neck using the provided screws.
- Align the assembled stand with the mounting points on the back of the monitor panel and secure it firmly.
- Alternatively, the monitor supports VESA 75x75 mm mounting for wall or desk mounts.
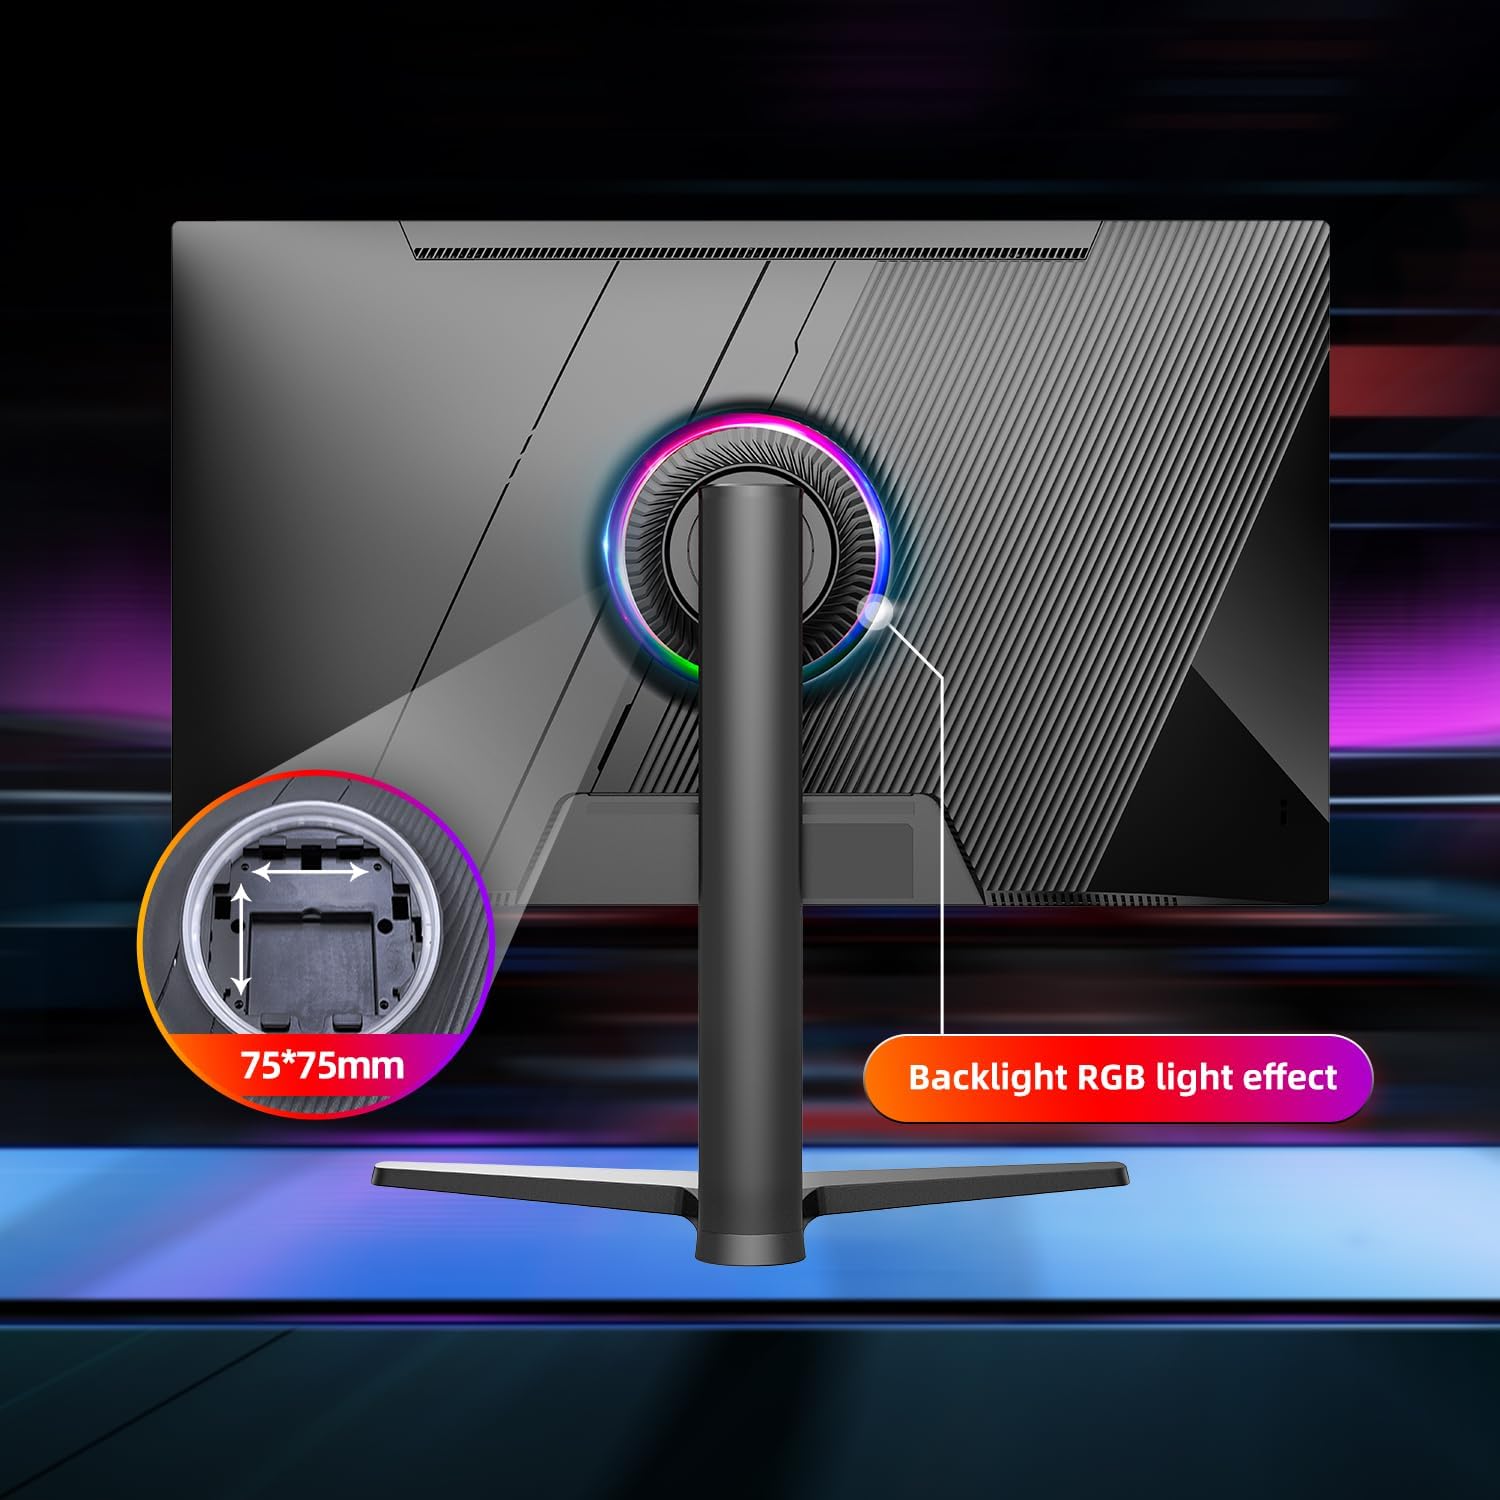
Figure 2.2: Rear view of the monitor highlighting the VESA 75x75mm mounting points and the customizable RGB backlight effect.
2.3 Connectivity
The monitor offers multiple input ports for connecting to various devices. Ensure your graphics card supports the required refresh rates for optimal performance.
- 2x HDMI 2.1 Ports: Supports 4K resolution at 120Hz.
- 2x DisplayPort 1.4 Ports: Supports 4K resolution at 144Hz.
- Audio Out: For connecting external speakers or headphones.
- DC Power Input: For the power adapter.
Tip: 4K HDMI 120Hz / DisplayPort 144Hz is only supported by NVIDIA 20 series and above graphics cards.

Figure 2.3: Overview of the monitor's input/output ports and general dimensions.
3. Operating Instructions
3.1 Power On/Off
Press the power button located on the back or bottom of the monitor to turn it on or off. The power indicator light will illuminate when the monitor is active.
3.2 On-Screen Display (OSD) Menu
The OSD menu allows you to adjust various display parameters. Use the OSD buttons, typically located on the bottom-right or back of the monitor, to navigate and select options.
Common OSD settings include:
- Picture Settings: Brightness, Contrast, Sharpness, Color Temperature.
- Color Settings: sRGB, DCI-P3 modes, Gamma.
- Gaming Settings: Overdrive, FreeSync/G-Sync, FPS counter, Timer, Crosshair.
- Input Select: Switch between HDMI and DisplayPort inputs.
- System Settings: Language, OSD Timeout, Reset to Factory Defaults.
3.3 Gaming Features
Your CUNPU monitor is equipped with features to enhance your gaming experience:
- High Refresh Rate: 144Hz refresh rate for smoother motion.
- Fast Response Time: 1ms GTG (Gray-to-Gray) response time to reduce motion blur.
- Adaptive Sync Technology: Compatible with AMD FreeSync Premium and NVIDIA G-Sync for tear-free and stutter-free gameplay.
- Game Assist Features: Built-in FPS counter, timer, and crosshair functions for competitive gaming.
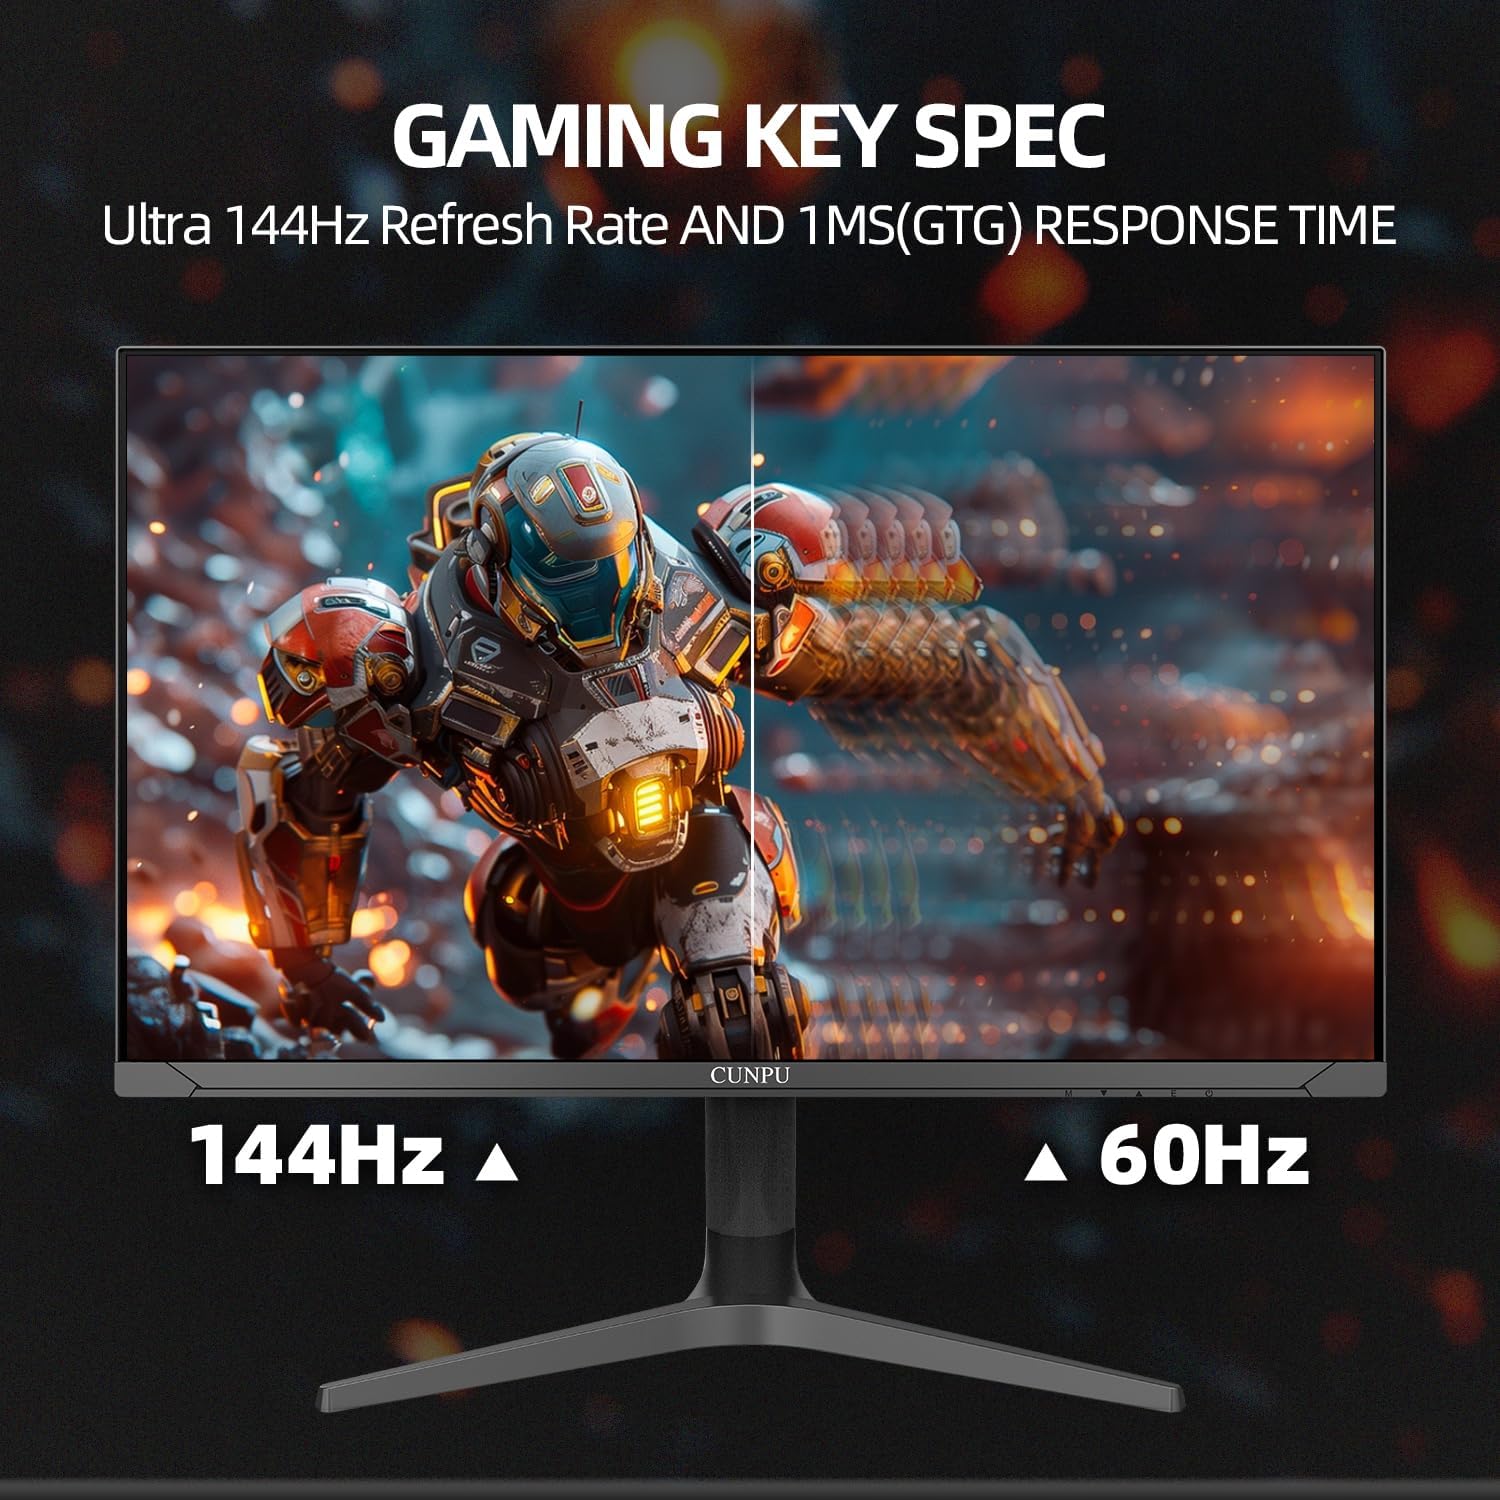
Figure 3.1: Visual representation of the monitor's 144Hz refresh rate and 1ms GTG response time in a gaming context.

Figure 3.2: Comparison of display quality with Adaptive Sync technology enabled versus disabled, showing reduced tearing.
3.4 Ergonomic Adjustments
The monitor stand allows for various adjustments to optimize your viewing comfort:
- Tilt: -5° to 15°
- Swivel: -15° to 15°
- Height Adjustment: Up to 130 mm
- Pivot: Supports landscape or portrait orientation.
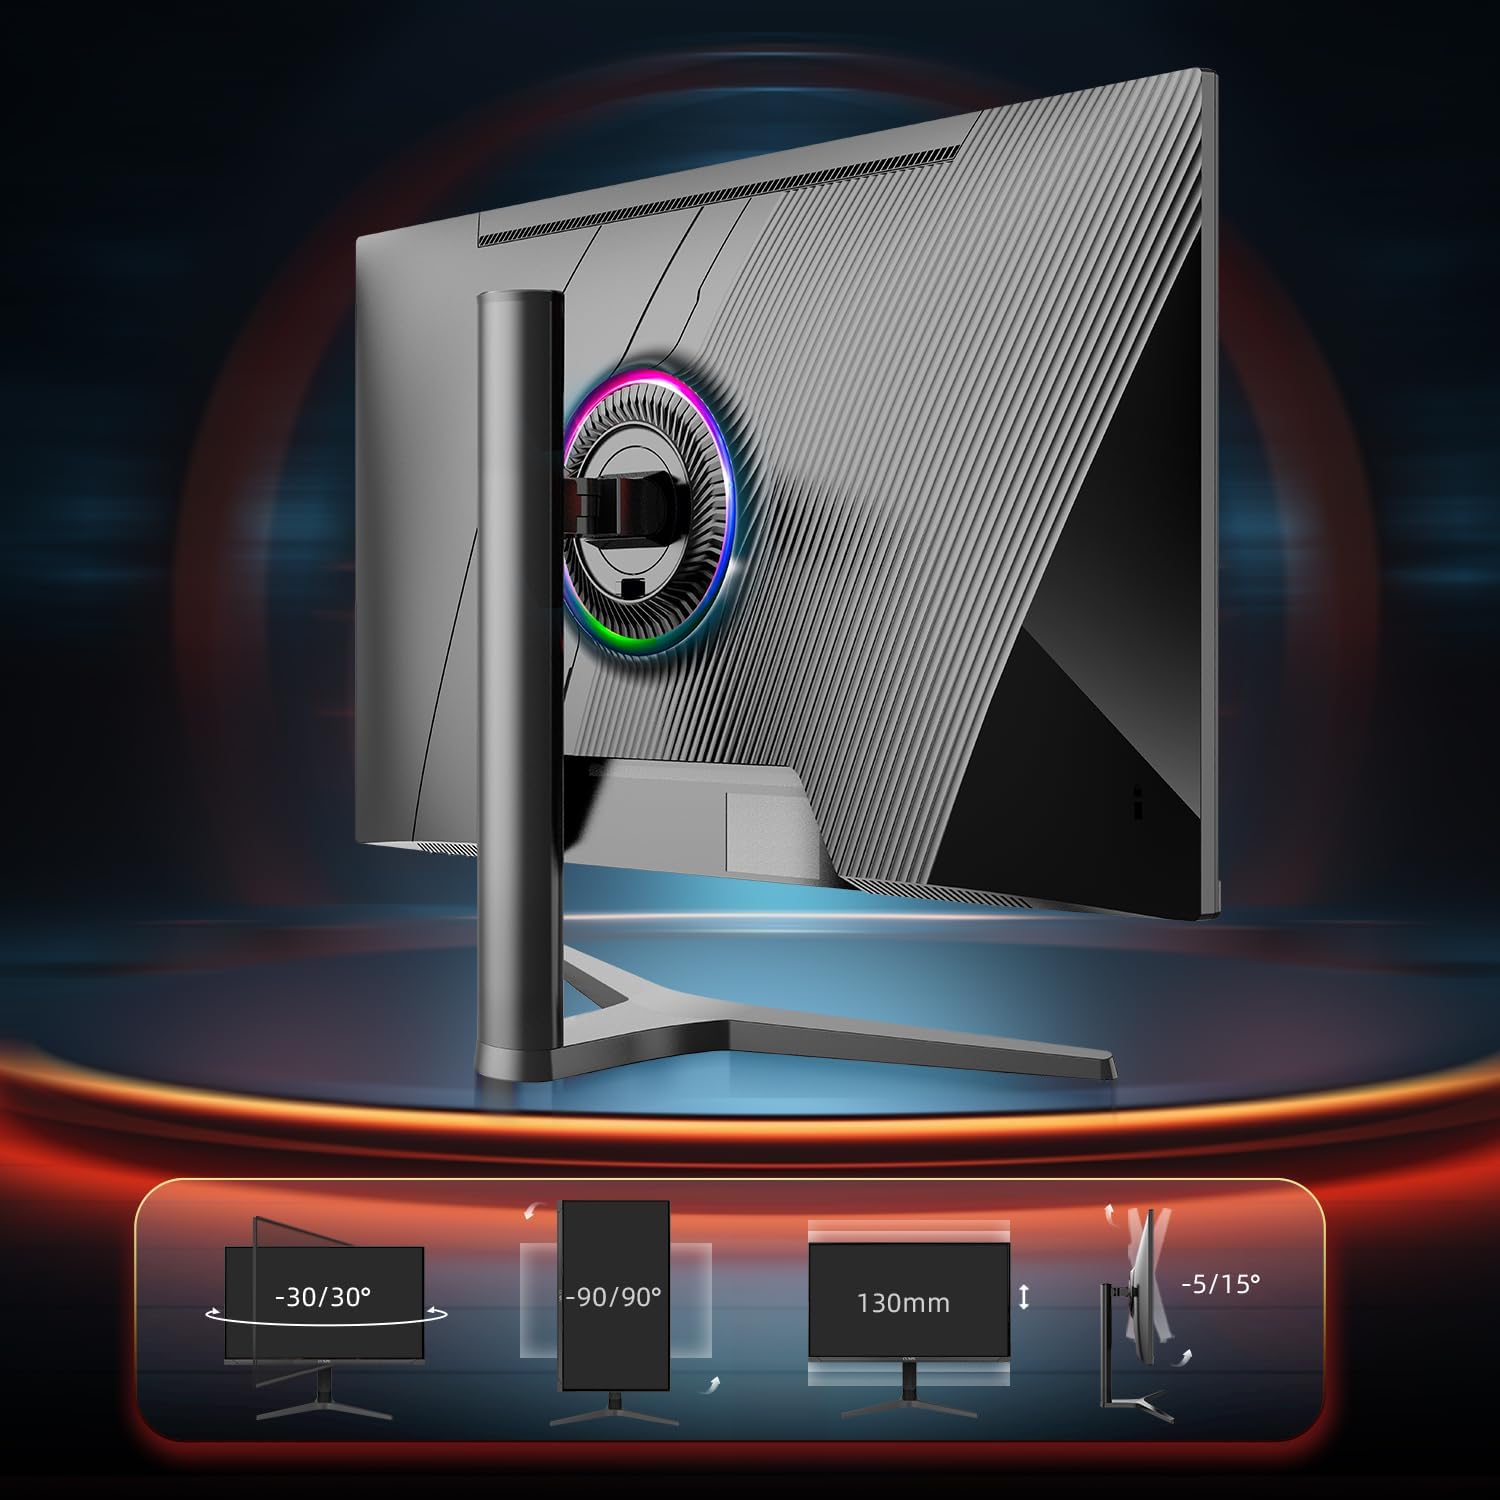
Figure 3.3: Illustrations of the monitor's ergonomic adjustments, including tilt, swivel, height, and pivot capabilities.
4. Maintenance
- Cleaning the Screen: Use a soft, lint-free cloth lightly dampened with water or a specialized screen cleaner. Do not spray cleaner directly onto the screen.
- Cleaning the Casing: Use a soft, dry cloth to wipe the monitor casing. Avoid abrasive cleaners or solvents.
- Power Off When Not in Use: Turn off the monitor when not in use for extended periods to conserve energy and prolong its lifespan.
- Avoid Direct Sunlight: Do not expose the monitor to direct sunlight or excessive heat.
- Ventilation: Ensure proper ventilation around the monitor to prevent overheating. Do not block the ventilation openings.
5. Troubleshooting
If you encounter issues with your monitor, refer to the following common problems and solutions:
5.1 No Power / No Display
- Ensure the power cable is securely connected to both the monitor and a working power outlet.
- Verify the power adapter is functioning correctly.
- Check if the monitor's power indicator light is on. If not, press the power button.
5.2 No Signal / Blank Screen
- Confirm that the video cable (HDMI or DisplayPort) is securely connected to both the monitor and your computer/device.
- Ensure the correct input source is selected in the monitor's OSD menu.
- Try a different video cable or port to rule out cable or port issues.
- Verify your computer's graphics card drivers are up to date.
5.3 Flickering / Intermittent Black Screens
- Ensure you are using VESA certified DisplayPort or HDMI cables, especially for high refresh rates and resolutions. Non-certified cables can cause instability.
- Check your graphics card settings for refresh rate and resolution. Ensure they are within the monitor's supported range.
- Disable Adaptive Sync (FreeSync/G-Sync) in the OSD menu or graphics card control panel to see if the issue persists.
- Update your graphics card drivers.
5.4 Image Tearing / Stuttering
- Ensure Adaptive Sync (FreeSync/G-Sync) is enabled in both the monitor's OSD menu and your graphics card control panel.
- Verify your game's frame rate is within the FreeSync/G-Sync range of the monitor.
5.5 Poor Sound Quality from Built-in Speakers
- The built-in speakers are designed for basic audio. For higher quality audio, connect external speakers or headphones to the monitor's Audio Out port or directly to your computer.
- Check the volume settings on both the monitor and your connected device.
6. Specifications
| Feature | Detail |
|---|---|
| Screen Size | 32 Inches |
| Resolution | 4K UHD (3840 x 2160 Pixels) |
| Panel Type | Fast IPS |
| Refresh Rate | 144Hz (DisplayPort), 120Hz (HDMI 2.1) |
| Response Time | 1ms GTG |
| Color Gamut | 120% sRGB, DCI-P3 90% |
| Brightness | 300 Candela (nit) |
| Contrast Ratio | 1000:1 (Static) |
| HDR Support | HDR10 |
| Adaptive Sync | FreeSync & G-Sync Compatible |
| Connectivity | 2x HDMI 2.1, 2x DisplayPort 1.4, 1x Audio Out |
| Ergonomics | Tilt (-5° to 15°), Swivel (-15° to 15°), Height Adjustment (130mm), Pivot |
| VESA Mount | 75x75 mm |
| Product Dimensions (with stand) | 7.48 x 31.1 x 19.68 inches |
| Item Weight | 20.3 pounds |
| Model Number | S027/32/34ES |
7. Warranty and Support
For warranty information and technical support, please contact the seller directly. Many common issues can be resolved by ensuring proper cable connections and updating graphics drivers.
To contact the seller, Cunpu-US, please visit their Amazon seller page: Cunpu-US Seller Page.
Please retain your proof of purchase for any warranty claims.
Ask a question about this manual
Ask about setup, troubleshooting, compatibility, parts, safety, or missing instructions. Manuals+ will review the question and use this page’s manual context to help answer it.