1. Introduction
Thank you for choosing the Generic Electric Shaver RQ-817A. This manual provides essential information for the safe and effective use, maintenance, and troubleshooting of your new shaver. Please read it thoroughly before first use and retain it for future reference.
This electric shaver is designed for both head and face shaving, offering a versatile 2-in-1 functionality. It features an LED digital display, three adjustable speeds, and is suitable for both wet and dry shaving. The device is USB rechargeable for convenience.
2. Important Safety Information
Please read all safety instructions carefully before using the appliance.
- Do not push the head shaver or press hard against the skin. The shaver uses an ultra-thin knife net designed to cut hair by lightly touching the skin. Excessive pressure can cause irritation or damage to the skin and the shaver.
- Always clean the shaver after each use to prevent bacterial growth and maintain optimal performance.
- This appliance is not intended for use by persons (including children) with reduced physical, sensory or mental capabilities, or lack of experience and knowledge, unless they have been given supervision or instruction concerning use of the appliance by a person responsible for their safety.
- Keep the appliance and its cord away from heated surfaces.
- Do not immerse the shaver in water for extended periods, despite its wet/dry capabilities.
- Only use the provided USB charging cable.
- Do not attempt to disassemble or repair the shaver yourself. Contact customer support for assistance.
3. Package Contents
Verify that all items are present in the package:
- 1 x Electric Shaver RQ-817A
- 1 x Clear Cleaning Brush
- 1 x USB Charging Cable
- 1 x User Manual (this document)

Image: The electric shaver shown with its included accessories: a clear protective cap, a small cleaning brush, a USB charging cable, and the instruction manual, all packaged in a retail box.
4. Product Overview
Familiarize yourself with the components of your electric shaver:
- Dual Reciprocating Foil Shaver Head: For close and thorough shaving of face and head.
- Integrated Hair Clipper: Located on the back for trimming longer hair before shaving or for styling.
- Power Button: To turn the shaver on/off and adjust speed settings.
- LED Digital Display: Shows remaining battery percentage and current speed setting.
- USB Charging Port: For connecting the charging cable.
- Foil Mesh Release Button: For easy removal of the foil mesh for cleaning.

Image: A detailed view of the shaver's LED display, indicating 85% power remaining and the current speed setting.

Image: An exploded view illustrating the steel trapezoidal reciprocating double cutter head, designed for 360-degree intelligent face contouring, and the separate back haircut head.
5. Setup
5.1 Initial Charging
Before using your shaver for the first time, ensure it is fully charged.
- Connect the USB charging cable to the shaver's charging port.
- Plug the other end of the USB cable into a compatible USB power adapter (not included) or a computer's USB port.
- The LED display will show a charging indicator (red light) and the battery percentage will increase.
- A full charge takes approximately 2 hours and provides up to 120 minutes of usage time.
- Once fully charged, the charging indicator may change or the display will show 100%.

Image: The shaver's display showing battery status and key charging/battery life specifications.
6. Operating Instructions
6.1 Powering On/Off
- To turn on the shaver, press the power button once.
- To turn off the shaver, press and hold the power button for a few seconds.
6.2 Shaving (Face & Head)
The shaver can be used for both wet and dry shaving. For best results, especially for sensitive skin, using shaving foam is recommended.
- Ensure your skin is clean. For wet shaving, apply shaving foam or gel.
- Turn on the shaver.
- Gently glide the shaver head over your skin, moving against the direction of hair growth.
- Do not press hard. The ultra-thin knife net is designed for effective shaving with light contact.
- For longer hair, use the integrated hair clipper on the back of the shaver first to trim hair to a shorter length before using the foil shaver head.
6.3 Adjusting Speed
The shaver features three adjustable speed settings to accommodate different hair thicknesses and personal preferences.
- While the shaver is on, press the power button repeatedly to cycle through the speed settings.
- The LED display will indicate the current speed (e.g., 1st gear: Soft mode, 2nd gear: Daily mode, 3rd gear: Strong mode).
- Choose a speed that provides the most comfortable and effective shave for your hair type.
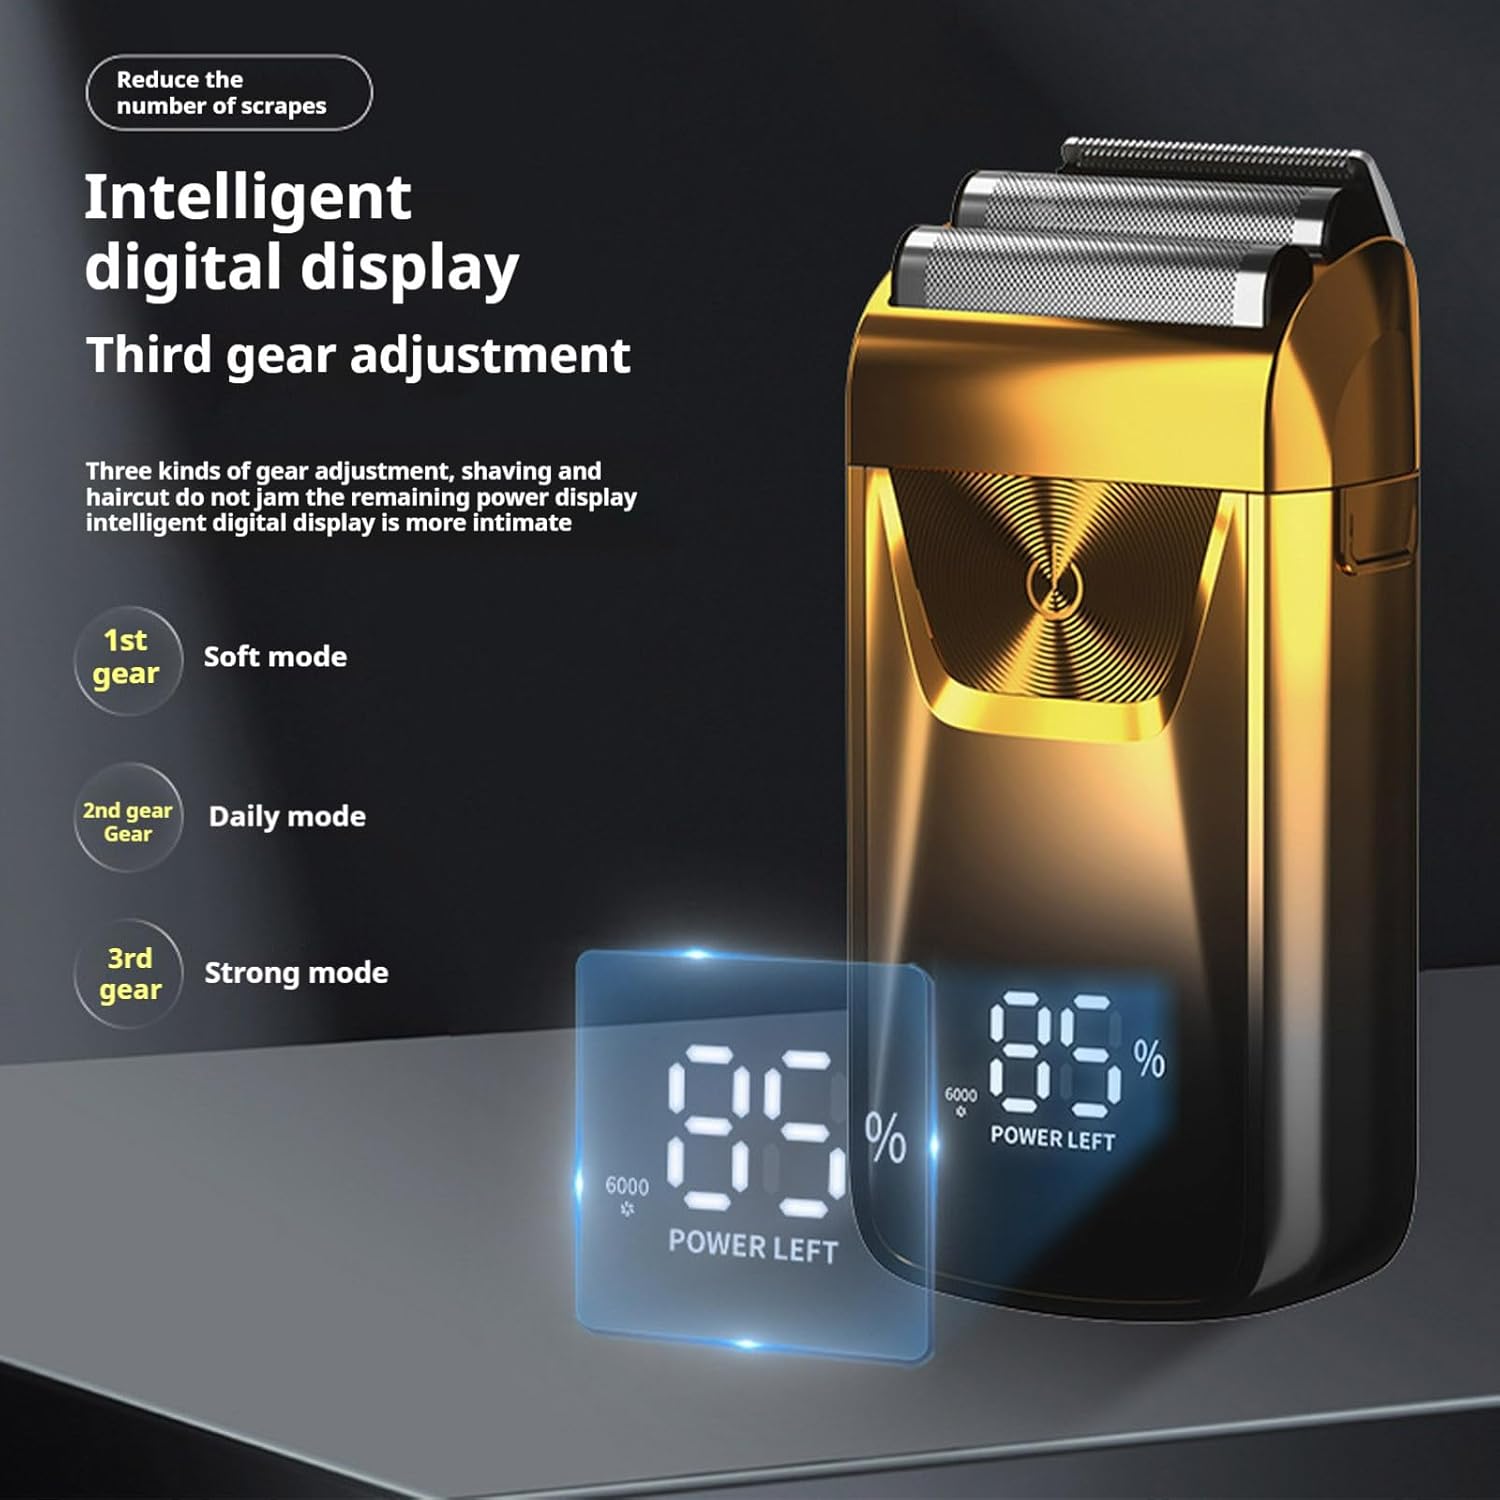
Image: The shaver's intelligent digital display highlighting the three adjustable speed modes for customized shaving.
7. Maintenance and Cleaning
Regular cleaning ensures optimal performance and hygiene of your shaver.
- Turn Off the Shaver: Always ensure the shaver is turned off before cleaning.
- Remove Foil Mesh: Press the release button on the right side of the shaver to detach the aluminum foil mesh.
- Clean Blades and Foil: Use the provided clear cleaning brush to remove trapped hair from the foil mesh and the internal blades. For a more thorough clean, rinse the foil mesh and blades under running water.
- Dry Components: Allow all components to air dry completely before reassembling. Do not use cloths or tissues on the foil as this can damage it.
- Reassemble: Carefully reattach the foil mesh until it clicks into place.
- Lubrication (Optional): Periodically, a drop of shaver oil (not included) can be applied to the blades to maintain smooth operation.

Image: The shaver head with the foil mesh removed, illustrating the internal blades and the mechanism for easy cleaning.
8. Troubleshooting
If you encounter any issues with your shaver, refer to the following common problems and solutions:
| Problem | Possible Cause | Solution |
|---|---|---|
| Shaver does not turn on. | Low battery or no charge. | Charge the shaver fully (approx. 2 hours). |
| Poor shaving performance. | Blades are dull or clogged with hair. Incorrect shaving technique. | Clean the shaver head thoroughly. Ensure you are shaving against hair growth with light pressure. Consider using shaving foam. |
| Shaver stops during use. | Battery is depleted. | Recharge the shaver. |
| Skin irritation after shaving. | Excessive pressure applied. Dry shaving on sensitive skin. | Use lighter pressure. Try wet shaving with foam or gel. Ensure blades are clean. |
9. Specifications
| Feature | Detail |
|---|---|
| Model | RQ-817A |
| Input Voltage | 5V |
| Rated Power | 5W |
| Battery Capacity | 600 mAh Lithium-Ion |
| Charging Time | 2 hours |
| Usage Time | Up to 120 minutes |
| Noise Level | 36-45dB |
| Product Size | 11.5 cm x 5.5 cm (approx. 4.5 in x 2.2 in) |
| Item Weight | 20 Grams (0.71 ounces) |
| Head Type | Foil |
| Number of Blades | 2 |
| Blade Material | Stainless Steel |
| Power Source | Battery Powered (USB Rechargeable) |
| Additional Features | Battery Indicator, Dry Shave, Portable, Rechargeable, Wet Shave |
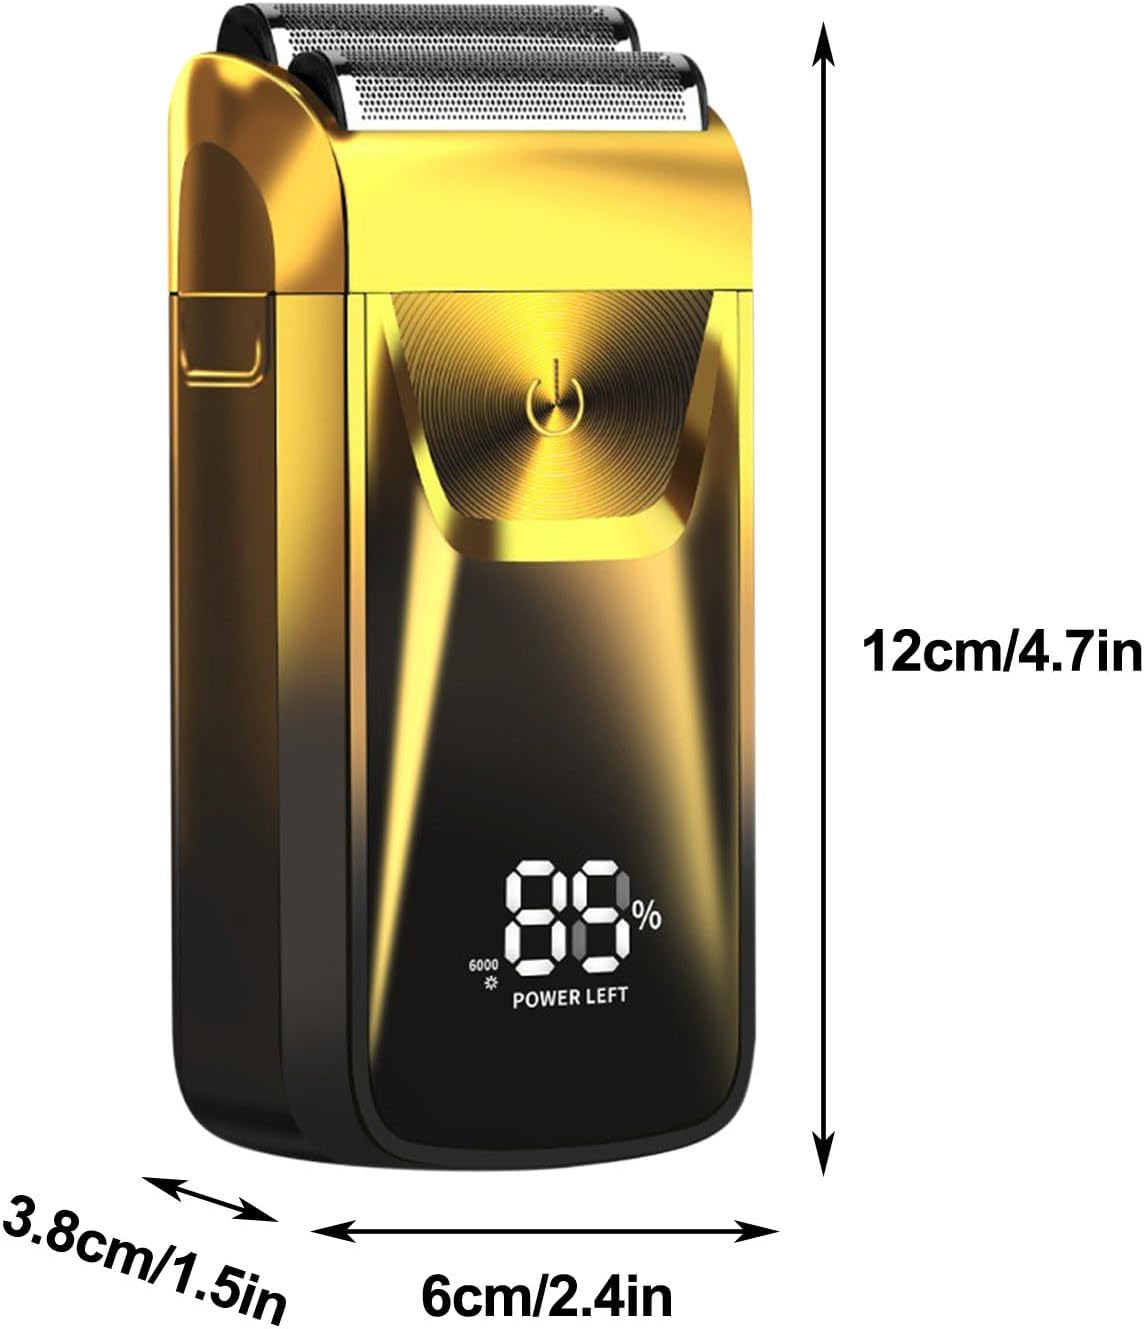
Image: Visual representation of the shaver's dimensions.
10. Warranty and Support
For warranty information or technical support, please refer to the retailer's policy or contact the seller directly. Keep your purchase receipt as proof of purchase.


