1. Introduction
The I0DO Blood Hunter Light is a high-intensity LED flashlight designed to assist hunters in tracking wounded game by illuminating blood trails in low-light conditions. Its specialized light spectrum enhances the visibility of blood, making recovery efforts more efficient and effective. This manual provides essential information for the proper setup, operation, and maintenance of your device.

Figure 1: The I0DO Blood Hunter Light in use, demonstrating its ability to highlight blood trails for tracking.
2. Product Features
- High-Intensity LED: Utilizes an ultra-bright LED to illuminate blood trails effectively.
- Rechargeable Battery: Equipped with a long-lasting, detachable lithium-ion battery.
- Adjustable Focus: Allows adjustment from a wide flood beam to a concentrated spot beam.
- Durable Construction: Waterproof and impact-resistant aluminum body for reliable use in various conditions.
- Compact and Lightweight: Easy to carry and handle during tracking expeditions.
- Type-C Charging: Convenient and modern charging interface.

Figure 2: The I0DO Blood Hunter Light, showcasing its specialized light output, rechargeable battery, and Type-C charging cable.
3. Setup
3.1 Battery Installation
The I0DO Blood Hunter Light uses a detachable rechargeable lithium-ion battery. Ensure the battery is correctly inserted before first use.
- Unscrew the tail cap of the flashlight by turning it counter-clockwise.
- Insert the provided lithium-ion battery with the positive (+) end facing towards the flashlight head.
- Screw the tail cap back on clockwise until secure.

Figure 3: Illustration of the detachable rechargeable battery and its compartment.
3.2 Charging the Device
Before initial use, fully charge the flashlight. Use the provided Type-C USB cable for charging.
- Locate the Type-C charging port on the flashlight body.
- Connect one end of the Type-C USB cable to the flashlight and the other end to a compatible USB power source (e.g., wall adapter, power bank, computer USB port).
- Observe the charging indicator light.

Figure 4: The flashlight connected to a Type-C charging cable.
3.3 Charging Indicator
The flashlight features a charging indicator light to show the battery status:
- Red Light: Indicates the battery is charging or has low power.
- Green Light: Indicates the battery is fully charged.
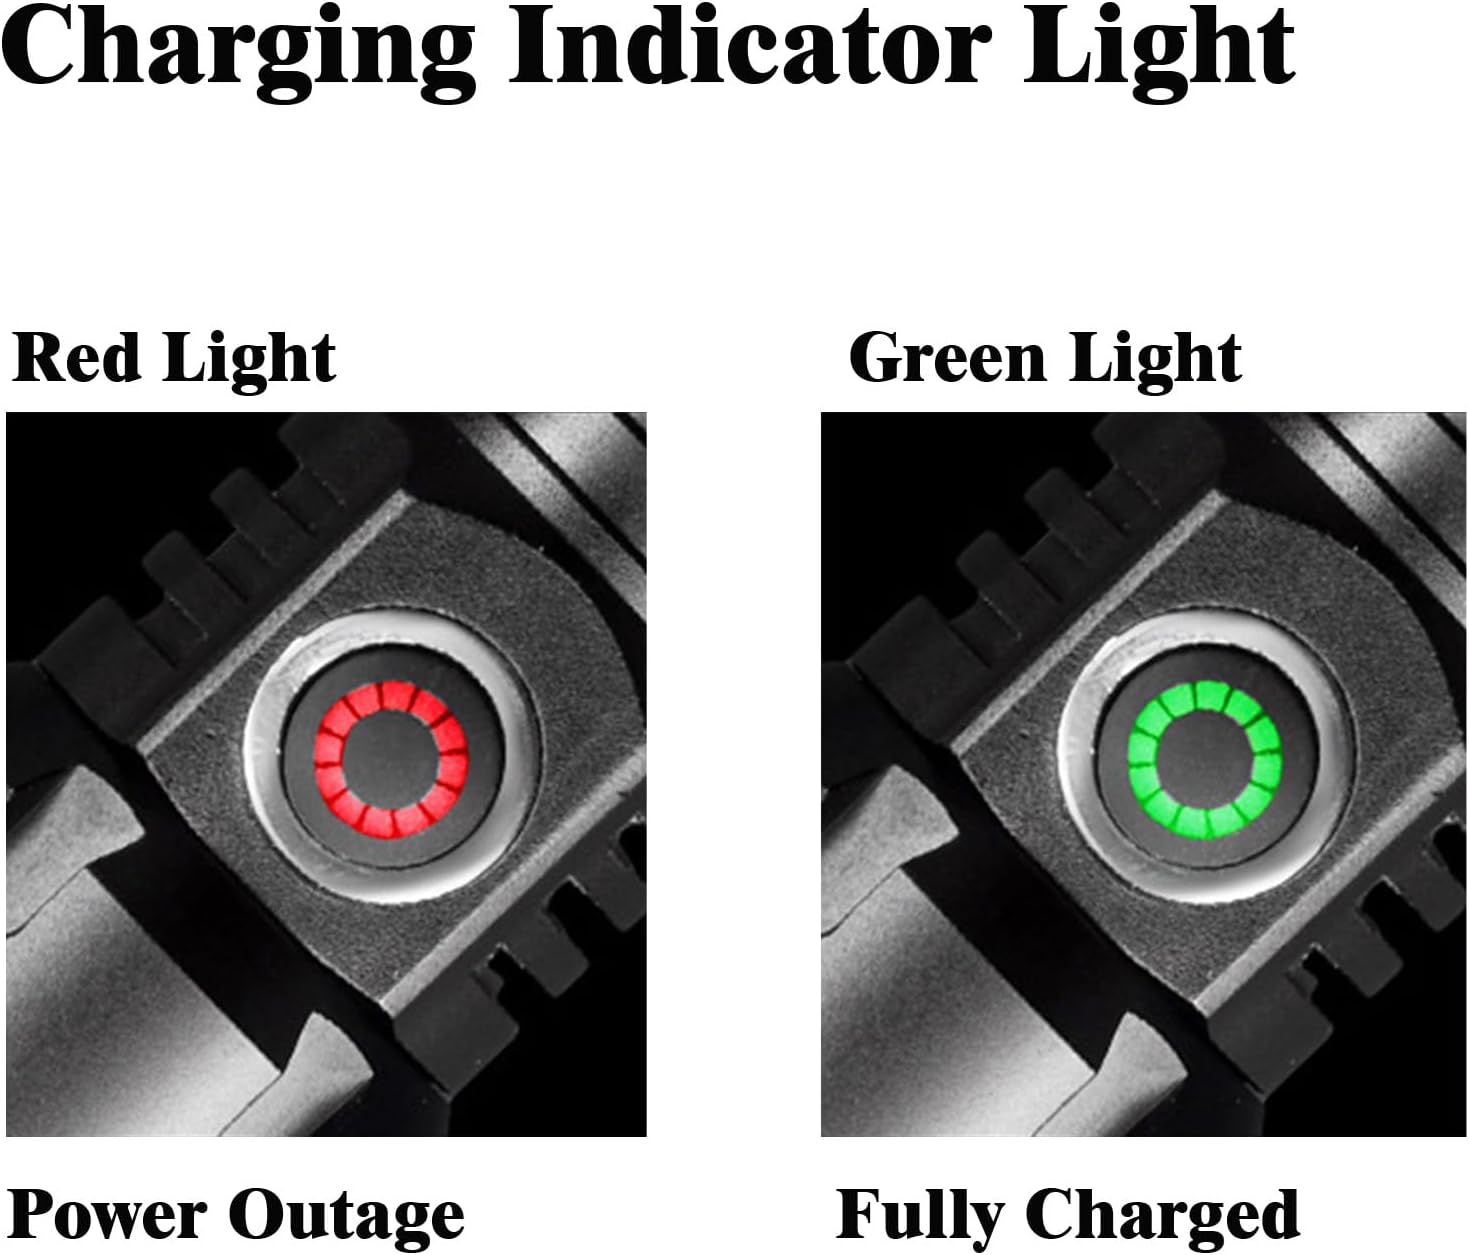
Figure 5: Charging indicator lights: Red (charging/low battery) and Green (fully charged).
4. Operating Instructions
4.1 Power On/Off
To turn the flashlight on or off, press the easy-to-locate power switch on the body of the flashlight.
4.2 Adjusting Focus
The flashlight features an adjustable focus mechanism to optimize visibility for different tracking scenarios.
- To adjust the focus, gently pull or push the lamp head of the flashlight.
- Pulling the head outwards will narrow the beam to a concentrated spot, ideal for long-distance tracking.
- Pushing the head inwards will widen the beam to a floodlight, suitable for illuminating a broader area.

Figure 6: Demonstrating the zoomable feature for adjusting the light beam.
4.3 Blood Tracking Technique
Effective blood tracking requires patience and proper use of the flashlight.
- Adjust Focus: Stretch the lamp head to adjust the focus, optimizing the spot size and intensity for clear visibility of blood.
- Scan Carefully: Trace the blood trail carefully and scan the ground for any signs of blood or droplets.
- Be Patient: Blood trails can be faint and may take time to locate. Maintain patience and thoroughness while following the trail.
- Practice: Familiarize yourself with the flashlight's capabilities before critical use. Practice in various conditions to enhance your tracking skills.
5. Maintenance
5.1 Cleaning
To ensure optimal performance and longevity, keep your flashlight clean.
- Wipe the exterior of the flashlight with a soft, damp cloth.
- Do not use abrasive cleaners or solvents, as they may damage the finish or internal components.
- Keep the lens clean for maximum light output. Use a lens cleaning cloth if necessary.
5.2 Battery Care
Proper battery care extends the life of your device.
- Recharge the battery regularly, especially after extended use.
- Avoid completely draining the battery before recharging.
- If storing the flashlight for a long period, charge the battery to approximately 50% and recharge every few months to prevent deep discharge.
5.3 Storage
Store the flashlight in a cool, dry place away from direct sunlight and extreme temperatures. Ensure the flashlight is turned off to prevent accidental activation and battery drain.
6. Troubleshooting
- Flashlight not turning on:
- Ensure the battery is correctly inserted with the positive (+) end facing the head.
- Check if the battery is charged. Recharge if necessary.
- Verify the tail cap is screwed on tightly.
- Light is dim:
- The battery may be low. Recharge the flashlight.
- Clean the lens if it appears dirty or smudged.
- Charging indicator not working:
- Ensure the charging cable is securely connected to both the flashlight and the power source.
- Try a different USB cable or power adapter to rule out faulty accessories.
7. Specifications

Figure 7: Physical dimensions and weight of the I0DO Blood Hunter Light.
| Feature | Detail |
|---|---|
| Model Number | Blood Hunter Light |
| Brightness | 2000 Lumens |
| Power Source | Battery Powered (1 Lithium Ion battery included) |
| Battery Type | Lithium Ion (Rechargeable) |
| Light Source Type | LED |
| Material | Aluminum |
| Special Features | Adjustable Focus, High Power, Impact Resistant, Long Range, Rechargeable |
| Water Resistance Level | Waterproof |
| Product Dimensions | 5.5"D x 1.2"W x 1.2"H |
| Item Weight | 6.4 ounces |
| Voltage | 3.7 Volts |
| Wattage | 30 watts |
8. Warranty Information
This product comes with a Limited Warranty. Please refer to the product packaging or contact the manufacturer for specific details regarding warranty coverage and terms.
9. Support
For further assistance, technical support, or inquiries not covered in this manual, please refer to the contact information provided with your product packaging or visit the official I0DO website.