1. Important Safety Information
Please read and understand all instructions before assembly and use. Keep this manual for future reference.
- Proper Assembly: Ensure all components are assembled correctly and securely according to the provided instructions. Improper assembly can lead to instability and injury.
- Weight Limit: Do not exceed the maximum weight limit of 3500 pounds for this bed frame. Overloading can cause structural damage and collapse.
- Electrical Safety: Exercise caution when using the integrated charging station and LED lights. Ensure all connections are dry and free from damage. Do not expose electrical components to water or excessive moisture.
- Children and Pets: Keep small children and pets away from the assembly area. Small parts can be a choking hazard.
- Maintenance: Regularly inspect the bed frame for loose bolts, damaged parts, or frayed electrical cords. Address any issues immediately.
2. Product Overview
The AGXI Floating Bed Frame Queen (Model JNXF01-14Q) offers a modern aesthetic with practical features designed for comfort and convenience. Its innovative hidden foot design creates the illusion of a floating bed, enhanced by integrated LED lighting. The frame also includes a built-in charging station to keep your devices powered and within reach.
Key Features:
- Modern Floating Design: Hidden support legs create a unique floating appearance.
- Smart RGB LED Lights: Customizable lighting with over 60,000 colors, adjustable via app or remote control, featuring music, voice, and timing modes.
- Convenient Charging Station: Includes 2 AC outlets, 1 USB port, and 1 Type-C port for easy device charging.
- Sturdy Metal Construction: Features 11 stable metal slats and 9 thick legs for superior durability and noise-free support.
- Easy Assembly: Designed for quick and straightforward assembly, typically under 30 minutes for one person.
Product Dimensions:
Overall Dimensions: 79.6"L x 59.6"W x 14"H (for Queen mattress size L80" x W60")

Figure 2.1: Product Dimensions and Features
3. Package Contents
Before beginning assembly, ensure all parts and tools are present. Refer to the packing list included in your box. If any parts are missing or damaged, please contact customer support.

Figure 3.1: Detailed view of bed frame components and features.
4. Assembly Instructions
Assembly is designed to be straightforward. All necessary tools and hardware are included. Follow the numbered steps carefully.
Step-by-Step Guide:
- Unpack and Identify Parts: Lay out all components on a clean, soft surface (e.g., carpet) to prevent scratches. Verify all parts against the packing list. Each part is labeled with a number or letter for easy identification.
- Assemble the Headboard: Connect the headboard pieces using the provided bolts and Allen wrench. Ensure all connections are finger-tight before final tightening.
- Construct the Main Frame: Attach the side rails and footboard to the headboard. The frame features reinforced corners for enhanced stability.
- Install Support Legs: Securely attach the central support legs to the main frame. These legs are crucial for distributing weight evenly and minimizing wobbling.
- Apply Cushion Strips: Adhere the provided cushion strips to the frame where the mattress will rest. This helps prevent friction and noise.
- Insert Slats: Place the 11 metal slats across the frame. Ensure they are properly seated in their designated slots for optimal mattress support.
- Install Charging Station: Mount the charging station onto the designated area on the side rail. Connect its power cord to a wall outlet.
- Attach LED Lights: Secure the LED light strip to the underside of the bed frame using the provided straps. Connect the LED lights to the USB port on the charging station.
- Final Tightening: Once all components are in place, go back and securely tighten all bolts using the Allen wrench. Do not overtighten.
Assembly Video:
Video 4.1: Official AGXI assembly guide for the Floating Bed Frame with LED Lights and Charging Station. This video demonstrates the step-by-step process of putting together the bed frame, including attaching the headboard, installing support legs, and connecting the electrical components.

Figure 4.2: Built-in Mattress Slide Stopper for secure mattress placement.
5. Operating Instructions
5.1 LED Lights Operation
The integrated RGB LED lights offer a wide range of customization options to enhance your bedroom ambiance.
- Control Methods: The LED lights can be controlled via a dedicated mobile application or the included key remote control.
- Color Selection: Choose from over 60,000 colors to match your mood or decor.
- Dynamic Modes: Explore various modes including music synchronization, voice control, and timing functions for automated lighting schedules.
- Brightness Adjustment: Adjust the brightness level to your preference.
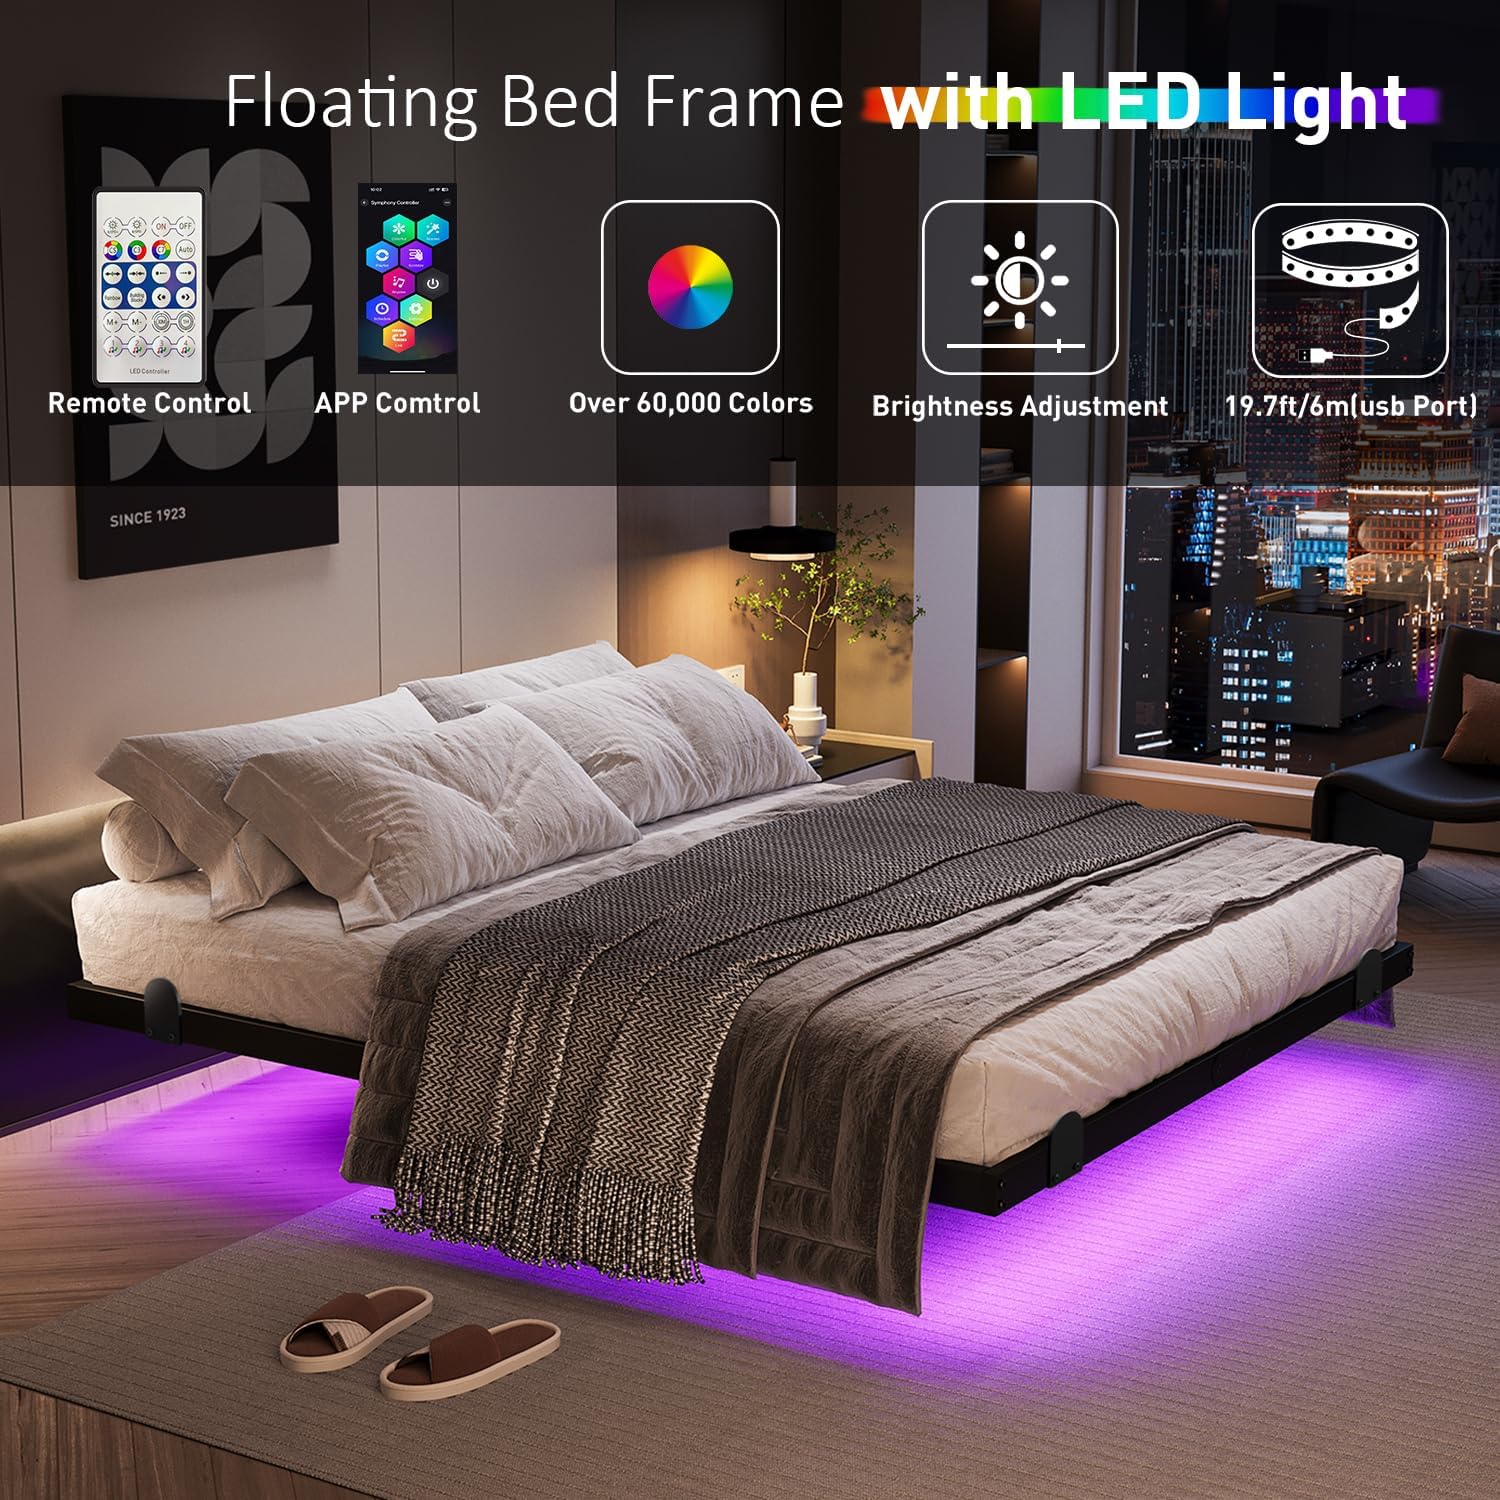
Figure 5.1: LED Light Control Options.

Figure 5.2: Three-side Ambient Lights Design.
5.2 Charging Station Usage
The bed frame includes a convenient charging station to power your electronic devices.
- Power Outlets: The station features 2 standard AC outlets for larger electronics.
- USB Ports: A 1 USB port and 1 Type-C port are available for charging smartphones, tablets, and other USB-powered devices.
- Placement: The charging station is strategically placed on the side of the bed frame for easy access.

Figure 5.3: Charging Station with AC, USB, and Type-C ports.
6. Maintenance
Regular maintenance will ensure the longevity and optimal performance of your AGXI bed frame.
- Cleaning: Wipe the metal frame with a soft, damp cloth. Avoid abrasive cleaners or harsh chemicals that could damage the finish.
- Check Connections: Periodically inspect all bolts and screws to ensure they remain tight. Retighten as necessary.
- Electrical Components: Keep the charging station and LED light strips clean and dry. Do not attempt to repair damaged electrical components yourself; contact a qualified technician or customer support.
- Weight Distribution: Avoid placing excessive or uneven weight on the bed frame to prevent stress on the structure.
7. Troubleshooting
If you encounter any issues with your bed frame, refer to the following common problems and solutions:
- Bed Frame is Wobbly/Noisy:
Solution: Check all bolts and connections. Ensure they are securely tightened. Verify that all support legs are making firm contact with the floor. Ensure the mattress cushion strips are properly installed. - LED Lights Not Working:
Solution: Ensure the charging station is plugged into a live wall outlet and the power switch on the station is turned ON. Check the connection between the LED strip and the USB port. If using the remote, ensure batteries are functional. Try controlling via the mobile app if available. - Charging Station Not Providing Power:
Solution: Confirm the charging station's power cord is securely plugged into a working wall outlet. Check the power switch on the station. Test with a different device or outlet to rule out device or outlet issues. - Mattress Slides:
Solution: Ensure the built-in mattress slide stoppers are correctly installed and positioned. Verify that the mattress is properly centered on the frame.
If the problem persists after attempting these solutions, please contact AGXI customer support for further assistance.
8. Specifications
| Feature | Detail |
|---|---|
| Size | Queen |
| Special Features | Charging Station, Remote Control, Visual Floating Design, With Smart RGB LED Lights |
| Color | Black |
| Product Dimensions | 79.6"L x 59.6"W x 14"H |
| Brand | AGXI |
| Included Components | USB, LED Light Strip, Charging Station |
| Finish Type | Painted |
| Assembly Required | Yes |
| Form Factor | Floating Bed Frame |
| Warranty Type | Limited |
| Ground To Item Distance | 14 Inches |
| Item Weight | 42.3 pounds |
| Model Number | JNXF01-14Q |
| Date First Available | October 1, 2024 |
9. Warranty and Customer Support
The AGXI Floating Bed Frame comes with a limited warranty. For specific details regarding warranty coverage, please refer to the documentation included with your purchase or contact AGXI customer support.
If you encounter any missing or damaged parts, quality issues, or are not satisfied with your product, please contact us. We are committed to ensuring you have a great shopping experience and will respond within 24 hours.
Contact Information:
Please refer to your purchase documentation or the AGXI brand store on Amazon for the most current customer support contact details.
Online Resources:
Visit the AGXI Store on Amazon for additional product information and support.