1. Introduction
This user manual provides essential information for the safe and efficient operation of your Haier I-Pro Series 1 HW100-BP14929A-S washing machine. Please read these instructions carefully before using the appliance and retain them for future reference. Proper use and maintenance will ensure optimal performance and longevity of your washing machine.
1.1 Safety Information
- Ensure the appliance is properly grounded before use.
- Do not allow children to play with or operate the washing machine.
- Unplug the appliance before cleaning or performing any maintenance.
- Do not wash items that have been contaminated with flammable substances.
- Refer to the installation section for proper water and electrical connections.
2. Product Overview
The Haier I-Pro Series 1 HW100-BP14929A-S is a front-load washing machine designed for efficient and thorough cleaning of your laundry. It features a 10 kg capacity, a powerful Inverter motor, and advanced washing technologies.
2.1 Appliance Components

Figure 2.1: Front View of the Washing Machine. This image displays the front of the Haier I-Pro Series 1 washing machine, showing the control panel, detergent drawer, and the main drum door.
- Detergent Dispenser Drawer
- Control Panel
- Drum Door
- Drum
- Service Filter Cover (bottom right)
- Adjustable Feet
2.2 Control Panel

Figure 2.2: Control Panel Detail. This image shows a detailed view of the washing machine's control panel, including the program selector dial, digital display, and various function buttons such as Delay, Time, Temp, Speed, Extra Rinse, and Start/Pause.
The control panel allows you to select wash programs, adjust settings, and monitor the washing cycle. Key elements include:
- Program Selector Dial: Used to choose the desired wash program.
- Digital Display: Shows remaining time, error codes, and selected options.
- Function Buttons:
- Delay: Sets a delayed start time for the wash cycle.
- Time: Adjusts wash duration for certain programs.
- Temp: Modifies the wash water temperature.
- Speed: Changes the spin speed.
- Extra Rinse: Adds an additional rinse cycle.
- Start/Pause: Starts or pauses the selected program.
3. Setup and Installation
Proper installation is crucial for the safe and efficient operation of your washing machine. Please follow these steps carefully.
3.1 Unpacking
- Remove all packaging materials, including the polystyrene base and any protective films.
- Inspect the appliance for any damage during transit. Report any damage immediately to your retailer.
3.2 Removing Transit Bolts
Before using the machine, you must remove the transit bolts located at the rear of the appliance. These bolts secure the drum during transport and must be removed to prevent damage during operation.
- Locate the transit bolts on the back panel.
- Use a wrench to loosen and remove all bolts.
- Insert the plastic caps provided into the holes.
3.3 Positioning and Leveling

Figure 3.1: Appliance Dimensions. This image illustrates the physical dimensions of the Haier HW100-BP14929A-S washing machine: Height 85 cm, Width 59.5 cm, Depth 63.6 cm. These measurements are crucial for proper installation and placement.
- Place the washing machine on a firm, level floor.
- Adjust the feet to ensure the appliance is perfectly level and stable. Use a spirit level to verify.
- Ensure there is adequate space around the machine for ventilation and access.
3.4 Water Connection
- Connect the inlet hose to a cold water tap with a 3/4" thread.
- Ensure all connections are tight to prevent leaks.
- Position the drain hose into a standpipe or over the edge of a sink, ensuring it is securely fixed to prevent dislodgement.
3.5 Electrical Connection
- Connect the power cord to a grounded electrical outlet.
- Ensure the voltage and frequency match the specifications on the rating plate of the appliance.
- Do not use extension cords or multiple adapters.
4. Operating Instructions
Follow these steps for effective and efficient washing.
4.1 Preparing Laundry
- Sort laundry by fabric type, color, and degree of soiling.
- Check garment care labels for washing instructions.
- Empty pockets and close zippers or fasteners.
4.2 Loading Laundry
- Open the drum door and load laundry loosely into the drum.
- Do not overload the machine. The 10 kg capacity refers to dry laundry weight.
4.3 Adding Detergent and Additives
- Pull out the detergent dispenser drawer.
- Add appropriate amounts of detergent to the main wash compartment.
- Add fabric softener to the designated compartment (if desired).
- Close the detergent drawer gently.
4.4 Program Selection
Turn the Program Selector Dial to choose one of the 15 available wash programs. Refer to the program chart in your quick start guide for details on each program.

Figure 4.1: 15 Wash Programs. This image highlights the variety of 15 wash programs available on the Haier washing machine, indicating its versatility for different fabric types and cleaning needs.
4.5 Adjusting Options
After selecting a program, you can customize settings using the function buttons:
- Temperature (Temp): Adjust the wash water temperature.
- Spin Speed (Speed): Modify the spin speed.
- Extra Rinse: Add an extra rinse cycle for sensitive skin or heavily soiled items.
- Delay Start (Delay): Set a time for the wash cycle to begin later.
4.6 Special Features
- Steam Function:

Figure 4.2: Steam & Refresh Option. This image shows the washing machine's display indicating the "Vapor & Refresh" (Steam & Refresh) option, which helps eliminate odors, dust, allergens, and reduces wrinkles without a full wash cycle.
The steam function helps to eliminate odors, dust, and allergens, and can reduce wrinkles in garments. Select this option for a refreshing treatment without a full wash.
- ABT® Antibacterial Technology:
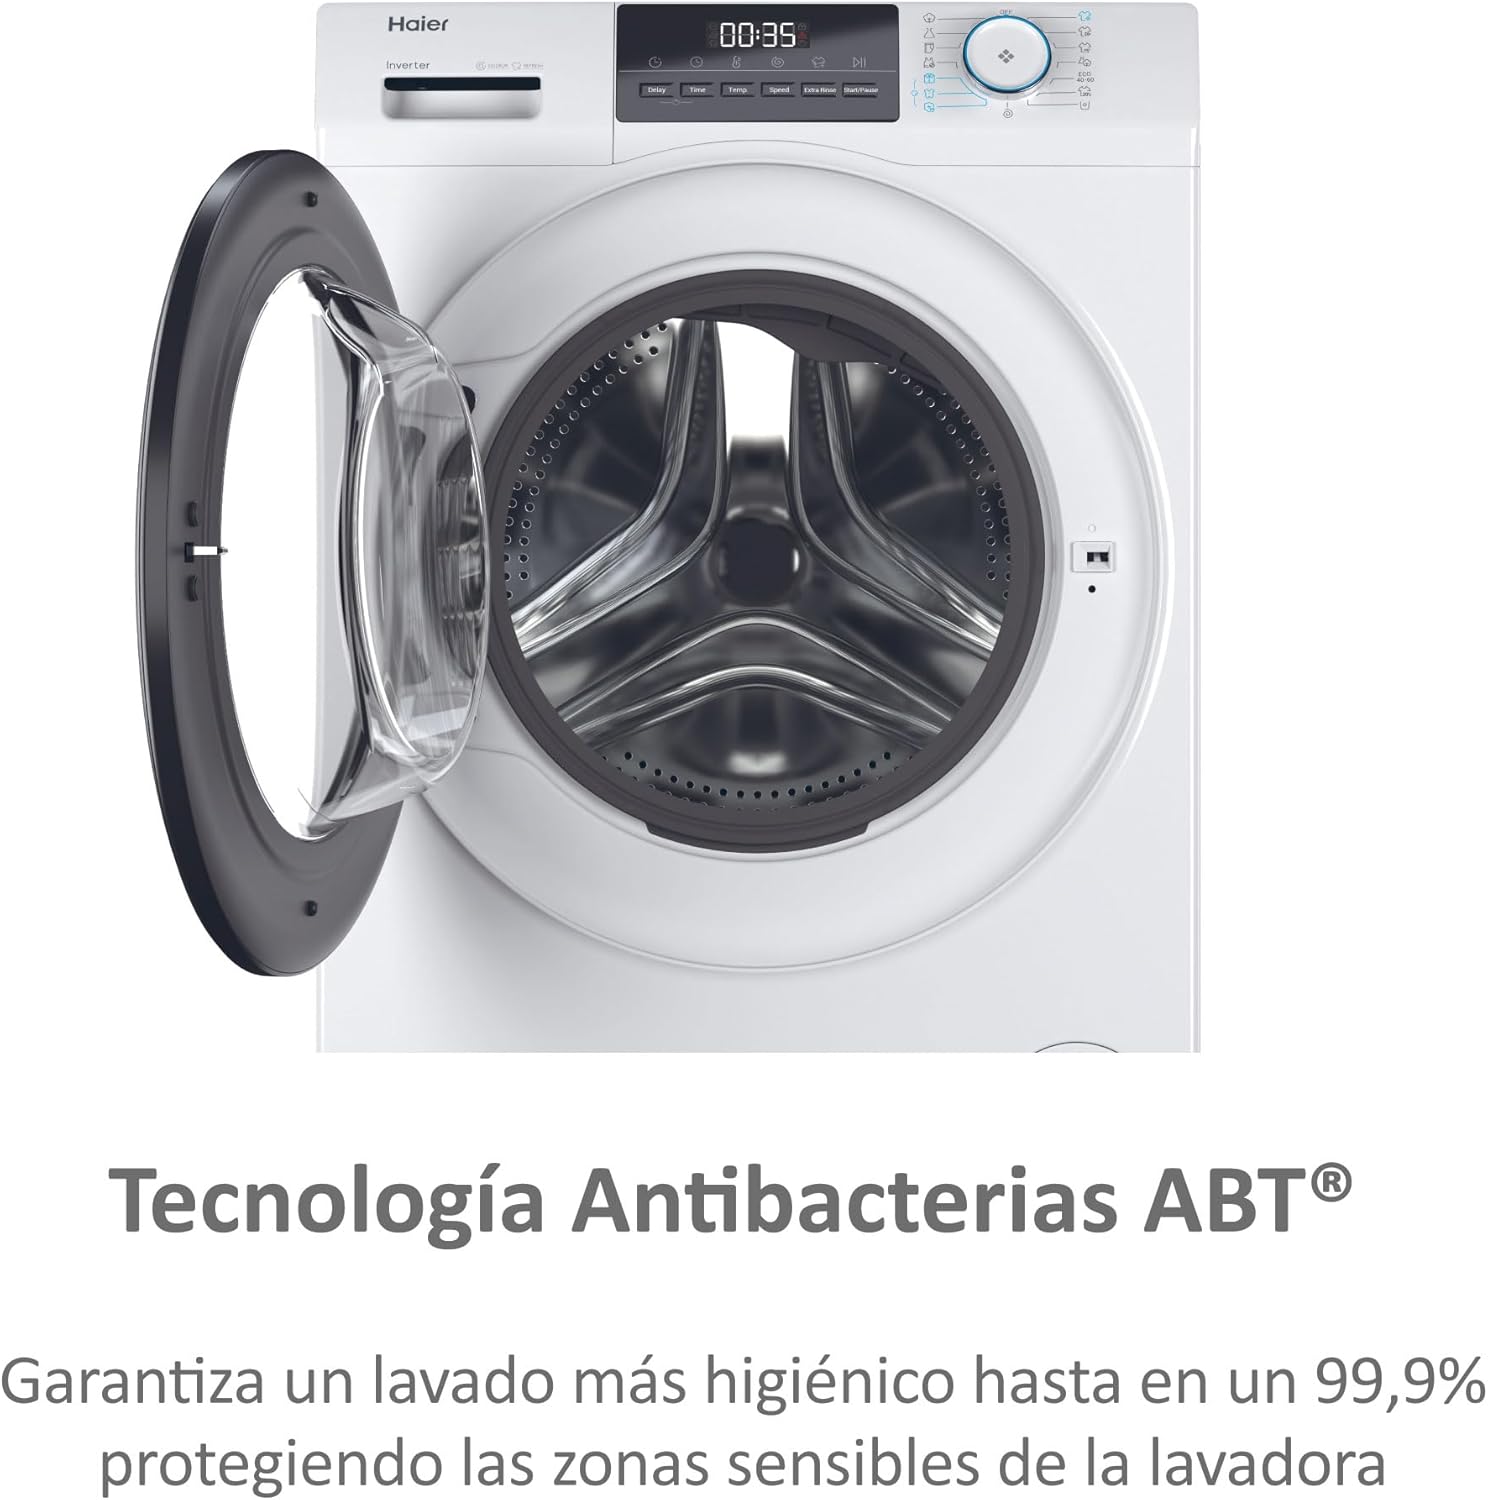
Figure 4.3: ABT® Antibacterial Technology. This image highlights the ABT® (Anti-Bacterial Treatment) technology, which ensures a more hygienic wash by protecting sensitive areas of the washing machine from bacteria, achieving up to 99.9% bacterial elimination.
This technology protects sensitive areas of the washing machine from bacteria, ensuring a more hygienic wash by eliminating up to 99.9% of bacteria and allergens.
- Automatic Load Sensor (KG Detector):
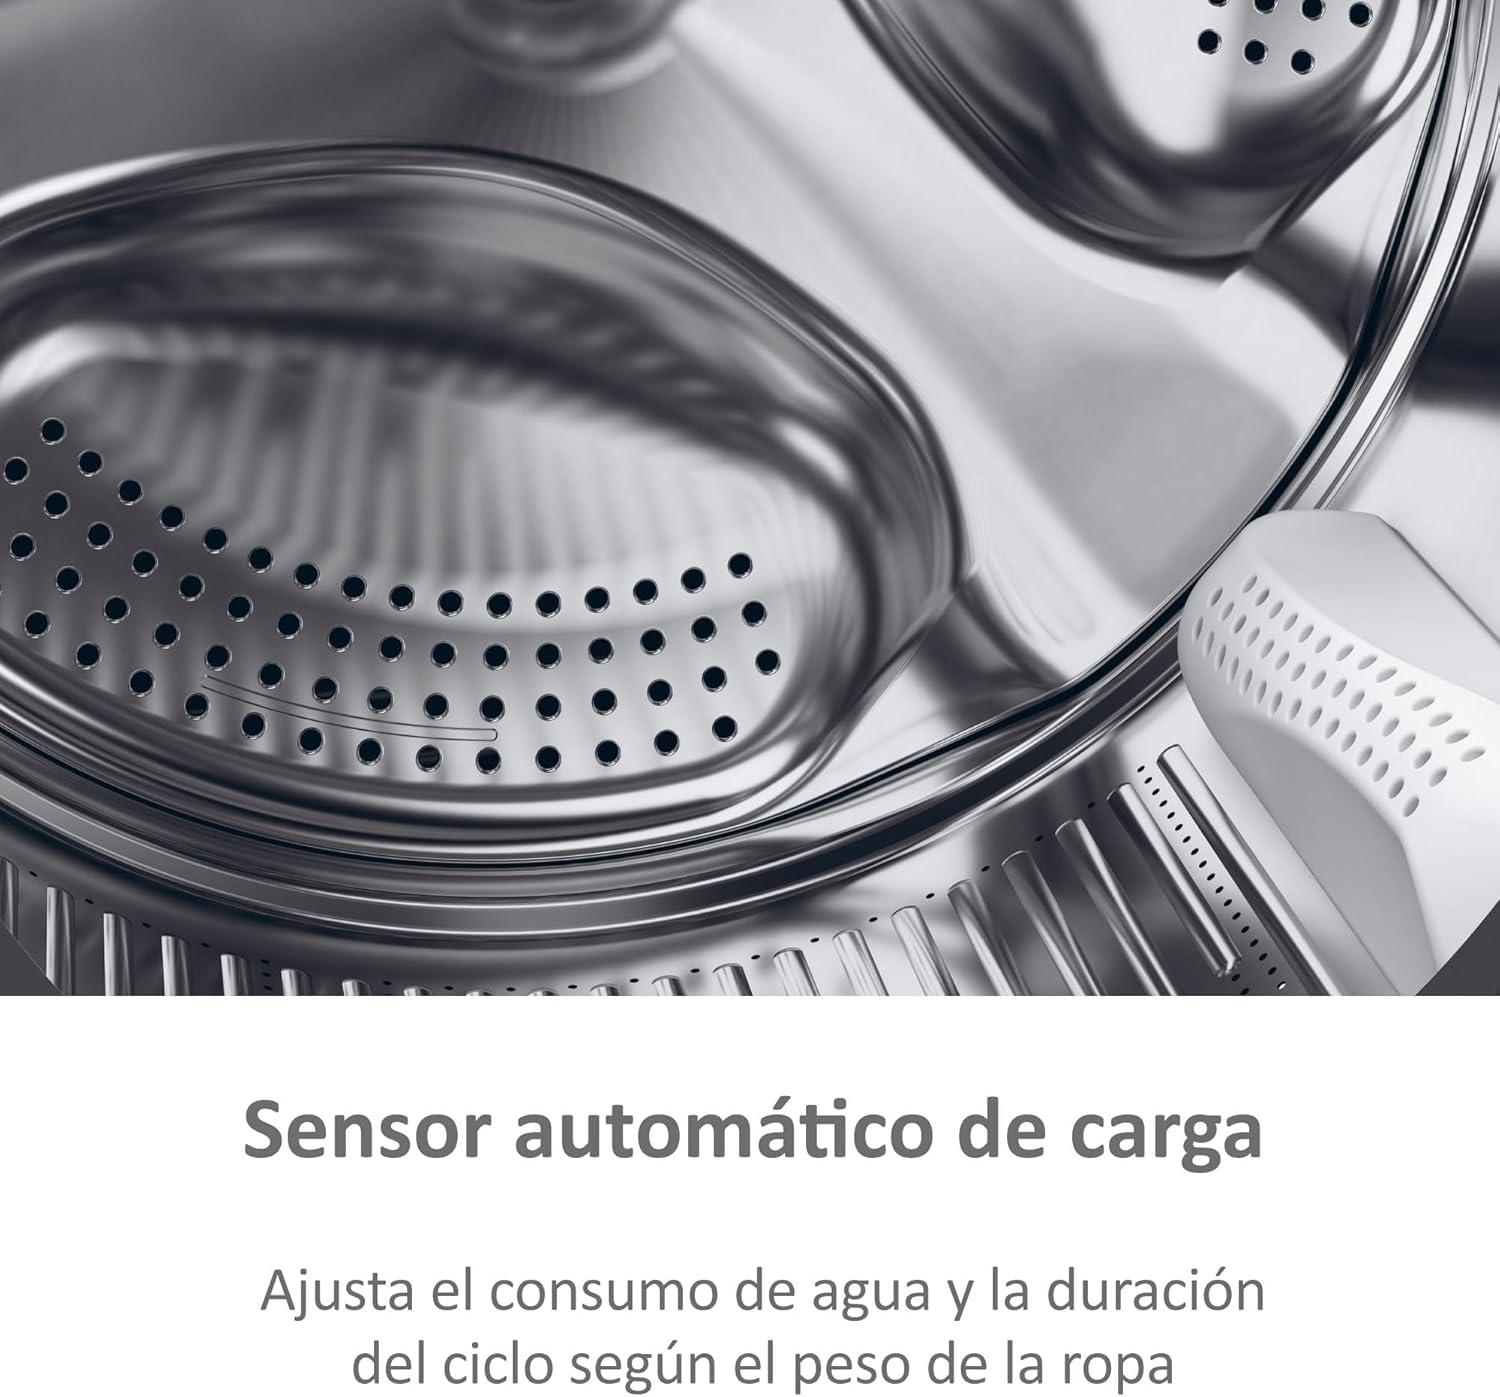
Figure 4.4: Automatic Load Sensor. This image illustrates the automatic load sensor feature, which adjusts water consumption and cycle duration based on the weight of the laundry, optimizing efficiency.
The machine automatically detects the weight of the laundry and adjusts water consumption and cycle duration accordingly, optimizing efficiency.
4.7 Starting the Wash Cycle
- Press the Start/Pause button to begin the selected program.
- The display will show the remaining time.
4.8 End of Cycle
- The machine will signal the end of the cycle.
- Open the door and remove the laundry promptly to prevent wrinkles.
- Leave the door slightly ajar to allow the drum to dry and prevent odors.
5. Maintenance and Care
Regular maintenance ensures the longevity and optimal performance of your washing machine.
5.1 Cleaning the Detergent Dispenser
- Pull out the dispenser drawer completely.
- Rinse it under running water to remove any detergent residue.
- Clean the housing of the dispenser drawer with a brush.
- Reinsert the drawer.
5.2 Cleaning the Drum
- Run a maintenance wash cycle (e.g., a hot wash with no laundry and a descaling agent) periodically to clean the drum and remove residue.
5.3 Cleaning the Door Seal
- Wipe the rubber door seal after each wash to remove lint and moisture.
- Periodically clean any mold or residue that may accumulate.
5.4 Cleaning the Drain Filter
The drain filter should be cleaned regularly to prevent blockages.
- Open the service filter cover at the bottom right of the machine.
- Place a shallow container underneath to catch any residual water.
- Slowly unscrew the filter and allow water to drain.
- Remove any lint or foreign objects from the filter.
- Clean the filter under running water and screw it back in securely.
- Close the service filter cover.
5.5 External Cleaning
- Wipe the exterior of the machine with a soft, damp cloth.
- Do not use abrasive cleaners or solvents.
6. Troubleshooting
Before contacting customer service, please refer to the following table for common issues and their solutions.
| Problem | Possible Cause | Solution |
|---|---|---|
| Machine does not start | Power cord not plugged in; door not closed properly; Start/Pause button not pressed. | Check power connection; ensure door is latched; press Start/Pause. |
| No water intake | Water tap closed; inlet hose kinked; water supply cut off. | Open water tap; straighten hose; check household water supply. |
| Water not draining | Drain hose kinked or blocked; drain filter clogged. | Straighten drain hose; clean drain filter (see Section 5.4). |
| Excessive vibration/noise | Transit bolts not removed; machine not level; uneven load. | Remove transit bolts (see Section 3.2); level the machine; redistribute laundry. |
| Detergent residue in drawer | Insufficient water pressure; clogged dispenser. | Check water pressure; clean detergent dispenser (see Section 5.1). |
7. Technical Specifications
Key technical details for the Haier I-Pro Series 1 HW100-BP14929A-S washing machine.
- Model: HW100-BP14929A-S
- Capacity: 10 kg
- Maximum Spin Speed: 1400 rpm
- Dimensions (H x W x D): 85 cm x 59.5 cm x 63.6 cm
- Weight: 64 kg
- Energy Efficiency Class (2021): A
- Energy Consumption: 41 kWh / 100 cycles
- Water Consumption: 48 liters / cycle
- Noise Level (Spin): 72 dB(A)
- Motor Type: Inverter
- Special Features: Steam Function, ABT® Antibacterial Treatment, Automatic Load Sensor (KG Detector), 15 Wash Programs.

Figure 7.1: Energy Label. This image displays the EU Energy Label for the Haier HW100-BP14929A-S washing machine, indicating its energy efficiency class A, energy consumption of 41 kWh/100 cycles, 10 kg capacity, 48 liters water consumption per cycle, and 72 dB noise level during spin.
For detailed product information, refer to the EPREL database: https://eprel.ec.europa.eu/qr/1933071
8. Warranty and Support
Your Haier washing machine is covered by a manufacturer's warranty. Please refer to the warranty card included with your appliance for specific terms and conditions.
- Warranty Period: Typically 24 months from the date of purchase.
- Customer Service: For technical assistance, repairs, or spare parts, please contact Haier customer support. Contact details can be found on the official Haier website or in your warranty documentation.
- Online Resources: Visit the official Haier website for FAQs, product registration, and additional support materials.