1. Introduction
Thank you for choosing the Sunoony Portable Digital Radio, Model BX-A22G. This device is designed to provide reliable reception across AM, FM, Shortwave (SW), and Weather Band (WB) frequencies, including NOAA weather alerts. It features a built-in rechargeable battery, support for external D-cell batteries, and media playback capabilities via USB and Micro SD card. This manual provides detailed instructions for safe and effective use of your radio.
2. Important Safety Information
Please read and understand all safety instructions before using this product. Keep this manual for future reference.
- Do not expose the radio to extreme temperatures, direct sunlight, or high humidity.
- Avoid dropping or subjecting the radio to strong impacts.
- Do not attempt to disassemble or modify the radio. This will void the warranty and may cause damage or injury.
- Use only the specified charging cable and power adapter (not included) for charging the built-in battery.
- When using D-cell batteries, ensure correct polarity and do not mix old and new batteries or different types of batteries. Remove batteries if the radio will not be used for an extended period.
- Keep the radio away from water and other liquids.
3. Package Contents
Verify that all items are present in the package:
- Sunoony Portable Digital Radio (Model BX-A22G)
- Type-C Charging Cord
- Owner's Manual (this document)
4. Product Overview
Familiarize yourself with the radio's components and controls.

Figure 4.1: Front view of the Sunoony Portable Digital Radio, Model BX-A22G, showing the speaker, LCD screen, and control buttons.

Figure 4.2: Detailed view of the radio's controls, including the large volume knob, LCD display with backlight, digital tuner & switch, power switch, and high/low tone control.
4.1. Controls and Ports
- LCD Screen: Displays frequency, time, battery status, and other information.
- Power Switch: Turns the radio on or off.
- Volume Knob: Adjusts audio output level.
- Tone Control: Adjusts audio tone (High/Low).
- MODE Button: Switches between radio bands (AM/FM/SW/WB) and media playback modes (USB/SD).
- BAND Button: Cycles through available bands within radio mode.
- Tuning Knob: Fine-tunes frequency.
- Number Keys (0-9): For direct frequency input and selecting preset stations.
- MEMORY Button: Stores and recalls preset stations.
- SCAN Button: Initiates automatic station scanning.
- ALERT Button: Activates NOAA weather alert function.
- SLEEP Button: Sets the sleep timer.
- Key Lock Button: Prevents accidental button presses.
- Telescopic Antenna: For improved radio reception.
- USB Port: For USB flash drive playback.
- Micro SD Card Slot: For Micro SD card playback.
- Type-C Charging Port: For charging the internal battery.
- 3.5mm Earphone Jack: For private listening.
- D-Cell Battery Compartment: For optional D-cell battery power.
5. Setup
5.1. Powering the Radio
The radio can be powered by its internal 4000mAh rechargeable battery or by four (4) D-cell batteries (not included).
5.1.1. Charging the Internal Battery

Figure 5.1: The radio can be powered by its internal 4000mAh battery, charged via a Type-C cable, or by four D-cell batteries.
- Connect the supplied Type-C charging cord to the radio's Type-C port.
- Connect the other end of the charging cord to a USB power adapter (5V/1A, not included) or a computer's USB port.
- The battery indicator on the LCD screen will show charging status. A full charge typically takes approximately 5 hours and provides up to 18 hours of listening time.
5.1.2. Installing D-Cell Batteries
- Locate the battery compartment on the back of the radio.
- Open the battery compartment cover.
- Insert four (4) D-cell batteries, ensuring correct polarity (+/-) as indicated inside the compartment.
- Close the battery compartment cover securely.
Note: The radio will automatically switch to D-cell battery power if the internal rechargeable battery is depleted or not present.
6. Operating Instructions
6.1. Power On/Off
Rotate the POWER knob clockwise to turn the radio on. Rotate it counter-clockwise until it clicks to turn the radio off.
6.2. Band Selection
Press the MODE button repeatedly to cycle through the available radio bands: AM, FM, SW (Shortwave), and WB (Weather Band). The selected band will be displayed on the LCD screen.
6.3. Adjusting Antenna for Reception
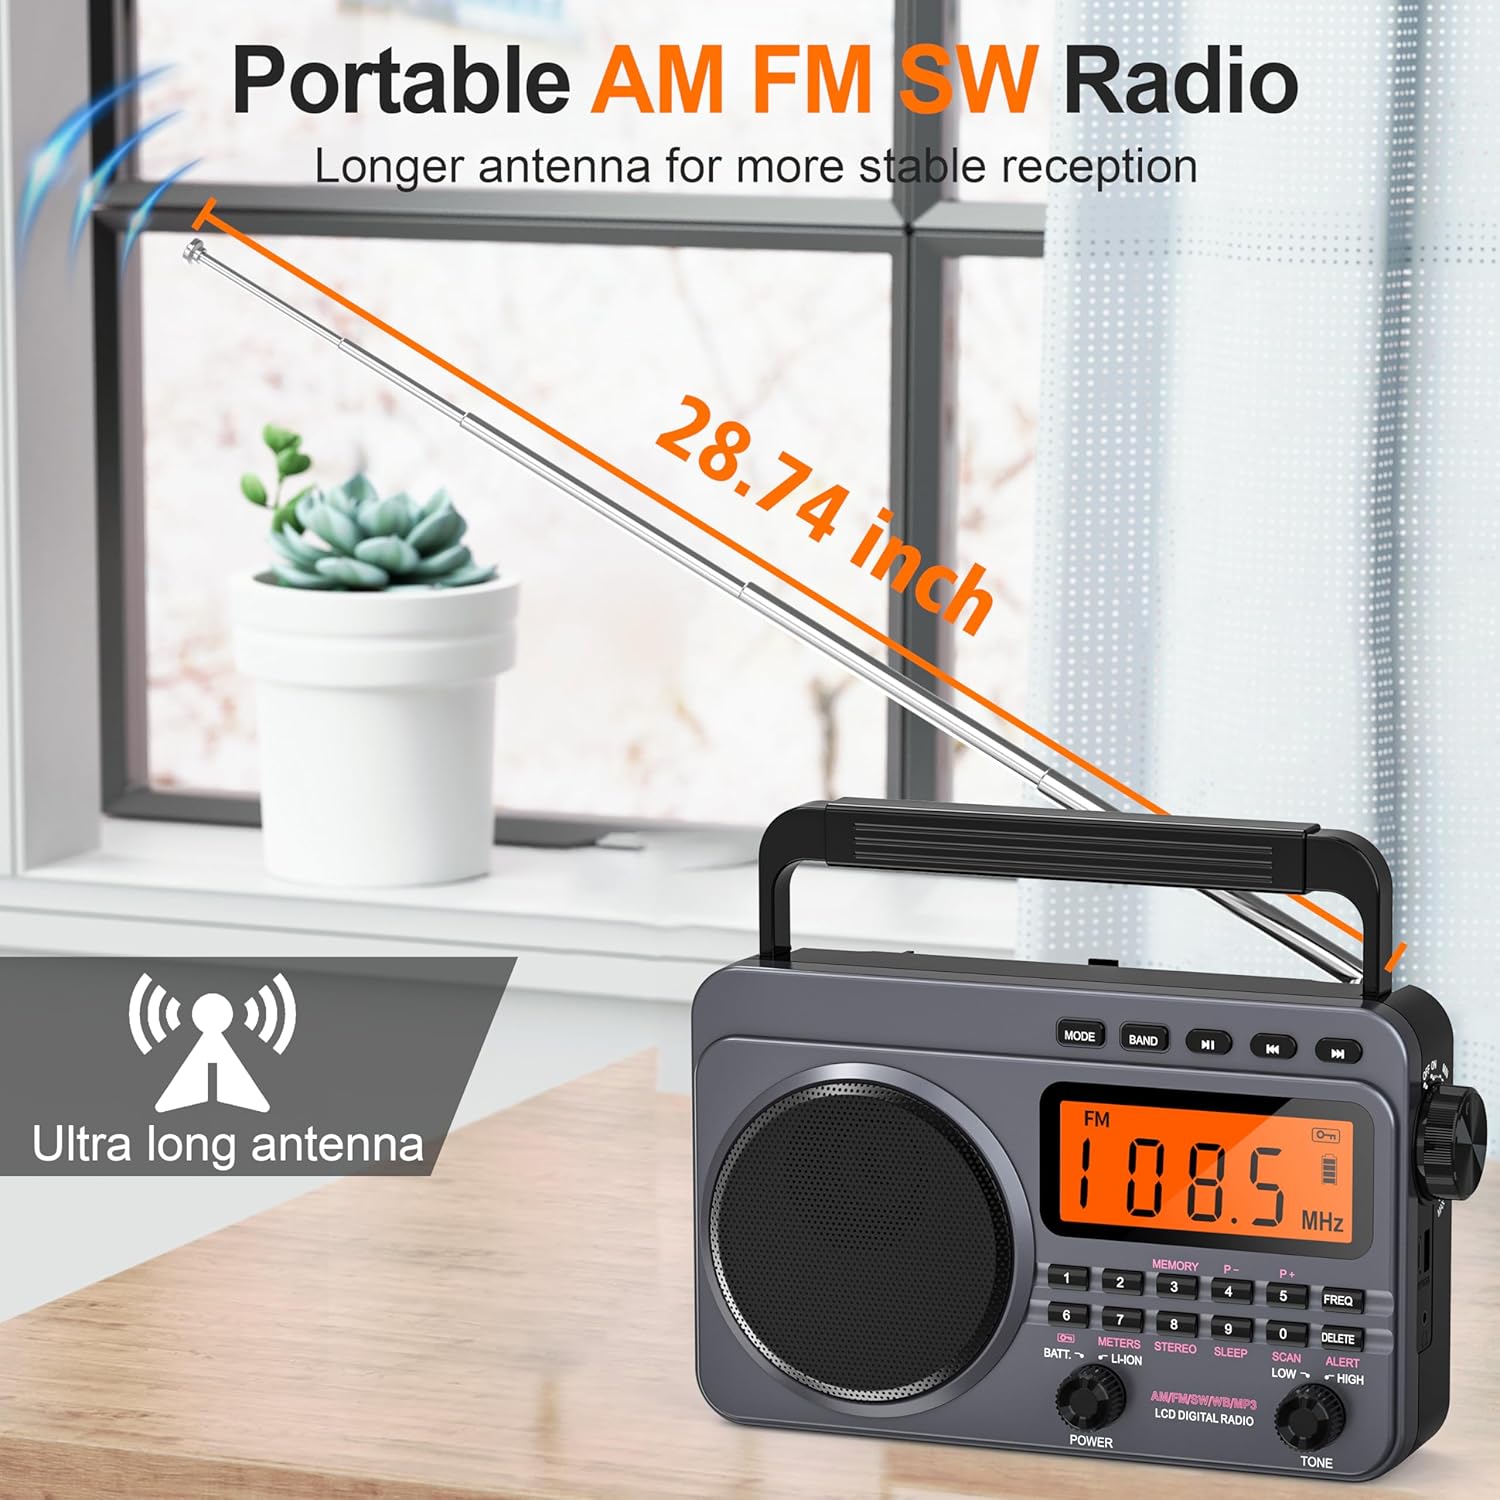
Figure 6.1: Extend the 28.74-inch telescopic antenna for optimal FM, SW, and WB reception.
For optimal FM, SW, and WB reception, fully extend and adjust the telescopic antenna. For AM reception, the radio has a built-in ferrite bar antenna, so antenna adjustment is generally not required, but rotating the radio itself may improve reception.
6.4. Tuning to Stations
The radio offers multiple tuning methods:
6.4.1. Automatic Scan

Figure 6.2: The radio supports auto station search, manual station search, and memory functions for storing presets.
Press the SCAN button to automatically search for and store available stations. The radio can preset up to 120 stations across all bands.
6.4.2. Manual Tuning
Rotate the Tuning Knob on the side of the radio to manually adjust the frequency up or down.
6.4.3. Direct Frequency Input

Figure 6.3: Use the number keys for direct frequency input or to select songs in media playback mode.
Use the number keys (0-9) to directly input a desired frequency. For example, to tune to 108.5 MHz, press 1-0-8-5. The radio will automatically tune to the entered frequency.
6.5. Storing and Recalling Preset Stations

Figure 6.4: Visual guide for accessing stored stations using the number keys.
6.5.1. Storing Stations
- Tune to the desired station using any of the methods above.
- Press and hold the MEMORY button until 'P--' appears on the screen.
- Use the number keys (0-9) to select a preset number (e.g., 01-99).
- Press MEMORY again to confirm. The station is now stored.
6.5.2. Recalling Stations
Press the MEMORY button briefly. Then, use the number keys to enter the preset number (e.g., 0-2 for P02, or 1-7 for P17). The radio will quickly access the stored station.
6.6. NOAA Weather Alert

Figure 6.5: The radio can automatically search for and alert hazardous weather conditions via NOAA.
Press the ALERT button to activate the NOAA weather alert function. In this mode, the radio will monitor the Weather Band (WB) and automatically alert you to hazardous weather conditions such as hurricanes, tornadoes, and severe storms. This feature is designed to provide critical time for preparation during emergencies.
6.7. Media Playback (USB/Micro SD Card)

Figure 6.6: Enjoy music by plugging in a TF card or USB disk. Headphones can be used for private listening.
- Insert a USB flash drive into the USB port or a Micro SD card into the Micro SD card slot.
- Press the MODE button until 'USB' or 'TF' (for Micro SD) appears on the LCD screen.
- The radio will automatically begin playing audio files (e.g., MP3) from the inserted media.
- Use the number keys to switch between songs.
- Use the 'Previous' and 'Next' track buttons (usually labeled with arrows) for navigation.
6.8. Volume and Tone Control
- Volume: Rotate the large Volume Knob to increase or decrease the audio output.
- Tone: Rotate the Tone Control knob to select between 'High' and 'Low' audio tones, adjusting the sound quality to your preference.
6.9. Sleep Timer
Press the SLEEP button to activate the sleep timer. Repeatedly press the button to cycle through available sleep times (e.g., 10, 20, 30, 60, 90 minutes). The radio will automatically turn off after the selected duration.
6.10. Key Lock Function

Figure 6.7: The lock button prevents accidental changes to settings or playback.
Press the Key Lock button to prevent accidental button presses. A lock icon will appear on the LCD screen. Press the button again to unlock the controls.
6.11. Earphone Use
Plug 3.5mm earphones into the Earphone Jack for private listening. The radio's speaker will automatically mute when earphones are connected.
7. Maintenance
- Cleaning: Wipe the radio with a soft, dry cloth. Do not use abrasive cleaners or solvents.
- Storage: Store the radio in a cool, dry place away from direct sunlight and extreme temperatures. If storing for an extended period, remove D-cell batteries.
- Battery Care: Recharge the internal battery regularly to maintain its lifespan, even if the radio is not frequently used.
8. Troubleshooting
If you encounter issues with your radio, refer to the following common problems and solutions:
| Problem | Possible Cause | Solution |
|---|---|---|
| Radio does not power on. | Internal battery is depleted. D-cell batteries are incorrectly installed or depleted. | Charge the internal battery. Check D-cell battery polarity and replace if necessary. |
| Poor radio reception. | Antenna not extended or positioned correctly. Weak signal in the area. | Fully extend and adjust the telescopic antenna. For AM, try rotating the radio. Move to a location with better signal reception. |
| No sound from speaker. | Volume is too low. Earphones are connected. | Increase the volume. Disconnect earphones. |
| Cannot play media from USB/SD card. | Incorrect mode selected. Unsupported file format. Media not inserted correctly. | Press MODE to select USB or TF mode. Ensure audio files are in a supported format (e.g., MP3). Re-insert the USB drive or Micro SD card. |
| Buttons are unresponsive. | Key Lock function is active. | Press the Key Lock button to deactivate it. |
If the problem persists after trying these solutions, please contact customer support.
9. Specifications
| Feature | Detail |
|---|---|
| Model Number | BX-A22G |
| Radio Bands Supported | AM, FM, SW, WB (4-Band) |
| Tuner Technology | Digital Tuning with Numeric Keys |
| Power Source | Battery Powered (4000mAh Lithium Ion rechargeable, 4x D-Cell optional) |
| Battery Capacity | 4000mAh (built-in) |
| Charging Port | Type-C |
| Media Playback | USB, Micro SD Card |
| Special Features | NOAA Weather Alert, LCD Screen with Backlight, Sleep Timer (0-90 mins), Key Lock, 3.5mm Earphone Jack, External Antenna Input |
| Antenna Length | 28.74 inches (telescopic) |
| Product Dimensions | 9.96"L x 3.8"W x 7.86"H |
| Item Weight | 1.7 pounds |
| Manufacturer | BXUS |
10. Warranty and Customer Support
Sunoony provides a 12-month manufacturer warranty for this product. If you experience any issues or have questions regarding your Sunoony Portable Digital Radio, please do not hesitate to contact our customer service team. We are committed to providing friendly and professional support.
For assistance, please refer to the contact information provided with your purchase or visit the official Sunoony brand store online.