1. Introduction
The Good Rider LX5 Motorcycle Helmet Bluetooth Intercom is designed to provide clear communication, stereo music, and GPS navigation audio for motorcyclists. Featuring Bluetooth 5.3, CVC noise reduction, and IPX6 waterproofing, this device supports group intercom for up to 10 riders over a distance of 2000 meters.
2. Package Contents
Verify that all items are present in your package:
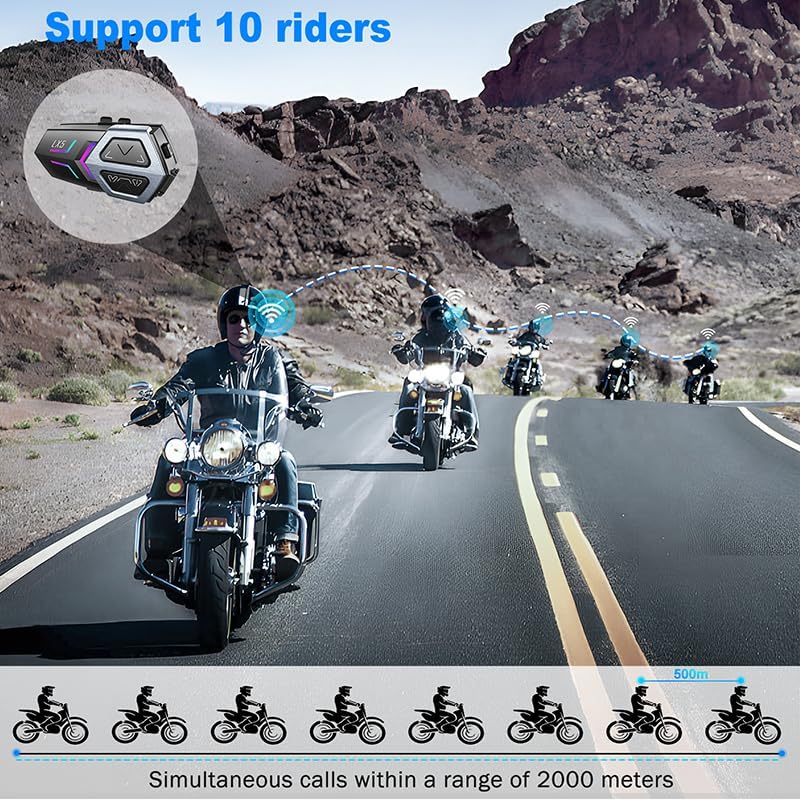
Image: Contents of the Good Rider LX5 package, including the intercom unit, microphones, cables, and mounting accessories.
- LX5 Host Unit
- Two-in-one Soft and Hard Microphone
- Magic Adhesive Base
- Hook Surface Magic Sticker
- Speaker Magic Sticker
- Bracket Magic Sticker
- TPE-C Charging Cable
- User Manual (this document)
3. Product Overview
Familiarize yourself with the LX5 unit's controls and indicators.

Image: Diagram illustrating the buttons and their functions on the LX5 intercom unit, including volume controls, intercom button, and indicator light.
Button Functions:
- Volume Down (Vol-):
- Long Press: Lower Volume
- Short Press: Play Previous Track
- Double Click: Wake up Voice Assistant Function
- Volume Up (Vol+):
- Long Press: Increase Volume
- Short Press: Play Next Track
- Double Click: Turn on/off Auto Answer Function
- Intercom Button (Center Button):
- Long Press (3 seconds): Turn on/off the device.
- Double Click: Search for intercom pairing.
- Short Press (after successful intercom pairing): Turn on/off the intercom call function.
- Long Press (3 seconds, while in standby): Enter Bluetooth pairing mode to connect to a phone.
- After successful phone connection:
- Short Press: Take a call / Terminate a call.
- Long Press: Reject a call.
- Double Click: Redial phone calls.
- Triple Click: Play/Pause music.
- Quadruple Click: Turn on/off the color changing light.
- Work Status Indicator Light: Provides visual feedback on device status.
4. Setup and Installation
Follow these steps to properly install the LX5 intercom system on your helmet.

Image: Step-by-step diagrams showing how to install the LX5 intercom unit, speakers, and microphone inside a motorcycle helmet using clips and adhesive stickers.
4.1. Mounting the Intercom Unit
- Using the Clip-on Base:
- Slide the clip onto the edge of your helmet.
- Slide the LX5 host unit onto the clip-on base until it clicks securely.
- Using the Adhesive Base:
- Clean the desired mounting area on your helmet.
- Peel off the protective film from the magic adhesive base and firmly press it onto the helmet surface.
- Slide the LX5 host unit onto the adhesive base until it clicks securely.
4.2. Installing Speakers and Microphone
- Attach the speaker magic stickers to the inside of your helmet, ensuring they align with your ears.
- Press the speakers firmly onto the magic stickers.
- Position the microphone near your mouth. Use the soft microphone for full-face helmets and the hard microphone for open-face helmets.
- Route the speaker and microphone cables neatly within the helmet padding.
- Connect the speaker/microphone cable to the LX5 host unit.
4.3. Charging the Device
Before first use, fully charge the LX5 unit. Connect the TPE-C charging cable to the charging port on the LX5 and to a USB power source. The indicator light will show charging status.

Image: Diagram showing the LX5 unit with battery capacity details, indicating 1200mAh, 3 hours charging time, 20 hours phone talk time, and 16 hours music time.
- Charging Time: Approximately 3 hours.
- Battery Life: Up to 20 hours talk time, 16 hours music time, 1 week standby.
- The device supports charging via a power bank.
5. Operating Instructions
5.1. Power On/Off
- Power On: Long press the Intercom button for 3 seconds.
- Power Off: Long press the Intercom button for 3 seconds.
5.2. Bluetooth Pairing with Phone
- Ensure the LX5 unit is powered off.
- Long press the Intercom button for 3 seconds until the indicator light flashes rapidly, indicating pairing mode.
- On your smartphone, enable Bluetooth and search for "LX5".
- Select "LX5" from the list of available devices to connect.
- Once connected, the indicator light will change, and you will hear a confirmation tone.

Image: Illustration of the LX5 unit connecting to two smartphones simultaneously, highlighting the ability to switch between devices for navigation, music, or calls.
The LX5 supports connecting to two phones simultaneously, allowing you to switch between devices for navigation, music, or answering calls without delay.
5.3. Group Intercom Pairing (Up to 10 Riders)
The LX5 supports full-duplex group intercom for up to 10 riders with a maximum communication distance of 2000 meters in open terrain.

Image: A group of motorcyclists riding on a road, with icons indicating simultaneous calls within a 2000-meter range, demonstrating the 10-rider intercom feature.
- Ensure all LX5 units are powered on.
- On each unit, double-click the Intercom button to enter intercom pairing mode. The indicator lights will flash.
- The units will automatically search for and connect to each other. Once connected, the indicator lights will change, and you will hear a confirmation tone.
- To initiate or end an intercom call after pairing, short press the Intercom button.
5.4. Phone Call Management
- Answer Call: Short press the Intercom button.
- End Call: Short press the Intercom button.
- Reject Call: Long press the Intercom button.
- Redial Last Number: Double-click the Intercom button.
- Automatic Answering: The LX5 can be set to automatically answer incoming calls.
- To toggle automatic answering (manual/automatic): While in standby, press and hold the Intercom button and both Volume + and Volume - buttons simultaneously for 3 seconds.

Image: A rider wearing a helmet, with sound waves emanating from the intercom unit, illustrating the automatic answering feature for incoming calls.
5.5. Music Playback
- Play/Pause Music: Triple-click the Intercom button.
- Next Track: Short press the Volume + button.
- Previous Track: Short press the Volume - button.
- Volume Up: Long press the Volume + button.
- Volume Down: Long press the Volume - button.
The LX5 features high-definition sound quality, especially for bass, providing a rich stereo surround sound experience within the helmet.

Image: A rider on a motorcycle with musical notes indicating high-quality audio, and a detailed diagram of a speaker driver emphasizing sound quality.
Music sharing is also supported, allowing two riders to enjoy the same song. To enable music sharing, ensure two units are successfully paired.
5.6. Voice Assistant
Activate your smartphone's voice assistant (e.g., Siri) for hands-free control.
- Activate Voice Assistant: Double-click the Volume - button.

Image: The LX5 unit with speech bubbles indicating voice commands like "Call XX for me," "Play music," "What's the weather like today?", and "Navigating to the company," demonstrating the voice assistant function.
5.7. Noise Reduction
The LX5 features CVC noise reduction technology, effectively minimizing ambient noise such as wind and engine sounds, ensuring clear voice communication even at high speeds.
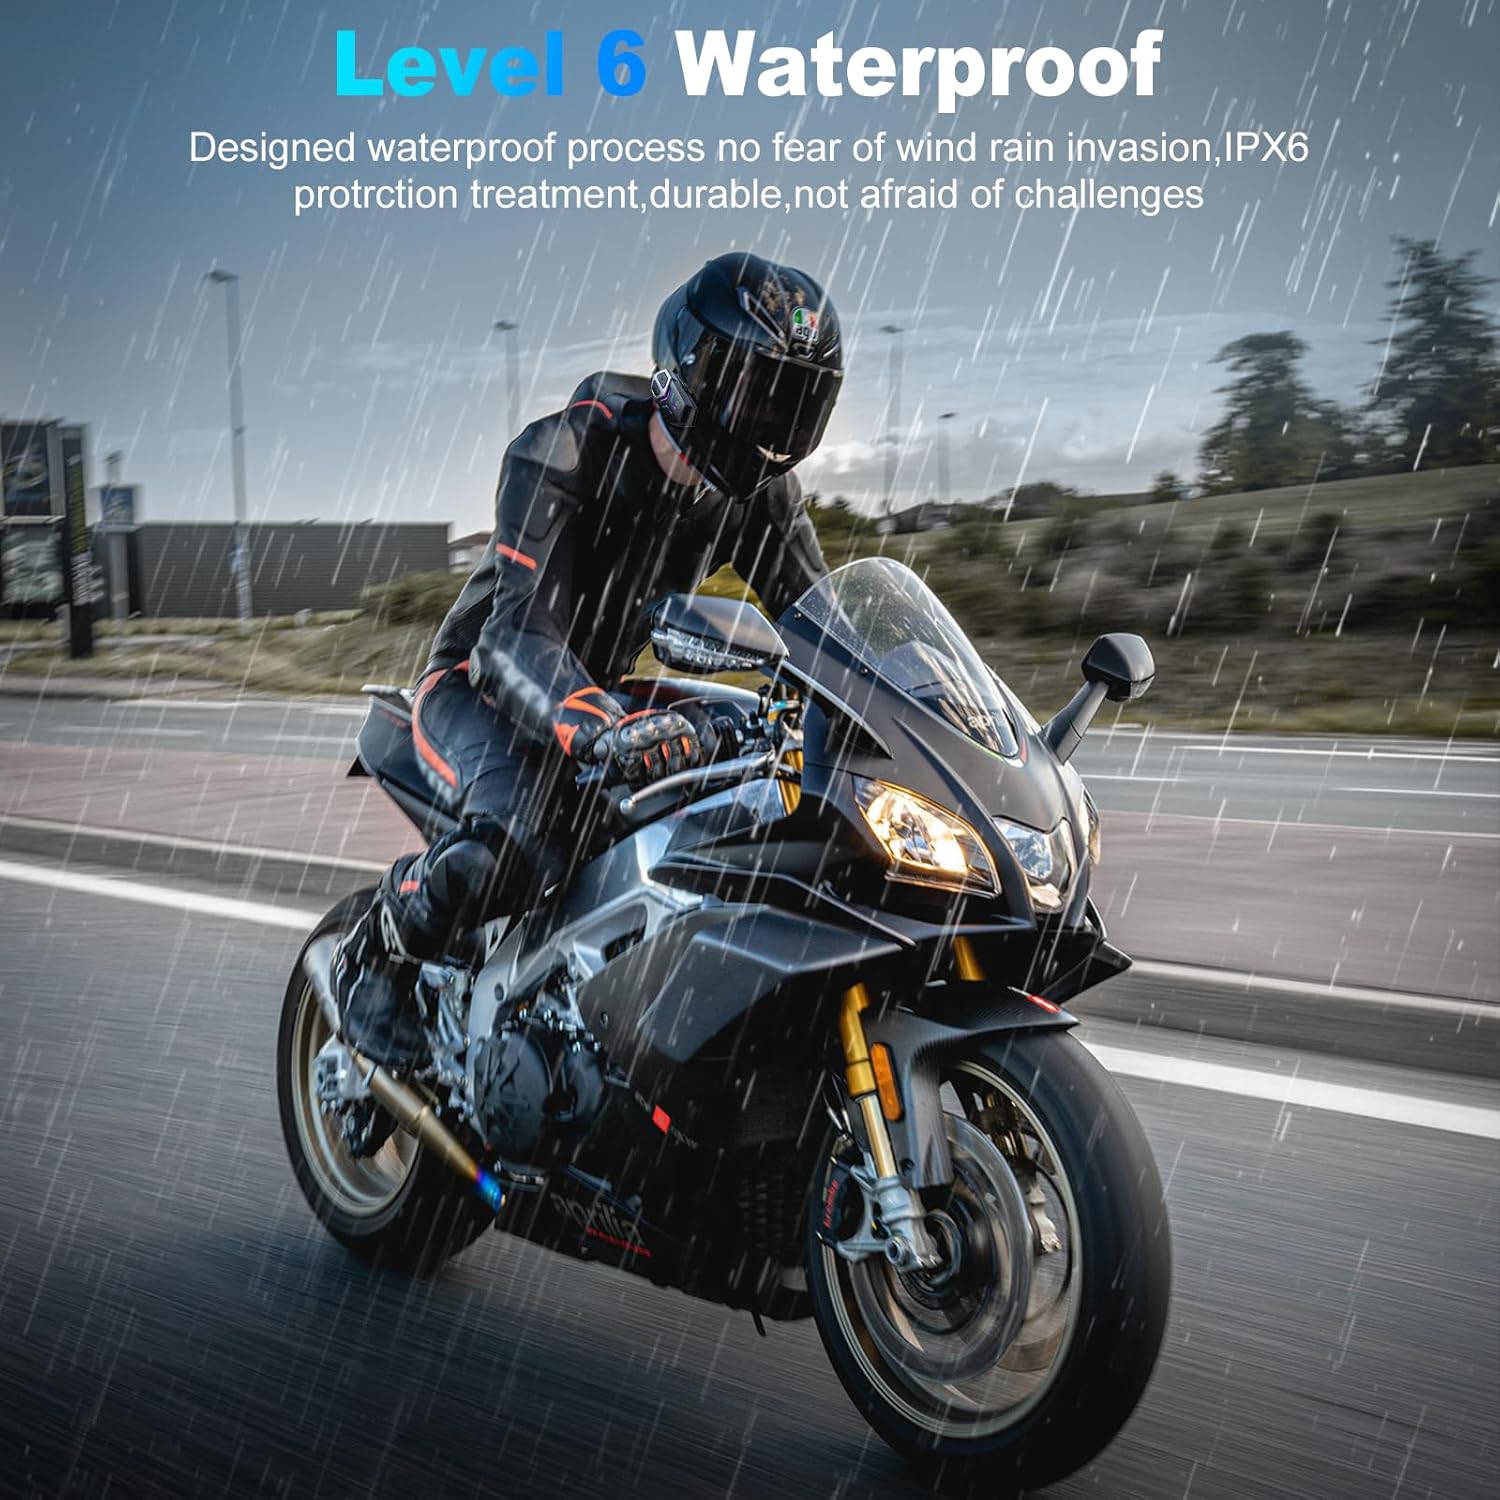
Image: A motorcyclist riding at speed, with sound wave graphics indicating intelligent noise reduction and clear call quality from the 40mm speakers.
6. Maintenance
- Cleaning: Use a soft, damp cloth to clean the unit. Do not use harsh chemicals or abrasive cleaners.
- Water Resistance: The LX5 is IPX6 waterproof, meaning it is protected against high-pressure water jets from any direction. It can withstand rain but should not be submerged in water.
- Storage: Store the device in a cool, dry place when not in use. Avoid extreme temperatures.
- Battery Care: To prolong battery life, charge the device regularly, even if not used for extended periods.

Image: A motorcyclist riding in the rain, with text indicating "Level 6 Waterproof" and IPX6 protection, highlighting its durability against weather conditions.
7. Troubleshooting
| Problem | Possible Cause | Solution |
|---|---|---|
| Device does not power on. | Low battery. | Charge the device for at least 3 hours. |
| Cannot pair with phone. | Device not in pairing mode; Bluetooth off on phone; device already connected to another phone. | Ensure LX5 is in pairing mode (rapid flashing light). Turn on phone's Bluetooth. Disconnect from other devices. |
| Intercom not connecting. | Units not in intercom pairing mode; too far apart. | Double-click Intercom button on all units to enter pairing mode. Ensure units are within range (2000m). |
| No sound from speakers. | Volume too low; speakers not connected properly; faulty speakers. | Increase volume. Check speaker connections. Test with another audio source if possible. |
| Poor sound quality/excessive noise. | Microphone placement; environmental interference. | Adjust microphone closer to mouth. Ensure CVC noise reduction is active. |
8. Specifications
| Feature | Detail |
|---|---|
| Model Name | Motorcycle Bluetooth Intercom Headset (LX5) |
| Bluetooth Version | 5.3 |
| Connectivity Technology | Wireless (Bluetooth) |
| Noise Control | Active Noise Cancellation (CVC) |
| Intercom Range | Up to 2000 meters (group) |
| Max Riders for Intercom | 10 Riders |
| Battery Capacity | 1200mAh |
| Charging Time | Approximately 3 hours |
| Working Time (Talk) | Up to 20 hours |
| Working Time (Music) | Up to 16 hours |
| Standby Time | Up to 1 week |
| Water Resistance Level | IPX6 Waterproof |
| Material | Plastic, Rubber |
| Product Dimensions | 3.5 x 2 x 1.2 inches |
| Item Weight | 10.9 ounces |
| Audio Driver Size | 40 Millimeters |
| Impedance | 32 Ohm |
| Compatible Devices | Smartphones |
| Manufacturer | Good Rider |
9. Warranty Information
Specific warranty details are not provided in this manual. Please refer to the product packaging or contact Good Rider customer support for warranty information.
10. Customer Support
For further assistance, technical support, or inquiries, please refer to the contact information provided on the product packaging or the official Good Rider website.