1. Introduction
This manual provides comprehensive instructions for the AMANKA VHS to Digital Converter. This device is designed to facilitate the transfer of analog video and audio from various sources, such as VHS players, VCRs, Hi8 camcorders, DV cameras, and DVD players, into a digital format on your personal computer or Mac. It enables the preservation and sharing of your valuable analog media.

Image 1: AMANKA VHS to Digital Converter with included cables.
2. Package Contents
Please verify that all items listed below are included in your package:
- 1 x USB Video Capture Card
- 1 x Scart Port Adapter
- 1 x RCA Cable
- 1 x User Manual
- 1 x Software CD-ROM (OBS recording software can also be downloaded from the Internet)

Image 2: Visual representation of the package contents.
3. Product Overview
The AMANKA VHS to Digital Converter features a compact design with multiple input options for analog video and audio, and a USB output for connection to your computer. It includes standard RCA (composite video and stereo audio) and S-Video inputs.

Image 3: Detailed view of the converter's ports and approximate dimensions.
4. Setup Instructions
4.1 Connecting to an Analog Source
- Identify the output ports on your analog device (e.g., VCR, camcorder). These are typically RCA (yellow for video, white for left audio, red for right audio) or S-Video.
- Connect the corresponding RCA or S-Video cables from your analog device to the input ports on the AMANKA converter. Ensure color-matching for RCA cables (yellow to yellow, white to white, red to red).
- If your analog device uses a SCART output, use the provided SCART adapter. Connect the RCA cables from the converter to the adapter, then plug the adapter into the SCART port on your analog device.
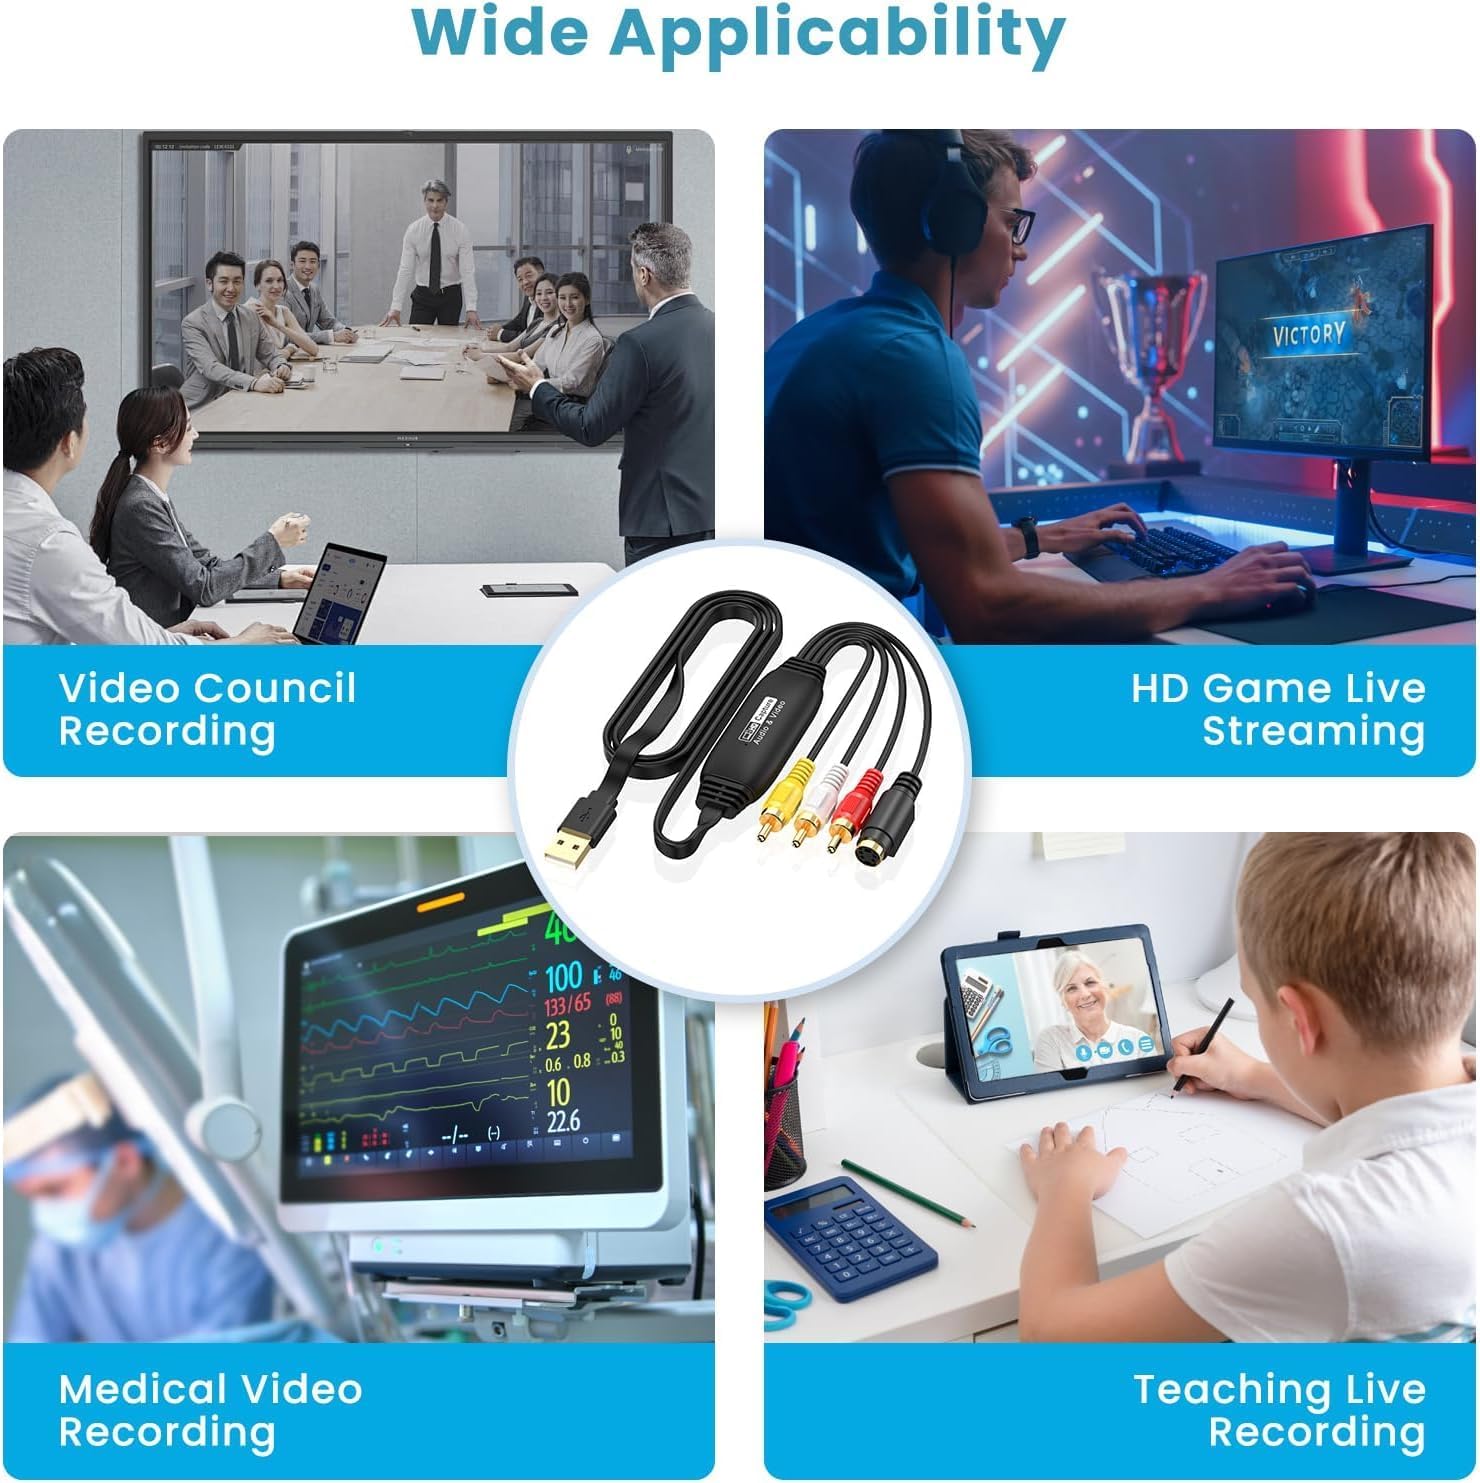
Image 4: Connection diagram from an analog source to the converter.
4.2 Connecting to a Computer
- Connect the USB plug of the AMANKA converter to an available USB 2.0 port on your PC, laptop, or all-in-one PC.
- The device is plug-and-play and typically does not require manual driver installation on compatible operating systems.
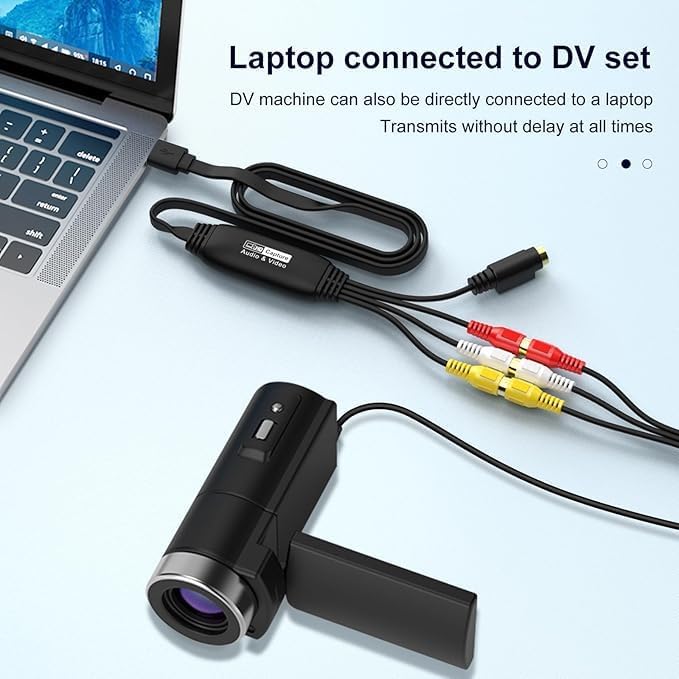
Image 5: Example of connecting the converter to a laptop and a DV device.

Image 6: The converter can also be used to connect older game consoles to modern displays or for recording gameplay.
5. Operating Instructions
5.1 General Operation
Once the converter is connected to both your analog source and computer, you will need recording software to capture the video and audio. The device supports various third-party software applications.

Image 7: Examples of compatible third-party software.
5.2 Using with OBS Studio (Windows/Linux)
OBS Studio is a popular free and open-source software for video recording and live streaming. It is recommended for use with this converter.
- Download and install OBS Studio from its official website if you do not have it already.
- Open OBS Studio. In the 'Sources' box, click the '+' icon to add a new source.
- Select 'Video Capture Device' from the list.
- In the properties window, select your converter (e.g., 'AV TO USB 2.0' or similar) as the 'Device'.
- Configure video and audio settings as needed. For audio, ensure the correct audio input device (e.g., 'USB 2.0 MIC') is selected.
- Click 'Start Recording' to begin capturing your analog content.

Image 8: OBS Studio setup for video capture.
5.3 Using with QuickTime (Mac OS X)
For Mac users, QuickTime Player can be used to capture video from the converter.
- Open QuickTime Player.
- Go to 'File' > 'New Movie Recording' to open the capture window.
- Click the small arrow next to the record button to select your video and audio input sources. Choose 'AV TO USB 2.0' for video and 'USB 2.0 MIC' for audio.
- Adjust quality settings if desired.
- Click the record button to start recording your analog content.

Image 9: QuickTime Player setup for video capture on Mac OS X.
6. Compatibility
The AMANKA VHS to Digital Converter offers broad compatibility with various operating systems and devices:
- Operating Systems: Compatible with Windows (7/8/10/11), macOS, Linux, and Android.
- Input Devices: Supports camcorders, game consoles, DV cameras, surveillance cameras, DVD players, TV boxes, medical devices, and other analog video sources with RCA or S-Video outputs.
- Output Devices: Connects to PCs, laptops, and all-in-one PCs via USB.
- Software: Works with OBS Studio, Potplayer, QuickTime, XSplit, and other recording software that supports USB video input.
- Video Formats: Supports NTSC and PAL input formats. Output supports MJPEG and YUV422, with a maximum resolution of 1080P.
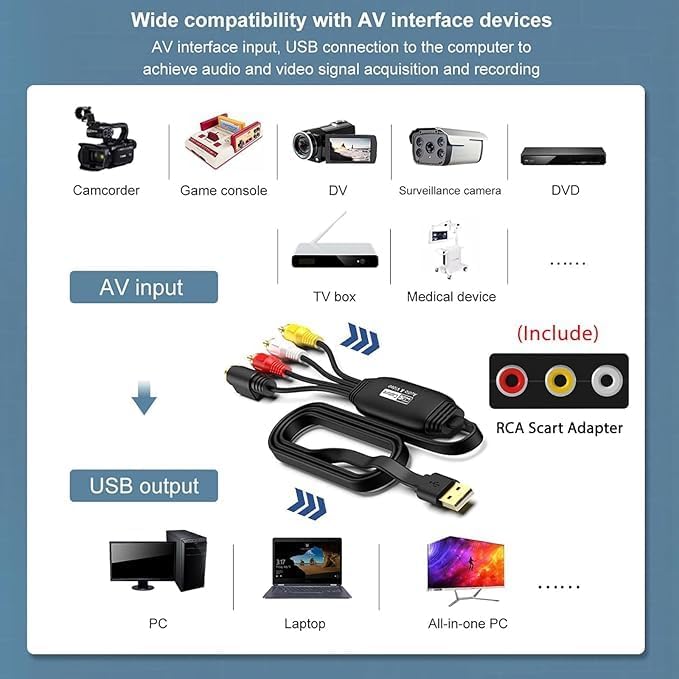
Image 10: Overview of compatible AV interface devices and computer systems.
7. Maintenance
To ensure the longevity and optimal performance of your AMANKA VHS to Digital Converter, please follow these simple maintenance guidelines:
- Keep the device in a dry environment, away from moisture and extreme temperatures.
- Avoid exposing the device to direct sunlight for extended periods.
- Clean the exterior of the device with a soft, dry cloth. Do not use liquid cleaners or abrasive materials.
- Handle cables and connectors gently to prevent damage.
- Store the device and its accessories in a safe place when not in use.
8. Troubleshooting
If you encounter issues while using your AMANKA VHS to Digital Converter, please refer to the following common problems and solutions:
- No Video Signal:
- Ensure all RCA or S-Video cables are securely connected to both the analog source and the converter.
- Verify that the analog source (VCR, camcorder) is powered on and playing content.
- Check the input selection in your recording software (e.g., OBS Studio, QuickTime) to ensure the correct video capture device is selected.
- Confirm that your analog source is outputting a compatible video format (NTSC or PAL).
- No Audio:
- Ensure the red and white RCA audio cables are correctly connected.
- In your recording software, verify that the correct audio input device (e.g., 'USB 2.0 MIC') is selected and not muted.
- Check the audio output settings of your analog source.
- If using OBS Studio on Windows, some users have reported audio issues. Try adjusting audio settings within OBS or ensure your system's sound drivers are up to date. On Linux and macOS, audio capture is generally more reliable with recommended software.
- Software Not Recognizing Device:
- Ensure the converter is plugged into a functional USB 2.0 port.
- Restart your computer and try again.
- If using the provided CD-ROM software and experiencing issues, it is recommended to download and use a widely supported third-party software like OBS Studio, which often has better compatibility and community support.
- For Mac, ensure QuickTime Player is updated to the latest version.
- Poor Video Quality:
- Ensure all cable connections are secure and free from interference.
- If available, use S-Video instead of composite RCA for potentially better video quality.
- Check the quality settings within your recording software.
- The quality of the output is dependent on the quality of the original analog source.
9. Specifications
| Feature | Specification |
| Model Number | ca9e28ce-8d6f-4836-b9eb-5a3bb4a1154e |
| Brand | AMANKA |
| Connector Type | RCA, S-Video, USB 2.0 |
| Input Video Format | NTSC, PAL |
| Output Video Format | MJPEG, YUV422 |
| Max Output Resolution | 1080P |
| Compatible OS | Windows, macOS, Linux, Android |
| Item Weight | 4.2 ounces |
| Package Dimensions | 5.94 x 3.98 x 1.06 inches |
10. Warranty and Support
AMANKA provides technical support for its products. If you have any questions, encounter issues not covered in this manual, or require assistance with your VHS to Digital Converter, please do not hesitate to contact our customer support team. Refer to the product packaging or the AMANKA official website for contact information.
Please retain your proof of purchase for warranty claims.