
58979
CEN-TECH 630 Peak Amp Portable Jump Starter and Power Pack
Model: 58979
Introduction
This manual provides important information for the safe operation, maintenance, and troubleshooting of your CEN-TECH 630 Peak Amp Portable Jump Starter and Power Pack. Please read this manual thoroughly before using the product and retain it for future reference.
The CEN-TECH Portable Jump Starter is a versatile device designed to provide 630 peak amps for jump-starting vehicles, a 12V DC power supply, and a bright LED work light. It also features a 10W USB power output for charging personal electronic devices. Built-in safety features protect against reverse polarity, short circuits, low-voltage, overcharging, and over-discharging. The unit includes an easy-to-understand interface with colored LED indicators for battery status and fault detection, powered by a reliable 12V UL-listed sealed lead-acid battery.
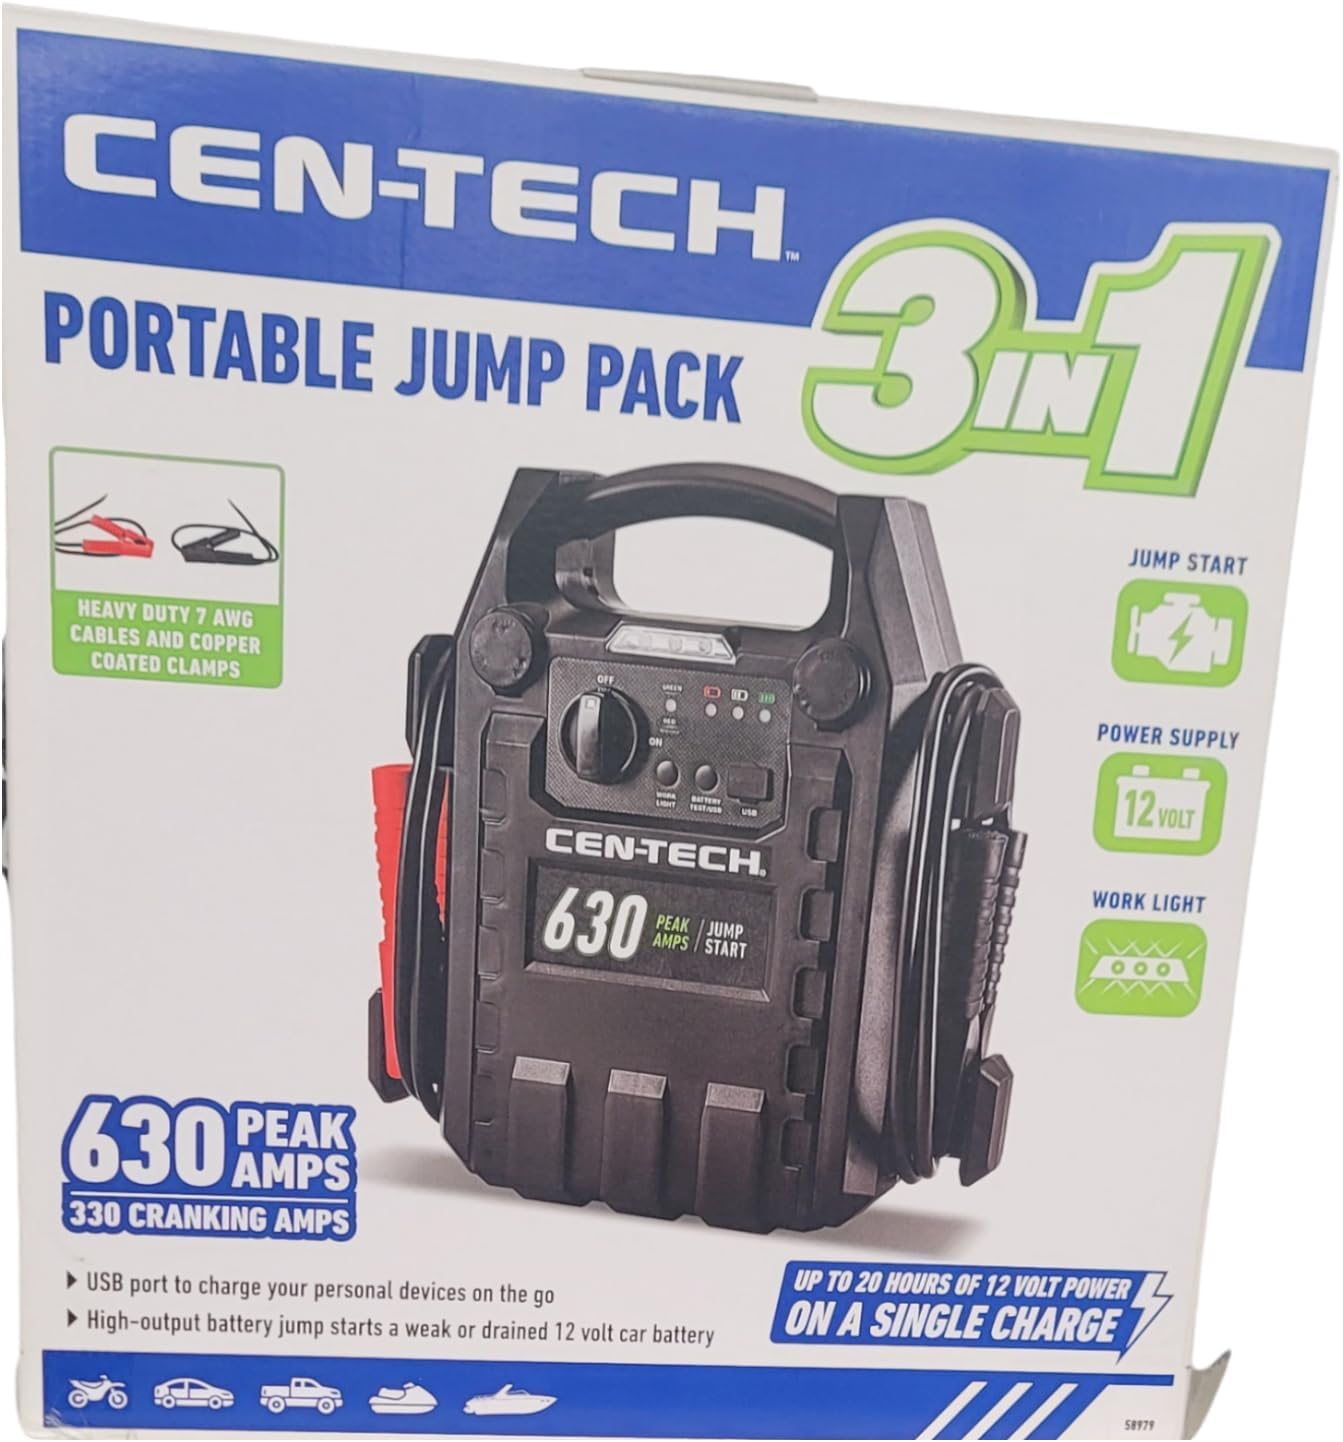
Figure 1: CEN-TECH 630 Peak Amp Portable Jump Starter and Power Pack.
Safety Information
Always observe the following safety precautions to prevent injury or damage to the unit:
- Read all instructions before using the product.
- Do not expose the unit to rain or wet conditions.
- Do not operate the unit if it has received a sharp blow, been dropped, or otherwise damaged.
- Ensure proper ventilation during use and charging.
- Keep out of reach of children.
- Wear eye protection when working with batteries.
- Do not short-circuit the output terminals.
- Always connect the positive (+) clamp to the positive (+) battery terminal first, then the negative (-) clamp to a non-moving metal part of the vehicle chassis away from the battery.
- Disconnect in reverse order: negative (-) first, then positive (+).
- Do not attempt to jump start a frozen battery.
- Do not use this unit as a battery charger for vehicle batteries.
- This unit contains a sealed lead-acid battery. Recycle properly.
Package Contents
Verify that all items are present:
- CEN-TECH 630 Peak Amp Portable Jump Starter and Power Pack
- AC Adapter
- User Manual (this document)
Setup and Initial Charging
Before first use, fully charge the unit for at least 24 hours. This conditions the battery and ensures maximum performance.
- Locate the charging port on the unit.
- Connect the supplied AC adapter to the charging port.
- Plug the AC adapter into a standard 120V AC wall outlet.
- The charging indicator light will illuminate. Allow the unit to charge until the "Fully Charged" indicator illuminates, or for a minimum of 24 hours for the initial charge.
- Once fully charged, disconnect the AC adapter.
It is recommended to recharge the unit every 3 months when not in use to maintain battery health and readiness.
Operating Instructions
Jump Starting a Vehicle
Ensure the vehicle's ignition is off and all accessories (lights, radio, etc.) are turned off. Ensure the jump starter is fully charged.
- Connect the red positive (+) clamp to the positive (+) terminal of the vehicle's battery.
- Connect the black negative (-) clamp to a non-moving metal part of the vehicle's chassis, away from the battery and fuel lines.
- Ensure both clamps have a solid connection.
- Turn the jump starter's power switch to the "ON" position.
- Attempt to start the vehicle. If the vehicle does not start after 5-6 seconds, wait at least 3 minutes before attempting again to allow the jump starter to cool.
- Once the vehicle starts, immediately turn the jump starter's power switch to the "OFF" position.
- Disconnect the black negative (-) clamp first, then disconnect the red positive (+) clamp.
- Recharge the jump starter as soon as possible after use.
Important: Do not crank the engine for more than 6 seconds at a time. Allow the jump starter to cool for at least 3 minutes between attempts.
Using the 12V DC Power Outlets
The unit features two 12V DC outlets for powering compatible 12V accessories (e.g., portable air compressors, car vacuums). The total output for both outlets is 12V DC.
- Ensure the jump starter is in the "ON" position.
- Plug your 12V DC accessory into one of the 12V DC outlets.
- Operate your accessory as per its own instructions.
- When finished, disconnect the accessory and turn the jump starter to the "OFF" position.
Note: Continuous use of the 12V DC outlets will drain the internal battery. Monitor the battery status indicator.
Using the USB Charging Port
The 2.1A USB charging port provides power for charging smartphones, tablets, and other USB-powered devices.
- Ensure the jump starter is in the "ON" position.
- Connect your USB device to the USB port using a compatible USB cable.
- Your device should begin charging.
- When finished, disconnect your device and turn the jump starter to the "OFF" position.
Using the Work Light
The built-in 3 LED work light provides illumination in low-light conditions.
- Locate the work light switch/button on the unit.
- Press the switch/button to turn the light ON.
- Press again to turn the light OFF.
Maintenance and Storage
Proper maintenance ensures the longevity and performance of your jump starter.
- Recharge Regularly: Recharge the unit every 3 months, even if not used, to maintain the internal battery's charge and extend its lifespan.
- Cleaning: Clean the unit with a dry, soft cloth. Do not use abrasive cleaners or solvents.
- Clamp Care: Keep the battery clamps clean and free of corrosion.
- Storage: Store the unit in a cool, dry place, away from direct sunlight and extreme temperatures. Ensure the power switch is in the "OFF" position during storage.
- Battery Replacement: The internal sealed lead-acid battery is not user-replaceable. Contact qualified service personnel for battery replacement.
Troubleshooting
| Problem | Possible Cause | Solution |
|---|---|---|
| Unit does not turn on or charge. | Internal battery is completely discharged or faulty. AC adapter is not connected properly or is faulty. | Ensure AC adapter is securely connected and plugged into a live outlet. Allow unit to charge for at least 24 hours. If problem persists, contact customer support. |
| Vehicle does not start after jump attempt. | Jump starter battery is low. Clamps are not making good contact. Vehicle battery is severely discharged or faulty. | Recharge the jump starter. Ensure clamps are clean and securely connected to the correct terminals. Check vehicle battery condition. Wait 3 minutes between attempts. |
| USB port or 12V DC outlets not working. | Jump starter is not turned "ON". Internal battery is low. Device/accessory is not compatible or faulty. | Ensure the jump starter is "ON". Recharge the unit. Test with a different device/accessory. |
| Overcharge/Over-discharge protection activated. | Unit has been charged too long or discharged too deeply. | The unit's internal protection system has activated. Disconnect from power source or load. Allow unit to rest, then attempt to recharge or use normally. |
Specifications
| Feature | Detail |
|---|---|
| Model Number | 58979 |
| Peak Amps | 630 Amps |
| Cranking Amps | 330 Amps |
| Internal Battery | 12V, 17 Ah Sealed Lead-Acid |
| DC Power Outlets | Two 12V DC outlets |
| USB Output | 2.1A (10W) |
| Work Light | Built-in 3 LED |
| Booster Cables | Heavy Duty 7 AWG with Copper Coated Steel Clamps |
| Weight | 15.9 Pounds |
| Safety Standard | UL Listed |
Warranty and Customer Support
For warranty information or technical assistance, please refer to the manufacturer's official website or contact their customer support directly. Keep your purchase receipt as proof of purchase.
Manufacturer: HFT
Model Number: 58979
Related documents58979


Ask a question about this manual
Ask about setup, troubleshooting, compatibility, parts, safety, or missing instructions. Manuals+ will review the question and use this page’s manual context to help answer it.