1. Introduction
Welcome to the instruction manual for your KiwiCo Winter Wonderland Advent Calendar. This kit provides 24 days of creative projects, culminating in a festive winter village scene with interactive elements. This manual will guide you through the assembly process and provide important information for safe and enjoyable use.

Image 1.1: The complete KiwiCo Winter Wonderland Advent Calendar set, featuring houses, a sledding hill, an ice skating rink, and various figures.
2. Safety Information
- Age Recommendation: This product is designed for ages 3 and up. Adult supervision is recommended for younger children during assembly and play, especially with small parts.
- Small Parts Warning: The kit contains small parts which may pose a choking hazard. Keep away from children under 3 years of age.
- Battery Safety: If your kit includes components requiring batteries, ensure they are inserted correctly according to polarity (+/-). Do not mix old and new batteries, or different types of batteries. Remove exhausted batteries promptly.
- Material Handling: The kit includes materials such as felt, paper, and wood. Handle with care.
3. Package Contents
Your KiwiCo Winter Wonderland Advent Calendar includes 24 individually packaged daily projects, a toolkit, and an instruction guide. Each daily package contains components for a specific part of the winter village.

Image 3.1: The advent calendar box opened, revealing individually numbered project boxes and a welcome sheet.
3.1 Daily Project Boxes
Each box is numbered for a specific day, from Day 1 to Day 24. Open one box per day to reveal a new project component and its corresponding instructions.
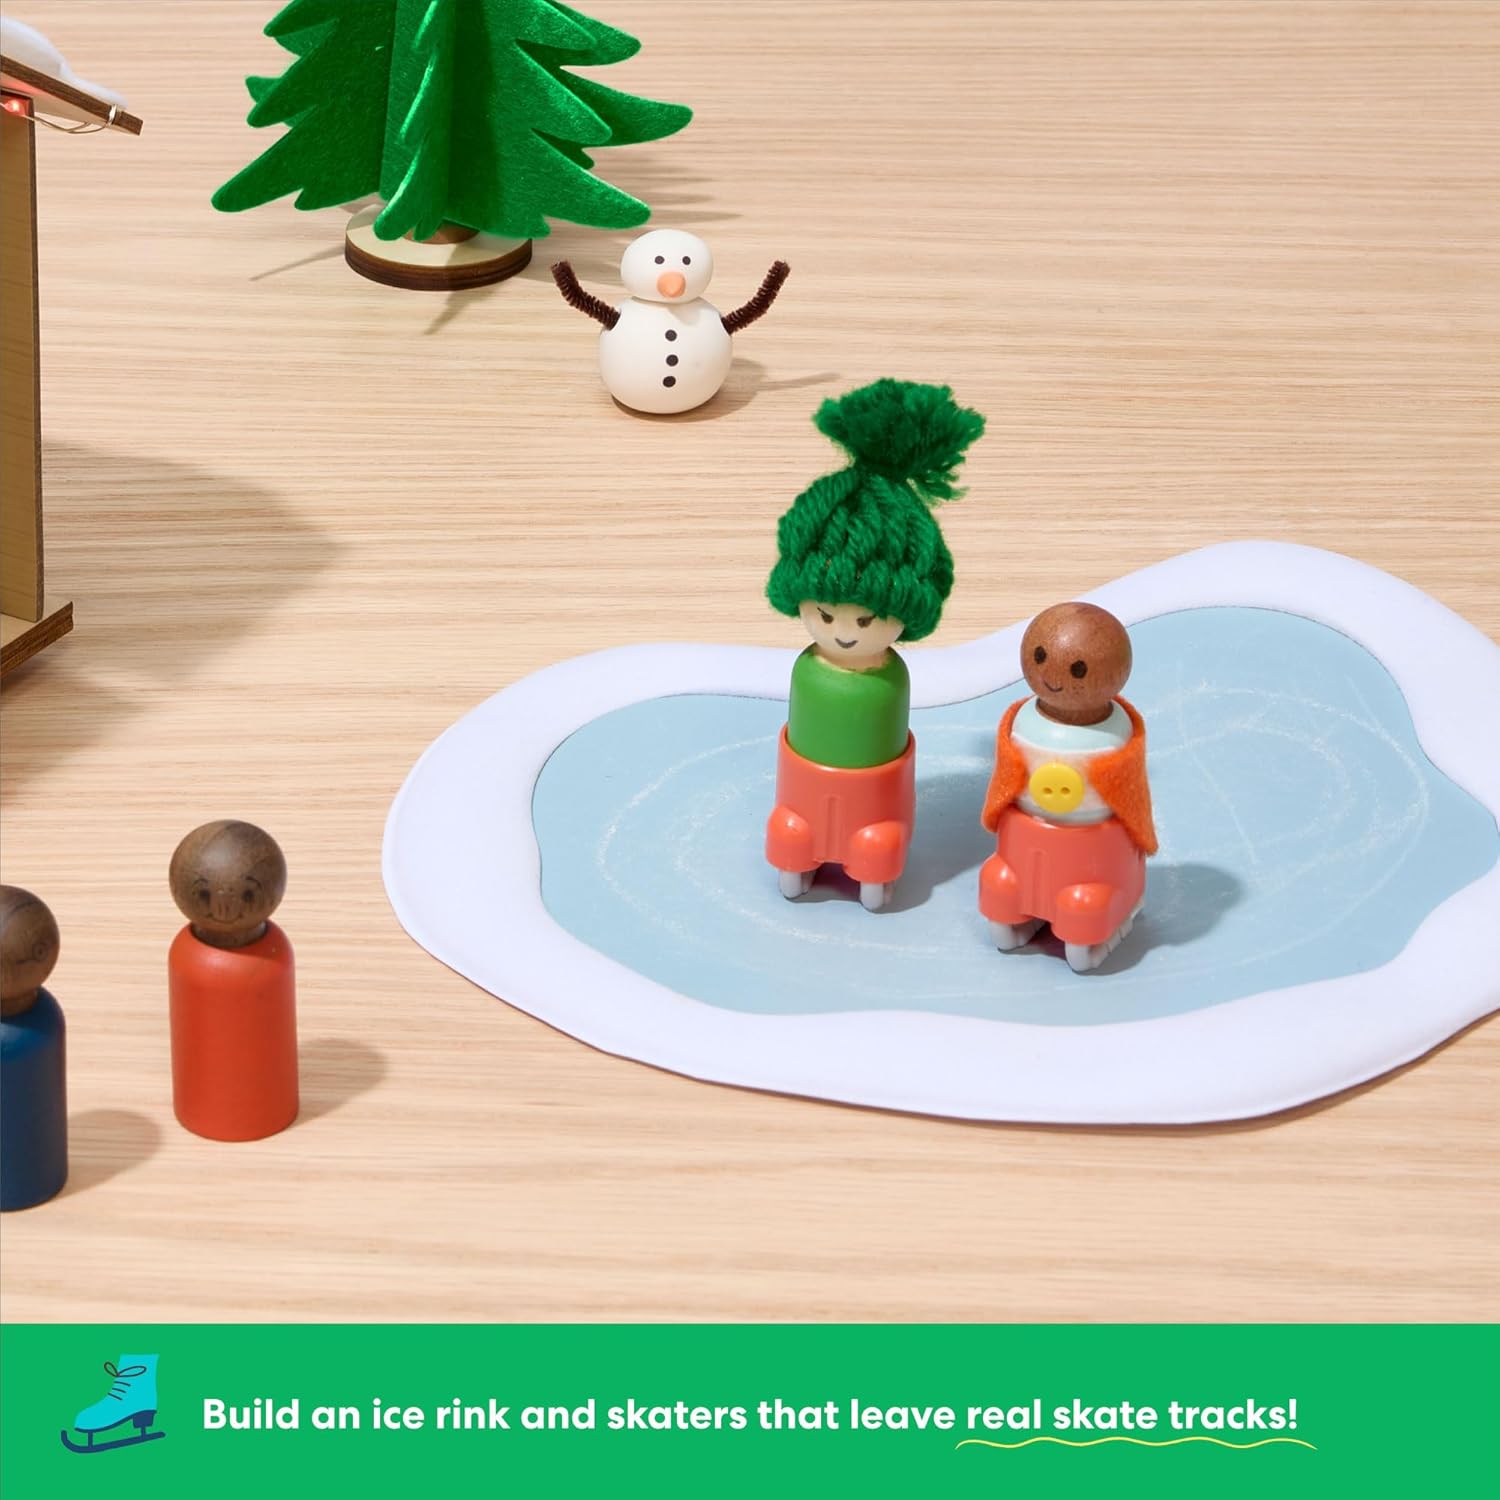
Image 3.2: A close-up view of several daily project boxes, showing their numbered labels and the individual instruction sheets.
3.2 Toolkit and Hardware
A separate toolkit is included, containing all necessary hardware and additional components required for building your creations throughout the 24 days. Refer to the main instruction sheet or individual daily instructions for guidance on when to access these items.
4. Setup and Assembly
Follow the daily instructions provided within each numbered box. Each project is designed to be completed sequentially, building upon previous days' creations to form the complete winter wonderland scene.
- Day 1: Open Box 1 and follow the instructions to assemble the first project.
- Subsequent Days: On each subsequent day, open the corresponding numbered box. Locate the individual instruction sheet inside and assemble the new component.
- Integrating Components: As you progress, integrate the newly built components into your growing winter village display.
- Toolkit Use: Refer to the main instruction sheet or individual daily instructions for guidance on when to use items from the toolkit.

Image 4.1: A child engaged in assembling a component of the advent calendar, demonstrating the hands-on nature of the projects.
5. Operating Interactive Features
The Winter Wonderland Advent Calendar includes interactive elements such as a motorized sledding hill and an ice skating rink. Specific instructions for activating and operating these features will be provided within the relevant daily project boxes.
5.1 Motorized Sledding Hill
The motorized sledding hill features a conveyor belt mechanism. Ensure batteries are correctly installed (if required for this component) and activate the switch to observe the sledders in motion.
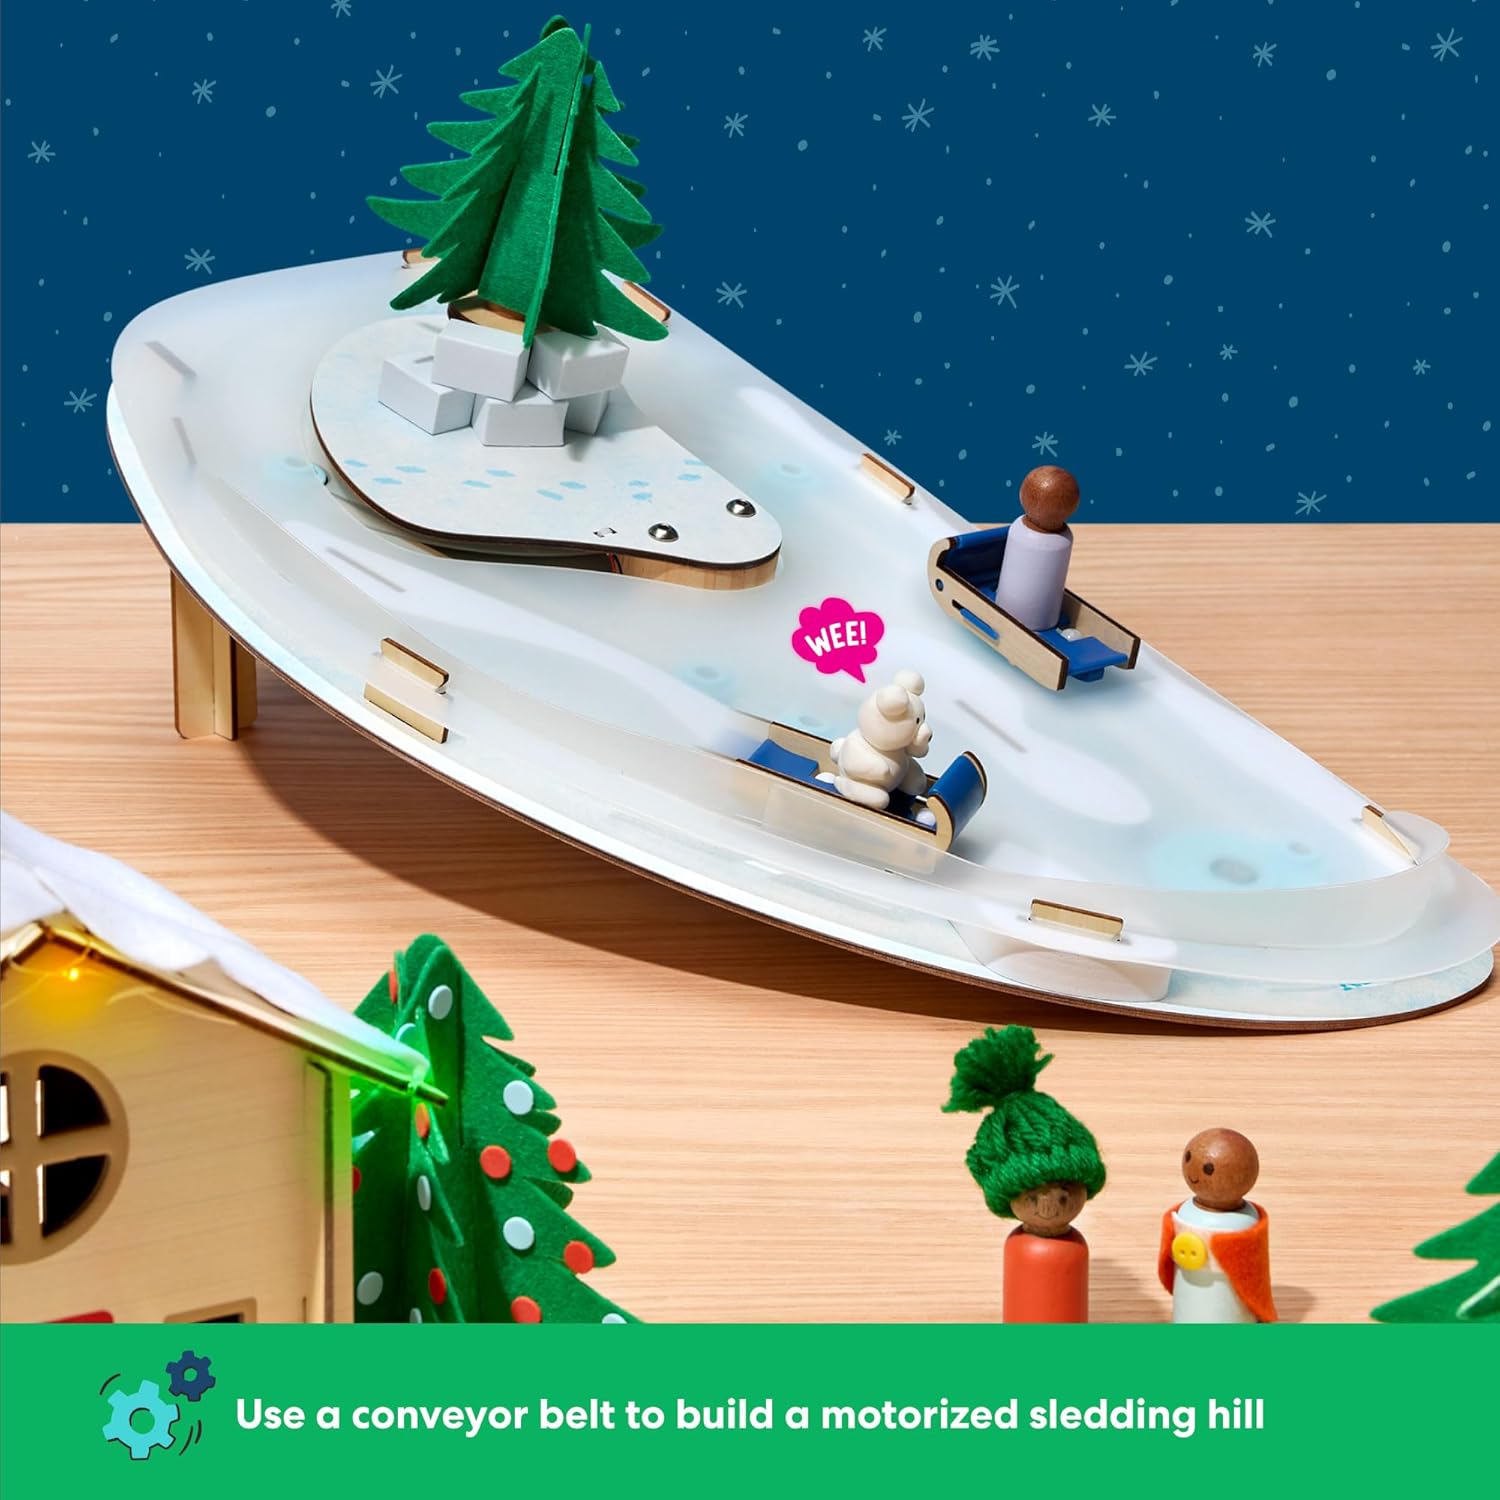
Image 5.1: A detailed view of the motorized sledding hill, showing figures on sleds and the conveyor belt mechanism.
5.2 Ice Skating Rink
The ice skating rink allows figures to leave simulated skate tracks. Follow the instructions for placing the figures and manipulating them to create these effects.

Image 5.2: A close-up of the ice skating rink with two peg figures, designed to leave tracks as they move.
5.3 Lights and Action
Certain components of the village may include lights or other action features. Instructions for activating these will be found within the respective daily boxes. Batteries are included for these features.
6. Maintenance and Storage
- Cleaning: Wipe components with a dry, soft cloth. Avoid using liquids or abrasive cleaners.
- Storage: After the holiday season, the finished houses can be used to store the smaller pieces of your winter village. This allows for organized storage and reuse in subsequent years.
- Battery Replacement: If any battery-operated features cease to function, replace batteries as indicated in the specific project instructions.

Image 6.1: A child interacting with the fully assembled winter village, showcasing the various components in use.
7. Troubleshooting
| Problem | Possible Cause | Solution |
|---|---|---|
| Motorized sledding hill not moving. | Batteries are depleted or incorrectly installed. | Check battery orientation and replace with fresh batteries if necessary. Ensure the power switch is in the "ON" position. |
| Lights are not illuminating. | Batteries are depleted or connection is loose. | Verify battery installation and replace if needed. Check all electrical connections for tightness. |
| Parts do not fit together. | Incorrect part or improper alignment. | Refer to the specific daily instruction sheet to confirm correct parts and proper assembly steps. Do not force parts. |
8. Specifications
- Brand: KiwiCo
- Model: SADC
- Item Weight: 6.34 pounds
- Product Dimensions: 36 x 12 x 0.1 inches (assembled display area)
- Material Type: Felt, Paper, Wood
- Age Range: Kid (Recommended for ages 3+)
- Theme: Christmas, Winter Wonderland
9. Warranty and Support
For information regarding product warranty, replacement parts, or technical support, please visit the official KiwiCo website or contact their customer service directly. Contact details can typically be found on the product packaging or their website.
KiwiCo Official Website: www.kiwico.com
10. Product Videos
10.1 KiwiCo Winter Wonderland Advent Calendar Overview
Video 10.1: An official overview of the KiwiCo Winter Wonderland Advent Calendar, showcasing its features and the daily build process. This video provides a quick look at the assembled village and its interactive elements.