1. Introduction
This manual provides detailed instructions for the installation, operation, maintenance, and troubleshooting of your RUITHOE LED Black Shower Panels Tower System. Please read this manual thoroughly before installation and use to ensure proper function and safety. Keep this manual for future reference.
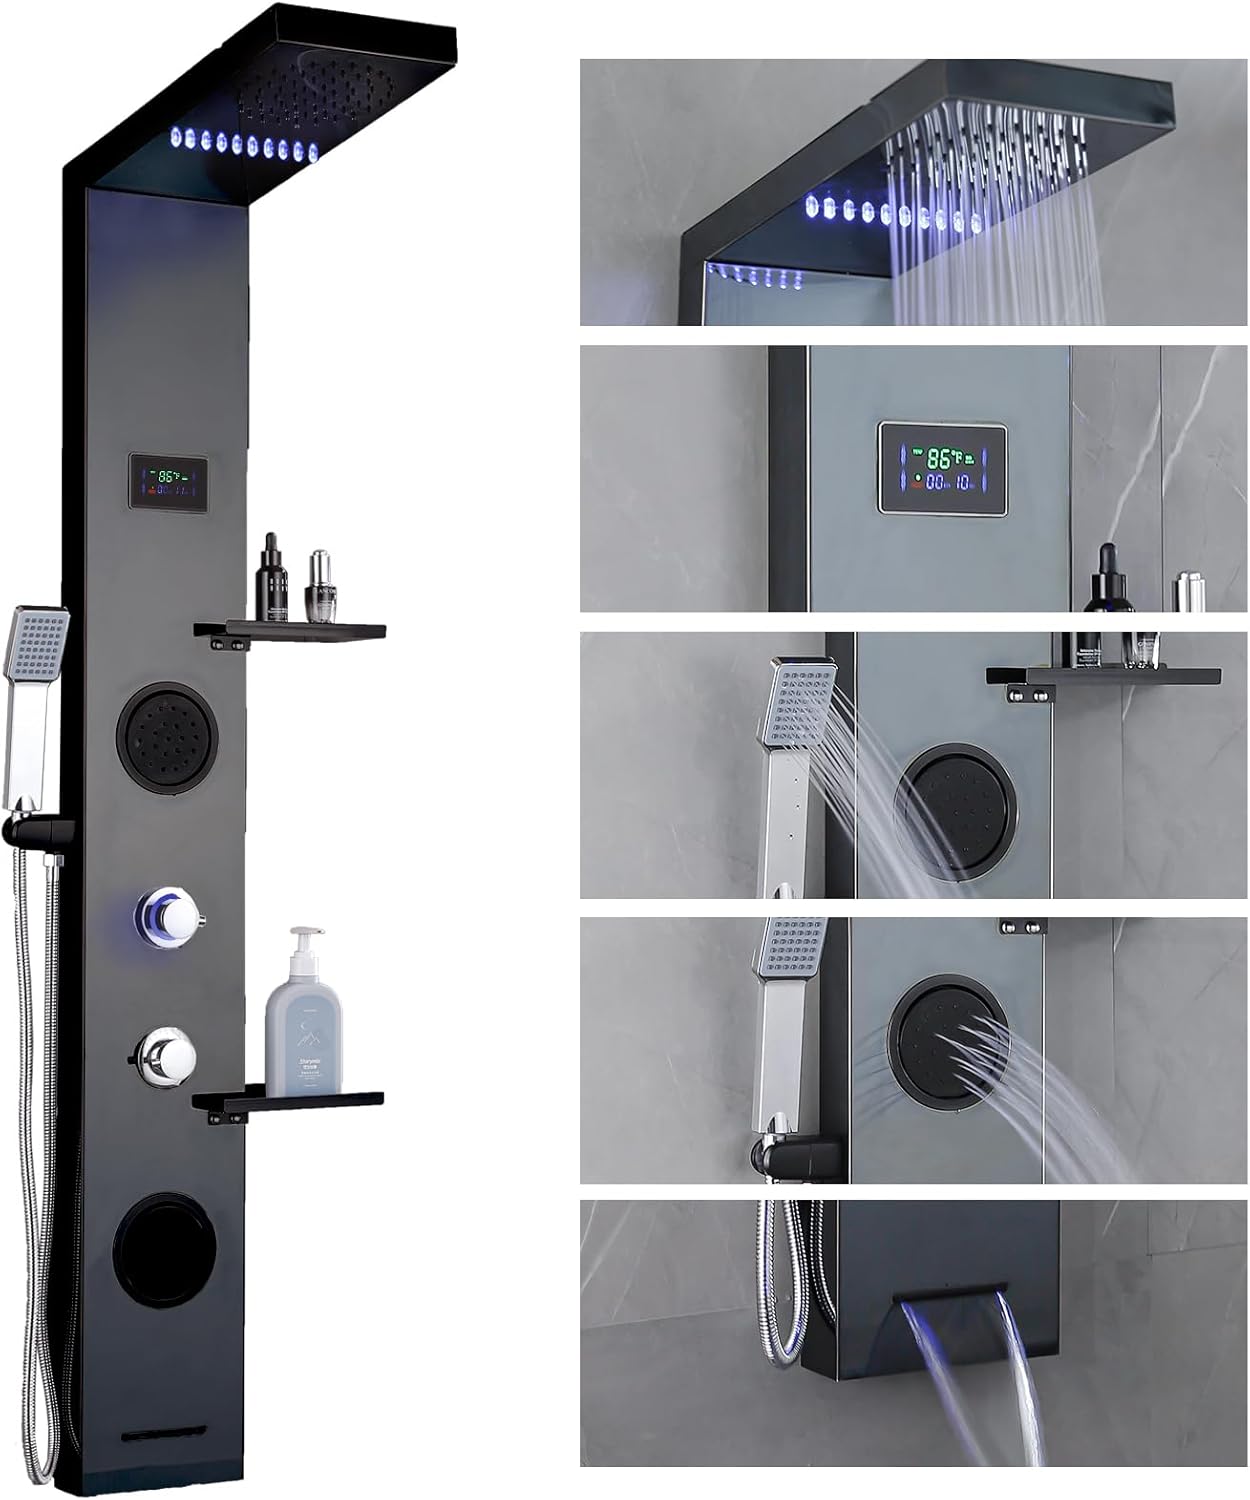
Image: The RUITHOE LED Black Shower Panels Tower System, showcasing its various features including the rainfall shower head, handheld shower, body jets, waterfall spout, and LCD temperature display.
2. Safety Information
- Ensure all plumbing and electrical connections are performed by a qualified professional in accordance with local codes.
- Turn off the main water supply before beginning installation.
- Verify water temperature before stepping into the shower to prevent scalding. The LCD display provides real-time temperature readings.
- Do not use abrasive cleaners or harsh chemicals on the shower panel surface, as this may damage the finish.
- Regularly inspect hoses and connections for leaks or damage.
3. Package Contents
Verify that all components are present before installation:
- Shower Panels Tower System
- Mount hardware
- Shower handheld
- Supply lines (hot and cold)
- Instruction Manual
4. Setup and Installation
Proper installation is crucial for the optimal performance and longevity of your shower panel system. Follow these steps carefully.
4.1. Mounting the Shower Panel
- Prepare the Wall: Ensure the wall surface is clean, dry, and structurally sound. Mark the desired mounting height for the shower panel.
- Drill Holes: Use a drill to create pilot holes at the marked locations for the mounting brackets.
- Insert Anchors: Gently tap wall anchors into the drilled holes using a hammer.
- Attach Brackets: Secure the mounting brackets to the wall using screws.
- Connect Internal Components: Before mounting the main panel, connect the internal wiring for the LED lights and ensure all internal hoses are securely clamped.
- Mount the Panel: Carefully lift the shower panel and align it with the wall brackets. Secure the panel to the brackets.

Image: Dimensional diagram of the shower panel, indicating measurements for installation planning.
4.2. Water Connections
- Apply Thread Sealant: Wrap plumber's tape around the threads of the hot and cold water supply lines.
- Connect Supply Lines: Attach the hot and cold supply lines from your wall to the corresponding inlets on the back of the shower panel. Ensure connections are tight to prevent leaks.
- Test for Leaks: Slowly turn on the main water supply and check all connections for leaks. Tighten as necessary.
4.3. Attaching Handheld Shower and Shelf
- Handheld Shower: Connect the flexible hose to the handheld shower unit and secure it to the designated holder on the panel.
- Storage Shelf: Attach the storage shelf to the pre-drilled holes on the shower panel using the provided screws.
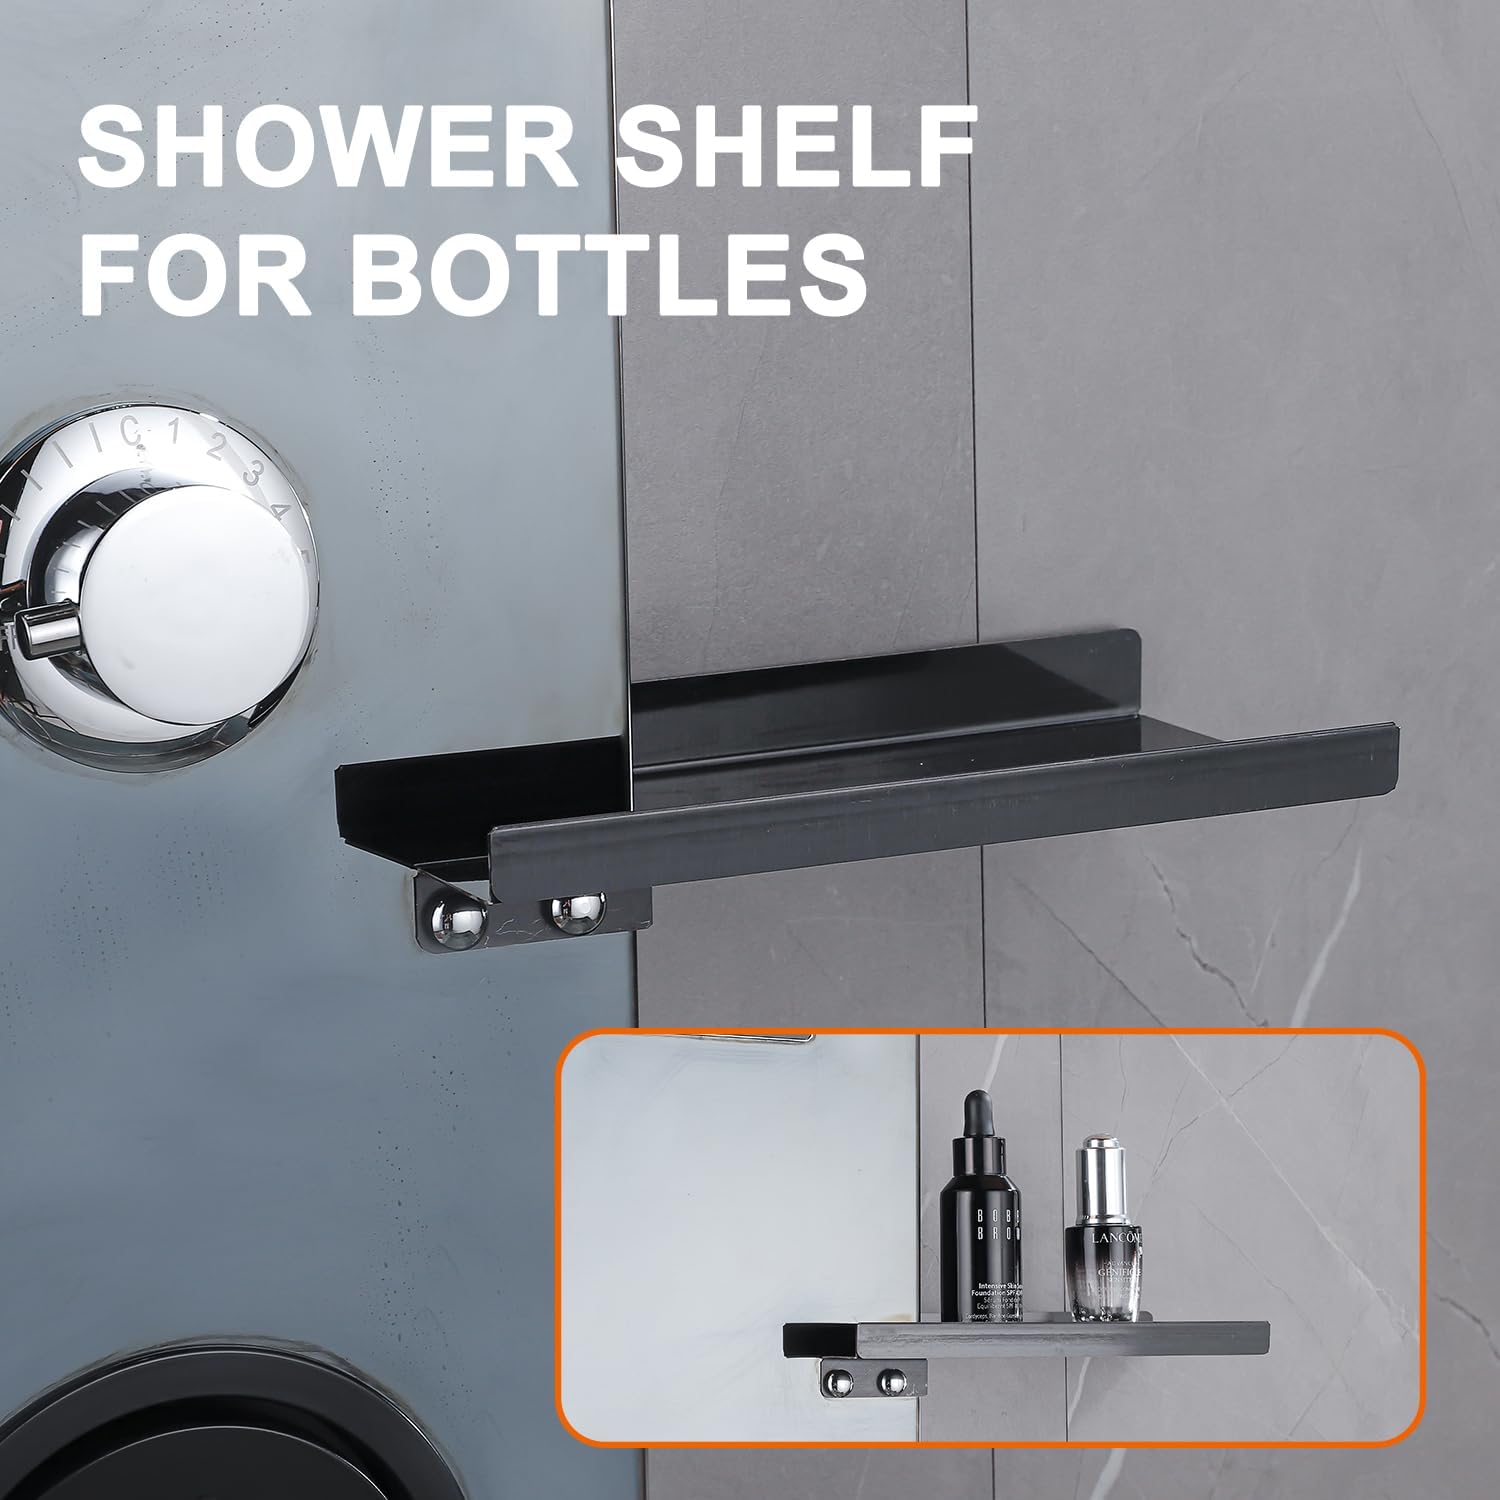
Image: The integrated shower shelf, designed for holding shower essentials.
4.4. Installation Video Guide
For a visual guide on the installation process, please refer to the official installation video:
Video: A step-by-step guide demonstrating how to install the RUITHOE shower panel system.
5. Operating Instructions
Your shower panel system offers multiple functions for a customized showering experience.
5.1. Dual Handle Control

Image: The dual handle controls, one for switching shower modes and the other for adjusting water temperature.
- Mode Selector (Upper Handle): Rotate this handle to switch between the different shower functions: rainfall shower head, handheld shower, body jets, and waterfall spout.
- Temperature Control (Lower Handle): Rotate this handle to adjust the water temperature. Turn towards the blue indicator for colder water and towards the red indicator for warmer water.
5.2. Shower Functions

Image: Visual representation of the four distinct water spray modes: rainfall, body jets, handheld, and waterfall.
- Rainfall Shower Head: Provides a wide, gentle spray from above. Features integrated LED lights that are hydro-powered (no batteries required).
- Handheld Shower: Offers a focused spray for targeted rinsing.
- Body Jets: Delivers invigorating massage streams from the panel.
- Waterfall Spout: Creates a wide, cascading water flow, ideal for filling a bathtub.
5.3. LCD Temperature Display

Image: The LCD display indicating water temperature in Fahrenheit and the duration of the shower.
The integrated LCD display shows the real-time water temperature and the duration of your shower. This feature is hydro-powered and does not require batteries.
Video: An overview of the RUITHOE LED Shower Panels, demonstrating its various functions and the LCD display.
6. Maintenance
Regular maintenance helps preserve the appearance and functionality of your shower panel.
- Cleaning: Clean the stainless steel surface with a soft cloth and mild soap or a non-abrasive cleaner. Avoid harsh chemicals, abrasive pads, or acidic cleaners, which can damage the finish.
- Nozzle Cleaning: Periodically rub the silicone nozzles on the shower head and body jets to dislodge mineral buildup.
- Leak Inspection: Regularly check all connections and hoses for any signs of leaks. Tighten connections if necessary.
- Drip-Free Valve: The system is equipped with a high-quality sealed drip-free valve for durability.

Image: Cross-section view illustrating the high-quality sealed drip-free valve for reliable operation.
7. Troubleshooting
If you encounter issues with your shower panel, refer to the following common problems and solutions:
| Problem | Possible Cause | Solution |
|---|---|---|
| No water flow or low pressure | Water supply turned off; clogged nozzles; kinked hose. | Check water supply valves; clean nozzles; straighten hoses. |
| Leaks from connections | Loose connections; insufficient thread sealant. | Tighten connections; reapply plumber's tape if necessary. |
| LCD display not working | Insufficient water flow to power the hydro-generator. | Ensure adequate water pressure and flow. |
| LED lights not illuminating | Insufficient water flow to power the hydro-generator. | Ensure adequate water pressure and flow. |
If the problem persists after attempting these solutions, please contact customer support.
8. Specifications
| Feature | Detail |
|---|---|
| Brand | RUITHOE |
| Model Number | LYP-01-B |
| Color | Matte Black |
| Material | 304 Stainless Steel |
| Finish Type | Polished |
| Number of Handles | 2 |
| Mounting Type | Wall Mount |
| Item Weight | 20.1 pounds |
| Product Dimensions | 12 x 8 x 47 inches |
| Batteries Required | No (LEDs are hydro-powered) |
9. Warranty Information
This RUITHOE product is covered by the manufacturer's standard warranty. Please retain your proof of purchase for any warranty claims. For specific details regarding warranty coverage and duration, refer to the warranty card included with your product or contact RUITHOE customer support.
10. Customer Support
For further assistance, technical support, or to inquire about replacement parts, please contact RUITHOE customer service through the retailer where the product was purchased or visit the official RUITHOE website.