1. Introduction
Thank you for choosing the True & Tidy SX3 Heavy-Duty Commercial Garment Steamer. This appliance is designed to efficiently remove wrinkles from various fabrics using powerful steam. Please read this manual thoroughly before initial use to ensure safe operation and optimal performance. Keep this manual for future reference.
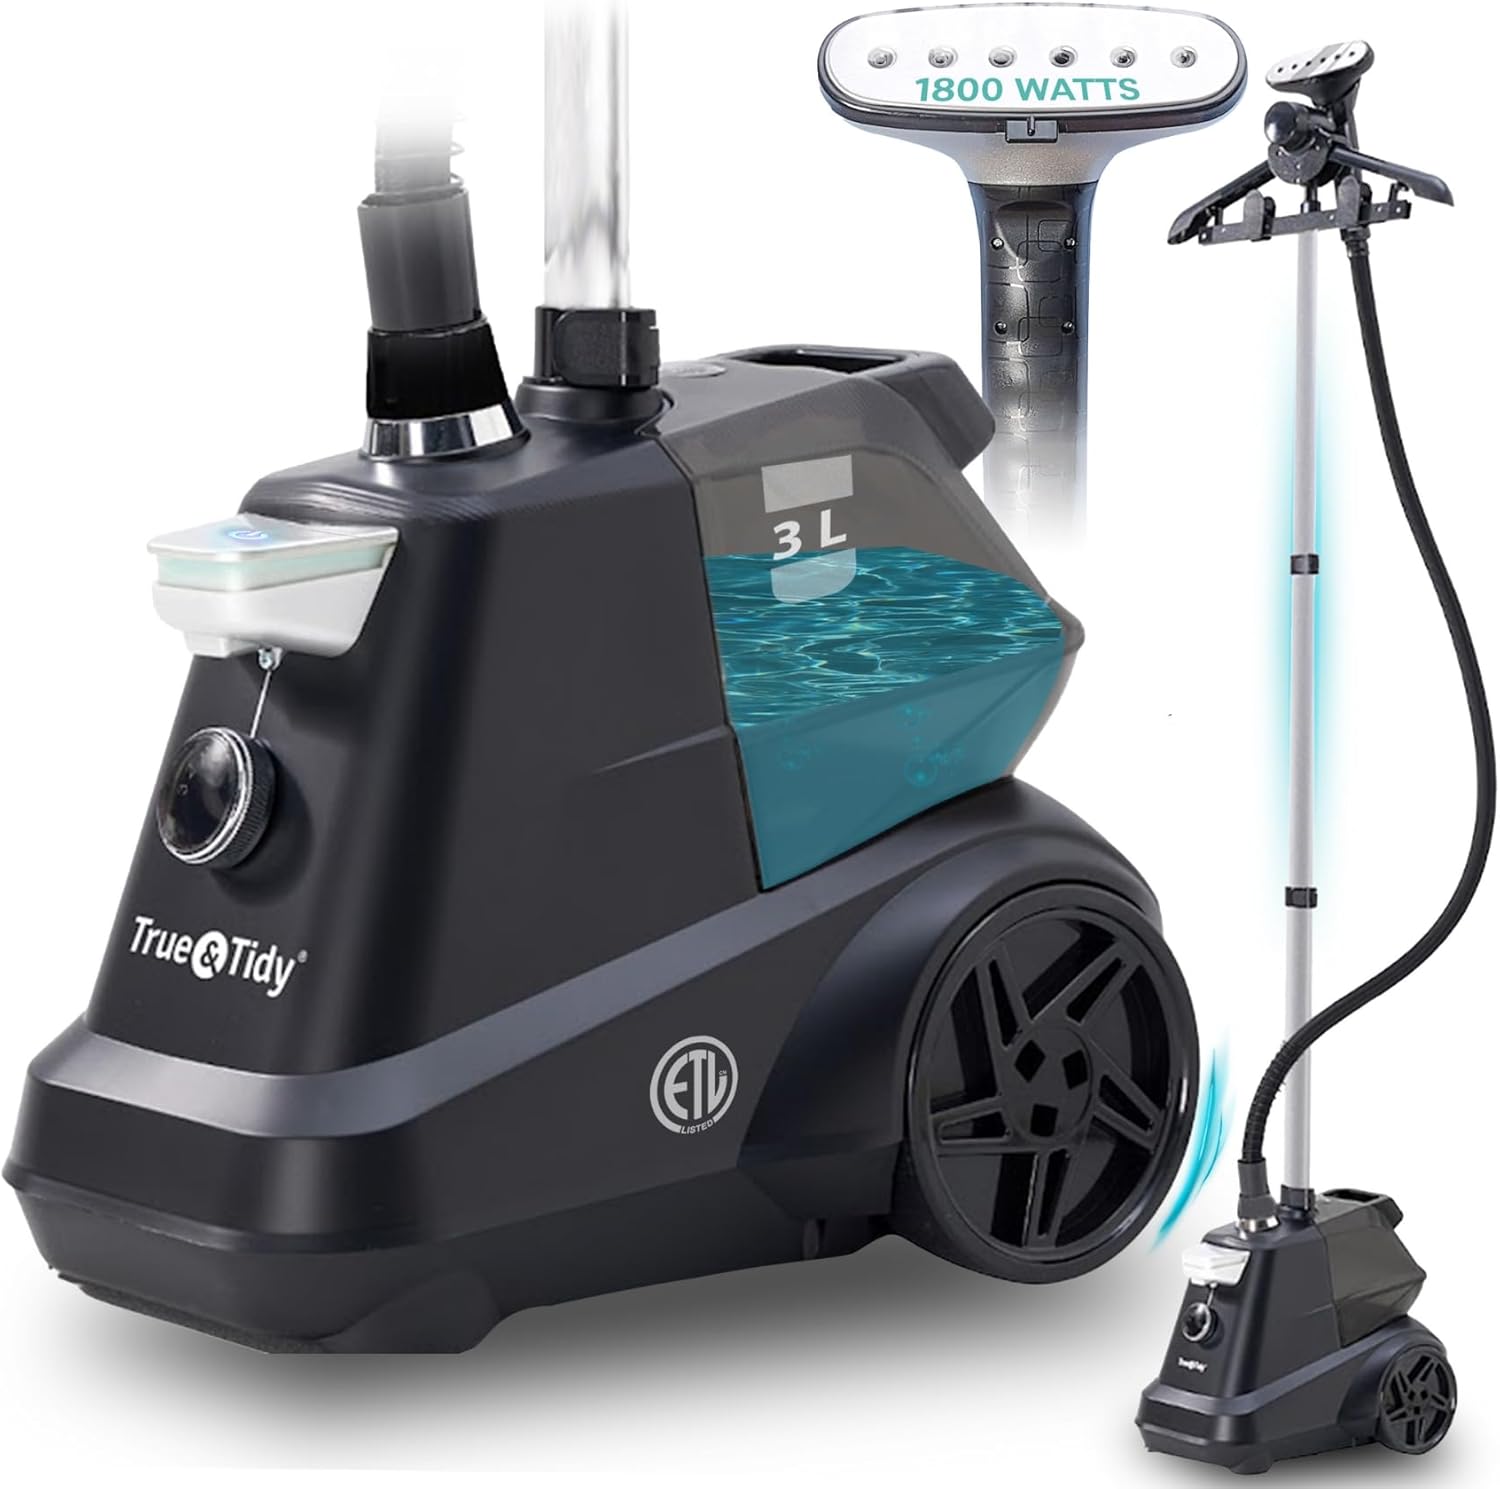
Image 1.1: The True & Tidy SX3 Heavy-Duty Commercial Garment Steamer with its main components.
2. Important Safety Instructions
When using electrical appliances, basic safety precautions should always be followed to reduce the risk of fire, electric shock, and injury to persons.
- Read all instructions before using the steamer.
- Use the appliance only for its intended use.
- To avoid the risk of electric shock, do not immerse the steamer base in water or other liquids.
- Always turn the steamer OFF before plugging or unplugging from the electrical outlet.
- Do not allow the cord to touch hot surfaces. Let the steamer cool completely before putting away.
- Never pull the cord to disconnect from the outlet; instead, grasp the plug and pull to disconnect.
- Burns can occur from touching hot metal parts, hot water, or steam. Use caution when handling.
- Do not operate the steamer with a damaged cord or if the appliance has been dropped or damaged.
- Always ensure the water tank is securely in place before operating.
- Use distilled or de-mineralized water to prevent mineral buildup and extend the life of the steamer.
- Keep children and pets away from the steamer during operation.

Image 2.1: The steamer is ETL certified, indicating compliance with safety standards.
3. Product Components
Familiarize yourself with the parts of your True & Tidy SX3 Garment Steamer:
- Steamer Base: Contains the water tank, heating element, and controls.
- Water Tank: Removable 3-liter capacity tank for water.
- Telescopic Support Pole: Adjustable height pole for hanging garments.
- Steam Hose: Connects the base to the steam nozzle. Features dual insulated hose with brass attachment.
- Steam Nozzle/Head: Delivers steam to fabrics. Made of stainless steel plated material.
- Multifunctional Hanger: Attaches to the support pole for holding various garments.
- Fabric Brush: Accessory for removing lint and enhancing steam penetration.
- Creaser: Accessory for creating sharp creases.
- Foot Pedal Controls: For power on/off and steam settings.
- Wheels: For easy mobility.

Image 3.1: Key components of the steamer, including the wheels, hose, steam nozzle, and multifunctional hanger.


Image 3.2: Detailed views of the brass hose attachment, steam head, and multifunctional hanger.
4. Setup Instructions
Follow these steps to assemble your garment steamer:
- Unpack Components: Carefully remove all parts from the packaging.
- Attach Telescopic Pole: Insert the bottom end of the telescopic support pole into the designated opening on the steamer base. Ensure it clicks securely into place.
- Attach Multifunctional Hanger: Slide the multifunctional hanger onto the top of the telescopic pole.
- Connect Steam Hose: Screw the steam hose connector clockwise into the steam outlet on the steamer base until it is tight.
- Fill Water Tank: Remove the 3-liter water tank from the base. Open the cap, fill with distilled or de-mineralized water, and securely close the cap. Place the filled water tank back into the steamer base, ensuring it is seated correctly.
- Adjust Pole Height: Extend the telescopic pole to your desired height for comfortable steaming.

Image 4.1: The telescopic pole can be adjusted to various heights for user comfort.

Image 4.2: Demonstrates filling the water tank and operating the foot pedal.
5. Operating Instructions
Operating your True & Tidy SX3 Garment Steamer is straightforward:
- Power On: Plug the power cord into a standard electrical outlet. Press the foot pedal power button to turn the steamer ON. The indicator light will illuminate.
- Heat Up: The steamer will begin to heat up. It takes approximately 50 seconds to reach operating temperature. Steam will start to emit from the nozzle.
- Select Steam Setting: Use the steam control dial on the base or the foot pedal to select one of the three steam settings (Low, Medium, High) suitable for your fabric type.
- Prepare Garment: Hang the garment on the multifunctional hanger. For best results, gently pull the fabric taut with one hand while steaming with the other.
- Steaming Technique: Hold the steam nozzle a few inches from the fabric. Move the nozzle in a downward motion, allowing the steam to penetrate the fibers. For stubborn wrinkles, you can gently press the nozzle against the fabric.
- Using Accessories: Attach the fabric brush for heavier fabrics or to remove lint. Use the creaser for sharp pleats or creases.
- Power Off: When finished, press the foot pedal power button to turn the steamer OFF. Unplug the unit from the electrical outlet.

Image 5.1: Illustrates the three steam settings and the use of the fabric brush and creaser accessories.

Image 5.2: Examples of the steamer being used to refresh clothes and sanitize household items.


Image 5.3: Details of the steam control dial and the foot pedal for hands-free operation.
6. Maintenance
Proper maintenance ensures the longevity and performance of your steamer.
6.1 Draining and Cleaning the Water Tank
- Always ensure the steamer is unplugged and completely cool before cleaning.
- Remove the water tank and empty any remaining water.
- Rinse the tank with clean water.
- For descaling (mineral buildup), fill the tank with a mixture of 50% white vinegar and 50% water. Let it sit for several hours or overnight. Empty and rinse thoroughly. Run a tank of clean water through the steamer to flush out any vinegar residue.
6.2 Cleaning the Exterior
- Wipe the exterior of the steamer base and nozzle with a soft, damp cloth.
- Do not use abrasive cleaners or solvents.
6.3 Storage
- Ensure the steamer is completely cool and dry before storing.
- Empty the water tank.
- Retract the telescopic pole for compact storage.
- Store the steamer in a cool, dry place.
7. Troubleshooting
If you encounter issues with your steamer, refer to the following table:
| Problem | Possible Cause | Solution |
|---|---|---|
| No steam or very little steam | Water tank empty Steamer not heated up Hose kinked Mineral buildup | Refill water tank Allow 50 seconds for heating Straighten hose Descale the steamer (see Maintenance) |
| Water leaking from nozzle | Condensation in hose Overfilling water tank | Hold nozzle upright to allow condensation to drain back into base Do not overfill the water tank |
| Steamer not turning on | Not plugged in Power button not pressed | Ensure power cord is securely plugged in Press the foot pedal power button firmly |
| Clothes still wrinkled after steaming | Not enough steam Fabric not pulled taut Incorrect technique | Increase steam setting Gently pull fabric taut while steaming Move nozzle slowly and evenly over fabric |
8. Specifications
Key technical details for the True & Tidy SX3 Garment Steamer:
| Feature | Specification |
|---|---|
| Model Number | SX3 |
| Wattage | 1800 watts |
| Voltage | 120 Volts |
| Water Tank Capacity | 3 Liters |
| Heat Time | Approximately 50 seconds |
| Continuous Steam Time | Over 90 minutes (with full tank) |
| Product Dimensions (L x W x H) | 14.5" x 10.42" x 70.5" (fully extended) |
| Item Weight | 12.1 Pounds |
| Color | Matte Black |
| UPC | 810074613019 |

Image 8.1: Highlights the 1800-watt power and 3-liter water tank capacity.
9. Warranty and Support
True & Tidy products are manufactured to high-quality standards. For warranty information or technical support, please refer to the warranty card included with your purchase or visit the official True & Tidy website. Our US-based customer support team is available to assist you with any questions or concerns.
Online Support: Visit the True & Tidy Store on Amazon
Note: No official product videos were available in the provided data to embed in this manual.