1. Introduction
This manual provides detailed instructions for the installation, operation, and maintenance of your Panasonic WhisperGreen Select FV-0511VKL3 Ceiling Mount Exhaust Fan with LED Light. Please read this manual thoroughly before installation and use to ensure proper function and safety. Keep this manual for future reference.

Figure 1: Panasonic WhisperGreen Select FV-0511VKL3 Exhaust Fan with LED Light. This image shows the complete fan unit, including the housing, duct connector, and the white grille with integrated LED light.
2. Safety Information
Always follow basic safety precautions when installing, operating, and maintaining electrical appliances to reduce the risk of fire, electric shock, or injury to persons.
- WARNING: Disconnect power at the service panel before installing or servicing the unit.
- Installation must be performed by a qualified electrician in accordance with all applicable codes and standards.
- Do not use this fan with any solid-state speed control device unless specifically approved for use with this model.
- Ensure proper grounding to prevent electrical shock.
- Do not install in a ceiling with insulation that exceeds the fan's rated temperature.
3. Product Features
The Panasonic WhisperGreen Select FV-0511VKL3 exhaust fan is designed for efficient and quiet ventilation with customizable options.
- Pick-A-Flow Airflow Selector: Allows selection of 50, 80, or 110 CFM (Cubic Feet per Minute) at the time of installation.
- SmartFlow Technology: Ensures consistent airflow performance even in static pressure environments.
- Quiet Operation: Engineered for low noise levels, typically 0.3 to 0.8 Sones.
- Integrated LED Light: Dimmable 3000K warm white LED light for efficient illumination. Includes a nightlight feature (requires separate wiring).
- Flex-Z Fast Bracket: Simplifies installation, allowing for positioning from below the ceiling.
- Customizable with Add-On Modules: Accommodates up to three optional modules (sold separately) such as Wi-Fi, Smart Action Motion Sensor, Condensation Sensor, and Multi-Speed with Time Delay.
- Ducting Options: Compatible with 4-inch or 6-inch ducting.
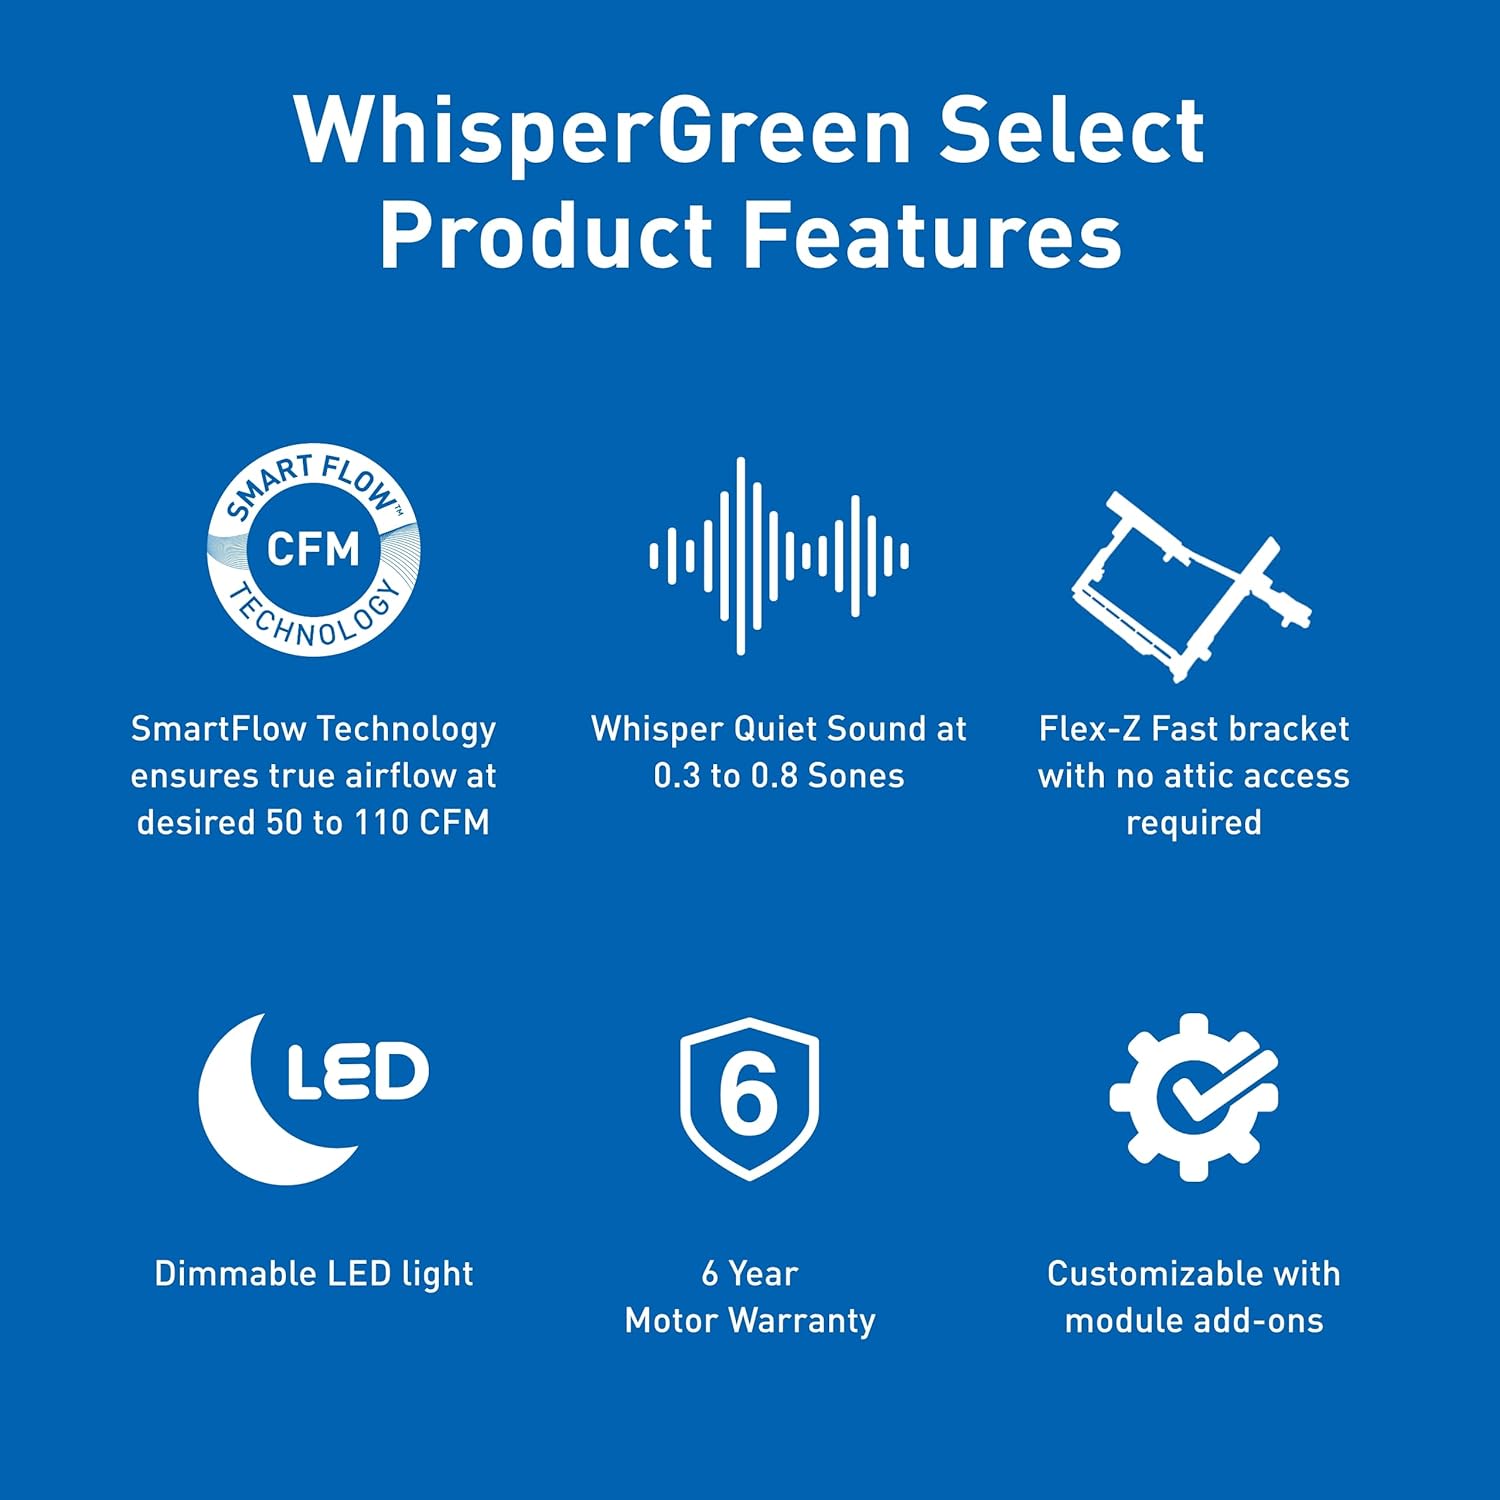
Figure 2: Overview of key product features including SmartFlow Technology, quiet operation, Flex-Z Fast bracket, dimmable LED light, 6-year motor warranty, and module customization.

Figure 3: Chart illustrating Sone levels and their corresponding sound comparisons, highlighting the quiet operation of the fan.
4. Installation Instructions
Before beginning installation, ensure all necessary tools and materials are available and that power to the installation area is disconnected at the circuit breaker.
4.1. Pre-Installation Checks
- Verify the ceiling opening dimensions. The fan housing measures approximately 10-1/4" x 10-1/4" x 7-1/2" (D x W x H).
- Ensure adequate clearance for the fan housing depth, especially for installations between floors.
- Confirm availability of 120V AC power supply.

Figure 4: Diagram showing the fan's dimensions (10-1/4" x 10-1/4" x 7-1/2") and indicating compatibility with 4" or 6" ducting via an adapter.
4.2. Using the Flex-Z Fast Bracket
The Flex-Z Fast bracket allows for flexible and secure installation, often without requiring attic access.
- Attach the Flex-Z Fast bracket to the ceiling joists using appropriate fasteners.
- Position the fan housing onto the bracket. The single-hinge design facilitates easy placement.
- Secure the fan housing to the bracket.

Figure 5: A person installing the fan using the Flex-Z Fast bracket, demonstrating its ease of use for positioning the fan housing.
4.3. Ducting Connection
Connect the exhaust ductwork to the fan's duct connector. The fan supports both 4-inch and 6-inch ducting. Ensure a tight seal to prevent air leakage.
4.4. Electrical Wiring
All wiring must comply with local electrical codes. Connect the fan to a 120V AC, 60Hz power supply. The LED light and nightlight features may require separate wiring for independent control.
4.5. CFM Selection (Pick-A-Flow)
Before installing the grille, select the desired airflow (CFM) using the Pick-A-Flow selector switch located on the fan unit. Options include 50, 80, and 110 CFM. Choose the CFM setting appropriate for your room size.

Figure 6: Close-up view of the Pick-A-Flow selector switch, allowing users to choose between 50, 80, and 110 CFM settings.

Figure 7: Guide for selecting appropriate CFM based on room size (square footage).
4.6. Optional Module Installation
If using optional add-on modules (e.g., Wi-Fi, motion sensor, condensation sensor), refer to the specific instructions provided with each module for proper installation into the fan unit. These modules are sold separately.

Figure 8: Illustration of various add-on modules available for customization, including Wi-Fi, Smart Action Motion Sensor, Condensation Sensor, and Multi-Speed with Time Delay.
4.7. Grille Installation
Once all connections are made and the CFM is set, attach the grille to the fan housing. Ensure it is securely fastened.
5. Operating Instructions
5.1. Fan Operation
Turn on the fan using the wall switch. The fan may have a slight delay before reaching full speed, which is normal operation. The fan will operate at the CFM level selected during installation.
5.2. LED Light Operation
The integrated LED light can be controlled independently if wired separately. It provides 3000K warm white illumination and is dimmable with compatible dimmer switches.

Figure 9: Illustration of the dimmable 3000K warm white LED light and its color temperature range.
5.3. Nightlight Feature
The fan includes a nightlight feature. This requires separate wiring during installation for independent control. Consult your electrician for proper setup.
5.4. Operation with Optional Modules
If optional modules are installed, refer to their respective instruction manuals for specific operating procedures. For example:
- Motion Sensor: Fan activates automatically when motion is detected.
- Condensation Sensor: Fan activates automatically when humidity levels exceed a set threshold.
- Multi-Speed with Time Delay: Allows for timed operation and variable speed control.
- Wi-Fi Module: Enables smart control via a compatible application.
6. Maintenance
Regular maintenance ensures optimal performance and longevity of your exhaust fan.
- WARNING: Always disconnect power at the circuit breaker before performing any maintenance.
- Grille Cleaning: Periodically remove the grille and wash it with a mild detergent. Rinse thoroughly and dry before reattaching.
- Fan Blade Cleaning: Gently wipe the fan blades with a damp cloth to remove dust and debris. Do not bend the blades.
- Housing Cleaning: Wipe the interior of the fan housing with a damp cloth if accessible.
- Do not use abrasive cleaners or solvents on any part of the fan.
7. Troubleshooting
Refer to the following table for common issues and their solutions.
| Problem | Possible Cause | Solution |
|---|---|---|
| Fan does not operate. | No power, loose wiring, faulty switch, fan delay. | Check circuit breaker. Verify all wiring connections are secure. Test wall switch. Note that the fan may have a 10-second delay before starting. |
| Fan is noisy. | Loose mounting, debris in fan, damaged fan blade, improper ducting. | Ensure fan is securely mounted. Clean fan blades and housing. Check ductwork for obstructions or kinks. |
| LED light does not turn on. | No power to light, loose wiring, faulty LED driver. | Check light switch and wiring connections. Consult a qualified electrician if the issue persists. |
| Fan does not clear humidity effectively. | Incorrect CFM setting, undersized fan for room, blocked ducting. | Verify CFM setting is appropriate for room size. Check ductwork for obstructions. Ensure proper sealing of duct connections. |
8. Specifications
| Feature | Detail |
|---|---|
| Model Number | FV-0511VKL3 |
| Brand | Panasonic |
| Air Flow Capacity (CFM) | 50, 80, 110 (Selectable) |
| Noise Level | 0.3 - 0.8 Sones |
| Wattage | 10 watts |
| Voltage | 120 Volts |
| Product Dimensions (H x W x D) | 7.5" x 10.25" x 10.25" (approximate housing) |
| Item Weight | 10.1 Pounds |
| LED Light | Dimmable 3000K Warm White |
| Ducting Size | 4" or 6" (with adapter) |
| Room Type | Bathroom, Garage, Laundry Rooms, Living Room |
| UPC | 885170418462 |
9. Warranty and Support
This Panasonic WhisperGreen Select exhaust fan comes with a 6-Year Motor Warranty. For warranty claims or technical support, please contact Panasonic customer service. Keep your proof of purchase for warranty validation.
For further assistance, visit the official Panasonic website or contact their customer support line.