Introduction
The Xtorm FS405 Fuel Series Solar Powerbank 20W – 10.000 mAh is designed to provide portable power for your electronic devices, offering the flexibility to charge via USB-C or its integrated solar panel. This power bank is built for outdoor adventures, featuring a durable, splash-resistant design and a powerful LED flashlight.
Safety Information
- Do not expose the power bank to extreme temperatures (above 45°C or below -10°C).
- Avoid dropping, disassembling, or attempting to repair the device yourself.
- Keep away from water, except for the specified splash resistance (IPX4). Do not submerge.
- Use only certified charging cables and adapters.
- Keep out of reach of children.
- Dispose of the product responsibly according to local regulations.
Package Contents
Please check the package for the following items:
- Xtorm FS405 Solar Powerbank
- USB-C Charging Cable (0.30m)
- User Manual
Product Overview

Front View: Shows the main solar charging panel and the Xtorm logo. The robust casing is visible around the edges.

Back View (LED Off): Displays the textured back casing and the integrated LED light panel in its off state.
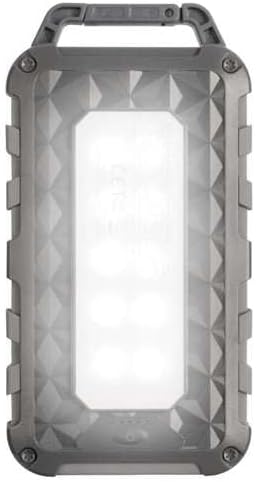
Back View (LED On): Shows the powerful LED light panel fully illuminated, indicating the flashlight function is active.

Top View: Highlights the sturdy integrated carabiner handle, designed for easy attachment to bags or gear.
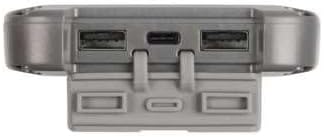
Bottom View: Displays the USB-C PD input/output port and two USB-A Quick Charge 3.0 output ports, protected by a cover.
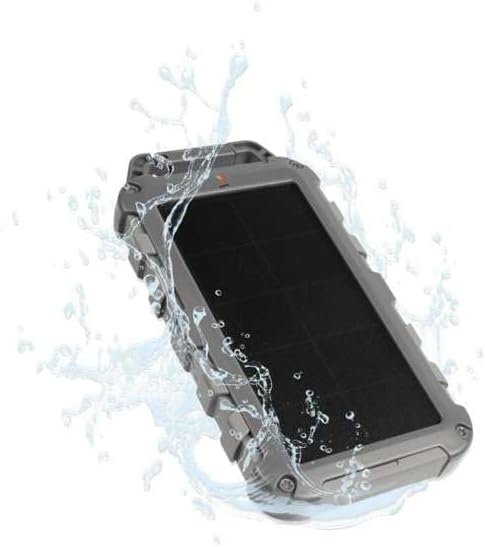
Durability Feature: Illustrates the power bank's splash-resistant design, suitable for outdoor conditions (IPX4 rated).
Setup
Initial Charge
Before first use, it is recommended to fully charge the Xtorm FS405 Solar Powerbank via the USB-C port for optimal performance.
- Connect the provided USB-C cable to the USB-C port on the power bank.
- Connect the other end of the USB-C cable to a compatible USB wall adapter (not included) or a computer's USB port.
- The LED indicators on the power bank will show the charging status. A full charge via USB-C typically takes approximately 2 hours.
Operating Instructions
Charging the Power Bank
The Xtorm FS405 can be charged using two methods:
1. Via USB-C (Recommended for Fast Charging)
- Connect the power bank to a USB-C power source using the included cable.
- The power bank will begin charging. This method provides the fastest charging speed for the power bank itself.
2. Via Solar Panel
The integrated solar panel allows for convenient charging when outdoors. For best results, place the power bank directly under strong sunlight.
- Place the solar panel facing direct sunlight.
- A small indicator light (usually green) will illuminate when solar charging is active.
- Note on Solar Charging Speed: Solar charging is a supplementary method and is significantly slower than USB-C charging. Factors like season, location, time of day, and cloud cover heavily influence charging speed.
Approximate solar charging times for a full charge:
- Spring/Summer (mostly sunny day): Approximately 10 days
- Autumn/Winter (mostly sunny day): Approximately 20 days
Solar charging is not effective on mostly cloudy days.
Charging External Devices
The power bank features one USB-C PD (Power Delivery) output and two USB-A Quick Charge 3.0 outputs.

Fast Charging Capability: The power bank can charge compatible smartphones, such as an iPhone 14 or 12/13, up to 50% in approximately 30 minutes using the 20W USB-C PD output.
- Connect your device's charging cable to one of the available output ports (USB-C or USB-A) on the power bank.
- Connect the other end of the cable to your device.
- The power bank will automatically begin charging your device.
- The LED indicators on the power bank will show the remaining battery level.
The 10,000mAh capacity is sufficient to charge most smartphones at least 2 times.
Using the LED Flashlight
The Xtorm FS405 includes a powerful integrated LED flashlight on its back.
- Locate the power button (usually on the side or near the ports).
- Press and hold the power button for a few seconds to turn the flashlight ON.
- Press and hold the power button again to turn the flashlight OFF.
Maintenance
- Clean the power bank with a soft, dry cloth. Do not use harsh chemicals or abrasive materials.
- Store the power bank in a cool, dry place when not in use.
- For long-term storage, charge the power bank to about 50-70% every 3-6 months to preserve battery health.
- Ensure the port covers are properly sealed when exposed to water splashes.
Troubleshooting
Power Bank Not Charging
- Check Cable: Ensure the USB-C cable is securely connected to both the power bank and the power source. Try a different cable.
- Check Power Source: Verify that the wall adapter or USB port is functioning correctly.
- Solar Charging: For solar charging, ensure the panel is in direct, strong sunlight. Remember solar charging is slow and not effective in low light or cloudy conditions.
Device Not Charging from Power Bank
- Check Power Bank Charge: Ensure the power bank has sufficient charge.
- Check Cables: Use the original charging cable for your device and ensure it's properly connected to both the power bank and your device. Try a different cable.
- Compatibility: Verify that your device is compatible with USB charging.
- Restart: Disconnect and reconnect the device.
Flashlight Not Working
- Check Power Bank Charge: Ensure the power bank has some charge remaining.
- Correct Operation: Ensure you are pressing and holding the power button correctly to activate the flashlight.
Specifications
| Feature | Detail |
|---|---|
| Model | FS405 |
| Brand | Xtorm |
| Series | Fuel Series 4 |
| Battery Capacity | 10,000 mAh (Lithium Polymer) |
| Max Power Output | 20 W |
| Output 1 (USB-C PD) | 20 W |
| Output 2 (USB-A QC 3.0) | 18 W |
| Output 3 (USB-A QC 3.0) | 18 W |
| Number of Outputs | 3 |
| Input Type | USB-C PD |
| Solar Panel Power | 1 W (SunPower cells) |
| Dimensions (L x W x H) | 17 cm x 9 cm x 2 cm |
| Weight | 289 g |
| Material | PC, ABS |
| Water Resistance | IPX4 (Splash Resistant) |
| Integrated Flashlight | Yes |
| Battery Charge Time (USB-C) | Approx. 2 hours |
Warranty and Support
For warranty information and customer support, please refer to the Xtorm official website or contact your local retailer. Keep your proof of purchase for any warranty claims.
Online Support: www.xtorm.eu


