Welcome
Thank you for purchasing the Harbor Breeze Valdosta 20 Inch Indoor Outdoor Ceiling Fan. This manual provides important information for the safe assembly, installation, operation, and maintenance of your fan. Please read all instructions carefully before beginning installation and retain this manual for future reference.
Important Safety Instructions
To reduce the risk of fire, electric shock, or personal injury, always follow these basic precautions:
- Read all instructions before installing the fan.
- Disconnect power at the main fuse box or circuit breaker before installation or servicing.
- Ensure all electrical connections comply with local codes and ordinances, and National Electrical Code (NEC).
- The fan must be properly grounded to avoid the possibility of electrical shock.
- Do not operate the fan with a damaged cord or plug.
- Avoid placing objects in the path of the fan blades.
- This fan is designed for indoor and outdoor use in covered areas such as porches, gazebos, pergolas, and patios. Do not expose to direct rain or standing water.
Package Contents
Verify that all components are present before beginning installation:
- Fan Motor Assembly
- Fan Blades (3)
- Mounting Hardware (hook, chain, screws)
- Remote Control
- User Manual

Image of the complete Harbor Breeze Valdosta ceiling fan with a tape measure for scale, showing its overall design and size.
Installation Guide
Before You Begin
Ensure you have the following tools and materials:
- Phillips screwdriver
- Ladder
- Wire strippers
- Electrical tape
Choose a suitable location for your fan. It should be mounted to a sturdy structure capable of supporting the fan's weight and allow for adequate clearance around the blades.
Mounting the Fan
- Turn off power: Before starting, ensure the power supply to the installation area is turned off at the circuit breaker.
- Attach mounting bracket: Secure the provided mounting bracket to a sturdy ceiling joist or a suitable support structure using appropriate screws.
- Assemble fan: Attach the fan blades to the motor assembly according to the diagrams in this manual.
- Hang the fan: Carefully lift the fan assembly and hang it onto the mounting hook.
- Wire connections: Connect the electrical wires from the fan to the power supply wires, ensuring proper polarity (live to live, neutral to neutral, ground to ground). Use wire nuts to secure connections.
- Secure fan: Once wiring is complete, secure the fan assembly to the mounting bracket.
- Restore power: Turn the power back on at the circuit breaker.

Image showing the Harbor Breeze Valdosta fan installed under a wooden pergola, demonstrating a typical outdoor placement.
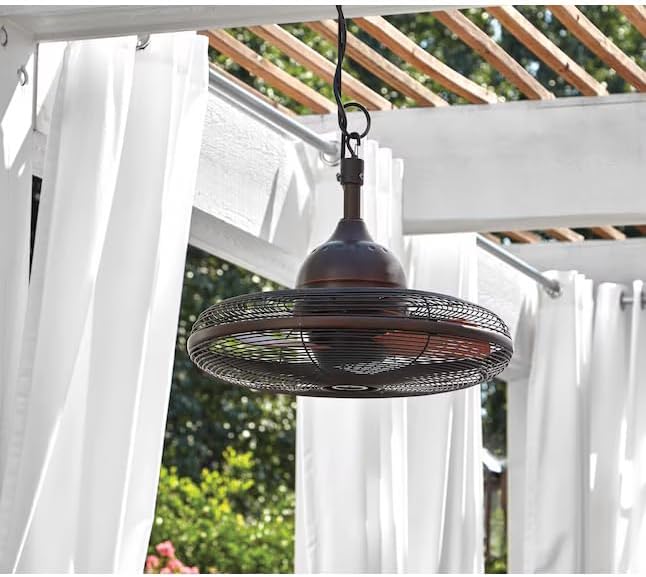
Image showing the Harbor Breeze Valdosta fan mounted to a wall bracket, illustrating an alternative installation method for covered outdoor spaces.

Image showing the Harbor Breeze Valdosta fan installed under a white pergola with curtains, highlighting its use in an outdoor living space.

Image showing the Harbor Breeze Valdosta fan installed under a light-colored ceiling with exposed beams, demonstrating a typical ceiling mount.

Close-up image of the fan's hanging hook and downrod connection point, showing the robust design.
Operation
Powering On/Off
Once installed and powered, the fan can be turned on or off using the included remote control.
Speed Control
The fan features multiple speed settings (Low, Medium, High) which can be adjusted via the remote control to suit your comfort needs.
Remote Control Usage
Point the remote control directly at the fan's receiver. Press the designated buttons for power on/off and speed adjustment. Ensure the remote has fresh batteries for optimal performance.
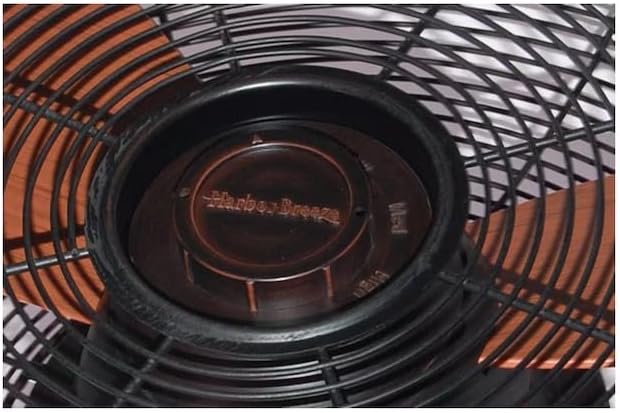
Close-up image of the fan's central hub, showing the 'Harbor Breeze' branding and clearly marked speed settings (Off, Low, Med, High) for manual adjustment if needed.

Image showing the fan from below, with the blades visible through the protective cage, and a tape measure for scale, indicating the fan's operational view.

Top-down view of the fan, clearly showing the three cinnamon-colored blades within the oil-rubbed bronze cage, highlighting the blade design.
Care and Maintenance
Regular maintenance will ensure the longevity and optimal performance of your fan.
- Cleaning: To clean the fan, wipe with a soft, damp cloth. Do not use abrasive cleaners or solvents as they may damage the finish. Ensure the fan is completely dry before operating.
- Blade Care: Periodically check the fan blades for dust accumulation. Clean them gently to maintain balance and airflow.
- Motor Care: The fan motor is permanently lubricated and requires no oiling.
- Hardware Check: Periodically check all screws and connections to ensure they are secure.
Troubleshooting
If you experience issues with your fan, refer to the following table for common problems and solutions:
| Problem | Possible Cause | Solution |
|---|---|---|
| Fan does not start | No power to the fan; Loose wire connections; Remote control battery low. | Check circuit breaker/fuse; Verify all wire connections are secure; Replace remote control battery. |
| Fan wobbles | Loose fan blades; Improperly mounted. | Tighten all blade screws; Ensure mounting bracket is securely fastened to the support structure. |
| Noisy operation | Loose screws; Fan not level; Obstruction. | Check and tighten all screws; Ensure fan is mounted level; Remove any obstructions from the fan's path. |
Product Specifications
| Feature | Specification |
|---|---|
| Brand | HARBOR BREEZE |
| Model Name | L1120H |
| Electric Fan Design | Ceiling Fan |
| Finish Type | Oil Rubbed |
| Number of Blades | 3 |
| Indoor/Outdoor Usage | Indoor/Outdoor (covered areas) |
| Control Method | Remote |
| Product Dimensions | 22.56 x 22.56 x 15.6 inches |
| Item Weight | 20.8 pounds |
| UPC | 850037720989 |
Warranty and Customer Support
This Harbor Breeze product is manufactured to the highest quality standards. For information regarding warranty coverage or if you require assistance with your product, please refer to the warranty card included in your package or contact Harbor Breeze customer support directly. Contact details can typically be found on the manufacturer's website or on the product packaging.