Prexiso PWDX-F19LI
PREXISO 2-in-1 Stud Finder with Laser Level User Manual
Model: PWDX-F19LI
Brand: Prexiso
Introduction
The PREXISO 2-in-1 Stud Finder with Laser Level is a versatile and reliable tool designed to simplify various construction and decoration tasks. This device combines the functionality of a precise line laser and an accurate stud scanner, making it an indispensable asset for both DIY enthusiasts and professionals. Its intuitive design, clear display, and multiple detection modes ensure safety and efficiency in locating hidden structures and ensuring level alignments.
Package Contents
Ensure all items are present and in good condition:
- Rechargeable PREXISO 2-in-1 Wall Stud Finder with Cross-Line Lasers
- Type-C Cable Wire (for charging)
- Wall Mount with Two Pins
- Self-Adhesive Strips (6 pieces)
- Portable Bag
- User Manual (this document)
Setup
Charging the Device
The PREXISO 2-in-1 Stud Finder is equipped with a rechargeable Li-ion battery. Connect the included Type-C cable to the device's USB-C charging port (located on the side) and plug the other end into a compatible USB power adapter (not included). The device will indicate charging status on its display.
Attaching the Wall Mount
The device comes with a versatile wall mount that allows for hands-free operation of the laser level. The mount can be attached to various surfaces using three methods:
- Self-Adhesive Strips: Ideal for smooth surfaces such as tile, glass, plastic, or finished wood. Ensure the surface is clean and dry before applying. Replace strips if they lose stickiness.
- Two Pins: For rougher surfaces where adhesive strips may not hold. Gently push the pins into the wall to secure the mount.
- Keyhole: For permanent mounting, a keyhole slot is provided to hang the mount on a screw or nail.
Once the mount is secured, the stud finder/laser level unit magnetically attaches to the mount, allowing for 360° rotation for optimal positioning.
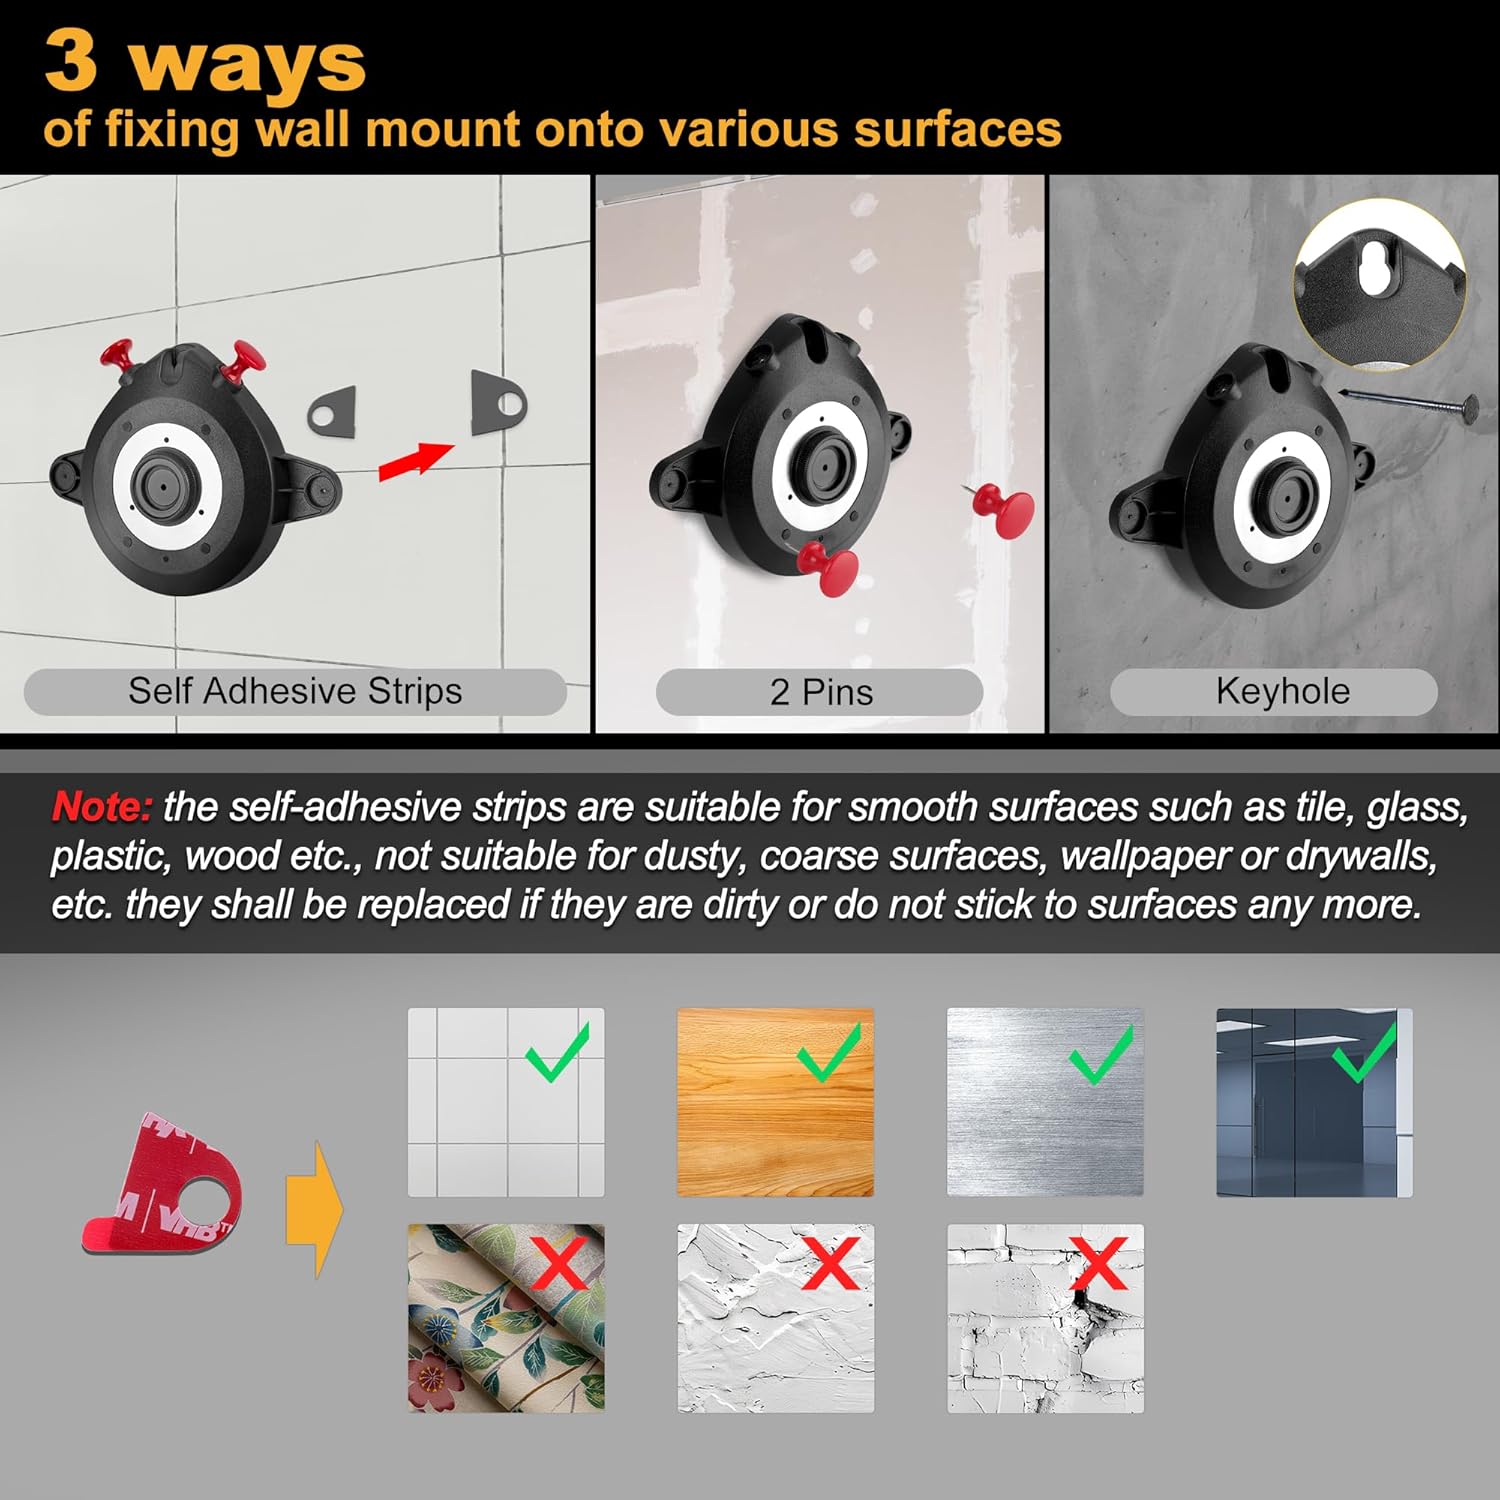
Figure 1: Wall Mount Fixing Methods. Note: Self-adhesive strips are not suitable for dusty, coarse surfaces, wallpaper, or drywalls.
Operating Modes
Stud Finder Mode
This mode is used to detect hidden wood and metal studs, as well as live AC wires behind walls.
- Calibration: Before each use, calibrate the device. Place the tool flat against the surface where you intend to scan. Press and hold the stud detection ON/OFF button (red button on the side) until the green lights turn on and the "READY" indicator disappears from the display. This ensures accurate readings.
- Scanning: While holding the button, slowly slide the tool horizontally across the surface. The backlit display will show signal strength bars, and LED lights will indicate proximity to a stud.
- Edge Detection: When a stud edge is found, the vertical laser line will automatically project onto the wall, and the left or right LED light will turn red, accompanied by an audio alert. Mark this edge.
- Center Finding: Continue sliding past the first edge until the signal drops. Then, slide back from the opposite direction to find the other edge. The center of the stud is located between these two marked edges. The device's display will guide you to the center.
- AC Wire Warning: In all scan modes, the device will indicate the presence of live AC wires up to 1-1/2 inches (38mm) deep, alerting you to potential electrical hazards.

Figure 2: Stud Edge Detection with LED Indicators and Laser Line.
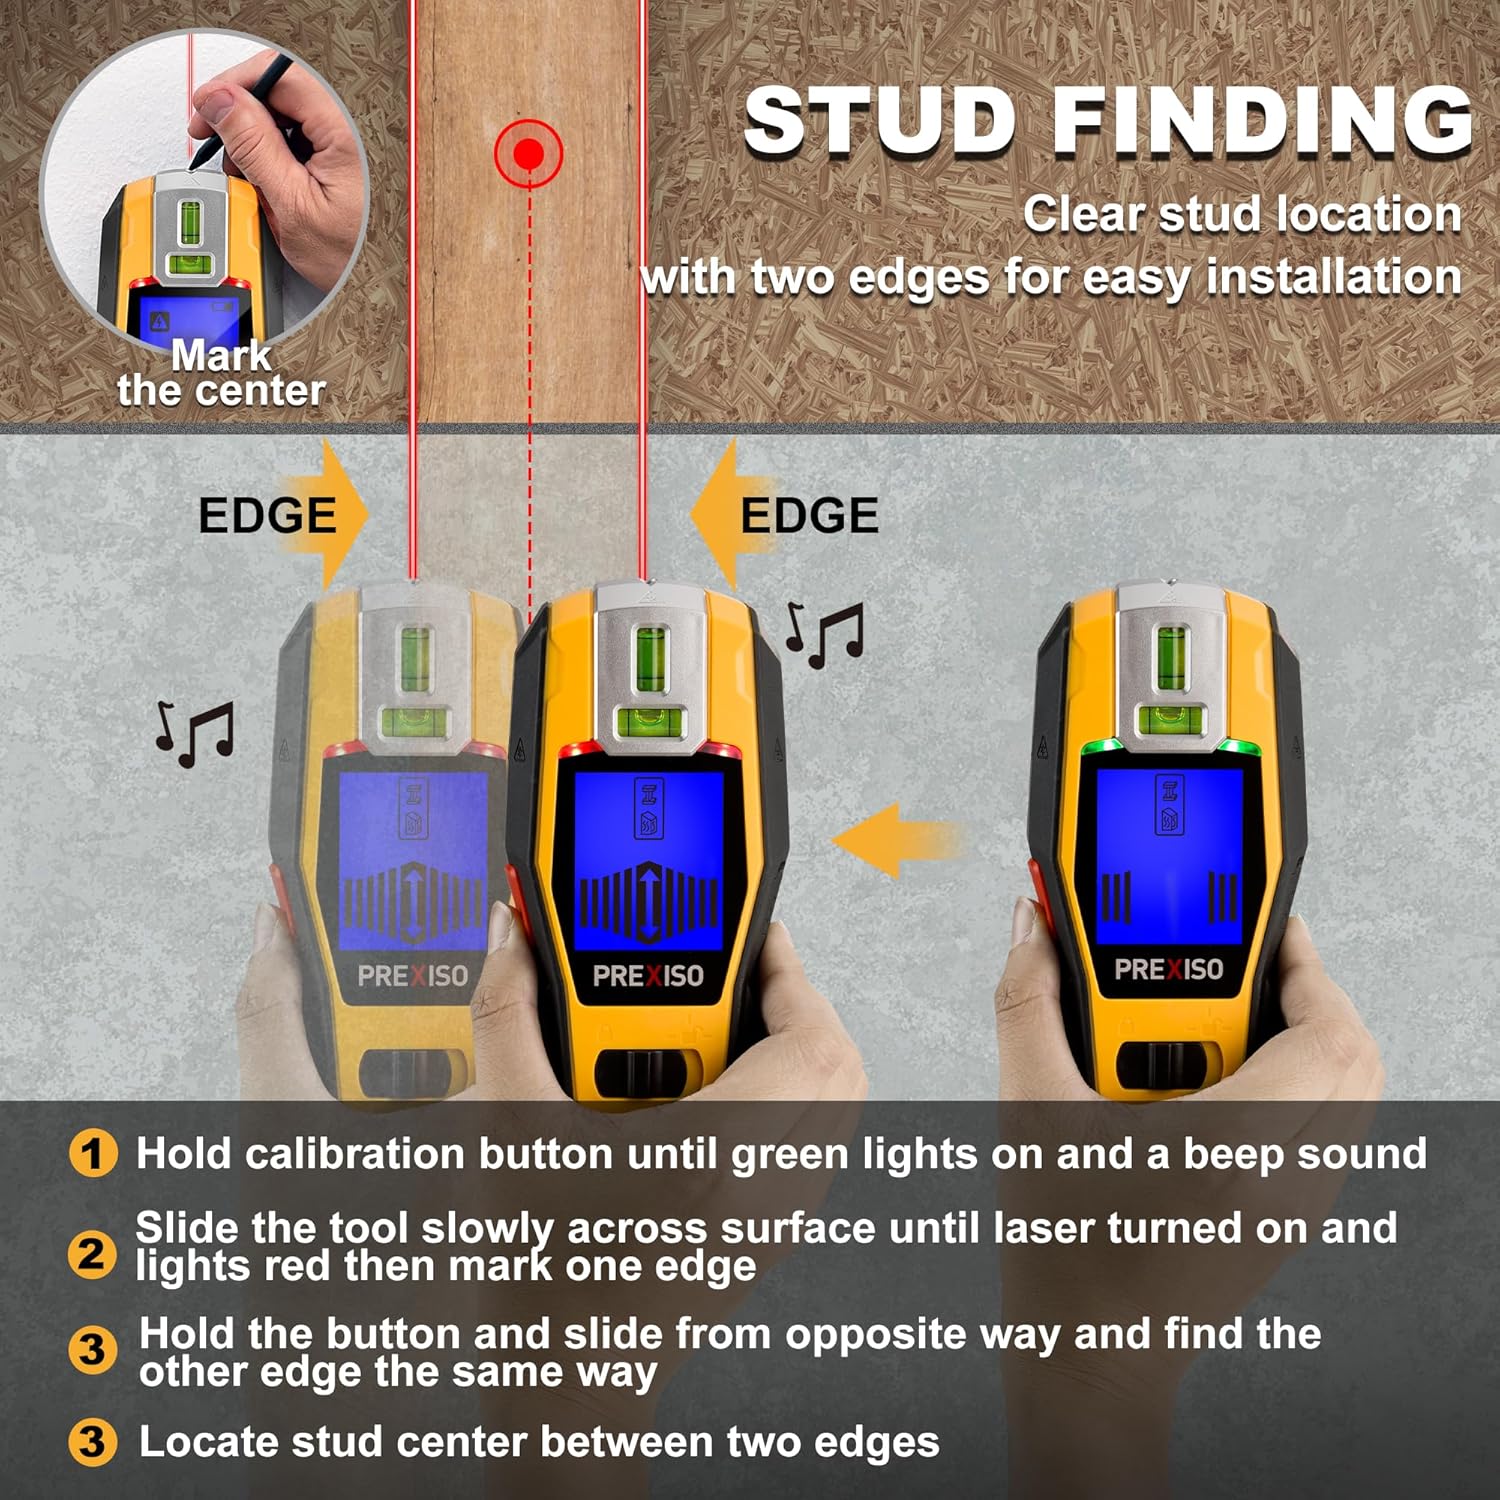
Figure 3: Detailed Stud Finding Process.

Figure 4: Stud and AC Wire Detection Capabilities.
Laser Level Mode
The laser level function provides precise horizontal and cross-line projections for various alignment tasks.
- Activation: Use the Laser ON/OFF/MODE switch button (yellow button at the bottom) to cycle through laser modes.
- Horizontal Line: Slide the switch to the first position to project a horizontal laser line.
- Cross-Line: Slide the switch to the second position to project both horizontal and vertical cross-lines.
- Bubble Vials: The device includes two LED-lighted bubble vials (horizontal and vertical) for additional visual reference and accurate leveling, especially in low-light conditions.
- Wall Mount Use: Attach the device to the wall mount for hands-free operation, allowing you to easily mark your lines. The 360° rotation of the mount provides flexibility.
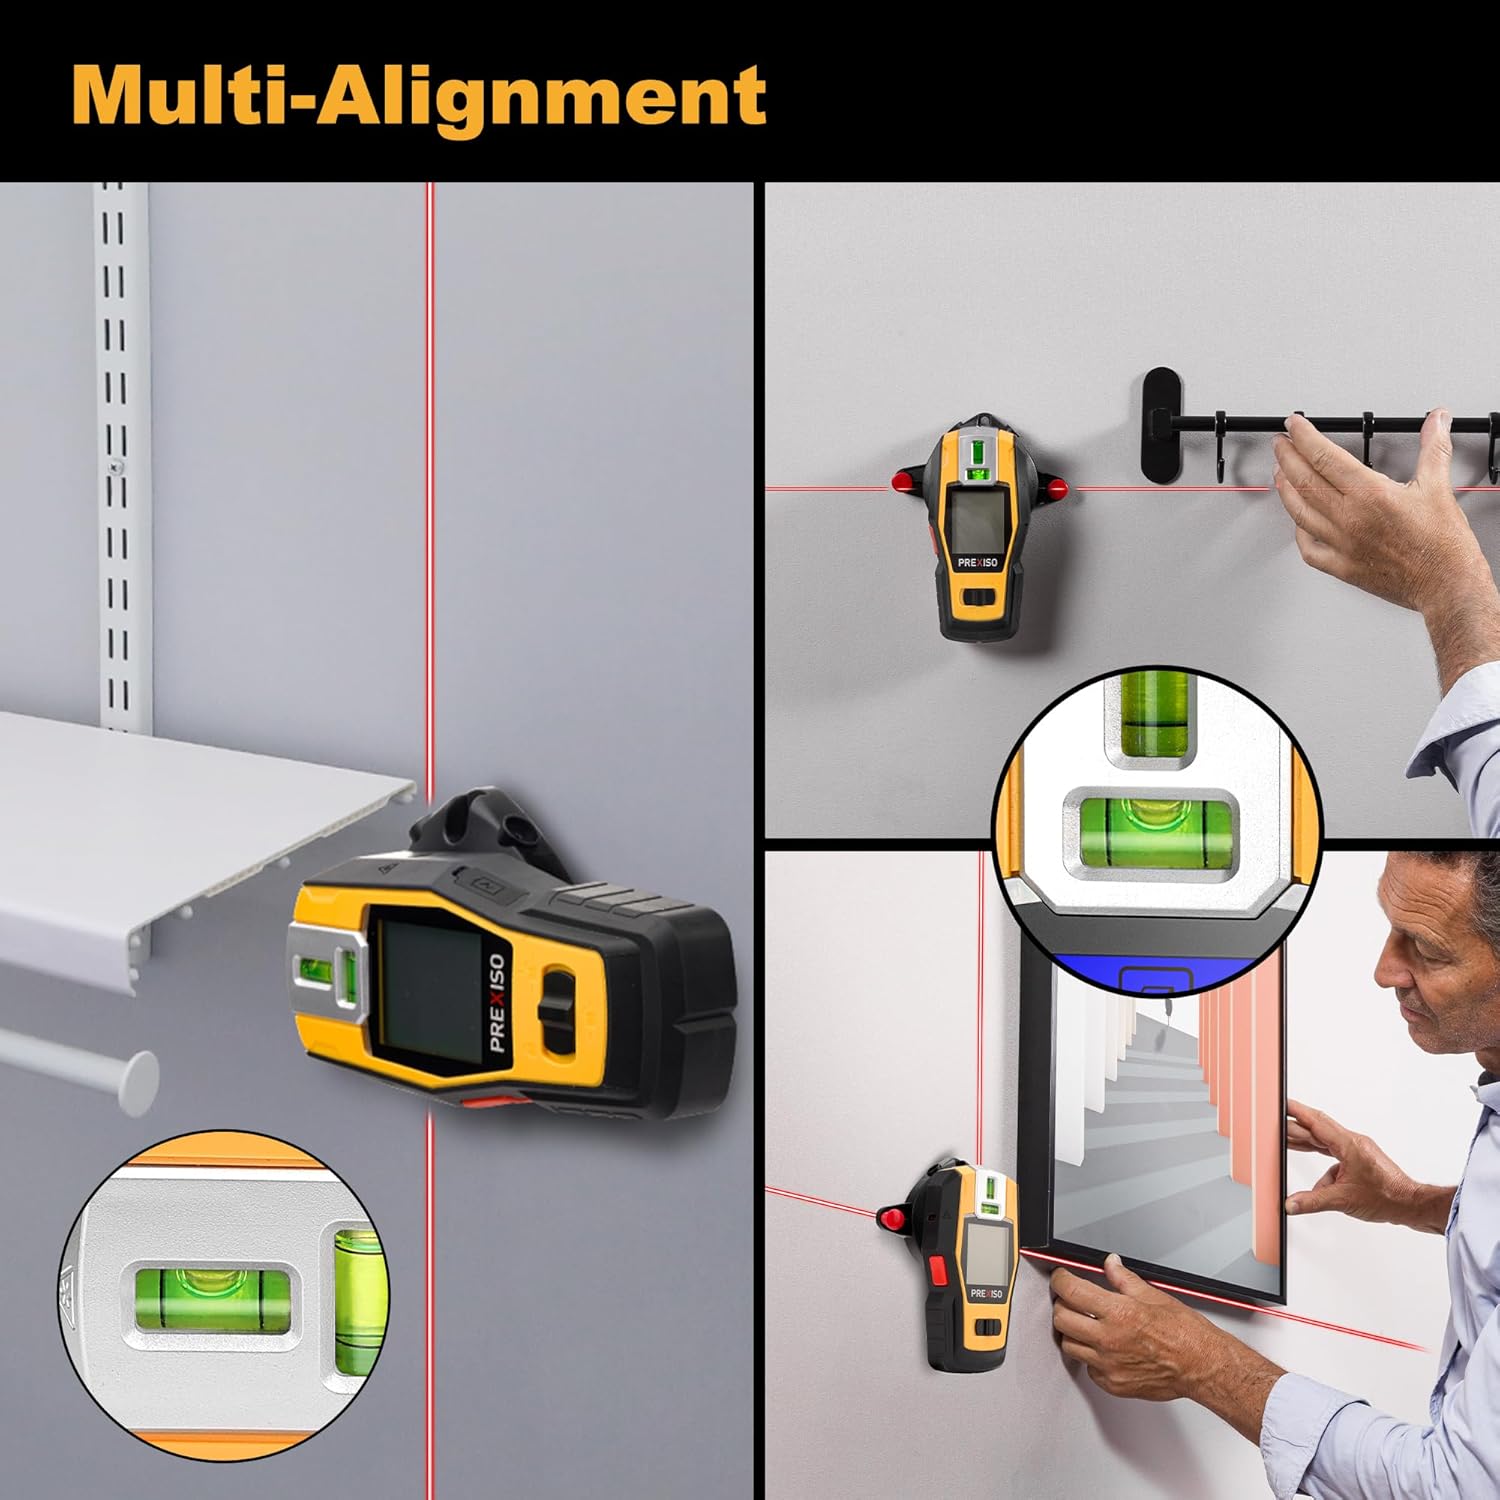
Figure 5: Multi-Alignment with Laser Level.
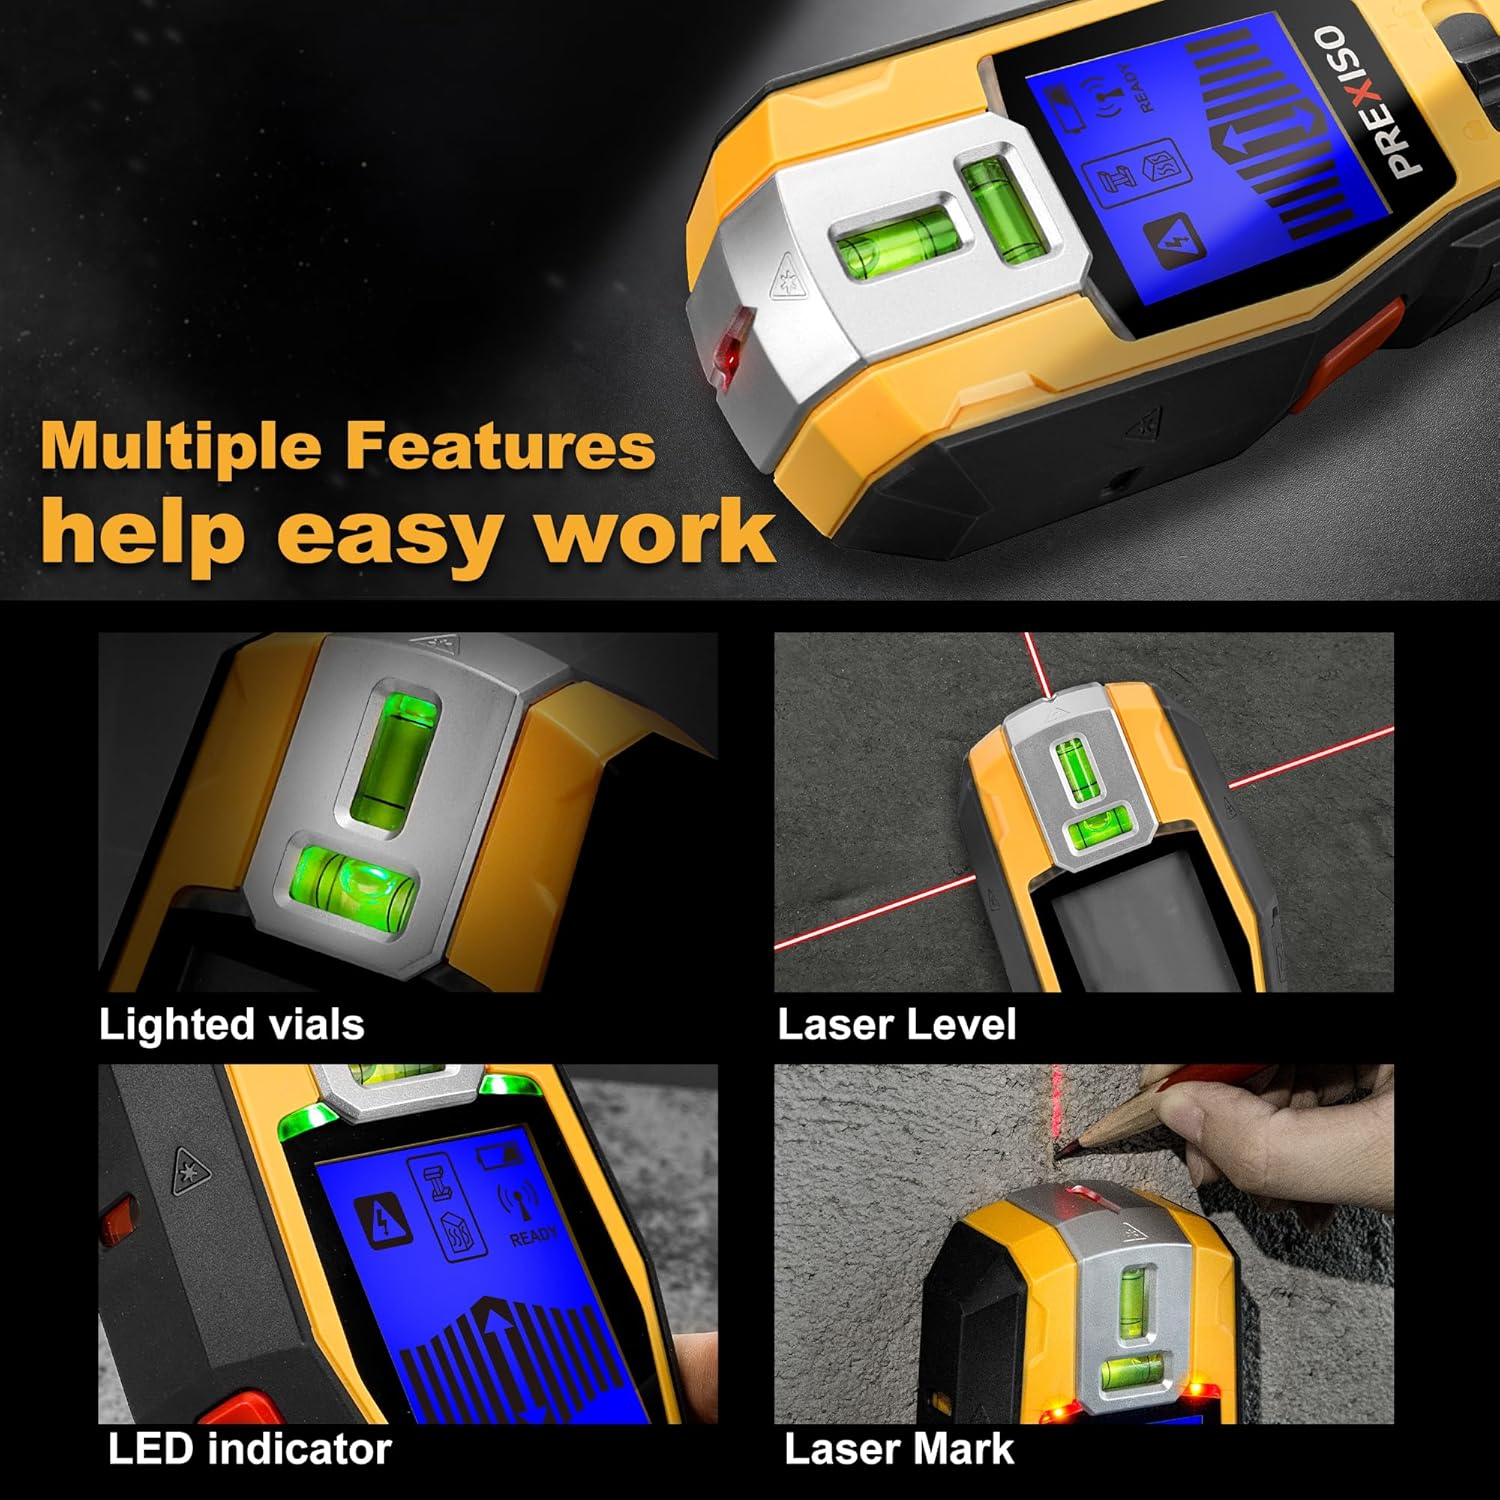
Figure 6: Laser Level Features.
Official Product Video
Video 1: PREXISO 2-in-1 Stud Finder with Laser Level, Rechargeable Multi Surface Cross Line Laser. This video demonstrates the product's features and usage.
Specifications
| Feature | Detail |
|---|---|
| Brand | Prexiso |
| Model | PWDX-F19LI |
| Color | Yellow and Black |
| Operation Mode | Automatic |
| UPC | 840128502686 |
| Item Weight | 1.17 pounds |
| Package Dimensions | 9.61 x 7.91 x 1.93 inches |
| Wood/Metal Stud Detection Depth | Up to 3/4 inch (19mm) |
| AC Wire Detection Depth | Up to 1-1/2 inches (38mm) |
| Laser Working Range (Indoor) | Up to 10m/30ft |
| Laser Class | Class II, output < 1mW |
| Battery | Rechargeable Li-ion (USB-C charging) |
Troubleshooting
- Inaccurate Readings: Ensure the device is properly calibrated before each scan. Avoid scanning over surfaces with high moisture content or metallic wallpaper, which can interfere with detection.
- Laser Not Visible: Ensure the device is charged. In laser level mode, the two bubble vials will be lighted. They are not active in detection mode.
- Adhesive Strips Not Sticking: Ensure the surface is clean, dry, and smooth. Replace the self-adhesive strips if they are dirty or no longer sticky.
- Device Not Powering On: Check battery level and ensure it is fully charged. If issues persist, contact customer support.
Maintenance
- Cleaning: Wipe the device with a soft, dry cloth. Do not use abrasive cleaners or solvents.
- Storage: Store the device in its portable bag in a cool, dry place away from direct sunlight and extreme temperatures.
- Battery Care: For optimal battery life, avoid fully discharging the battery frequently. Charge regularly, even if not in use for extended periods.
Warranty and Support
For warranty information, technical support, or service inquiries, please refer to the contact details provided on the official Prexiso website or the limited warranty card included in your package. Keep your purchase receipt as proof of purchase.