1. Introduction
This manual provides comprehensive instructions for the RETROSUN Replacement Remote Control, designed for use with various INFOMIR MAG Linux Set-Top IPTV Boxes. It covers setup, operation, programming, and troubleshooting to ensure optimal performance and user experience.

Image 1.1: Front and back view of the RETROSUN Replacement Remote Control.
2. Compatibility
This remote control is compatible with the following INFOMIR MAG Linux Set-Top IPTV Box models:
- MAG 524
- MAG 256
- MAG 322
- MAG 250
- MAG 324
- MAG 424
- Mag 524W3
- MAG 544
- MAG 520
- MAG 420
- MAG 255
- MAG 257
- MAG 410
- MAG 270
- MAG 275
- MAG 349
- MAG 351
- MAG 352
- MAG 520w3
- MAG 522w1
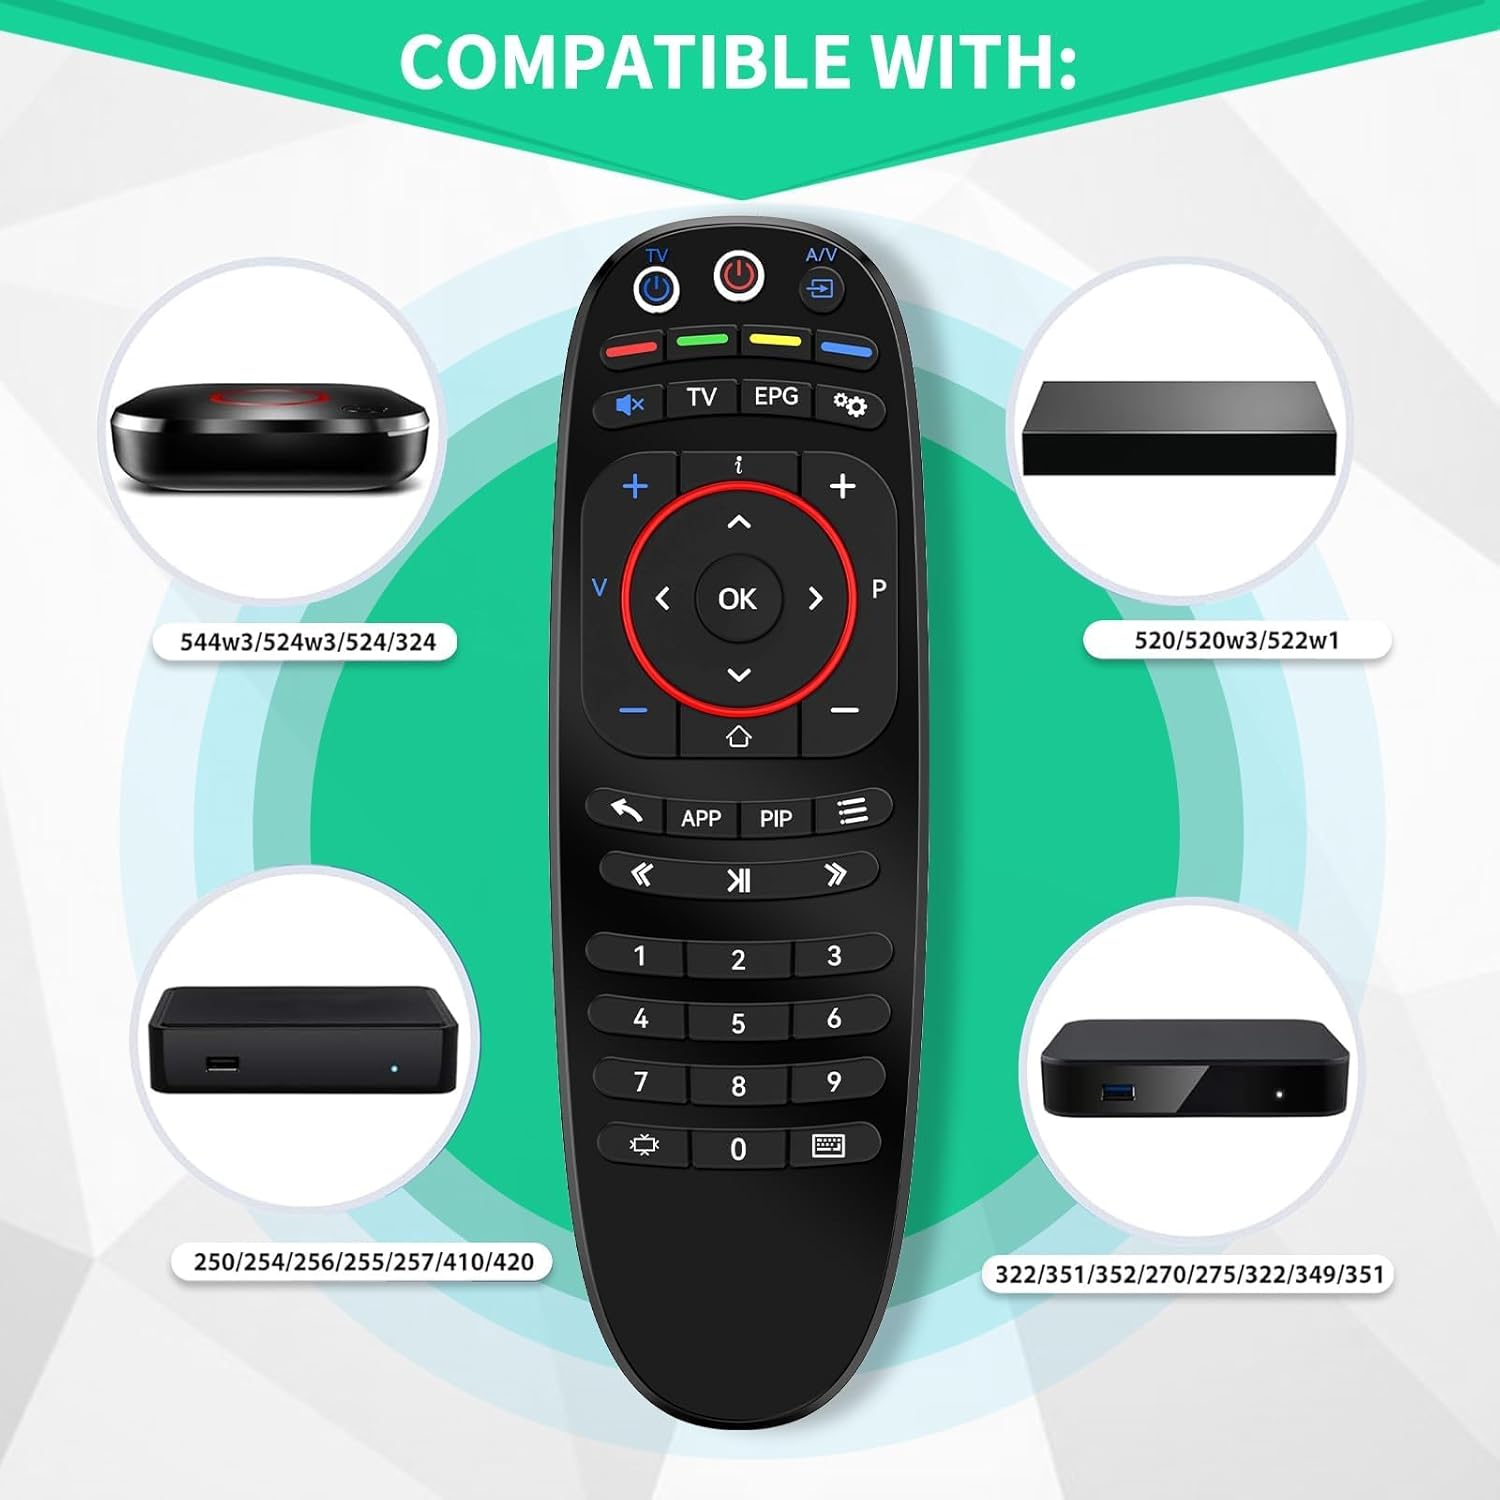
Image 2.1: Visual representation of compatible INFOMIR MAG models.
3. Setup
3.1 Battery Installation
The remote control requires two 1.5V AAA batteries (not included). Follow these steps to install them:
- Open the battery compartment cover on the back of the remote control.
- Insert two AAA batteries, ensuring correct polarity (+ and -) as indicated inside the compartment.
- Close the battery compartment cover securely.

Image 3.1: Battery installation guide.
3.2 Initial Use
Once batteries are installed, the remote control is ready for basic functions with compatible INFOMIR MAG Set-Top Boxes. For advanced functions, such as controlling your TV, programming is required.
4. Operating Instructions
4.1 Remote Control Button Functions (RCU)
Refer to the diagram below for an overview of the remote control's buttons and their primary functions:

Image 4.1: Remote Control Unit (RCU) button layout and functions.
- TV Power: Power on/off for TV (programmable).
- STB Power: Power on/off for Set-Top Box.
- A/V: Audio/Video input selection (programmable).
- Mute: Mute/unmute audio (programmable).
- Quick TV Access: Direct TV function (programmable).
- Volume +/-: Adjust volume (programmable).
- EPG: Electronic Program Guide.
- Setup: Access setup menu.
- Info: Display information.
- Switch Channels +/-: Change channels.
- Back: Go back to the previous screen.
- Context Menu (APP): Access application/context menu.
- Navigation (Up, Left, OK, Right, Down): Navigate menus and confirm selections.
- Resize: Adjust screen size/aspect ratio.
- Home: Return to the home screen.
- PIP: Picture-in-Picture function.
- Refresh: Refresh content.
- Menu: Access main menu.
- Rewind, Play/Pause, Fast Forward: Media playback controls.
- Keyboard: On-screen keyboard access.
- Numeric Keys (0-9): To select a TV channel or input numbers.
Note: Keys marked with an asterisk (*) are dedicated to copy and store IR commands from other remote controls.
4.2 IR Learning/Programming Procedure
This remote control supports IR learning, allowing you to copy functions from your original TV remote control to specific buttons on this replacement remote (STB RC). This enables control of both your Set-Top Box and TV with a single remote.
- Place the infrared LEDs of both the STB RC (this replacement remote) and your TV RC (original TV remote) opposite each other. Ensure a maximum distance of 5 cm between them. The IR diode of the original TV RC must face the STB RC's IR window.
- On the STB RC, press the 'Red' and 'Blue' buttons of 'Additional functions' simultaneously and hold them for 3 seconds. Access to the setup mode is confirmed when the visual LEDs under the 'TV Power' button (Green) and 'STB Power' button (Red) turn ON and remain ON.
- On the STB RC, press the button where you wish to store the copied data. The LED under the 'STB Power' button will blink once and then remain ON, indicating the selected button.
- On the TV RC, press and hold the button whose function you want to copy. Hold this button until the LED under the 'TV Power' button (Green) on the STB RC blinks twice. This indicates a successful operation. Both visual LEDs will remain ON.
- The STB RC will remain in copying setup mode, allowing you to program other buttons by repeating steps 3 and 4.
- To exit the copying process, press the 'OK' button on the STB RC. Both LEDs will double blink and then turn OFF.

Image 4.2: IR Learning/Programming Procedure.
4.3 Reset to Factory Settings
To reset the remote control to its factory default settings, follow these steps:
- Ensure the remote control is in idle mode (no IR transmission or visual activity).
- Press the 'SETUP' and 'OK' buttons simultaneously and hold them for approximately 2 seconds.
- Continue holding until the visual LEDs under the 'TV Power' button (Green) and 'STB Power' button (Red) turn ON.
- Release both buttons. The LEDs will turn OFF within 1 second, indicating that the reset is complete.
- After a few seconds, the remote control will exit setup mode and return to idle mode.

Image 4.3: Remote Control Reset Procedure.
5. Maintenance
- Keep the remote control dry. Moisture can damage the internal circuits.
- Avoid exposing the remote control to extreme temperatures.
- Do not drop or subject the remote control to strong impacts.
- Clean the remote control with a soft, dry cloth. Do not use abrasive cleaners or solvents.
- Remove batteries if the remote control will not be used for an extended period to prevent leakage.
6. Troubleshooting
| Problem | Possible Cause | Solution |
|---|---|---|
| Remote not responding to Set-Top Box. |
|
|
| TV functions (e.g., Volume, Power) not working. |
|
|
| LEDs do not light up during programming. |
|
|
7. Specifications
- Model: NFOMIR MAG
- Brand: RETROSUN
- Power Source: 2 x 1.5V AAA Batteries (not included)
- Dimensions: Approximately 6.88 x 2.08 x 0.98 inches (17.48 x 5.28 x 2.49 cm)
- Item Weight: Approximately 2.39 ounces (67.7 grams)
- Color: Black
- Special Feature: Ergonomic design, IR Learning Function
- Max Number of Supported Devices: 1 (Set-Top Box, with programmable TV functions)
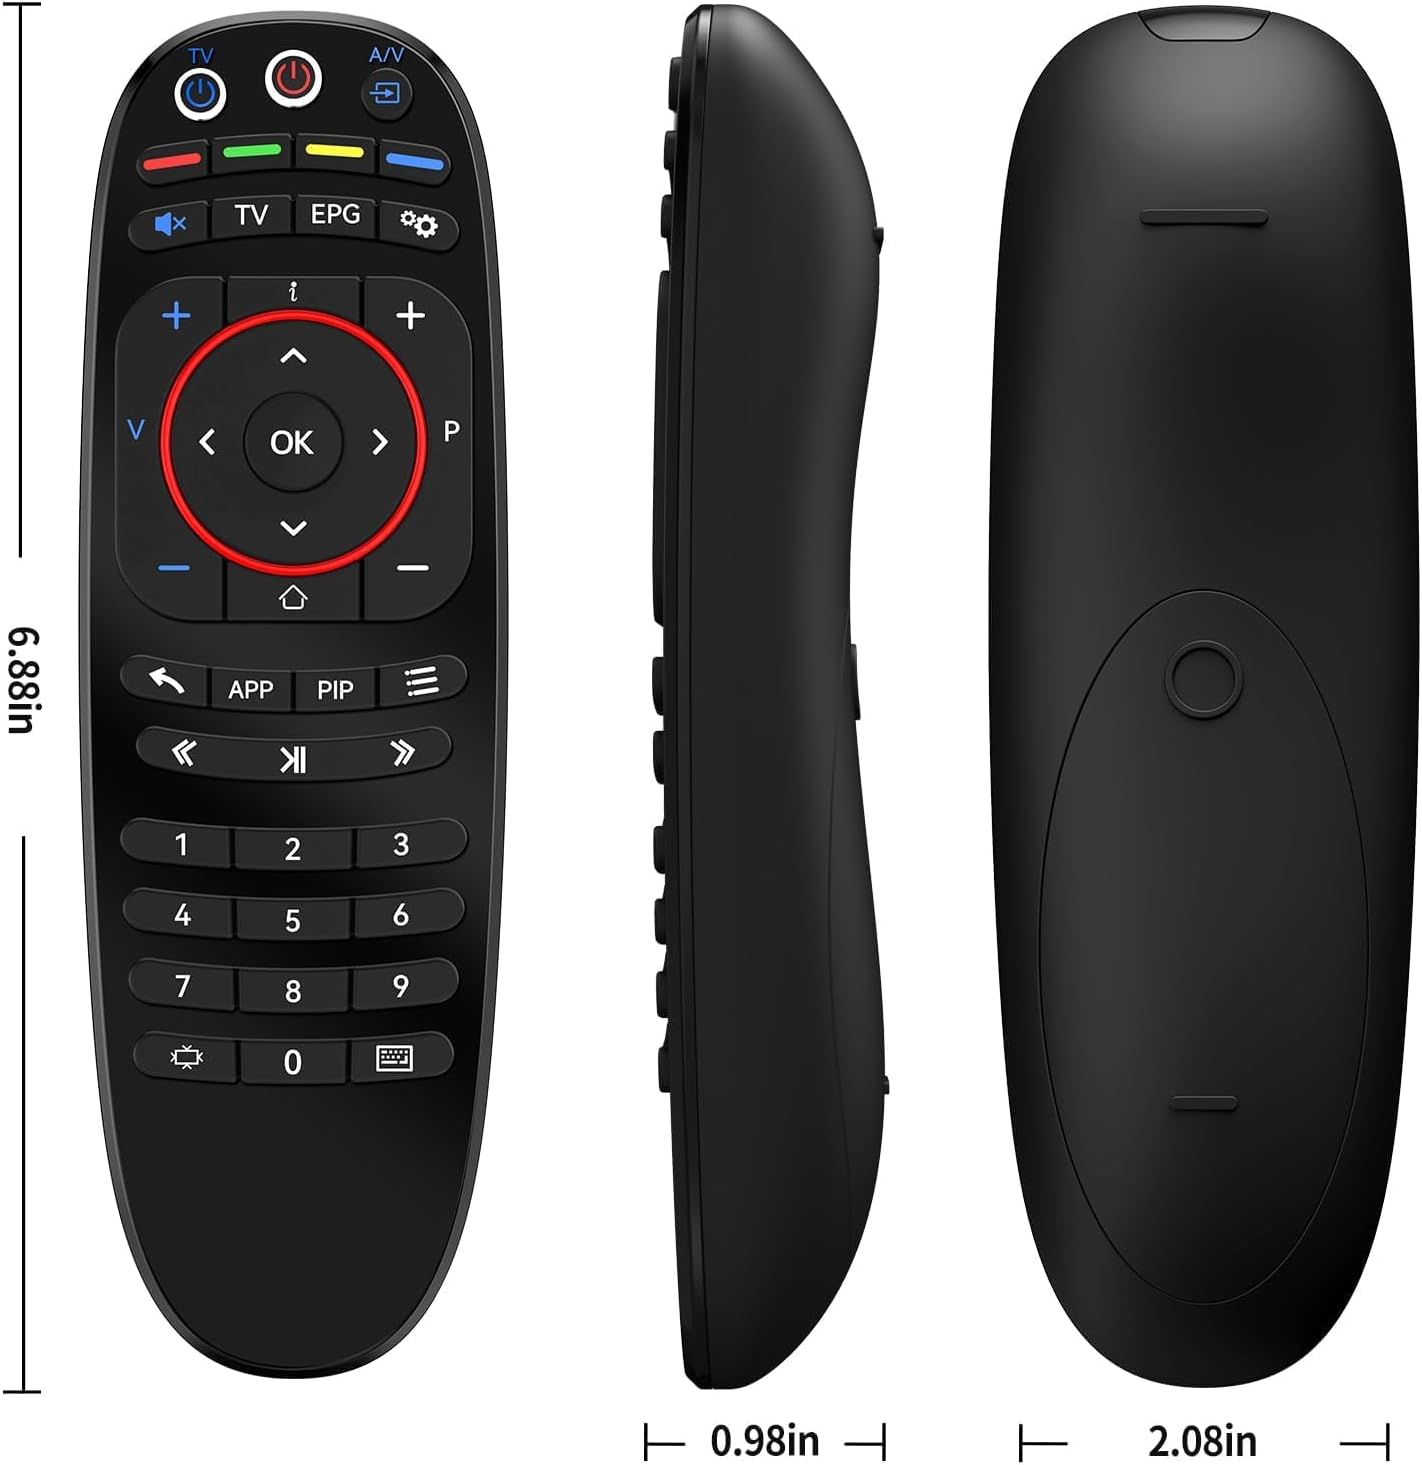
Image 7.1: Remote Control Dimensions.
8. Warranty and Support
This RETROSUN product is designed for reliability and performance. If you encounter any issues or have questions regarding your replacement remote control, please contact us through the Amazon messaging tool.
Our customer service team is available to assist you with compatibility checks and troubleshooting for your specific device models.