1. Introduction
This manual provides essential instructions for the safe and effective use of your Dyson WashG1 hard floor cleaner. Please read this manual thoroughly before first use and retain it for future reference. The Dyson WashG1 is designed for powerful cleaning of both wet and dry messes on hard floor surfaces.
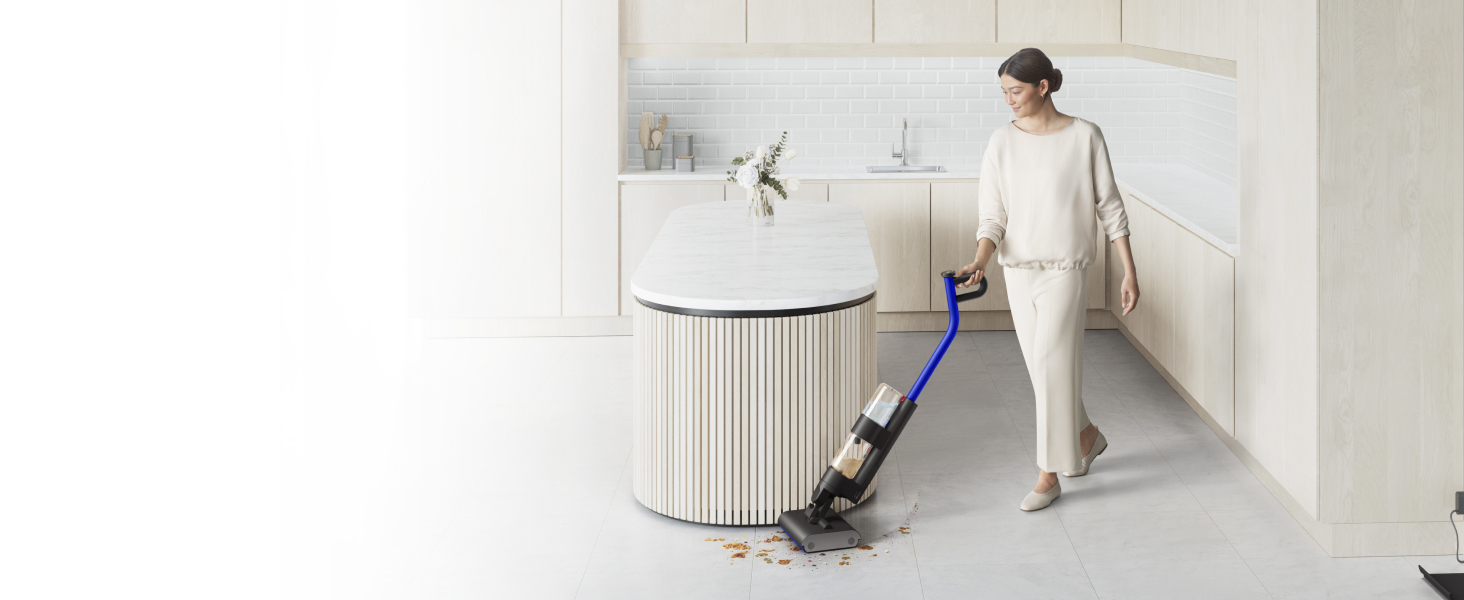
Image: The Dyson WashG1 in action, effectively cleaning up liquid and solid debris from a hard floor.
2. Safety Information
Always follow basic safety precautions when using electrical appliances to reduce the risk of fire, electric shock, or injury.
- Read all instructions before using the appliance.
- Do not immerse the appliance in water or other liquids.
- Keep hair, loose clothing, fingers, and all parts of the body away from openings and moving parts.
- Use only as described in this manual. Use only manufacturer's recommended attachments.
- Do not use with a damaged cord or plug. If the appliance is not working as it should, has been dropped, damaged, left outdoors, or dropped into water, return it to a service center.
- Do not pull or carry by cord, use cord as a handle, close a door on cord, or pull cord around sharp edges or corners. Do not run appliance over cord. Keep cord away from heated surfaces.
- Do not unplug by pulling on cord. To unplug, grasp the plug, not the cord.
- Do not handle plug or appliance with wet hands.
- Do not put any object into openings. Do not use with any opening blocked; keep free of dust, lint, hair, and anything that may reduce airflow.
- Turn off all controls before unplugging.
- Use extra care when cleaning on stairs.
- Do not use to pick up flammable or combustible liquids, such as gasoline, or use in areas where they may be present.
- Do not pick up anything that is burning or smoking, such as cigarettes, matches, or hot ashes.
- Do not use without tanks and filters in place.
- This appliance is for household use only.
3. Setup
3.1 Unpacking and Assembly
Carefully remove all components from the packaging. Refer to the image below for the contents of the package.

Image: The Dyson WashG1 main unit, charging dock, and power adapter as included in the box.
Assemble the handle to the main body of the cleaner until it clicks securely into place. Ensure all connections are firm before use.
3.2 Charging the Appliance
Before first use, fully charge the Dyson WashG1. Place the cleaner on its charging dock and connect the power adapter to a wall outlet. The display will indicate charging status.
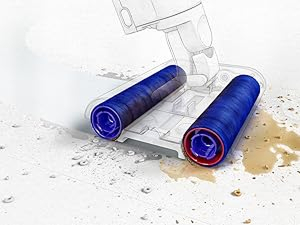
Image: The Dyson WashG1 positioned on its charging station, connected to a power outlet.
3.3 Filling the Clean Water Tank
Locate the clean water tank on the appliance. Remove it and fill with clean tap water. You may add a small amount of Dyson-approved cleaning solution if desired. Do not overfill. Reattach the tank securely.

Image: A hand demonstrating the removal of the clean water tank from the appliance.
4. Operation
4.1 Powering On and Cleaning Modes
Press the power button to turn on the appliance. The display will show the current cleaning mode and battery level. The Dyson WashG1 features a 'Max' mode for tackling stubborn stains, indicated by a 'MAX' icon and three water droplets on the display.

Image: Close-up of the Dyson WashG1's digital display, showing the 'MAX' cleaning mode activated.
4.2 Cleaning Process
The Dyson WashG1 is designed to remove both liquid and dry debris simultaneously. Its powerful microfibre rollers hydrate the floor with clean water and scrub away dirt, while a separate system extracts dirty water and debris into the dirty water tank.
Video: An animated demonstration of the Dyson WashG1's cleaning mechanism, showing how it applies clean water, scrubs with rollers, and separates wet and dry debris into different tanks.
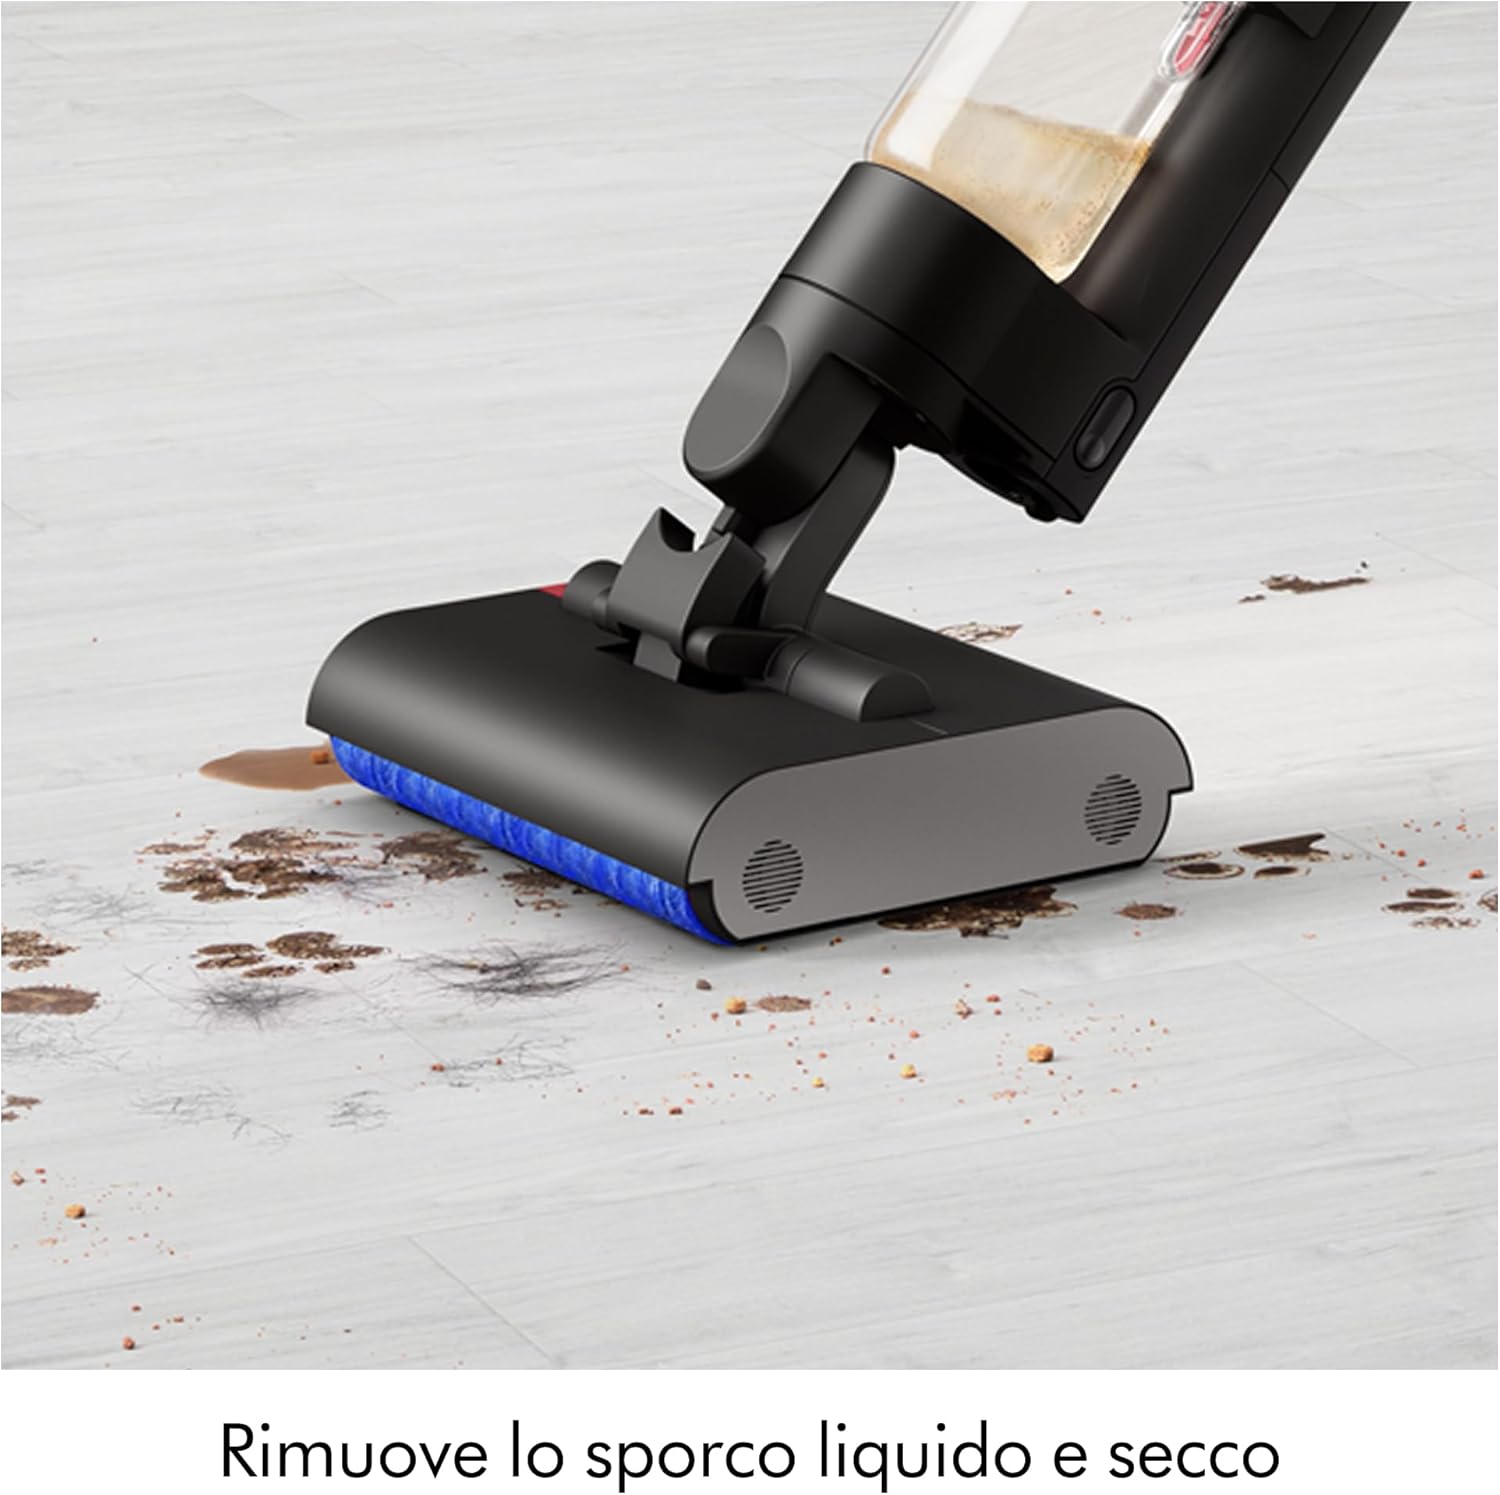
Image: The cleaner head actively removing a combination of liquid spills and solid particles from a hard floor surface.
4.3 Maneuverability and Coverage
The appliance is designed for easy maneuverability, allowing it to clean close to edges and under furniture. It provides up to 35 minutes of runtime, suitable for cleaning large floor areas.

Image: The Dyson WashG1 cleaning effectively under a dining chair, demonstrating its low-profile design.

Image: A user operating the Dyson WashG1 to clean a spacious hard floor in a contemporary kitchen setting.
5. Maintenance
Regular maintenance ensures optimal performance and longevity of your Dyson WashG1.
5.1 Emptying the Dirty Water Tank
After each use, remove the dirty water tank and empty its contents. The appliance separates liquid and solid debris for hygienic disposal.

Image: Demonstrates the two-step hygienic disposal process: pouring out dirty liquid and discarding solid waste.
5.2 Self-Cleaning Function
The Dyson WashG1 features an automatic self-cleaning cycle. After placing the cleaner on its dock, activate the self-clean function. The display will show 'Self clean Complete' once finished.
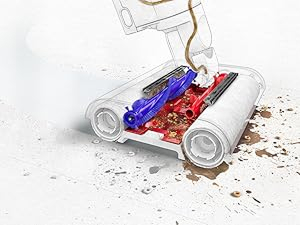
Image: The appliance's screen indicating that the self-cleaning cycle has been successfully completed.
5.3 Cleaning Rollers and Filters
For thorough cleaning, periodically remove the microfibre rollers and wash them under running water. Ensure they are completely dry before reinserting. Clean the filter regularly to maintain suction and water flow efficiency.

Image: An internal view showing the brush mechanism cleaning the rotating microfibre rollers.
6. Troubleshooting
If you encounter any issues with your Dyson WashG1, please refer to the following general troubleshooting tips. For more detailed assistance, consult the official Dyson support website or contact customer service.
- Appliance not turning on: Ensure the battery is charged. Check that the power button is pressed firmly.
- Poor cleaning performance: Check if the clean water tank is filled and the dirty water tank is empty. Ensure rollers are clean and properly installed. Clean any clogged filters.
- Water leakage: Verify that all tanks and components are securely attached. Check for any cracks or damage to the tanks or seals.
- Unpleasant odors: This often indicates that the dirty water tank or rollers need thorough cleaning. Perform a self-cleaning cycle and manually clean components as needed.
- Error codes on display: Refer to the Dyson support website for specific error code meanings and solutions.
7. Specifications
| Brand | Dyson |
| Model Name | WR01 |
| Special Feature | HEPA |
| Filter Type | Cyclonic Filter |
| Recommended Surfaces | Hard Floor, Stained Floor |
| Power Source | Battery Powered |
| Capacity | 1 Litre |
| Color | Black |
| Noise Level | 78 Decibels |
| Motor Horsepower | 0.127 horsepower |
| Style | Stick |
| Number of Speeds | 4 |
| Portable | Yes |
| Indoor/Outdoor Use | Indoor |
| Voltage | 14.4 Volts |
| Wattage | 95 watts |
| Battery Life | 35 Minutes |
| Run Time | 30 minutes |
| Item Weight | 4.9 Kilograms |
| Control Method | Touch |
8. Warranty & Support
Your Dyson WashG1 comes with a manufacturer's warranty. For details regarding warranty coverage, registration, and to access customer support, please visit the official Dyson website or contact their customer service department. Keep your proof of purchase for warranty claims.
For further assistance, including spare parts and accessories, please refer to the Dyson official channels.