1. Introduction
Thank you for choosing the Kmise MI8409 6-Channel Professional Audio Mixer. This manual provides essential information for the safe and efficient operation of your device. Please read it thoroughly before use and retain it for future reference. This mixer is designed for various audio applications, including live streaming, podcasting, DJ performances, and studio recording, offering versatile connectivity and sound processing capabilities.
2. Safety Information
- Power Supply: Use only the provided power adapter. Ensure the voltage matches the requirements specified on the device.
- Water and Moisture: Do not expose the mixer to water, rain, or excessive moisture. Avoid placing liquid-filled objects on or near the unit.
- Ventilation: Ensure adequate ventilation around the mixer. Do not block ventilation openings.
- Heat Sources: Keep the mixer away from heat sources such as radiators, heat registers, stoves, or other heat-producing appliances.
- Cleaning: Disconnect power before cleaning. Use a dry, soft cloth. Do not use liquid cleaners or aerosols.
- Servicing: Do not attempt to service this product yourself. Refer all servicing to qualified service personnel.
- Placement: Place the mixer on a stable, flat surface to prevent accidental falls.
3. Package Contents
Upon unpacking, please verify that all items listed below are present and in good condition:
- Kmise MI8409 6-Channel Professional Audio Mixer
- Power Adapter
- User Manual

Image: The Kmise MI8409 mixer, its power adapter, and the instruction manual, illustrating the typical package contents.
4. Product Overview and Controls
The Kmise MI8409 features a comprehensive set of controls for managing audio inputs, outputs, and effects. Familiarize yourself with the layout and functions of each component.

Image: A detailed diagram highlighting all input/output interfaces and control knobs on the Kmise MI8409 mixer.
4.1 Input/Output Interfaces
- MIC/LINE Input Interface (Channels 1-4): XLR/TRS combo jacks for microphones or line-level instruments.
- Recording Output (RCA): Stereo RCA outputs for connecting to recording devices.
- AUX Output Interface (RCA): Stereo RCA outputs for auxiliary connections.
- Main Output (XLR Balanced): Left and Right XLR outputs for connecting to main speakers or power amplifiers.
- Headphone Jack (PHONES): 1/4" TRS stereo output for monitoring.
- USB Port: For connecting USB flash drives for playback/recording or connecting to a computer.
4.2 Control Knobs and Switches
- Phantom Power Switch (+48V): Activates +48V phantom power for condenser microphones on channels 1-4.
- Channel Attenuation Switch (PAD): Reduces input signal level for high-output sources.
- Gain Adjustment Knob (GAIN): Adjusts the input sensitivity for each channel.
- Channel High Frequency Adjustment Knob (HIGH EQ): Controls the treble frequencies for each channel.
- Channel Bass Adjustment Knob (LOW EQ): Controls the bass frequencies for each channel.
- Effect Sending Knob (FX): Adjusts the amount of signal sent to the internal DSP effects processor for each channel.
- PAN Sound Balance Knob: Adjusts the stereo position (left/right) of the channel signal.
- Channel Volume Knob (LEVEL): Controls the output volume of each individual channel.
- Effect Mode Selection Knob (MP3): Selects the desired DSP effect program.
- Player Control Knob: Navigates menus and adjusts parameters for the MP3/Bluetooth player.
- Player Operation Buttons (USB/BT, REP, REC):
- USB/BT: Long press to switch between MP3 playback and Bluetooth playback.
- REP: In MP3 playing state, press to switch the track playing mode (e.g., repeat all, repeat one).
- REC: Long press to automatically enter recording when a USB flash drive is inserted. Press and hold again to exit. Press to play the recorded file.
- AUX Output Knob: Controls the volume of the AUX output.
- Headphone Monitor Volume Knob (PHONE): Adjusts the volume for the headphone output.
- Main Output Volume Fader (L MAIN R): Controls the overall output volume of the mixer.
- USB Channel Volume Knob (USB): Adjusts the volume of the USB/Bluetooth input.
- Effect Volume Knob (FX): Controls the overall volume of the applied DSP effects.
5. Setup Guide
5.1 Power Connection
- Ensure the mixer's power switch is in the OFF position.
- Connect the provided power adapter to the mixer's power input jack.
- Plug the power adapter into a suitable electrical outlet.
- Turn the mixer's power switch ON.
5.2 Input Connections
Connect your audio sources to the appropriate input jacks:
- Microphones: Connect dynamic or condenser microphones to the MIC/LINE input interfaces (XLR or 1/4" TRS). If using condenser microphones, activate the +48V phantom power switch.
- Instruments: Connect line-level instruments (e.g., keyboards, guitars with preamps) to the MIC/LINE input interfaces (1/4" TRS).
- External Audio Devices (Bluetooth): See Section 6.3 for Bluetooth pairing instructions.
- USB Flash Drive: Insert a FAT32 formatted USB flash drive into the USB port for MP3 playback or recording.
- Computer (USB Audio Interface): Connect the mixer to your computer via a USB cable. The mixer acts as a built-in sound card, requiring no external drivers.

Image: The mixer connected to a laptop, illustrating its function as a USB audio interface for direct computer connection and sound recording.
5.3 Output Connections
Connect your output devices:
- Main Speakers/Amplifier: Connect the Main Output (XLR Left/Right) to your powered speakers or power amplifier.
- Headphones: Plug your headphones into the PHONES jack for monitoring.
- Recording Device: Connect the Recording Output (RCA) to an external recording device.

Image: A comprehensive connection diagram illustrating how to connect various audio sources and output devices to the mixer.
6. Operating Instructions
6.1 Basic Channel Operation
- GAIN: Adjust the GAIN knob for each input channel to achieve an optimal input level. Avoid clipping (distortion) by keeping the signal within the green/yellow range on the level meters.
- EQ (HIGH/LOW): Use the HIGH and LOW EQ knobs to adjust the treble and bass frequencies of each channel to shape the sound.
- PAN: Adjust the PAN knob to position the channel's sound in the stereo field (left or right).
- LEVEL: Use the LEVEL knob to control the individual volume of each channel in the main mix.
6.2 Phantom Power (+48V)
If you are using condenser microphones, press the +48V phantom power switch. This supplies the necessary power to the microphones. Ensure dynamic microphones are not connected when phantom power is activated, unless they are designed to handle it.
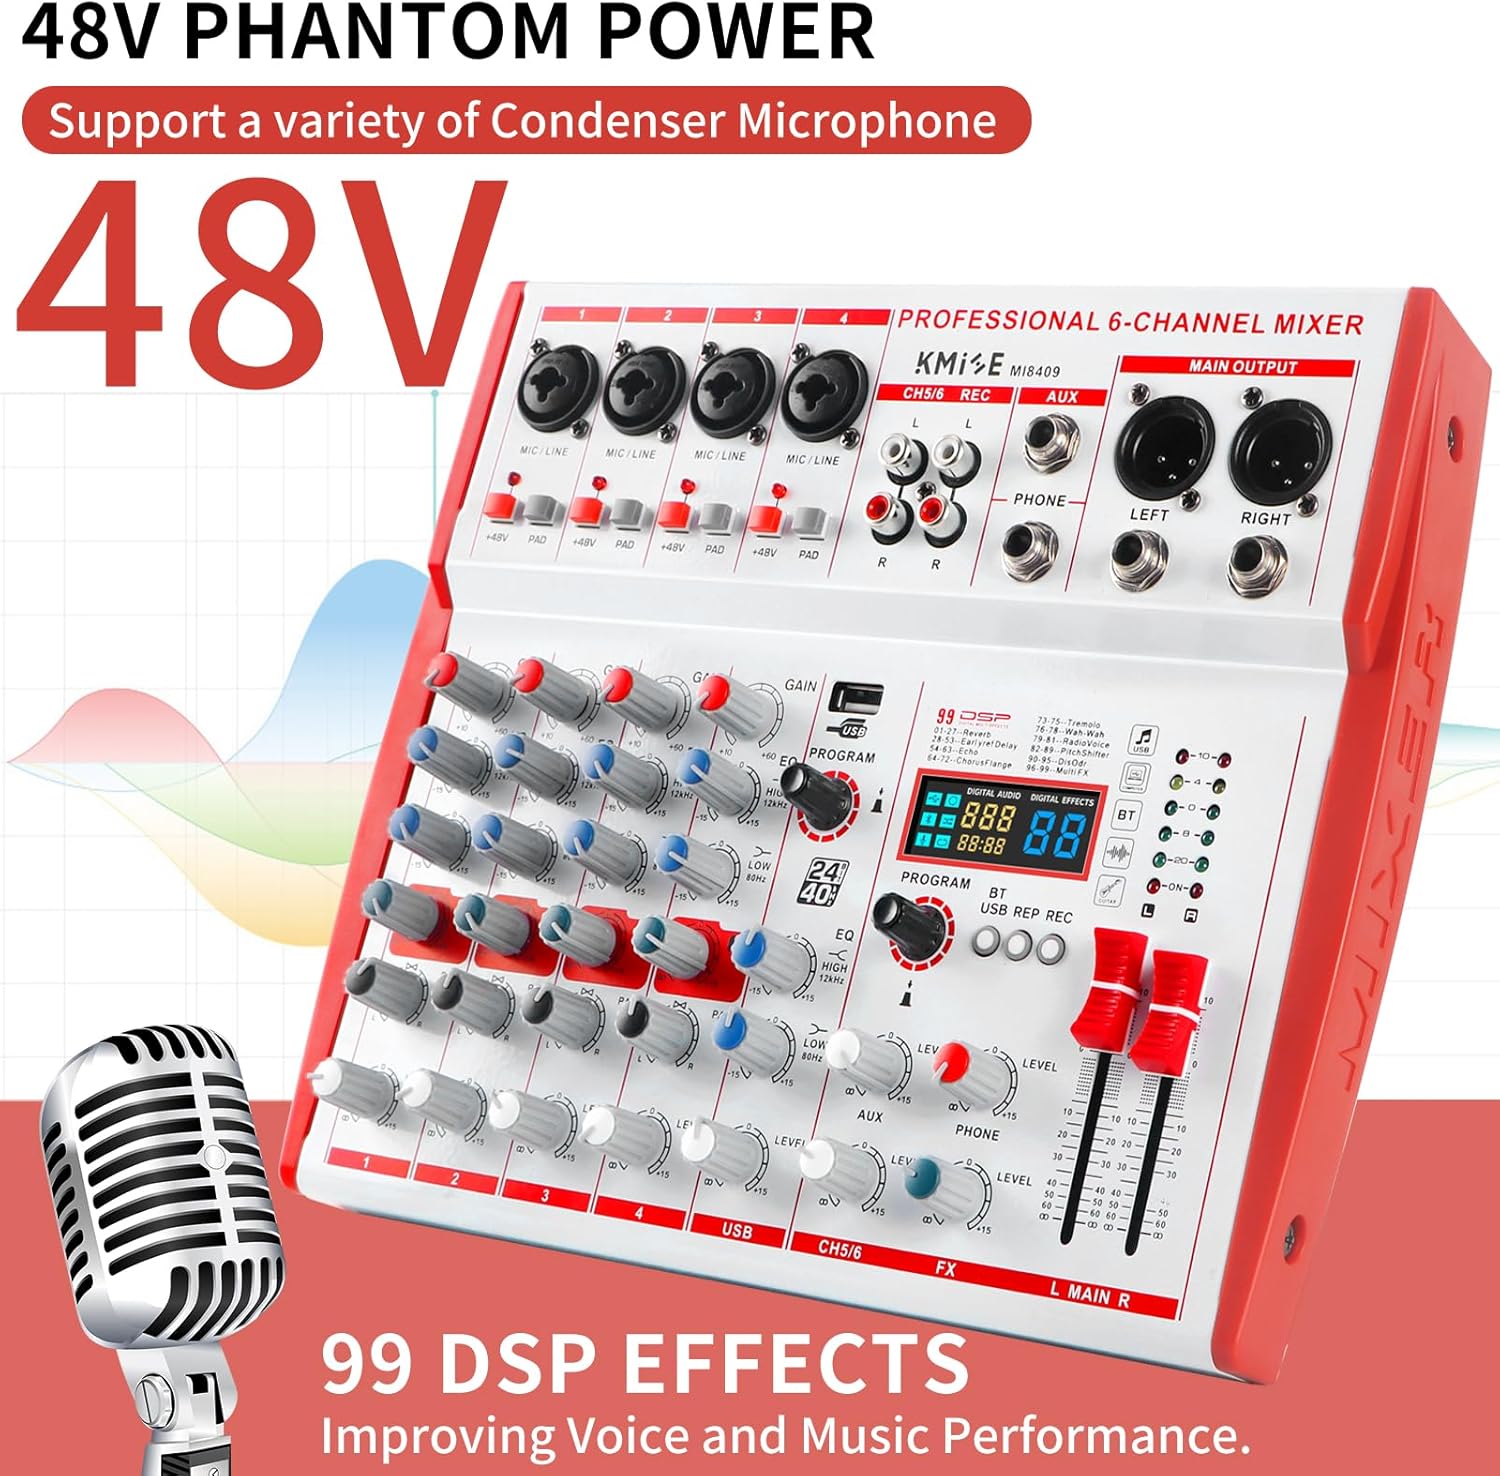
Image: The mixer highlighting the +48V phantom power switch, essential for condenser microphones, and the DSP effects section.
6.3 Bluetooth Connectivity
- Ensure the mixer is powered on.
- Long press the USB/BT button on the player control section until the display indicates Bluetooth mode (e.g., "BT").
- On your smartphone, tablet, or other Bluetooth device, search for available Bluetooth devices and select "KMISE MIXER" (or similar name).
- Once paired, you can play audio from your device through the mixer. Adjust the USB channel volume knob to control the Bluetooth audio level.

Image: The mixer demonstrating its Bluetooth wireless connection capability with a smartphone playing music.
6.4 USB Playback and Recording
- USB Playback: Insert a USB flash drive (FAT32 format recommended) containing MP3/WAV/Lossless APE/FLAC audio files into the USB port. The mixer will automatically detect and begin playback. Use the player control knob and REP button to navigate tracks and change playback modes.
- USB Recording: Insert a FAT32 formatted USB flash drive. Long press the REC button to start recording. The display will indicate recording status. Long press REC again to stop recording. Press REC briefly to play back the last recorded file.
- Recording to PC: Connect the mixer to your computer via USB. The mixer functions as an audio interface. Use appropriate recording software on your computer. A noise filter cable (not included) may be required to reduce hum when recording to PC.
6.5 DSP Effects
The mixer features 99 built-in DSP effects to enhance your audio. These include Reverb, Delay, Echo, Chorus, Flange, Tremolo, Wah-Wah, Radio Voice, Pitch Shifter, and Multi FX.
- Use the Effect Mode Selection Knob (MP3) to browse and select the desired effect program (1-99). The display will show the selected effect number.
- Adjust the FX knob on individual channels to send a portion of that channel's signal to the effects processor.
- Use the main Effect Volume Knob (FX) to control the overall level of the applied effects in the main mix.

Image: A visual guide to the 99 DSP effects, categorized by type, and a description of the USB/BT/REC button functions.
6.6 Monitoring
Connect headphones to the PHONES jack to monitor the main mix. Adjust the Headphone Monitor Volume Knob (PHONE) to set your desired listening level. This allows you to listen to the mix without affecting the main output.

Image: The mixer emphasizing the headphone jack, used for real-time monitoring of the audio signal.
7. Applications
The Kmise MI8409 mixer is suitable for a variety of audio production and performance scenarios:
- Live Streaming: Integrate multiple audio sources for clear and balanced broadcasts.
- Studio Recording: Capture high-quality audio for music production or voiceovers.
- DJ Stage: Mix tracks and apply effects for dynamic DJ sets.
- Podcasting: Manage multiple microphones and audio inputs for professional podcast recordings.
- Small Bands/Performances: Provide sound reinforcement for small musical ensembles.
- Weddings/Events: Control audio for ceremonies, speeches, and background music.

Image: A visual representation of the mixer's versatility across different applications, including live streaming, studio recording, DJ events, and weddings.
8. Specifications
| Feature | Specification |
|---|---|
| Model Number | MI8409 6 Channel |
| Number of Channels | 6 |
| Audio Input | MIC, LINE, Bluetooth |
| Output Connector Type | XLR, 1/4" TRS (balanced) |
| Connectivity Technology | Bluetooth, USB |
| Power Source | Corded Electric |
| Item Weight | 1.98 kg |
| Parcel Dimensions | 31.5 x 29.3 x 8.7 cm |
9. Troubleshooting
If you encounter issues with your Kmise MI8409 mixer, refer to the following common problems and solutions:
- No Sound Output:
- Check all cable connections (inputs, outputs, power).
- Ensure all channel LEVEL knobs and the Main Output Volume Fader are turned up.
- Verify that input sources are active and producing sound.
- If using phantom power, ensure it is activated for condenser microphones.
- Humming or Noise:
- Check for ground loops. Try connecting all audio equipment to the same power strip.
- Ensure all cables are properly shielded and in good condition.
- If recording to PC, a noise filter cable may be necessary.
- Reduce GAIN levels if input is too high, causing distortion.
- Bluetooth Connection Issues:
- Ensure the mixer is in Bluetooth mode (long press USB/BT button).
- Make sure your device's Bluetooth is on and discoverable.
- Try unpairing and re-pairing the device.
- Ensure no other devices are connected to the mixer via Bluetooth.
- USB Recording Not Working:
- Ensure the USB flash drive is formatted to FAT32.
- Check if the USB drive has sufficient free space.
- Try a different USB flash drive.
10. Maintenance
- Cleaning: Regularly wipe the mixer's surface with a soft, dry cloth. Avoid using harsh chemicals or abrasive cleaners.
- Storage: When not in use, store the mixer in a cool, dry place, away from direct sunlight and extreme temperatures.
- Cable Care: Handle cables carefully. Avoid sharp bends or kinks that can damage internal wiring.
11. Warranty and Support
Kmise products are designed for reliability and performance. For warranty information, technical support, or service inquiries, please refer to the contact details provided with your purchase or visit the official Kmise website. Please retain your proof of purchase for warranty claims.


