1. Introduction
This manual provides detailed instructions for the setup, operation, and maintenance of your LIUZHENZHEN IMX385 1080P HDMI Industrial Measurement Video Microscope Camera. This device is designed for high-definition imaging and video recording, suitable for applications such as PCB inspection, phone soldering, and general industrial measurement. Please read this manual thoroughly before using the product to ensure proper functionality and longevity.
2. Package Contents
Verify that all items listed below are present in your package. If any items are missing or damaged, please contact customer support.
- 1 x Microscope Camera (IMX385)
- 1 x Power Supply
- 1 x HDMI Cable
- 1 x USB Mouse
- Optional accessories (depending on your purchase):
- 1 x C-MOUNT Lens (e.g., 100X, 180X, 130X, 200X, or 500X)
- 1 x 56 LED Adjustable Microscope Ring Light
3. Product Features
The IMX385 Microscope Camera offers a range of advanced features for professional use:
- IMX385 Sensor: Provides clear and detailed images for precise observation.
- 1080P HDMI Output: Enables real-time viewing on a monitor or TV with high-definition clarity.
- Industrial Measurement Capabilities: Designed for precise measurements in various industrial applications.
- C Mount Design: Ensures easy and secure installation on compatible microscopes.
- U Disk Video Recording: Allows for convenient storage of captured images and videos directly to a USB drive.
4. Setup Guide
Follow these steps to set up your microscope camera system.
4.1. Unpacking and Inspection
Carefully remove all components from the packaging. Inspect each item for any signs of damage. Report any issues to your vendor immediately.
4.2. Attaching the C-Mount Lens (if applicable)
If your package includes a C-mount lens, gently screw it onto the front of the microscope camera until secure. Ensure it is properly aligned to avoid image distortion.

Image 1: The IMX385 microscope camera connected to a C-mount lens and an LED ring light, illustrating the primary components of the system.
4.3. Connecting to a Display
Connect one end of the provided HDMI cable to the HDMI port on the microscope camera and the other end to an HDMI input on your monitor or TV.

Image 2: A close-up view of the camera's rear panel, highlighting the HDMI, USB, and DC5V power input ports for connectivity.
4.4. Connecting Peripherals
Insert the USB mouse into one of the USB ports on the camera. If using a USB disk for recording, insert it into the other USB port.
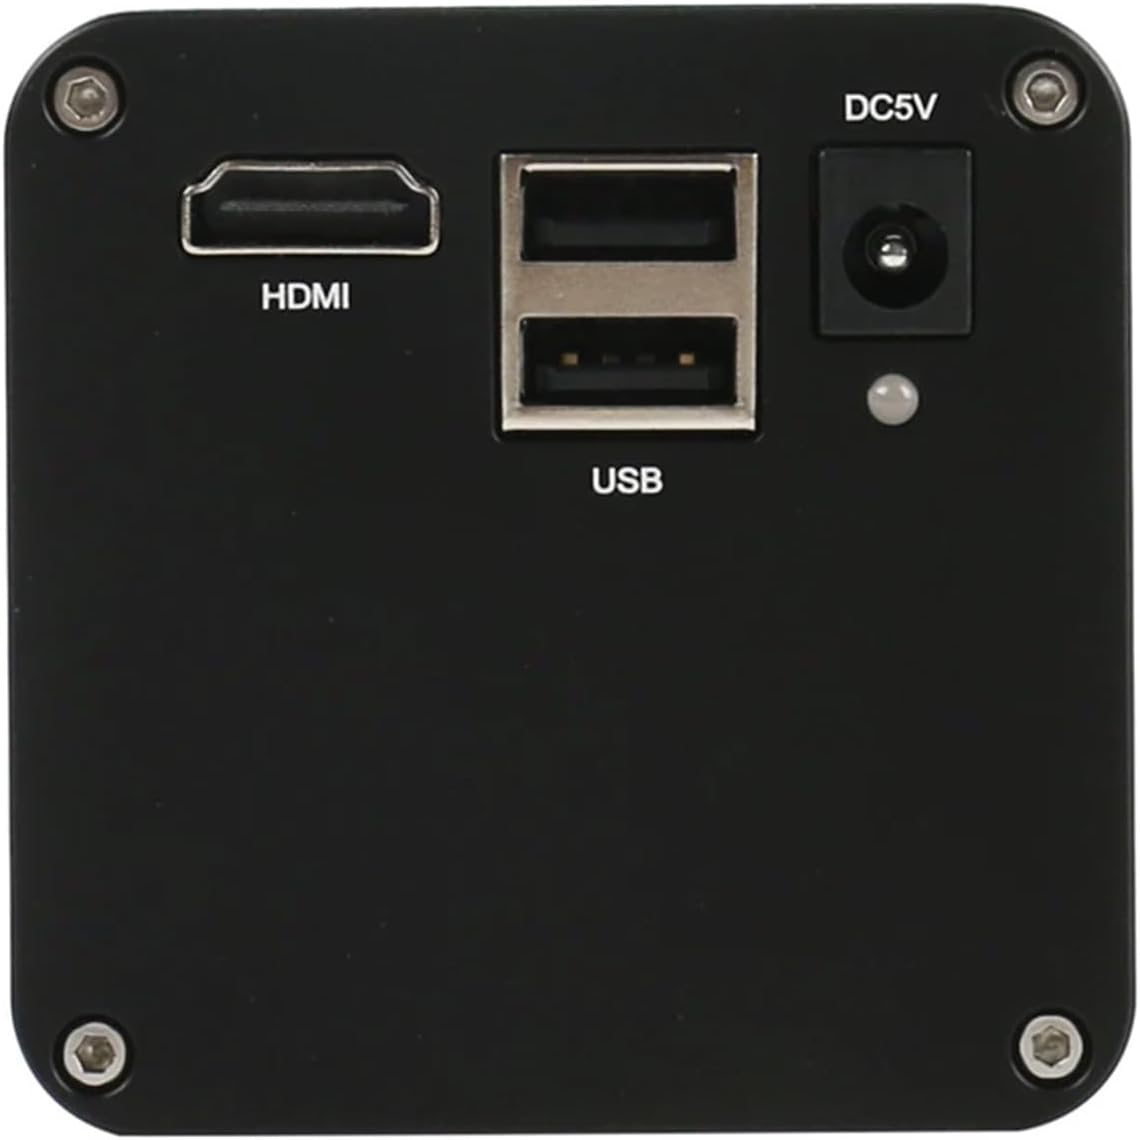
Image 3: An annotated image of the camera's interface panel, clearly labeling the HDMI, USB drive, 5V power supply, and USB mouse connection points.
4.5. Powering On
Connect the power supply to the DC5V input port on the camera, then plug the power supply into a wall outlet. The camera will power on automatically.
5. Operating Instructions
This section details the basic operation of your IMX385 microscope camera.
5.1. Live View
Once powered on and connected to a display via HDMI, the camera will automatically display a live feed. Use the focus ring on your C-mount lens to adjust the image clarity.
5.2. Using the USB Mouse
The USB mouse allows you to navigate the on-screen display (OSD) menu for various settings and functions, including image capture, video recording, and measurement tools (if applicable to your model).
5.3. Image Capture and Video Recording
Access the OSD menu using the USB mouse. Select the 'Capture' icon to take a still image or the 'Record' icon to start/stop video recording. Ensure a USB disk is inserted for saving files.
5.4. File Management
Files are saved to the connected USB disk. You can access saved images and videos directly from the camera's OSD menu or by connecting the USB disk to a computer.
6. Maintenance
Proper maintenance ensures the longevity and optimal performance of your microscope camera.
- Cleaning the Lens: Use a soft, lint-free cloth specifically designed for optical lenses to clean the C-mount lens. For stubborn spots, use a small amount of lens cleaning solution. Avoid abrasive materials.
- Cleaning the Camera Body: Wipe the camera body with a dry, soft cloth. Do not use liquid cleaners directly on the camera.
- Storage: When not in use, store the camera in a dry, dust-free environment, preferably in its original packaging or a protective case.
- Avoid Extreme Conditions: Do not expose the camera to extreme temperatures, high humidity, or direct sunlight for prolonged periods.
7. Troubleshooting
This section addresses common issues you might encounter.
| Problem | Possible Cause | Solution |
|---|---|---|
| No image on display. |
|
|
| Image is blurry or out of focus. |
|
|
| Cannot record to USB disk. |
|
|
8. Specifications
Detailed technical specifications for the IMX385 Microscope Camera.
| Feature | Detail |
|---|---|
| Sensor | IMX385 |
| Output Resolution | 1080P (HDMI) |
| Video Recording | U Disk Video Recorder |
| Lens Mount | C Mount |
| Package Dimensions | 1.18 x 0.79 x 0.39 inches |
| Item Weight | 1.76 ounces |
| Model Number | LIUZHENZHEN |
| Manufacturer | LIUZHENZHEN |
| First Available | July 30, 2024 |
9. Warranty and Support
For warranty information, please refer to the documentation provided at the time of purchase or contact your retailer.
For technical support or further assistance, please contact the manufacturer, LIUZHENZHEN, through their official channels or the vendor from whom you purchased the product.
Note: No official product videos from the seller were available for inclusion in this manual.