1. Introduction
This manual provides detailed instructions for the proper use, setup, operation, and maintenance of the INSIZE #3227-E1 Three Point Internal Micrometer. This precision instrument is designed for accurate measurement of internal diameters within a range of 0.8 to 1 inch. Adhering to these instructions will ensure optimal performance and longevity of your micrometer.
2. Product Overview
The INSIZE #3227-E1 is a high-precision three-point internal micrometer, engineered for measuring bore diameters with exceptional accuracy. Its design features three contact points that ensure self-centering within the bore, providing stable and repeatable measurements. The micrometer has a measurement range of 0.8 to 1 inch with a graduation of 0.0002 inches and an accuracy of 0.00016 inches. It includes a ratchet stop mechanism for consistent measuring force, preventing overtightening and ensuring measurement reliability.
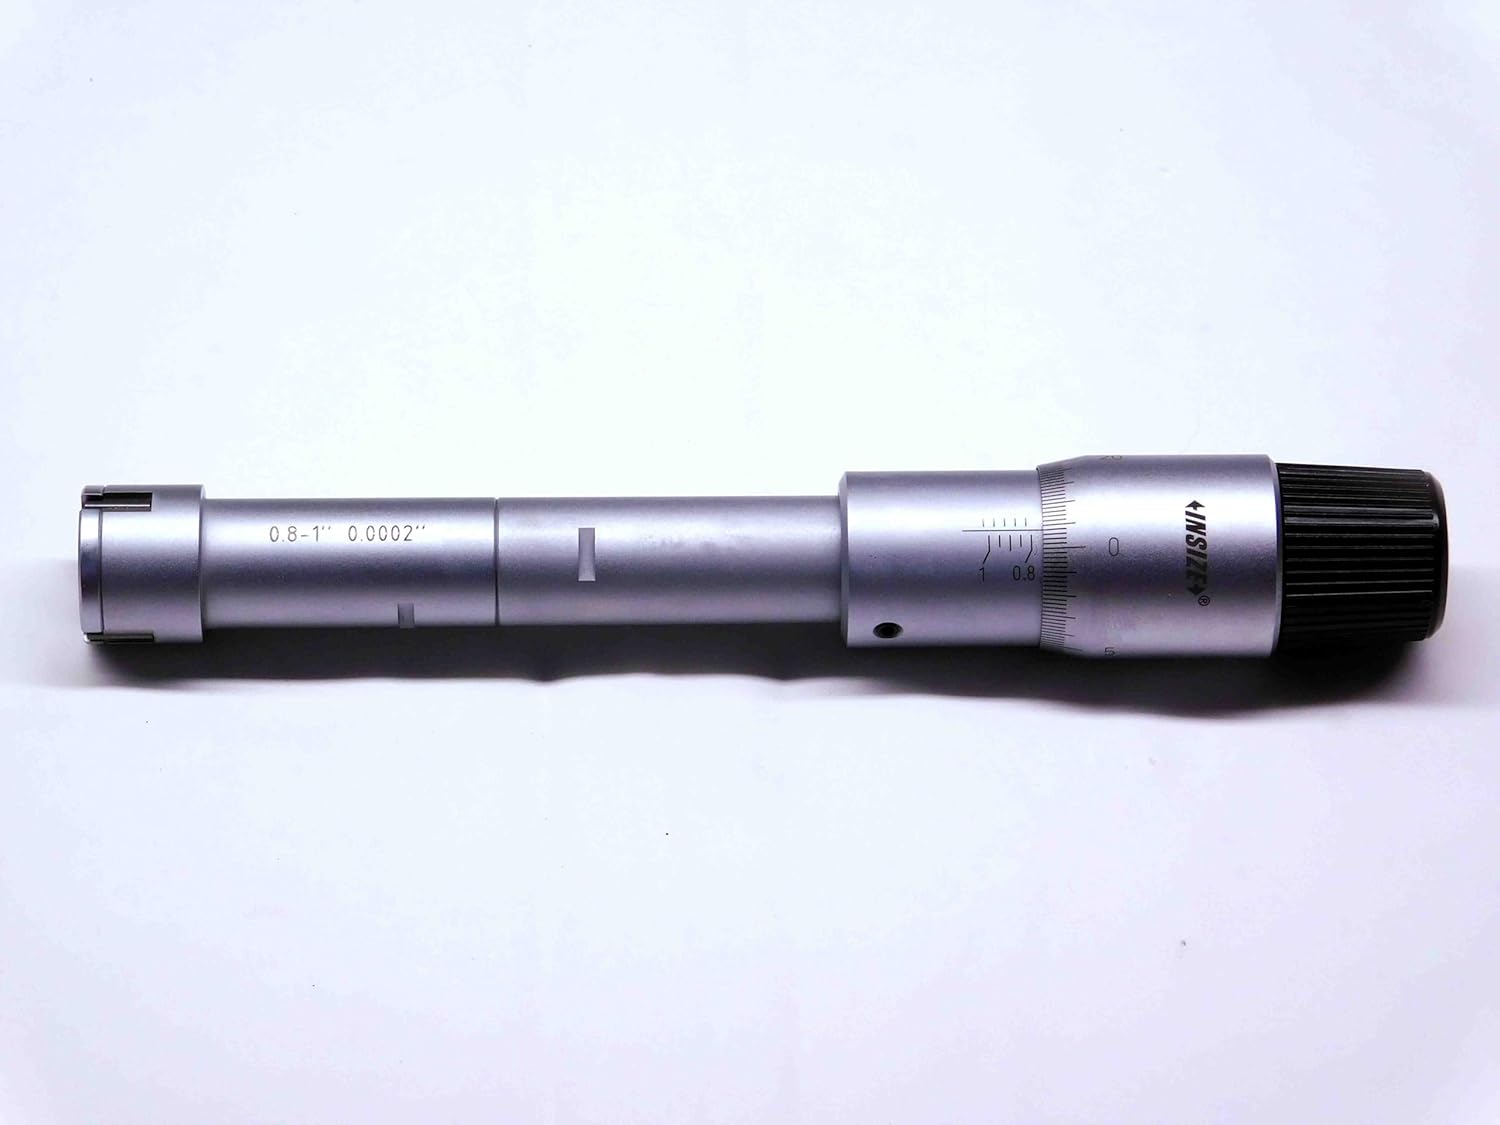
Figure 2.1: The INSIZE #3227-E1 Three Point Internal Micrometer. This image displays the main body of the micrometer, showing the measurement scale, thimble, and the three-point anvil system at the measuring end.
3. Components Included
Upon unpacking, verify that all components are present and in good condition:
- INSIZE #3227-E1 Three Point Internal Micrometer (0.8-1" Range)
- 1" Setting Ring
- 6" Extension Rod
- Protective Storage Case
- Inspection Certificate

Figure 3.1: Contents of the INSIZE #3227-E1 micrometer kit. This image shows the micrometer, setting ring, and extension rod neatly arranged within their protective case, alongside the product packaging.
4. Setup
4.1 Unpacking and Initial Inspection
- Carefully remove all components from the protective packaging.
- Inspect the micrometer and accessories for any signs of damage during transit. If damage is found, do not use the instrument and contact your supplier.
- Clean all measuring surfaces with a lint-free cloth.
4.2 Attaching the Extension Rod (Optional)
For deeper bores, the 6-inch extension rod can be attached to the micrometer:
- Ensure both the micrometer's thimble end and the extension rod's connecting end are clean.
- Gently screw the extension rod onto the micrometer's thimble end until it is finger-tight. Do not overtighten.
- Verify that the connection is secure and stable before use.
5. Operation
5.1 Basic Measurement Procedure
- Clean the Workpiece: Ensure the bore to be measured is clean and free of debris, oil, or burrs.
- Insert the Micrometer: Carefully insert the three-point measuring anvils into the bore.
- Advance the Thimble: Rotate the thimble (or the ratchet stop) clockwise to expand the anvils until they make firm contact with the bore walls.
- Use Ratchet Stop: For consistent measuring force, always use the ratchet stop. Rotate the ratchet stop until it clicks 2-3 times. This ensures uniform pressure and reduces operator error.
- Extract and Read: Gently withdraw the micrometer from the bore. Read the measurement directly from the sleeve and thimble scales.
5.2 Reading the Micrometer
The INSIZE #3227-E1 micrometer features a direct reading scale. The main scale on the sleeve indicates whole inches and tenths of an inch. The thimble scale provides the finer graduations. Each full rotation of the thimble corresponds to a specific linear movement of the measuring anvils. Refer to the markings on your specific instrument for precise interpretation of the scale divisions.
6. Calibration and Accuracy Verification
Regular calibration is crucial to maintain the accuracy of your micrometer. The included 1-inch setting ring is used to verify the instrument's zero point and overall accuracy within its range.
6.1 Using the 1" Setting Ring
- Ensure both the micrometer's measuring anvils and the setting ring's internal surface are clean.
- Carefully insert the micrometer into the 1" setting ring.
- Expand the anvils using the ratchet stop until they make firm contact with the inner surface of the setting ring (2-3 clicks).
- Read the measurement. It should indicate exactly 1.0000 inches.
- If the reading deviates, the micrometer may require adjustment or professional calibration. Consult a qualified technician for adjustments.

Figure 6.1: An example of an INSIZE Inspection Certificate. This document confirms the micrometer has undergone quality control checks and meets specified accuracy standards at the time of manufacture.
7. Maintenance
7.1 Cleaning
- After each use, wipe all measuring surfaces and the body of the micrometer with a clean, lint-free cloth.
- For stubborn grime, a small amount of instrument cleaning fluid can be applied to the cloth, then wipe dry immediately. Avoid harsh solvents.
- Do not immerse the micrometer in any liquid.
7.2 Storage
- Always store the micrometer in its protective case when not in use.
- Store in a dry environment, away from direct sunlight, extreme temperatures, and corrosive substances.
- Ensure the measuring anvils are slightly open (not fully closed) to relieve stress on the mechanism during storage.
7.3 Handling Precautions
- Avoid dropping or subjecting the micrometer to impact, as this can severely affect its accuracy.
- Do not force the thimble or ratchet stop beyond its natural stopping points.
- Use the instrument only for its intended purpose of internal diameter measurement.
8. Troubleshooting
If you encounter issues with your INSIZE #3227-E1 micrometer, consider the following common problems and solutions:
| Problem | Possible Cause | Solution |
|---|---|---|
| Inaccurate Readings |
|
|
| Stiff or Uneven Thimble Movement |
|
|
9. Specifications
- Model: #3227-E1
- Measurement Type: Three Point Internal Micrometer
- Measuring Range: 0.8 - 1 inch
- Graduation: 0.0002 inch
- Accuracy: ±0.00016 inch
- Features: Ratchet Stop, Includes 1" Setting Ring, Includes 6" Extension Rod
10. Warranty and Support
Specific warranty information for the INSIZE #3227-E1 Three Point Internal Micrometer is not provided within the product details. For warranty claims, technical support, or service inquiries, please contact your original point of purchase or the INSIZE authorized distributor in your region. Always refer to the official INSIZE website or documentation for the most current warranty terms and conditions.
For further assistance, you may visit the INSIZE official website (link for illustrative purposes, actual link may vary).


