1. Introduction
Thank you for choosing the VQIGGTSS Commercial Electric Meat Grinder. This manual provides essential information for the safe and efficient operation, maintenance, and care of your new appliance. Please read it thoroughly before first use and retain it for future reference.
This versatile appliance is designed for grinding various types of meat, including pork, chicken, beef, and shrimp, and is also suitable for making sausages, meatballs, and other food preparations. It is ideal for small restaurants, catering services, and household use requiring high capacity.
1.1 Safety Warnings
WARNING: Please follow all instructions carefully. Keep this item out of the reach of children. Exercise caution to avoid scratches or injury when using the appliance. Always ensure the machine is unplugged before cleaning or maintenance.

Image: Safety warning label displayed in multiple languages on the product.
2. Product Components and Included Parts
Familiarize yourself with the parts of your meat grinder before assembly and operation.
2.1 Main Components

Image: Labeled diagram of the VQIGGTSS Commercial Electric Meat Grinder, highlighting the Stainless Steel Tray, Fixing Nut, Orifice Plate, Stainless Steel Body, and Switch Button.
- Stainless Steel Body: Houses the motor and internal mechanisms.
- Stainless Steel Tray: Used to hold meat before grinding.
- Switch Button: Controls power to the unit (On/Off).
- Fixing Nut: Secures the grinding head components.
- Orifice Plate: Determines the fineness of the ground meat.
2.2 Included Accessories
The following items are included in your package:
- 1 x Meat Grinder Unit
- 2 x Knife Nets (Grinding Plates: typically 6mm and 8mm)
- 2 x Blades
- 1 x Sausage Stuffing Tube
3. Setup and Assembly
Before first use, clean all parts that will come into contact with food. Ensure the unit is unplugged during assembly.

Image: Illustration of the meat grinder's components disassembled for cleaning, emphasizing the ease of breakdown.
- Clean Components: Wash the grinding head, auger, blade, grinding plate, and tray with warm, soapy water. Rinse thoroughly and dry completely.
- Assemble Grinding Head: Insert the auger into the grinding head. Place a blade onto the auger shaft, ensuring it is correctly oriented (sharp edge facing outwards).
- Attach Grinding Plate: Select the desired grinding plate (e.g., 6mm for fine, 8mm for coarse) and place it over the blade.
- Secure Fixing Nut: Screw the fixing nut onto the grinding head to secure all components. Do not overtighten.
- Attach Grinding Head to Body: Slide the assembled grinding head onto the motor shaft on the main body. Secure it with the side knob or locking mechanism.
- Place Tray: Position the stainless steel tray on top of the grinding head.
- Position Unit: Place the meat grinder on a stable, flat, and dry surface. Ensure adequate ventilation around the unit.
- Connect Power: Plug the power cord into a grounded electrical outlet.
4. Operation
This section details how to use your meat grinder for various tasks.

Image: The VQIGGTSS Commercial Electric Meat Grinder actively grinding meat, showcasing its primary function.
4.1 Preparing Meat for Grinding
- Cut meat into pieces that fit easily into the feed tube (approximately 1-inch cubes).
- Remove any bones, large pieces of gristle, or tough tendons to prevent damage to the machine.
- For best results, chill the meat and grinder components (auger, blade, grinding plate) in the refrigerator for 30 minutes before grinding. This helps prevent smearing and ensures cleaner cuts.
4.2 Grinding Meat
- Ensure the meat grinder is properly assembled with the desired grinding plate.
- Place a suitable container beneath the grinding head to collect the ground meat.
- Turn on the machine using the switch button.
- Feed the prepared meat into the feed tube using the food pusher. Never use your fingers or any other utensil to push meat into the grinder.
- Continue feeding meat until all is ground. Turn off the machine once grinding is complete.

Image: A visual representation of the meat grinder's versatility, demonstrating its ability to process various ingredients with different grinding plates and a sausage stuffer.
4.3 Sausage Stuffing
- Disassemble the grinding head. Remove the blade and grinding plate.
- Attach the sausage stuffing tube to the grinding head. Secure it with the fixing nut.
- Prepare your sausage mixture.
- Place the sausage casing onto the stuffing tube.
- Turn on the machine.
- Feed the sausage mixture into the feed tube. The mixture will be pushed through the stuffing tube into the casing.
- Guide the casing as it fills, ensuring even distribution and avoiding air pockets.
- Once stuffing is complete, turn off the machine and remove the filled casing.

Image: A collage showcasing the diverse range of ingredients that can be processed by the meat grinder, from fresh produce to various meats and spices.
5. Cleaning and Maintenance
Regular cleaning and proper maintenance will extend the life of your meat grinder and ensure hygienic operation.
5.1 Disassembly for Cleaning
- Unplug the Unit: Always ensure the meat grinder is unplugged from the power outlet before disassembling or cleaning.
- Remove Tray: Lift off the stainless steel tray.
- Remove Grinding Head: Loosen the side knob or locking mechanism and carefully remove the entire grinding head assembly from the main body.
- Disassemble Grinding Head: Unscrew the fixing nut, then remove the grinding plate, blade, and auger.
5.2 Cleaning Instructions
- Wash all removable parts (tray, grinding head, auger, blade, grinding plates, stuffing tube) immediately after use with warm, soapy water.
- Use a brush to remove any stubborn meat residue from the grinding plates and blades.
- Rinse all parts thoroughly with clean water.
- Dry all parts completely with a soft cloth to prevent rust, especially for metal components.
- The main body of the unit should be wiped clean with a damp cloth. Never immerse the main body in water or any other liquid.
5.3 Storage
Store the clean and dry meat grinder and its accessories in a cool, dry place, away from direct sunlight and moisture. Keep all parts together to avoid loss.
6. Troubleshooting
This section addresses common issues you might encounter during operation.
| Problem | Possible Cause | Solution |
|---|---|---|
| Motor does not start. |
|
|
| Meat is not grinding or comes out poorly. |
|
|
| Loud noise or vibration during operation. |
|
|
7. Specifications
Technical details for the VQIGGTSS Commercial Electric Meat Grinder.
| Feature | Detail |
|---|---|
| Product Name | Commercial Electric Meat Grinder |
| Brand | VQIGGTSS |
| Model | 180kg/h 1100W |
| Rated Power | 1100W |
| Minced Meat Capacity | 180 kg/h |
| Product Weight | 26 kg |
| Product Dimensions (L x W x H) | 47 cm x 23 cm x 44.5 cm (approx.) |
| Material | Food-grade Stainless Steel |
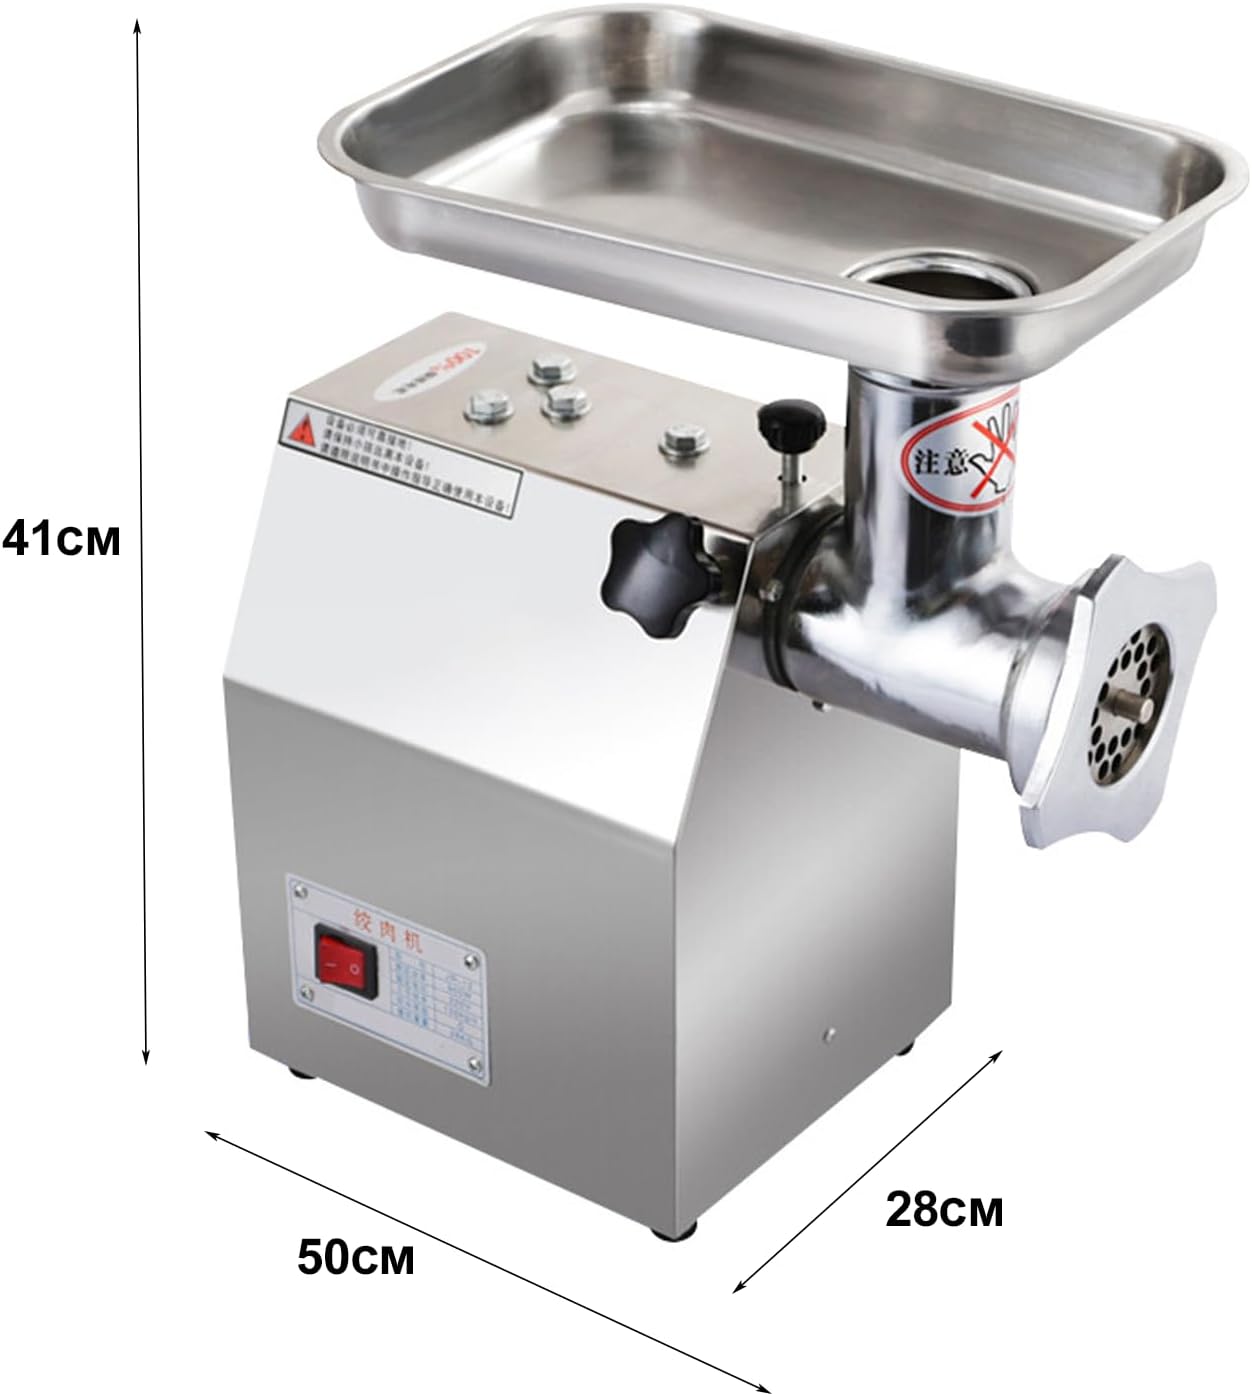
Image: Diagram illustrating the approximate dimensions of the meat grinder: 41cm height, 50cm length, and 28cm width.
8. Warranty and Support
For warranty information or technical support, please refer to the purchase documentation or contact your retailer. Keep your proof of purchase for any warranty claims.